With all we’ve been through recently, I thought we’d have some fun for the holidays by using some simple effects to create custom animated holiday greetings for social media. It’s a fun way to add something extra to a photo and give it a little life. Whether you’re sending an amusing greeting to a friend or family member or promoting a commercial product, it’s a lot of fun to play around with.
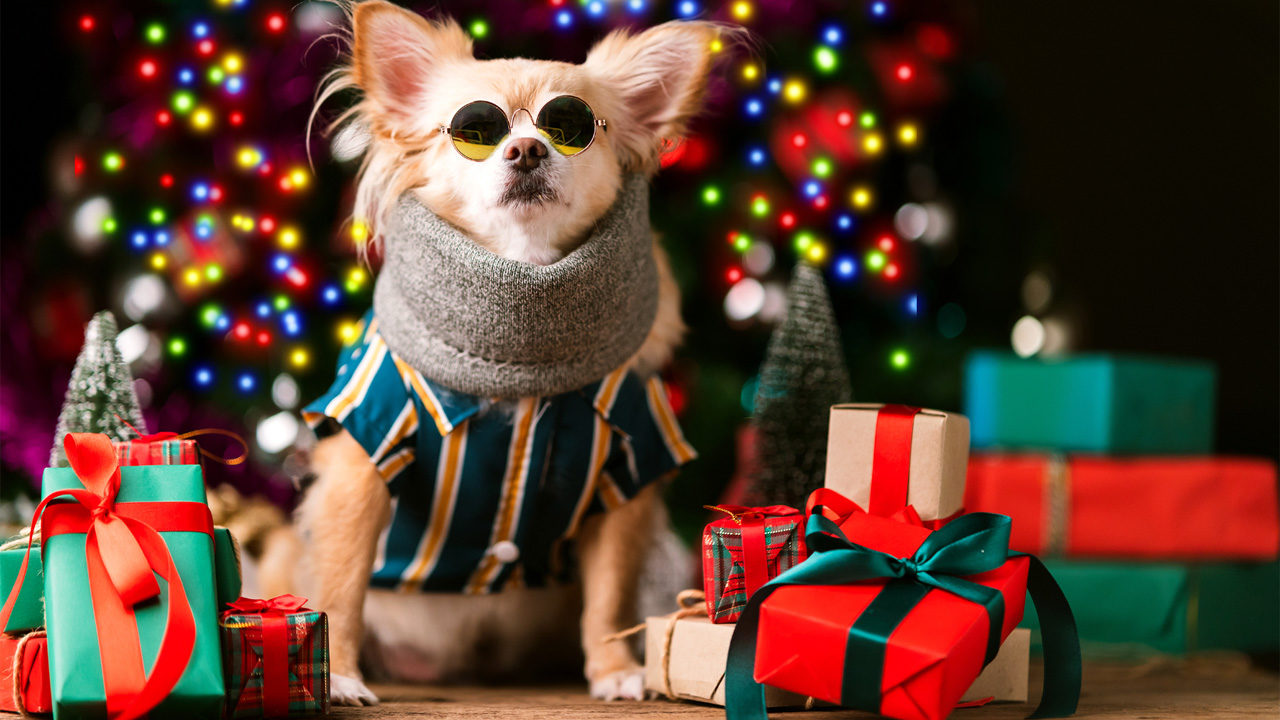
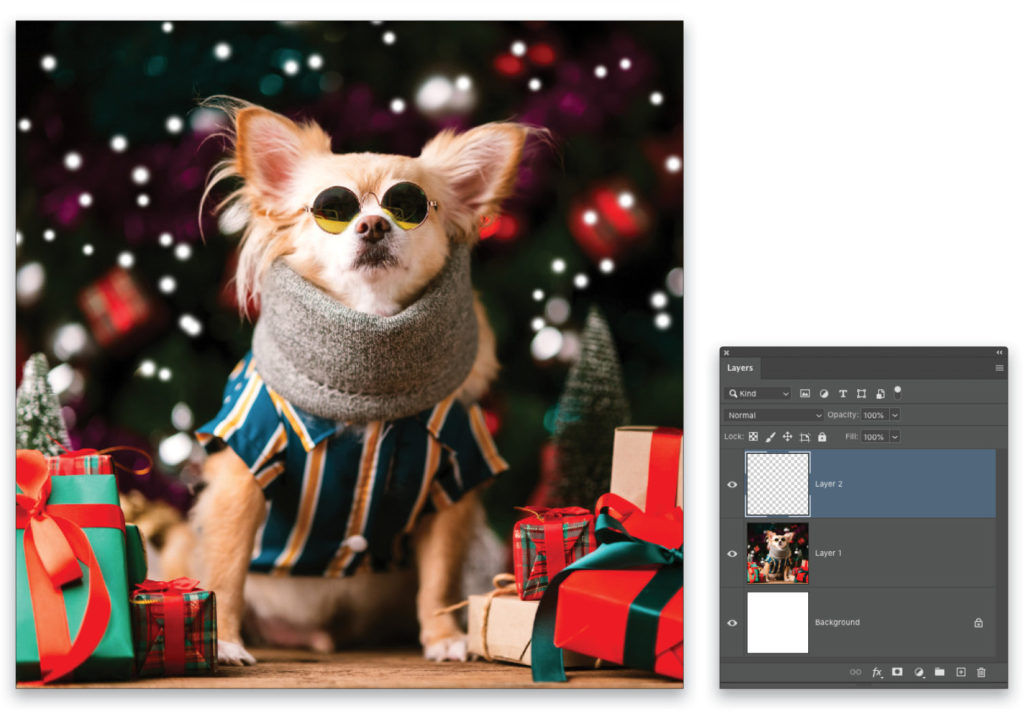
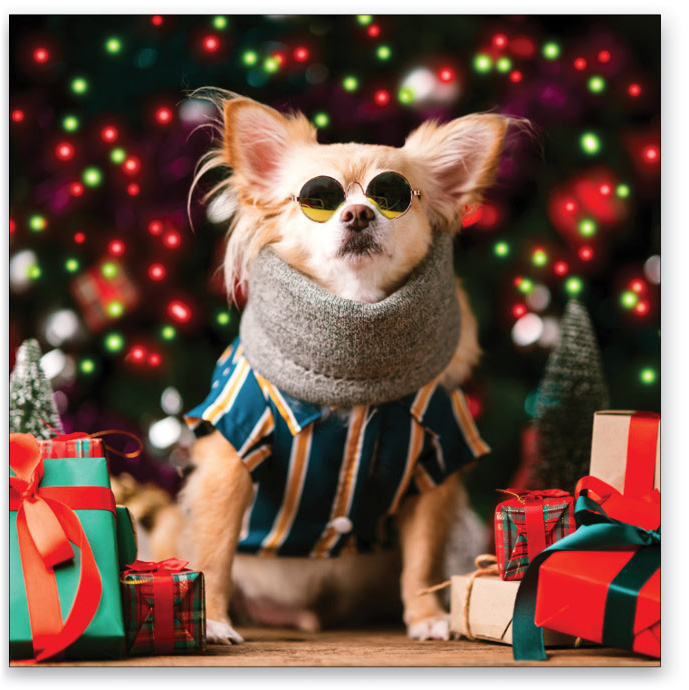
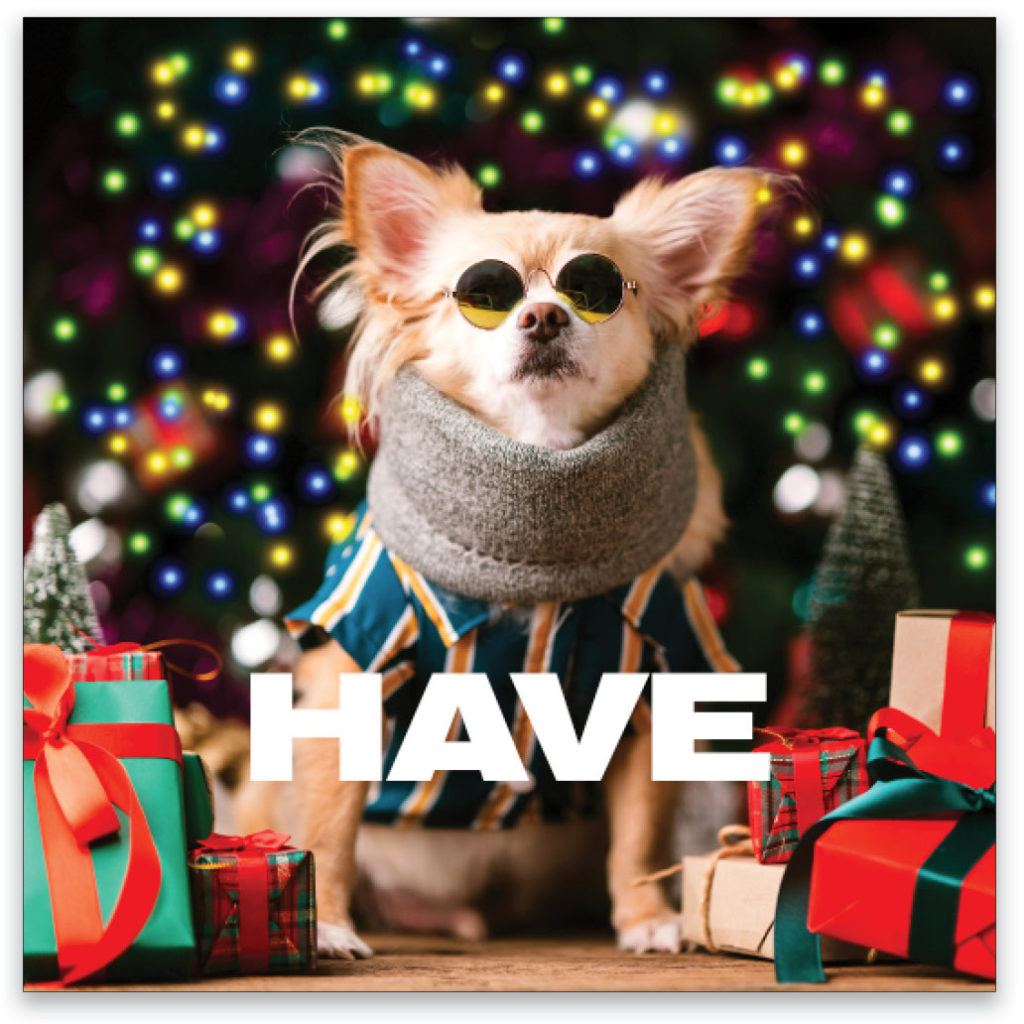
Step One: As usual, we need to start with a photo. We’re using a photo of this cute dog because it’s just too much fun; however, as good as the shot is, it could use a little livening up with some holiday lights. If you’d like to download the low-res watermarked version of this image to follow along, click this link, log in with your Adobe ID, and click the Save to Library button. Double-click the image in the Libraries panel (Window>Libraries) to open it in Photoshop.
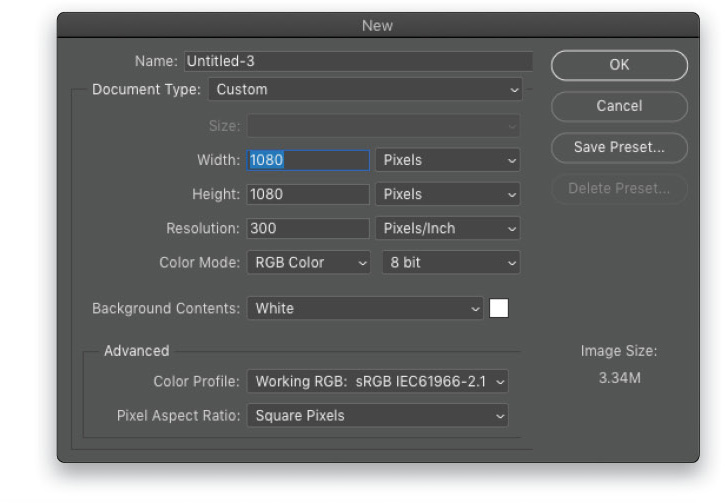
Step Two: First you need to determine where you want to use the image. Since the idea for this tutorial is to use the image on social media, let’s build it for posting to Instagram. Go to the File menu and choose New. Set both the Width and Height to 1080 pixels and the Resolution to 300 ppi. Click OK or Create.
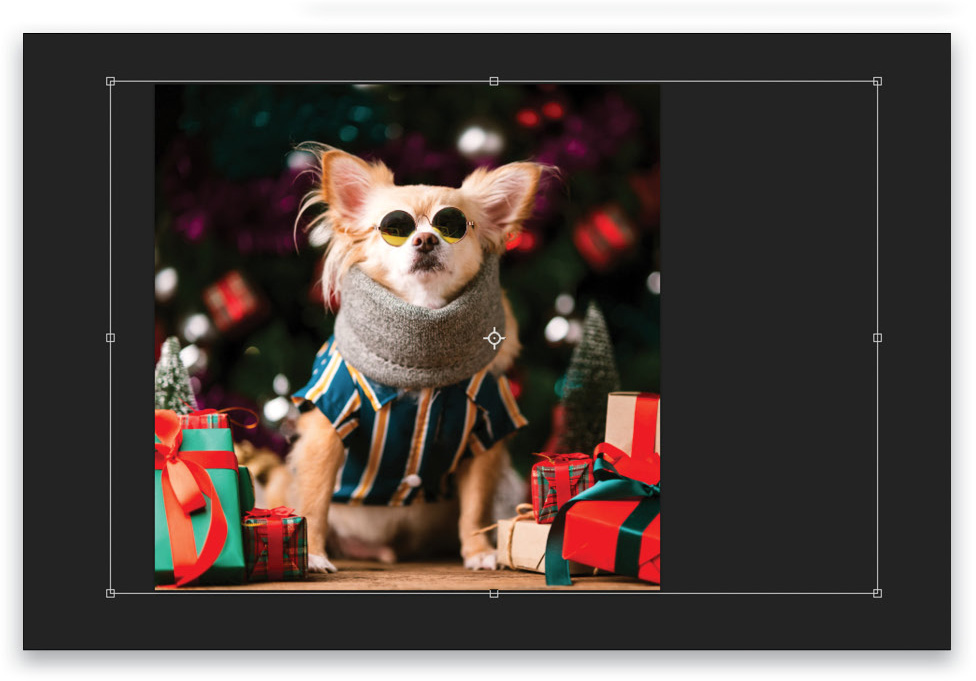
Step Three: Using the Move tool (V), click-and-drag the main image into this new square document. Use Free Transform (Command-T [PC: Ctrl-T]) to scale and position the image with the subject centered in the canvas, leaving some area around the dog to add the lights. Press Enter when done to commit the change.
Step Four: The lights themselves are a simple brush effect, which makes this technique all the more fun because you can experiment with different colors for the lights. For our example, we’ll use four colors that we’ll alternate to give the appearance of flashing lights.
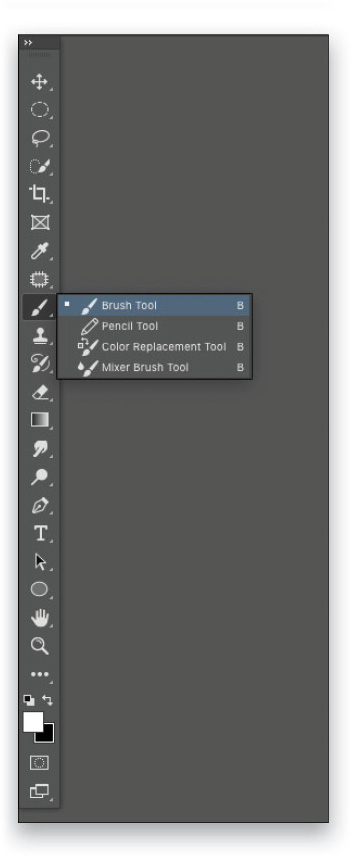
Start by selecting the Brush tool (B) in the Toolbar. Click the Brush Settings icon (folder with a brush) in the Options Bar, or go under the Window menu and choose Brush Settings, to open the Brush Settings panel.
Step Five: In the Brush Tip Shape section, start by selecting a simple round brush from the default set in the panel. The size can vary depending on how big you want the lights to be. We’re going with smaller lights with a brush Size of 35 px.
Toward the bottom of the panel, increase the Spacing to 300 and set the Hardness to 20%. Again, this is a good place to start, but play around with other sizes and even brush shapes, depending on the image.

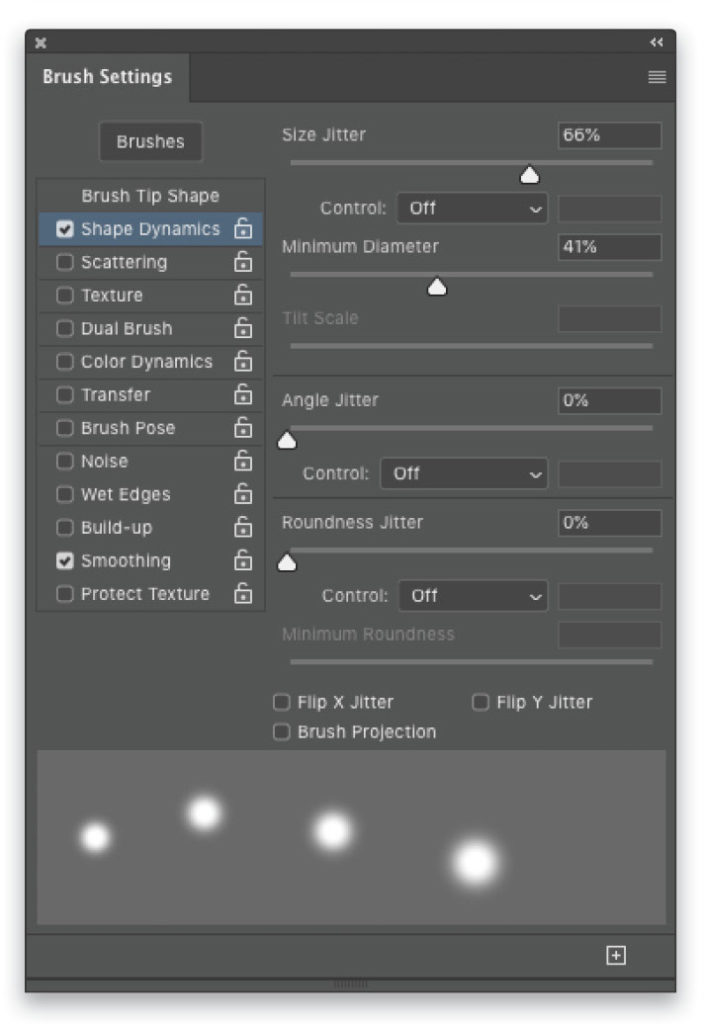
Step Six: Next, activate Shape Dynamics in the list on the left side of the panel. Increase the Size Jitter to 66%. This will vary the size of the “lights,” however, it varies the size from 0–66%, which means some will be too small. So, set the Minimum Diameter to 41%, which will ensure the brush won’t be smaller than 41% or larger than 66%.
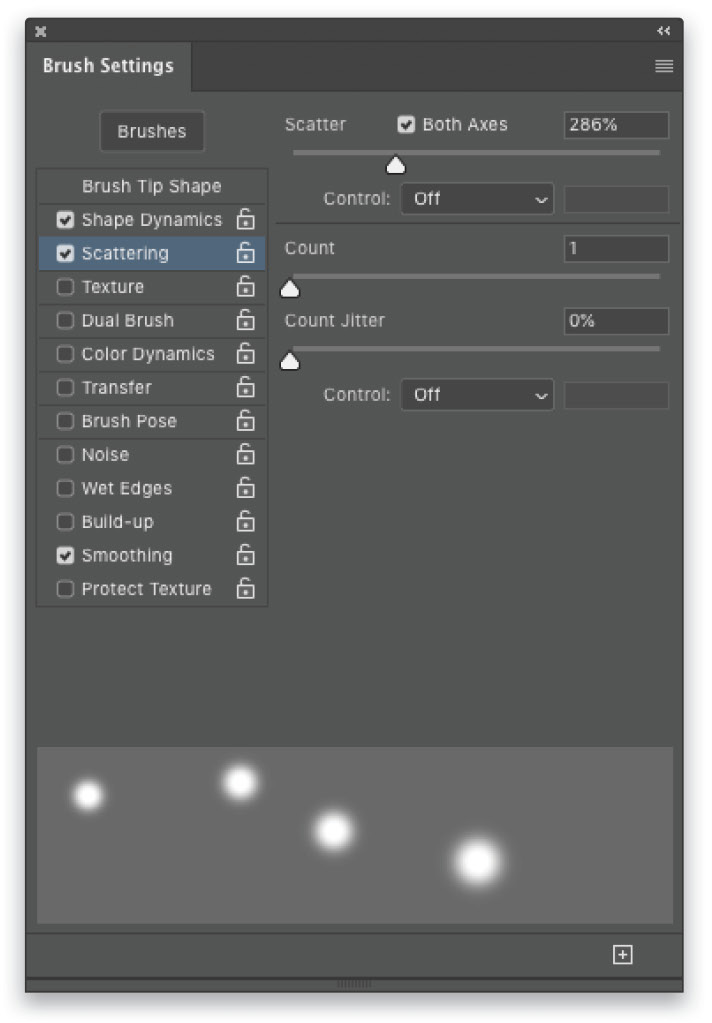
Step Seven: Now activate Scattering in the list on the left. Keeping it simple here, just check on Both Axes and increase the Scatter amount to around 286%.
Step Eight: Back in the Layers panel, create a new blank layer above the dog subject. Press D then X to set the Foreground color to white. Proceed to paint the lights around the subject. Don’t paint too many, as we’re going to build up the number of lights with additional layers, which will also play a part in animating the image later.
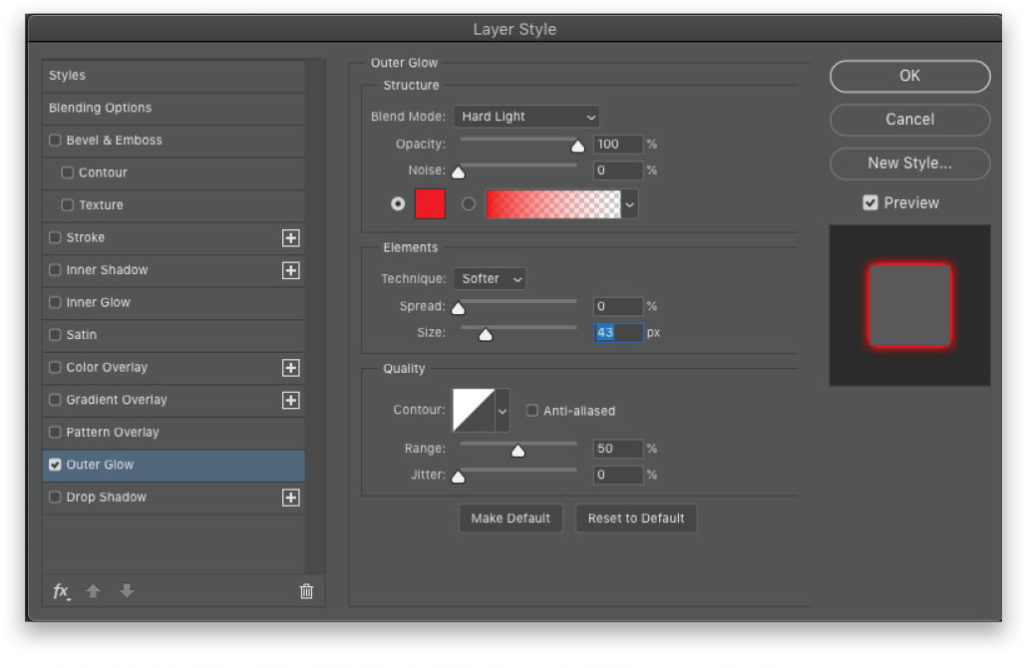
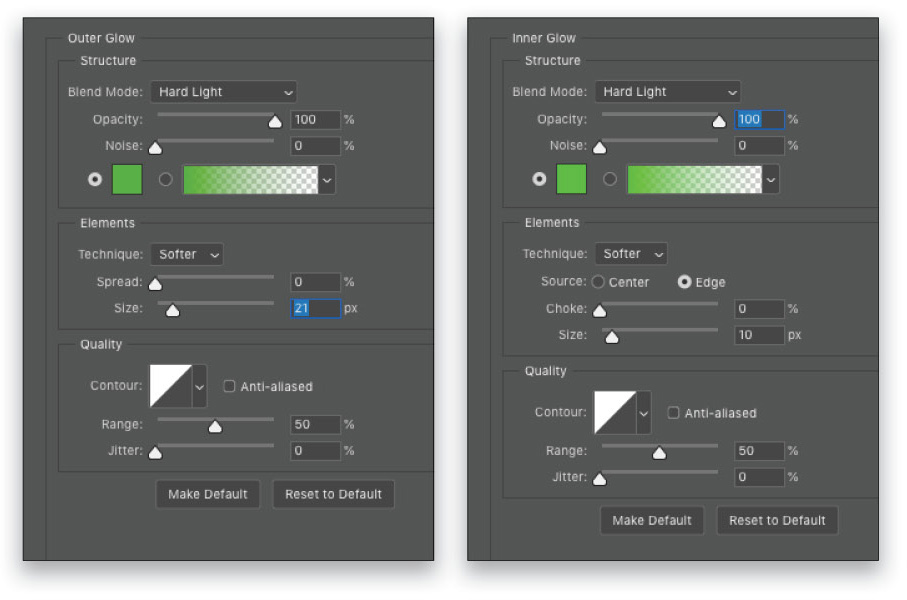
Step Nine: Click on the Add a Layer Style icon (fx) at the bottom of the Layers panel and choose Outer Glow. Click on the color swatch and start with a bright red. Click OK to close the Color Picker. Set the Blend Mode to Hard Light, which works well in most cases; but try other blend modes depending on the image. In the Elements section, set the Spread to 0% and the Size to around 43 px to give the lights a soft red glow. Don’t click OK yet.
Step 10: In the list of Styles on the left of the Layer Style dialog, activate Inner Glow. Use the same settings we did for the Outer Glow, except reduce the Size to allow for a small hot spot on the light. Click OK when done. Now, if all you wanted was some cool red lights, then you’re done. Have some hot chocolate and relax!
No, don’t stop! There’s more.

Step 11: Back in the Layers panel, double-click the name of the red light layer and rename it “Red Lights.” Since we’re going to create several light layers, this will make it easier to keep track of the layers. Once renamed, make a duplicate of the layer by pressing Command-J (PC: Ctrl-J), and rename this duplicate “Green Lights.”
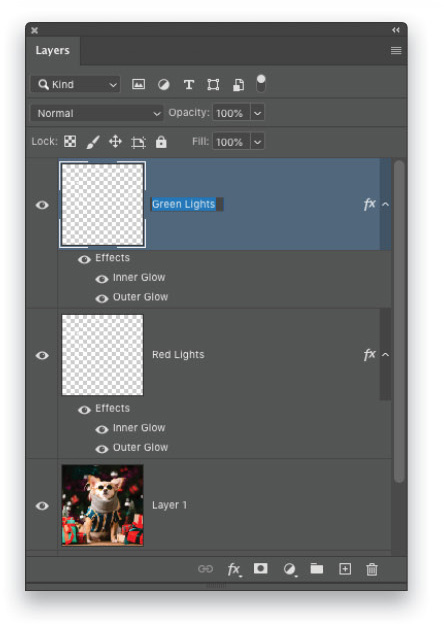
Step 12: Press Command-A (PC: Ctrl-A) to select the contents of the Green Lights layer and press Delete (PC: Backspace) to clear the layer. The layer styles remain, so just double-click on either “Outer Glow” or “Inner Glow” below the Green Lights layer in the Layers panel to reopen the Layer Style dialog. Change the color to a bright green on both the Outer and Inner Glow styles, change the Size for both styles as shown here, and click OK. Press Command-D (PC: Ctrl-D) to deselect.
Step 13: Using the same brush as before, paint some more lights into the background of the scene. They will be green because of the changes you made to the layer styles in the previous step.
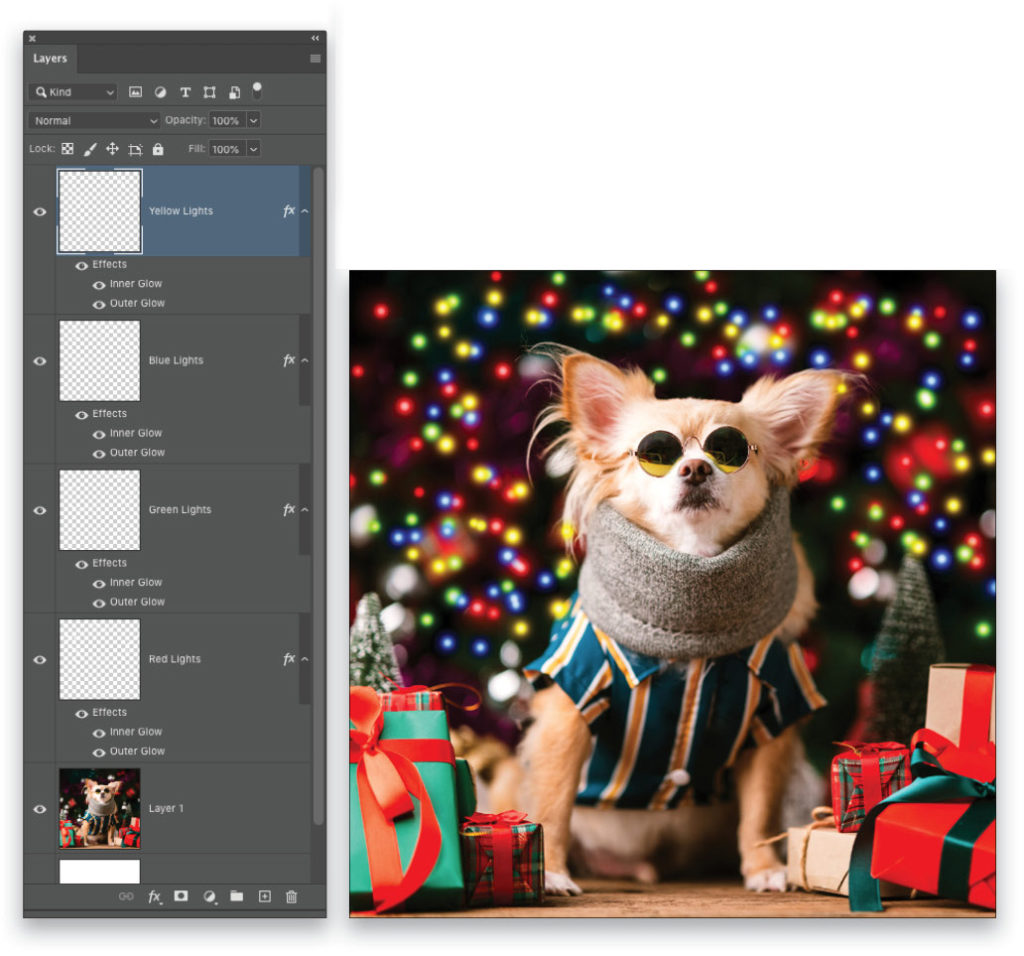
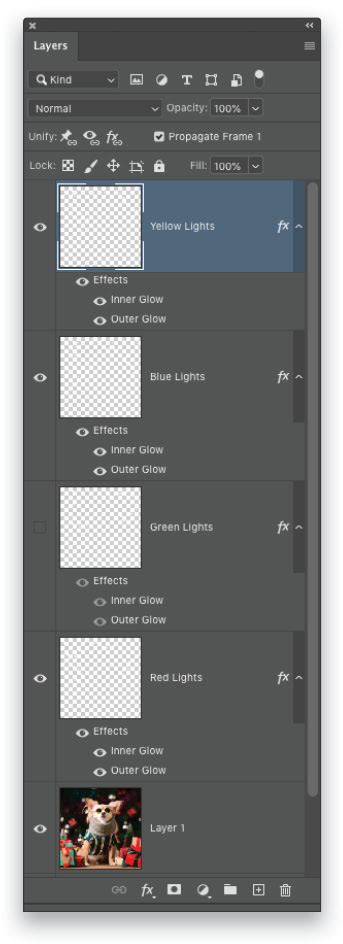
Step 14: Duplicate this layer, rename it “Blue Lights,” and then repeat Steps 12 and 13, except change both layers styles to a blue color. Repeat to create a Yellow Lights layer. When done, you should have four layers, one for each color set. With all the layers turned on, the image now looks quite festive!
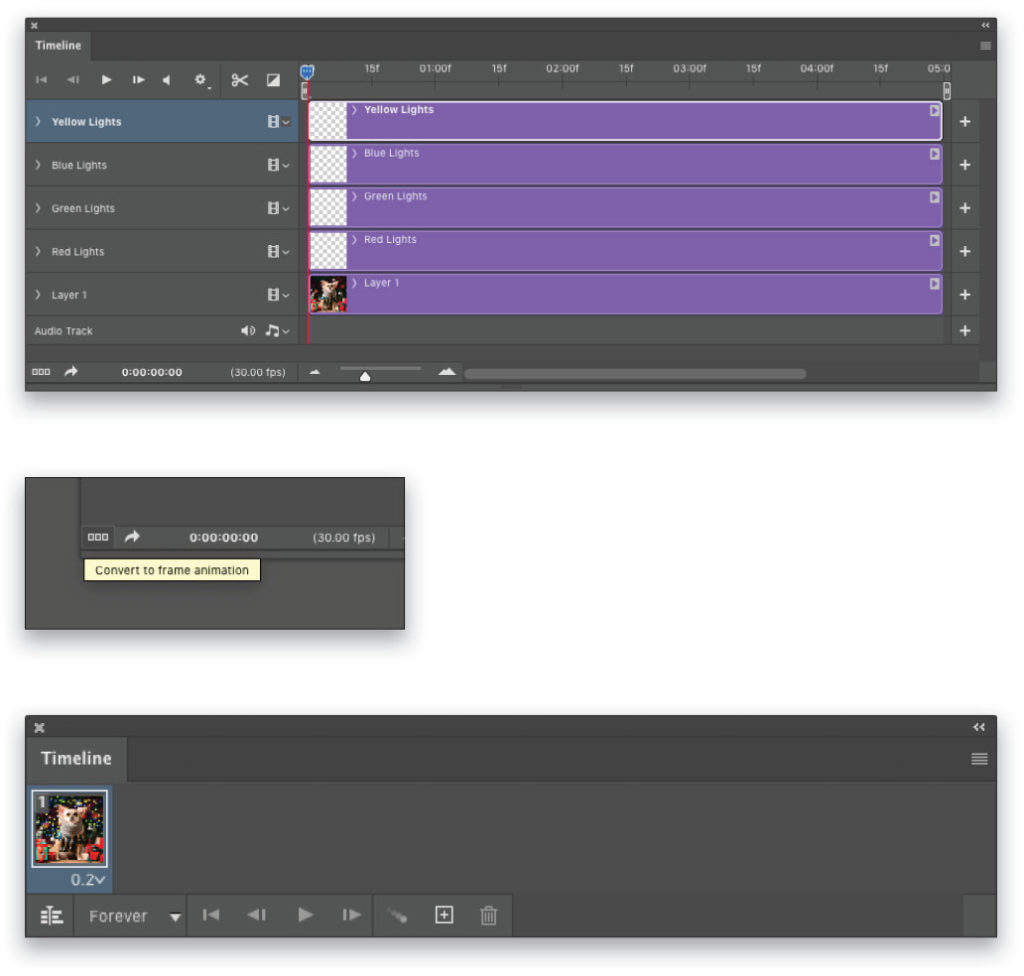
Step 15: Now we have the layers set up, let’s give it some life. Go under the Window menu and choose Timeline. Click the Create Video Timeline button in the middle of the Timeline panel, which should be at the bottom of your screen. The default timeline is for keyframe animation and video, but we’re going to keep it simple by using frame-based animation. Click on the small Convert to Frame Animation icon (three squares) in the lower-left corner of the Timeline panel to convert it to frame animation.
Click on the time setting just under the frame preview and set it to 0.2 seconds. This is how long this frame will stay on before it proceeds to the next. It’s worth experimenting with the timing by varying the duration for more randomness with the light sequencing.
Step 16: In the Layers panel, turn off the Red Lights layer by clicking its Eye icon. Leave all the other layers turned on. In the Timeline panel, click the Duplicates Selected Frames icon (plus symbol) next to the Deletes Selected Frames icon (trash can) to add a new frame.
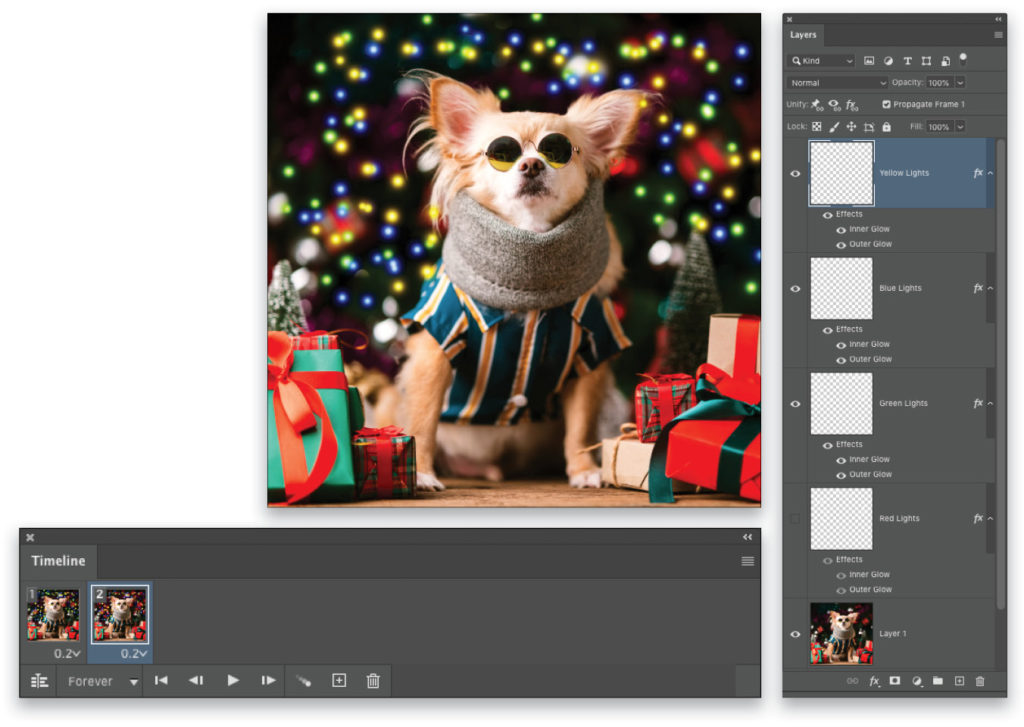
Step 17: Back in the Layers panel, turn the Red Lights layer back on, and turn off the Green Lights layer above.
Step 18: Add another frame in the Timeline panel, then turn the Green Lights layer back on, and turn the Blue Lights layer off. Add one more frame, then turn the Blue Lights layer back on, and turn the Yellow Lights layer off.
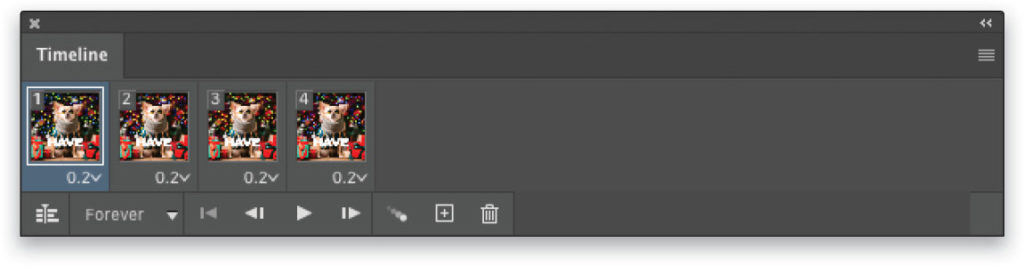
When done, you should have four frames in the Timeline. Click on each of the frames and, as you do, you should see one of the light layers turn off.
Click the Play button at the bottom of the Timeline panel, and you’ll see it looks like flashing holiday lights. If the change is too fast or slow, simply adjust the timing for each frame. You can also select all the frames and set the timing for all of them at once. Now the lights are done, let’s add some text in a fun way, as well, to turn it into an animated holiday greeting.
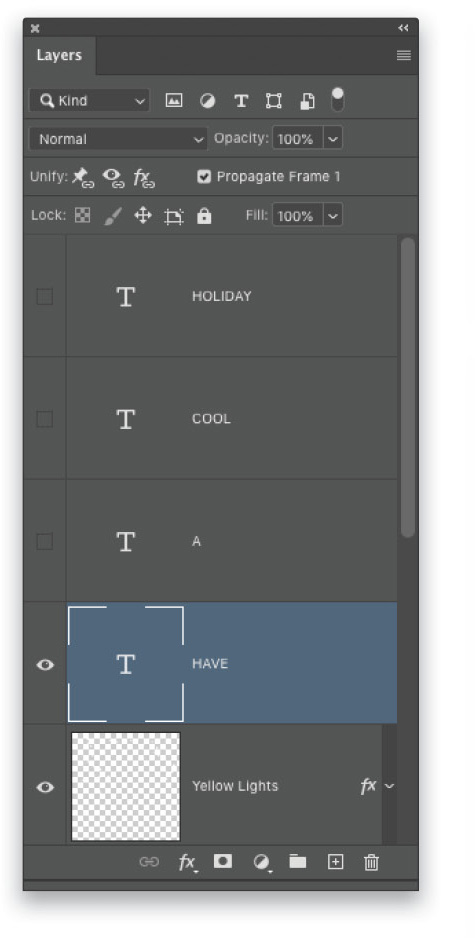
Step 19: In the Timeline panel, click on the first frame to make it active. Select the Type tool (T) in the Toolbar, and with white as the Foreground color, click the canvas to set a text layer. Here we just typed the word “HAVE” for the first frame. Feel free to use any font you want for this. Make sure the text object is center-justified in the Options Bar. Also, center-align the text in the canvas itself. Do this by pressing Command-A (PC: Ctrl-A) to select all, switching to the Move tool, and then clicking the Align Horizontal Centers and Align Vertical Centers icons in the Options Bar. While holding the Shift key, use the Move tool to drag the text down vertically a little so it doesn’t cover the dog’s face. Press Command-D (PC: Ctrl-D) to deselect.
Step 20: Make multiple duplicates of the text layer in the Layers panel. Since we have four total frames, create four text layers, and then use the Type tool to change the word on each of the duplicate layers. For this we’re using “HAVE A COOL HOLIDAY,” with each word on its own layer. Turn off all the text layers in the Layers panel except the first word.
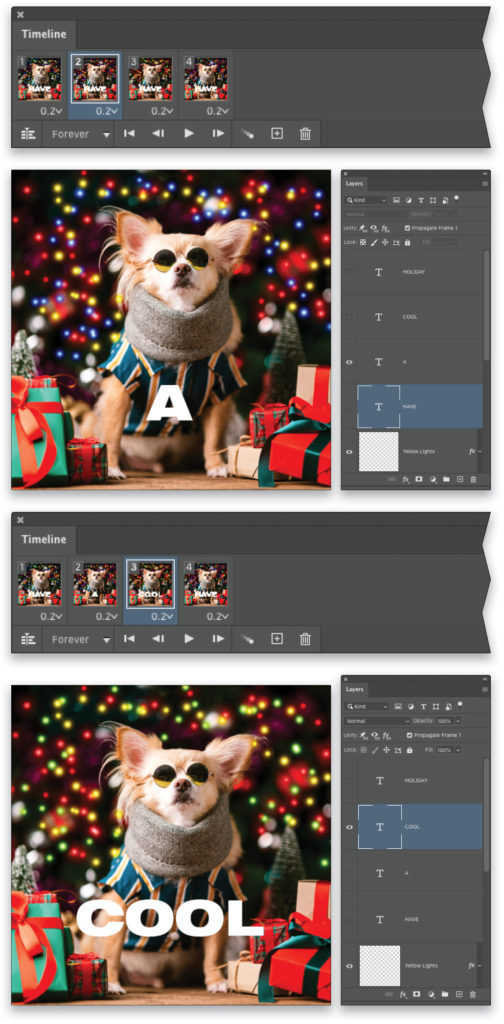
Step 21: Select the next frame in the Timeline, then in the Layers panel, turn off the first text layer and turn on the second text layer, which in this case is just “A.” Repeat this process, going through the remaining frames in the Timeline, and turning off and on the appropriate text layers for each.
Press the Play button in the Timeline again, and you’ll see the lights blinking and the text appear in sequence. You can start to see how mixing a variety of layers and effects, you can create custom looping GIFs in minutes.
Step 22: The question you’re probably asking at this point is, “How do I export it out as an animated GIF?” Before we do that, make sure to save your work up to this point. Go to the File menu and choose Save As. In the Save As dialog, name the file, navigate to where you want to save it, keep it as a Photoshop document (PSD) in the Format drop-down menu, and click Save.
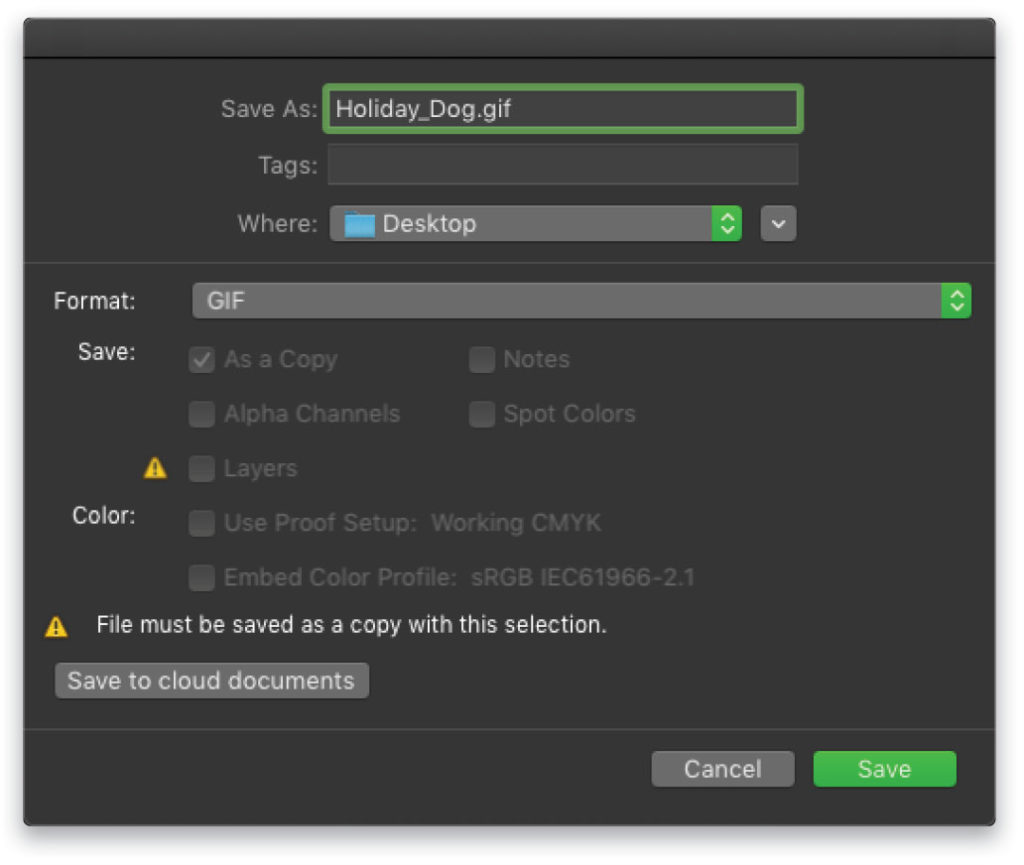
There are a couple different ways to save out GIFs in Photoshop. One quick method is to just go to the File menu and choose Save As again, but this time choose GIF in the Format drop-down menu, and click Save.
You can modify a few quality settings but for now just leave them at their defaults and click OK. This will automatically loop the frames, so when you open it in a browser, the animation will play forever.
Step 23: Another method for exporting involves using the Legacy Save for Web feature. This method gives you a few more settings to help keep the file size small for web use. Go under the File menu, to Export, and choose Save for Web (Legacy). Over on the right side you’ll see more advanced settings for color, image quality, and even the image size. By adjusting the color and image size you can drastically lower the file size so it will load faster on the web. This is where the handy preview window helps.
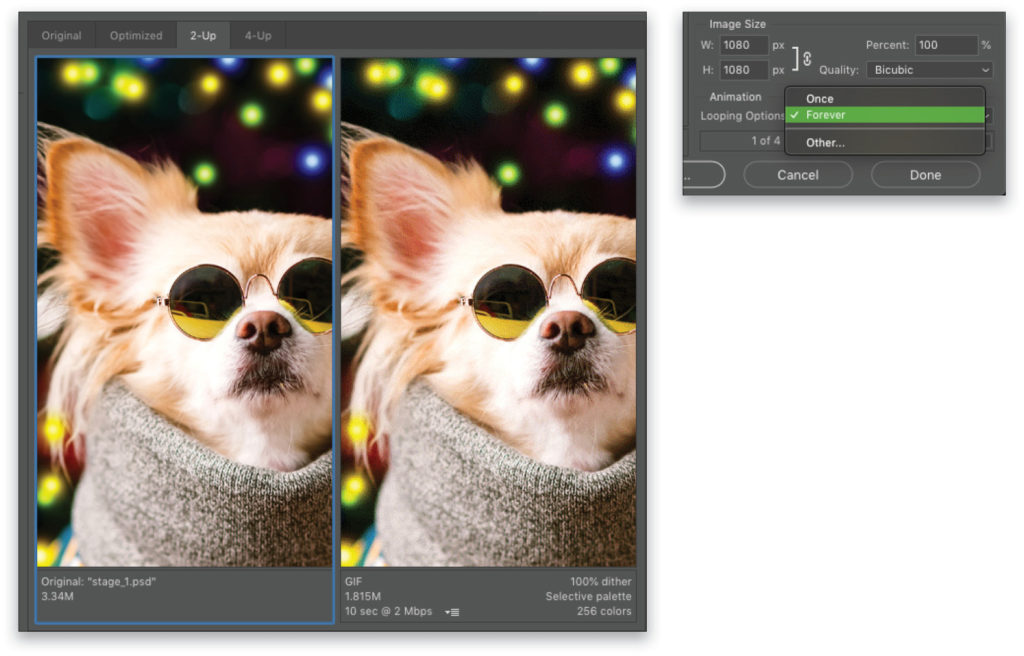
Notice up in the image tabs you have Original, Optimized, 2-Up, and 4-Up. I use either Optimized or 2-Up so I can compare the quality as I adjust the settings. You can even get a quick preview in your default browser before saving it by clicking the Preview button at the bottom left of the panel.
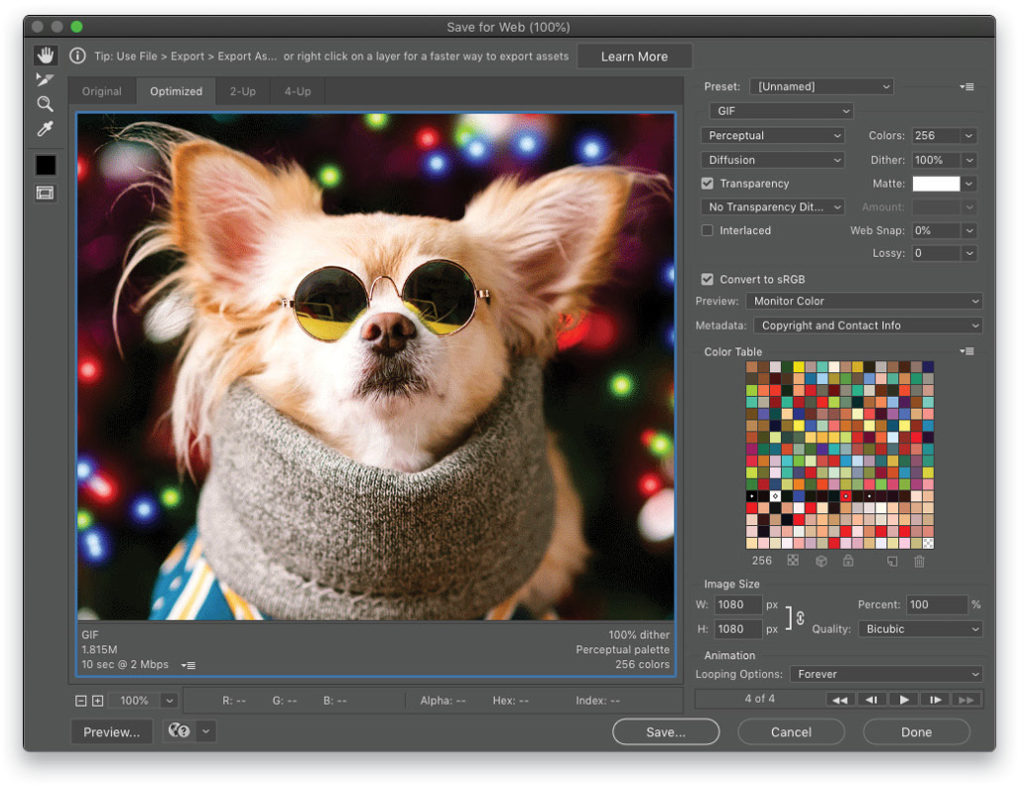
Finally, you also have the option of modifying the Looping Options for the animation. The default is Forever but you can also set it to play once or a specified number of times. Finally, just click Save. Then when prompted, name the file and click Save again. Your custom GIF is ready to upload to social media!
Now that you know how to create frame-based animated effects, what configuration of holiday lights are you going to create?

This article originally published in the December, 2020 issue of Photoshop User magazine.


