
In Photoshop, anything is possible. That includes making a digital photo look like it was printed and folded; lovingly toted around for years in someone’s wallet. This folded paper effect is a slick graphic design trick that can evoke a feeling of nostalgia. Today you’ll learn how to produce the effect on separate layers so you can swap in different photos.
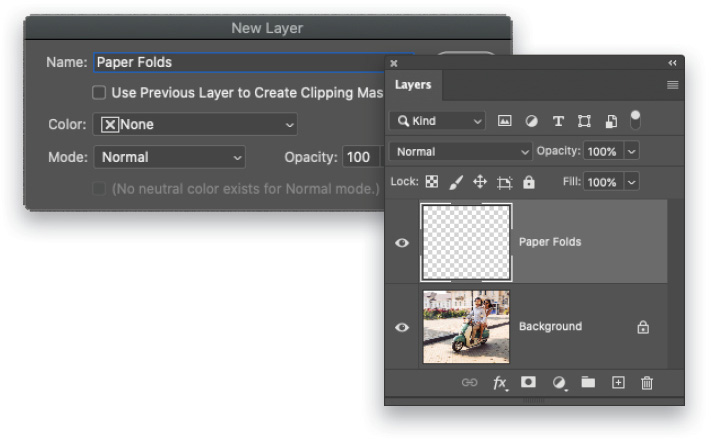
STEP ONE: Open a photo in Photoshop and then choose Layer>New>Layer. In the resulting dialog, enter “Paper Folds” into the Name field and click OK. (If you’re starting in Lightroom, select a thumbnail in the Library module and then choose Photo>Edit In>Adobe Photoshop 2021.)
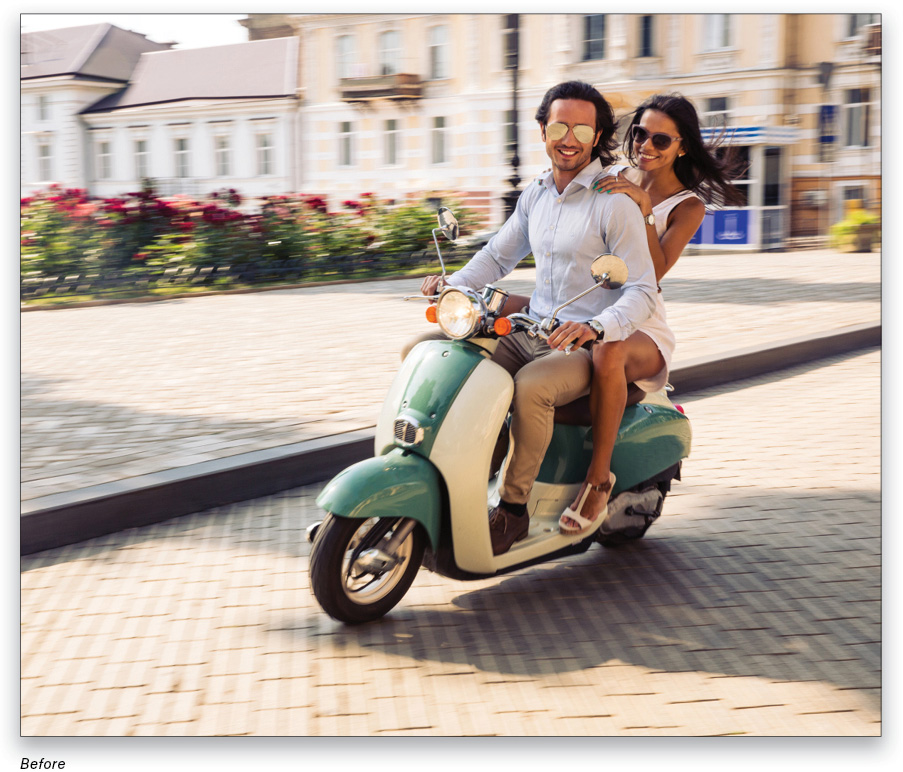
If you’d like to download the low-res watermarked versions of this image to follow along, click this link, log in with your Adobe ID, and click the Save to Library button. Right-click the image in the Libraries panel (Window>Libraries), and choose Edit to open it in Photoshop.
To make it easier to work with the image, increase the resolution of the practice file. (We normally don’t recommend enlarging images, but this is only for prac- tice purposes.) Go to Image>Image Size, turn on the Resample checkbox, select Preserve Details 2.0 from the Resample drop-down menu, set the Width to 3,000 pixels, and click OK. Then add a new layer as described above.
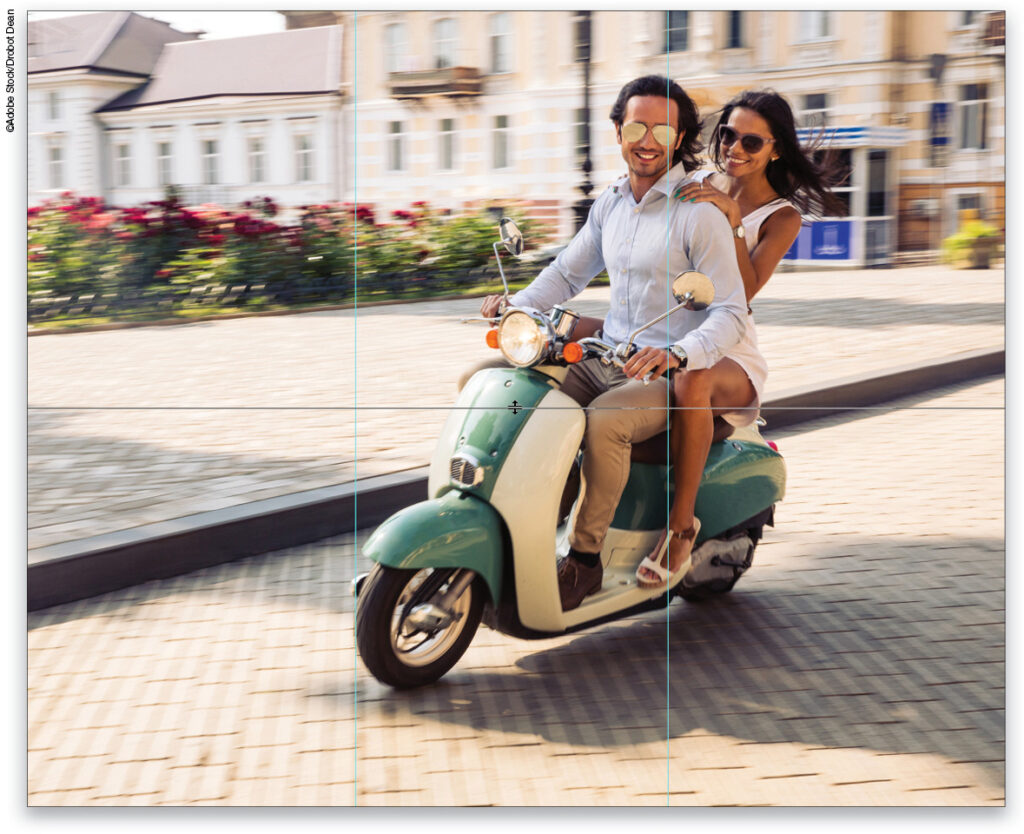
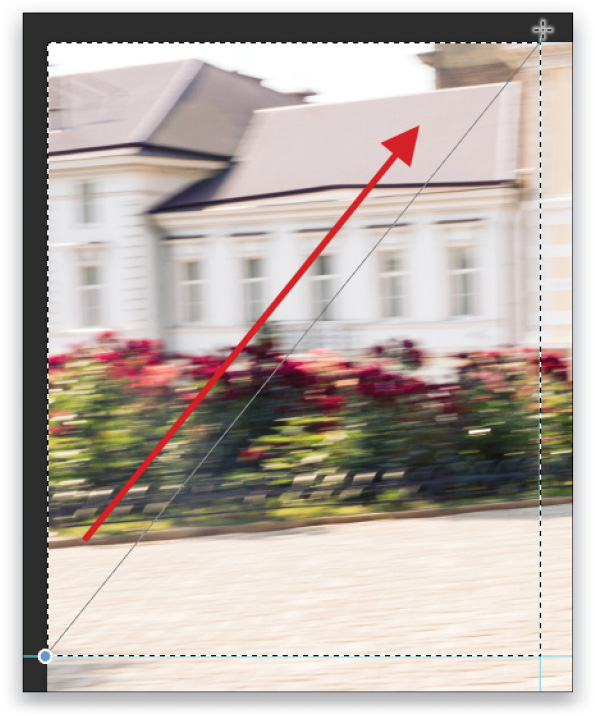
STEP TWO: We’re going to use guides to divide the image into six sections of (roughly) equal size, so choose View>Rulers. Point your cursor at the ruler on the left of your screen and then drag two guides out that divide the photo into thirds. Next, point your cursor at the ruler at the top of your screen and drag a guide to the middle of the image. The guides don’t have to be perfectly placed.
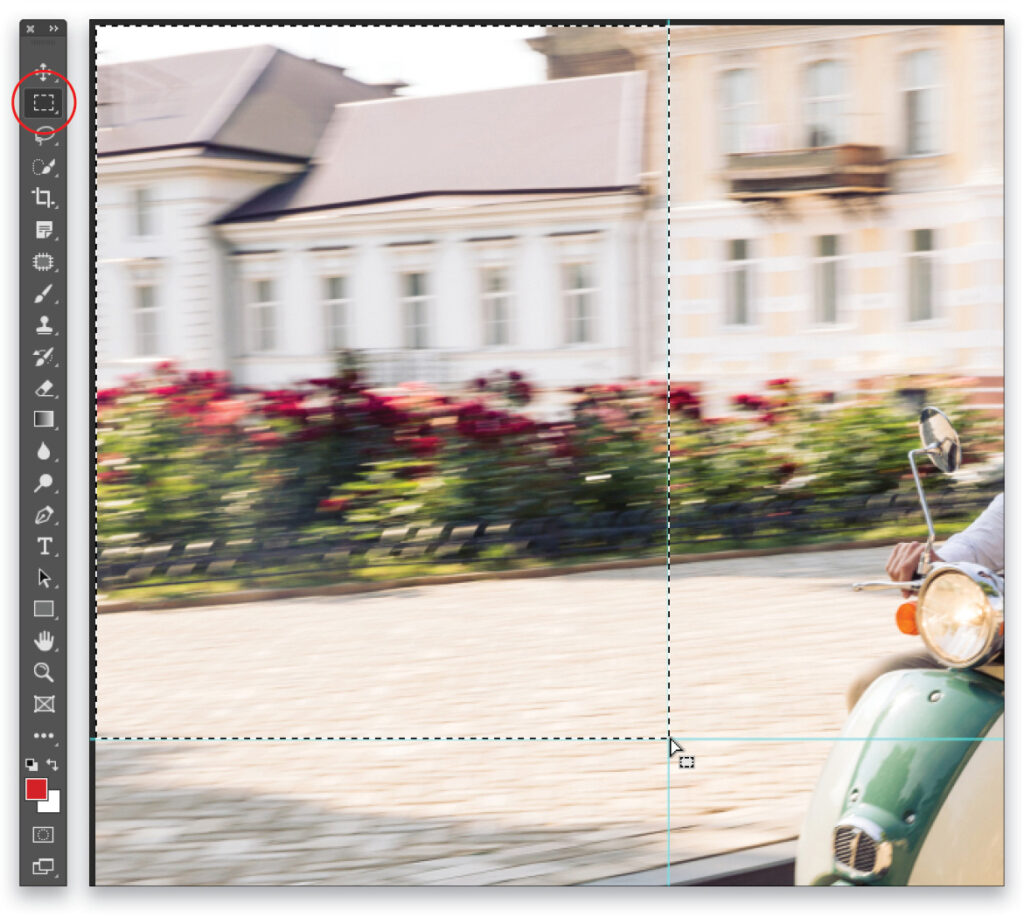
STEP THREE: Press M to grab the Rectangular Marquee tool (circled) and then draw a selection that encompasses the first section on the top row.
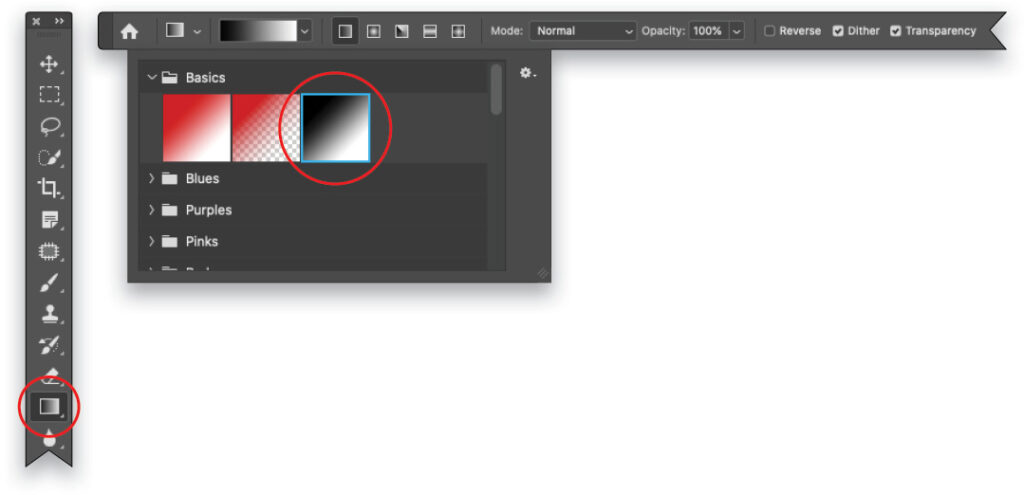
STEP FOUR: Press G to grab the Gradient tool (circled). In the Options Bar, click on the down-facing arrow next to the gradient preview thumbnail to open the Gradient Picker and, in the Basics folder, choose the Black, White preset (also circled). In the Options Bar, make sure the Linear Gradient is turned on, the Mode is set to Normal, and Opacity is 100%.
STEP FIVE: Point your cursor at the bottom-left corner of the selection and drag diagonally up to the top-right corner.
STEP SIX: Press M to switch back to the Rectangular Marquee and select the next section. Press G to grab the Gradient tool again and drag from the top-left corner of the selection down to the bottom-right corner. Repeat on the third section in the top row and draw the gradient from the bottom-right corner up to the top-left corner.
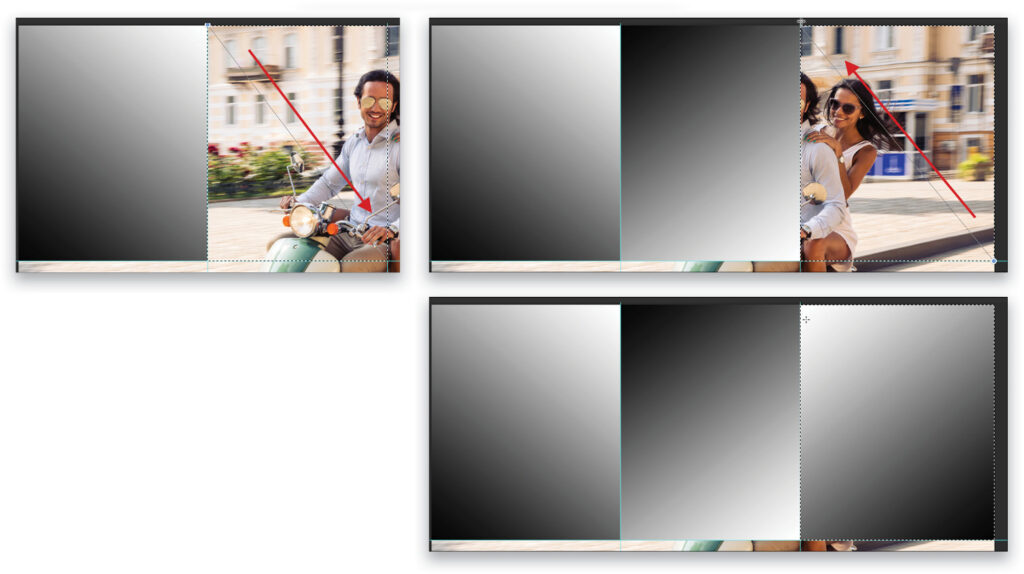
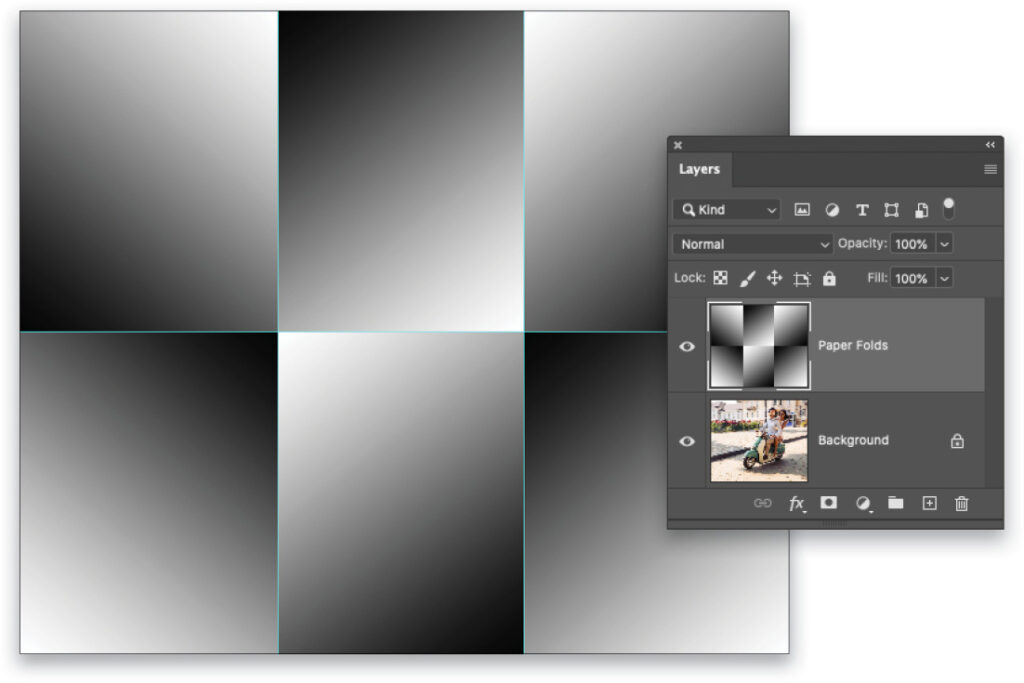
STEP SEVEN: Repeat Step Six to draw gradients across the second row. For the first section, drag from the top-right corner to the bottom-left corner. For the second section, drag from the bottom-right corner to the top-left corner. For the third section, drag from the top-left corner to the bottom-right corner. When you’re finished, choose Select>Deselect.
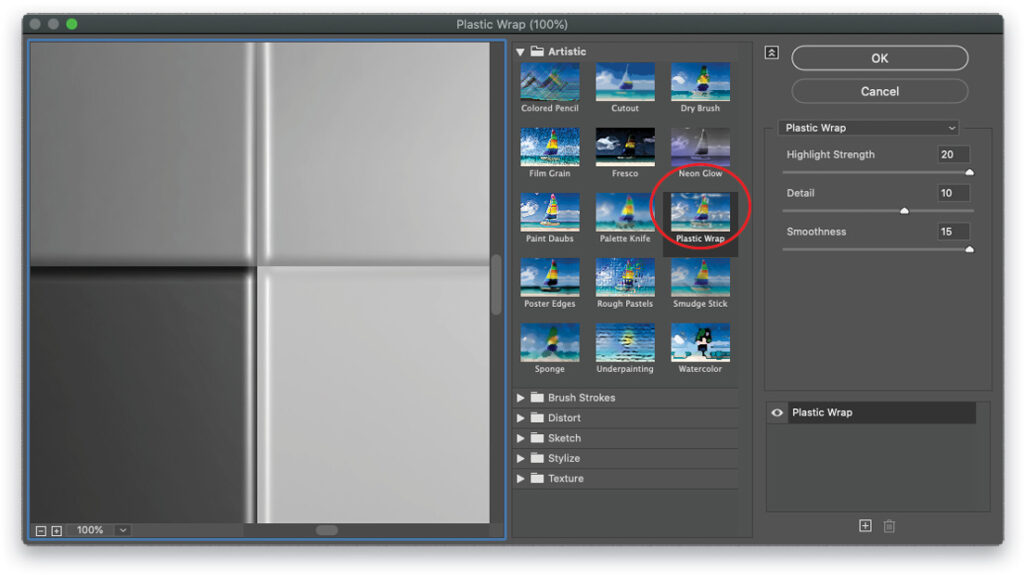
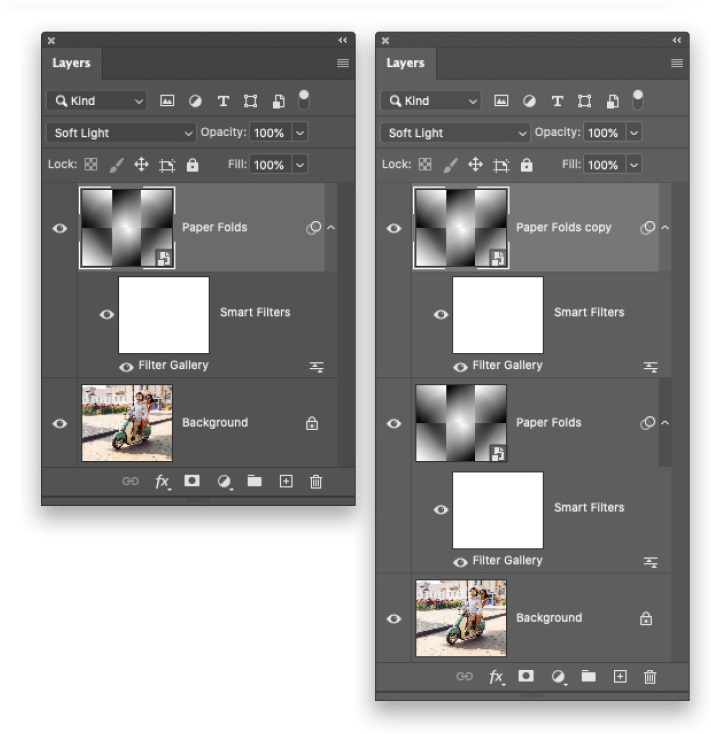
STEP EIGHT: With the Paper Folds layer active in your Layers panel, choose Filter>Convert for Smart Filters. (This turns the layer into a smart object, enabling you to reopen the filter you’re about to run if you want to tweak its settings.) Choose Filter>Filter Gallery and, in the Artistic category, click Plastic Wrap. This filter will accentuate the edges of the gradients you just made, to make them stand out more and look like folds. Set Highlight Strength to around 20, Detail to around 10, and Smoothness to around 15. Click OK.
STEP NINE: In the Layers panel, set the blend mode drop-down menu to Soft Light, and then duplicate the Paper Folds layer by pressing Command-J (PC: Ctrl-J).
Tip: If you’re working with a very high-pixel count image, you may need to duplicate the Paper Folds layer again to really see the folds. If another duplicate of the Paper Folds layer makes the effect too strong, lower its layer Opacity.
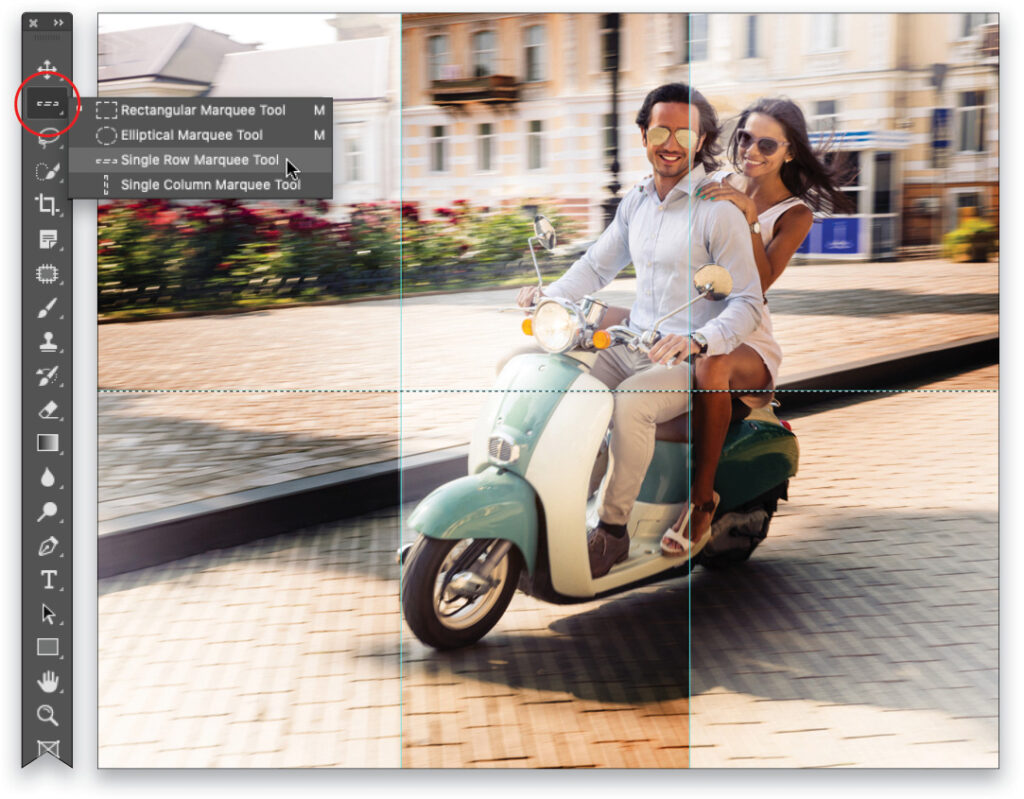
STEP 10: To distress the image along the fold lines, we’ll create a selection that we’ll fill with white, and then run a couple of filters on it. Start by grabbing the Single Row Marquee tool from the Toolbar (circled), which is nested with the Rectangular Marquee tool. Point your cursor anywhere along the horizontal guide and click once to select a single row of pixels along the guide.
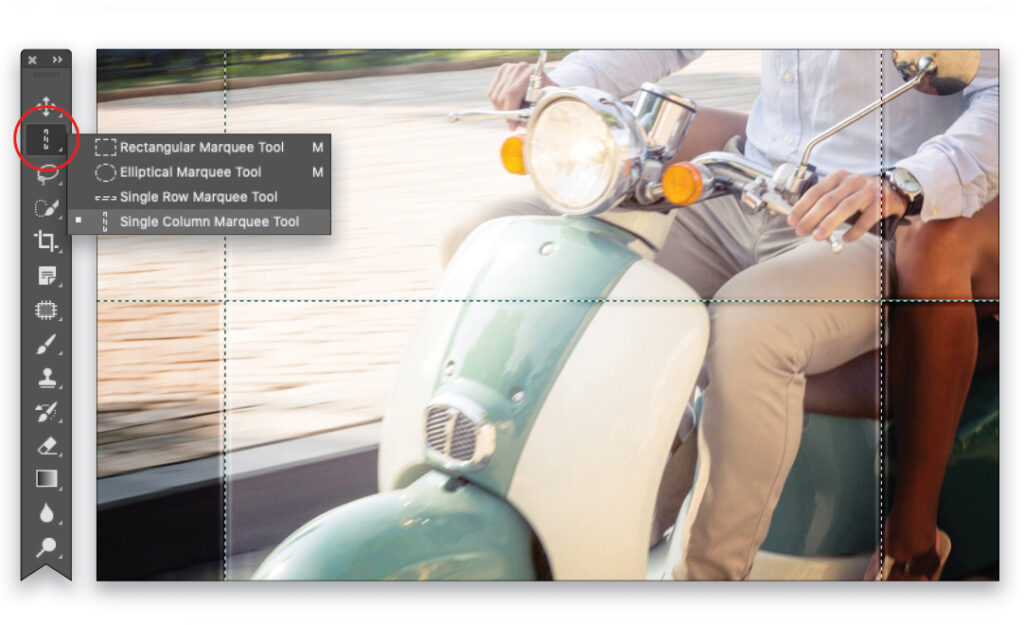
STEP 11: Switch to the Single Column Marquee tool and Shift-click the two vertical guides to add them to your selection. If you’re working with a high-resolution image, you may need to zoom in to see the marching ants of the selection you’re creating.
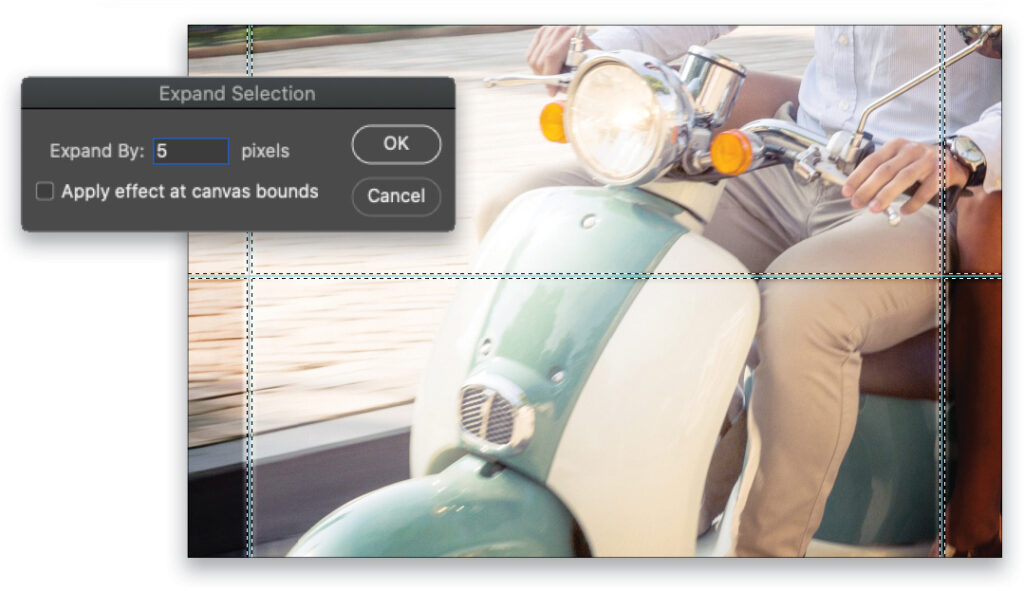
STEP 12: Make the selection bigger by choosing Select>Modify>Expand. In the dialog that opens, enter 5 pixels (try 3 on the Adobe preview image). Click OK.
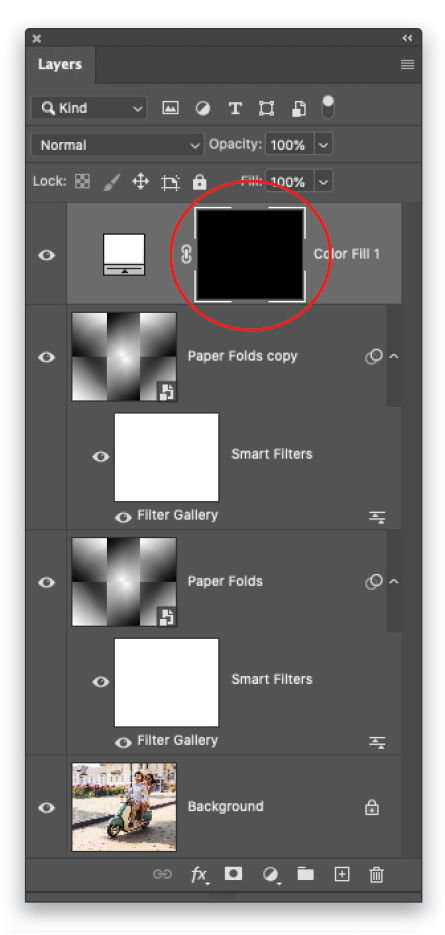
STEP 13: Click the half-black/half-white circle at the bottom of the Layers panel (circled) and choose Solid Color. In the Color Picker that opens, enter FFFFFF (for white) into the # field (also circled). Click OK.

STEP 14: In the Layers panel, click to activate the Color Fill 1 layer’s mask (circled).
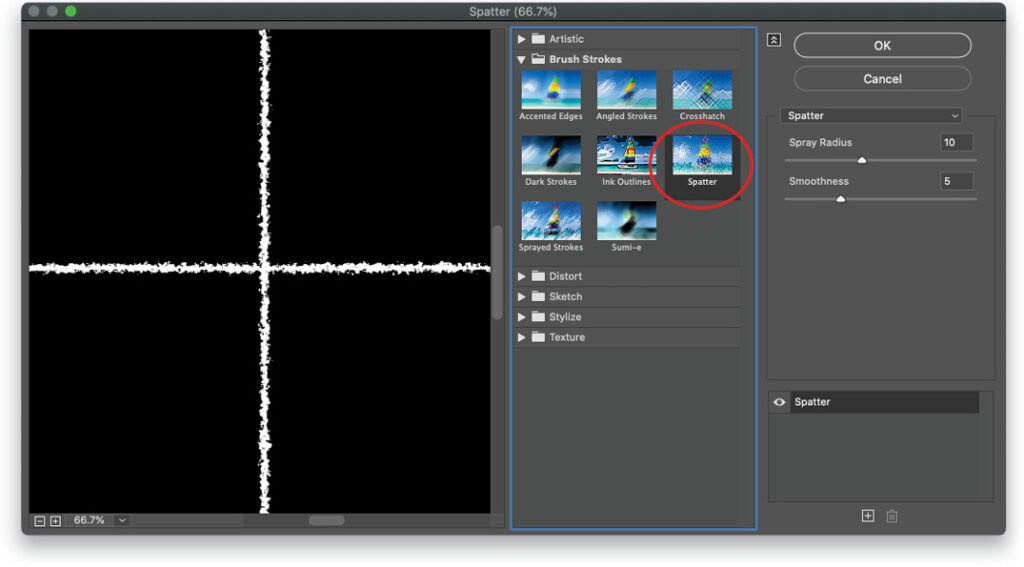
STEP 15: Choose Filter>Filter Gallery—be sure to choose the menu item with the ellipses, and not the Filter Gallery item that appears at the very top of the menu; otherwise, you’ll simply rerun the last filter you ran! If that happens, press Command-Z (PC: Ctrl-Z) to undo and try again. In the dialog that opens, open the Brush Strokes folder, and click Spatter. Enter a Spray Radius of around 10 and Smoothness of around 5. Click OK.
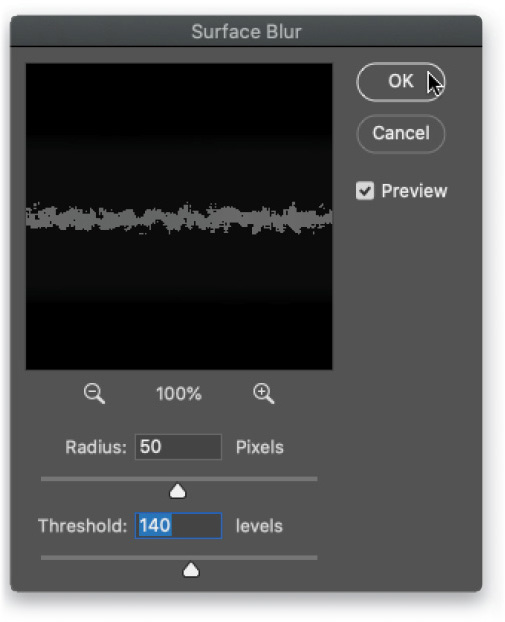
STEP 16: Choose Filter>Blur>Surface Blur. In the resulting dialog, enter a Radius of around 50 and a Threshold of around 140 (try 40 and 120 on the Adobe preview image). Click OK.
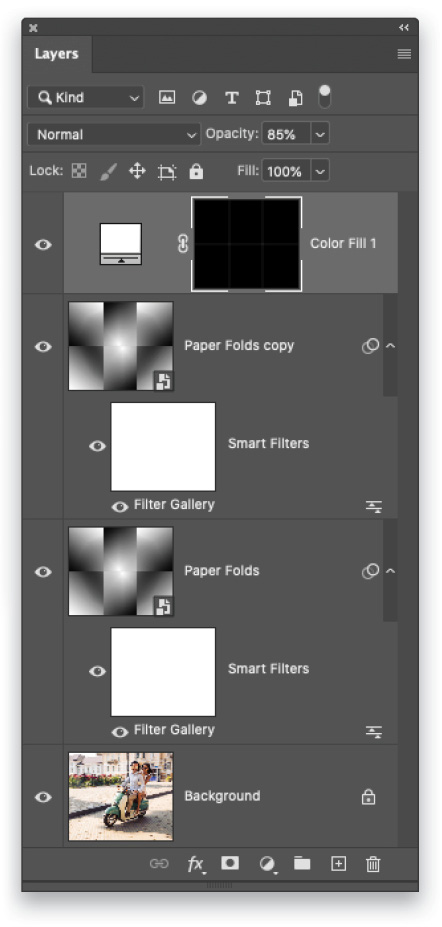
STEP 17: Turn off the guides by choosing View>Show>Guides. Lower the layer Opacity of the Color Fill 1 layer to around 85%.
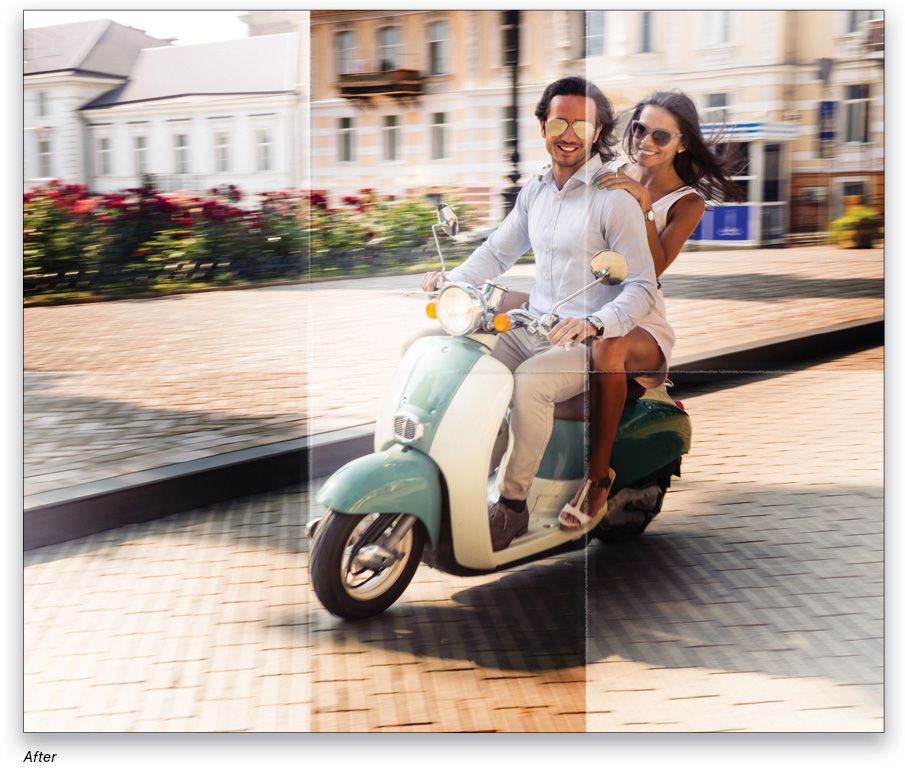
Below is a before and after of the final folded paper effect.
By saving this document as a Photoshop file (.psd extension), you can plop another similar pixel-count photo at the bottom of your layer stack and turn off the layer visibility of the original photo by clicking its Eye icon in the Layers panel. That trick will produce the folded paper effect without you having to re-create it. Until next time, may the creative force be with you all!
This article originally published in the July, 2021 issue of Photoshop User magazine.
About Photoshop User and KelbyOne
Photoshop User magazine comes out digitally 12 times a year and is part of KelbyOne, the leading educational resource for Photoshop, Lightroom, and photography. Pro members have access to more than 900 video courses and 100 back issues of Photoshop User. To learn more about KelbyOne, click here.


