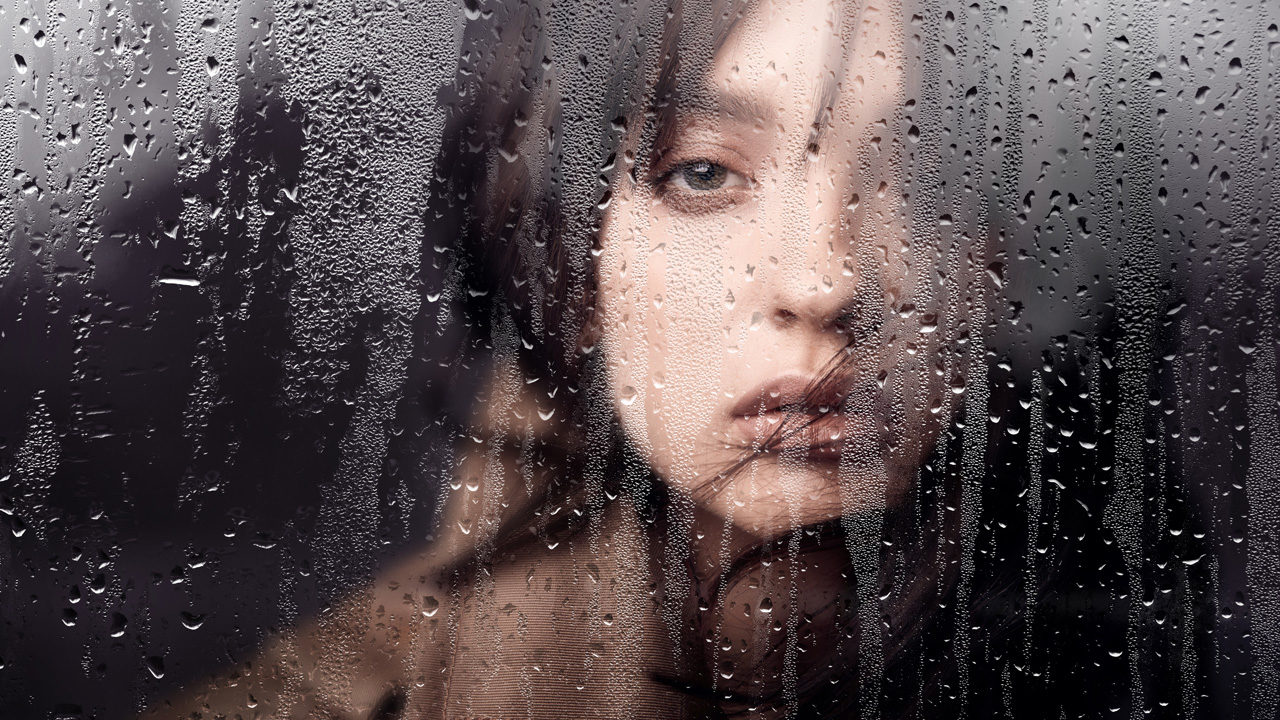
Blend modes are the lifelines of Photoshop, and their applications are infinite. Today, we’ll learn how to create an interesting wet-glass effect to make the image look as if it were captured through a moist window. With a key role played by the Hard Mix blend mode, we’ll combine the power of Curves, masks, and filters to achieve realistic results.
Step One: Open the Image of the Subject
First, let’s open our image into Photoshop. You can add this effect to any image you want. If you wish to follow along with the image used here, click this link to download the JPEG preview for free, or license the full-resolution version from Adobe Stock.
If you’re using your own image, go to File>Open, locate your image, and then click Open, or if you’re working in Application Frame mode in Photoshop, go to Finder (PC: Explorer), locate your image, and drag-and-drop it into Photoshop. If you downloaded the image from Adobe Stock,
you can load it from the Libraries panel by double- clicking it. To make it a little easier to work with the Adobe Stock preview image, you can increase its resolution. (We normally don’t recommend enlarging images, but this is only for practice purposes.) Go to Image>Image Size, turn on the Resample checkbox, set the Resolution to 100 ppi, and click OK.
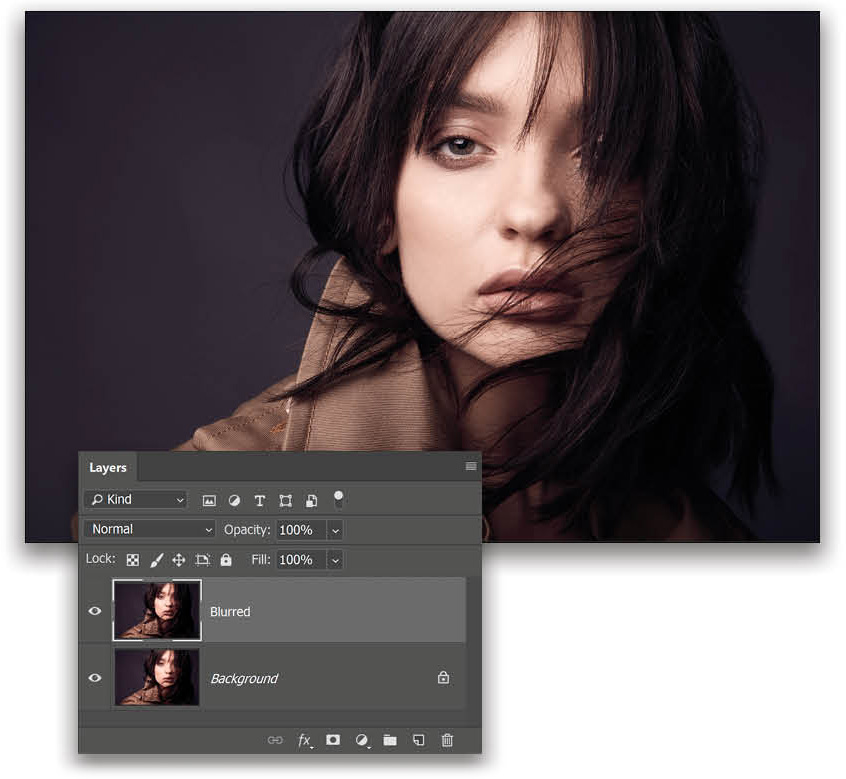
Step Two: Duplicate the Layer
Press Command-J (PC: Ctrl-J) to duplicate the Background layer, then double-click on the duplicate layer’s name and rename it “Blurred.”
Step Three: Add Box Blur
Before applying any filter, let’s convert the Blurred layer to a smart object so that we can adjust the intensity of blur after the fact. To do that, Right-click on the layer and choose Convert to Smart Object.
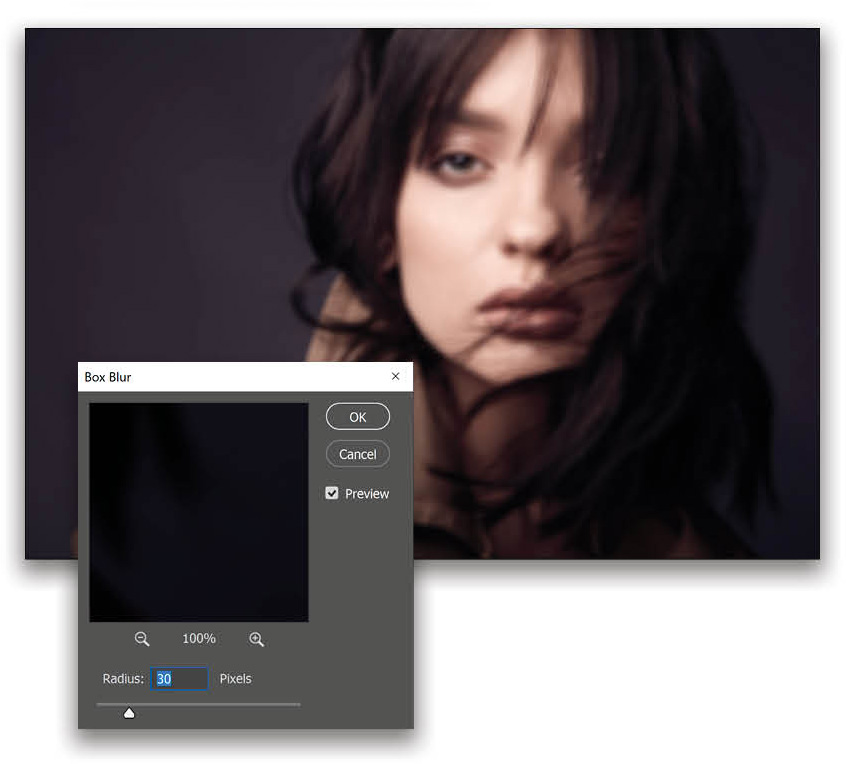
Now, go to Filter>Blur>Box Blur, and set the Radius to 30 Pixels for this example. When choosing a value, keep in mind the amount of blur the wetness of the glass will cause. Click OK.
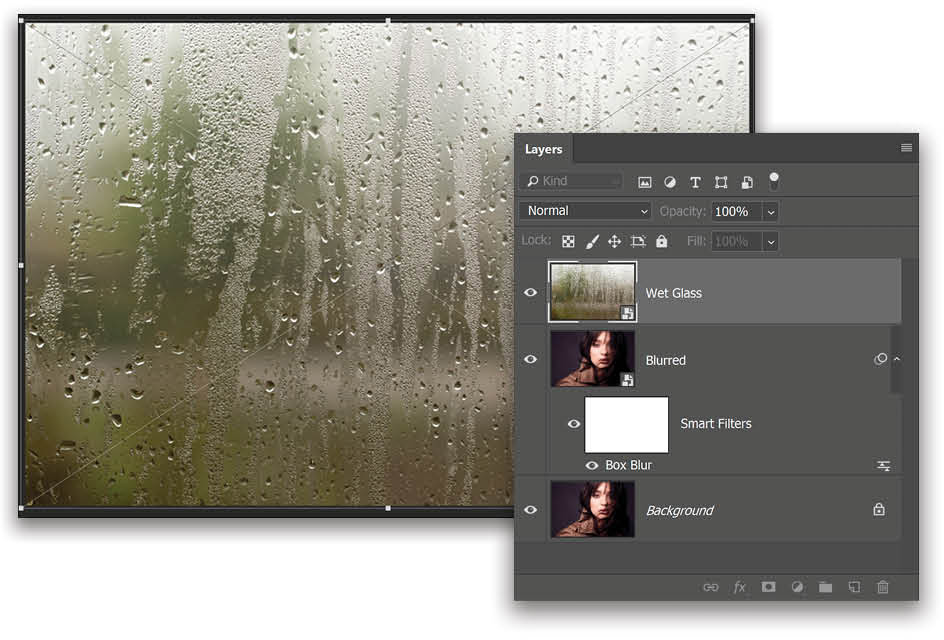
Step Four: Add the Wet Glass Texture
Now we need to add an image of wet glass. To download the one used here, click this link. Once downloaded, drag-and-drop the wet glass image from your Finder (PC: Explorer) onto your canvas, or you can drag-and-drop the wet glass image from the Libraries panel if you saved it there from Adobe Stock. Using the control handles on the bounding box, adjust the position and size of the texture, and then press Enter to commit the changes. Let’s name the layer “Wet Glass.”
Step Five: Make a Selection of Wet Areas Using Color Range
Now we need to make a rough selection of all the wet areas; however, it’s easier to select the non-wet areas and invert the selection later. Go to Select>Color Range. Set the Select menu to Sampled Colors and the Selection Preview to None. Check Localized Color Clusters and start with a Fuzziness of 10 and Range of 10%. Click on the Eye-dropper tool (the one on the left below the Save button), and then click on a non-wet area. Note: Make sure the Sample Size menu in the Options Bar is set to 3 by 3 Average and the Sample menu is set to All Layers.
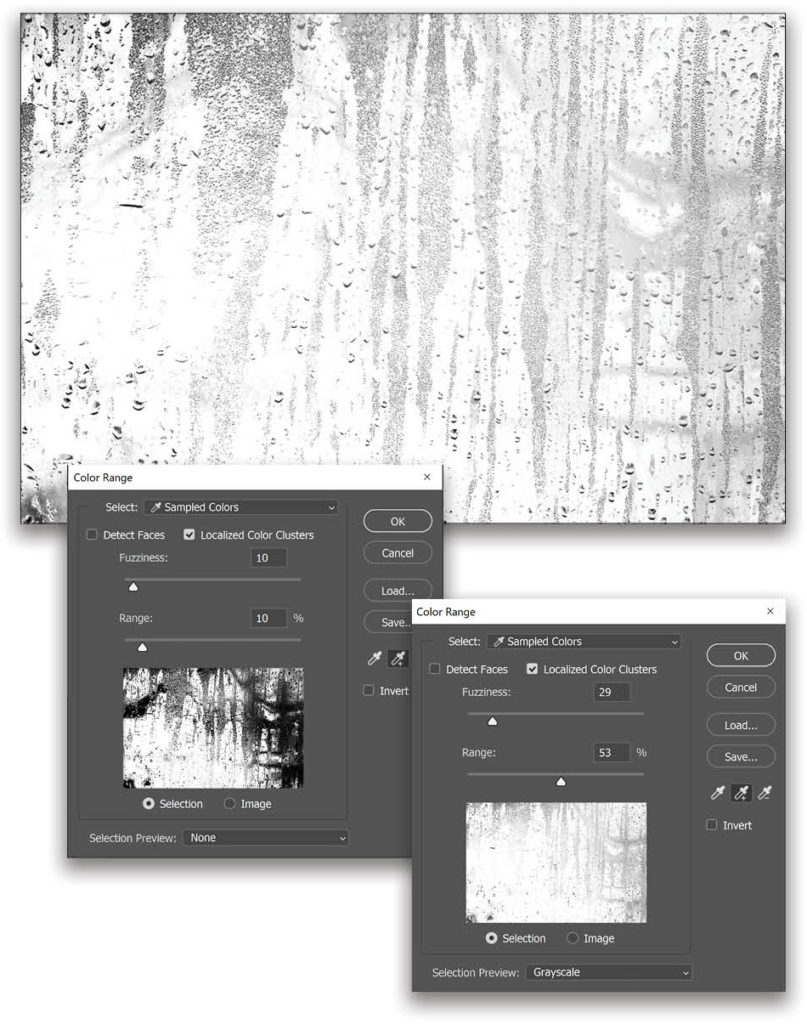
Now, click on the Add to Sample Eyedropper (the one in the middle), and start clicking on the non-wet areas throughout the image. Adjust the Fuzziness and Range as you go to fine-tune the selected areas.
In the Color Range dialog, change the Selection Preview menu to Grayscale. The areas that are selected are white; the areas that aren’t selected are black. We needed to select the wet areas, but right now, it’s just the opposite; therefore, check Invert in the Color Range dialog and click OK.
Step Six: Create a New Layer Below the Blurred Layer
We now have a selection of the wet areas, so click on the Background layer, and then click on the Create a New Layer icon at the bottom of the Layers panel. Let’s name this layer “Blurred Base.”
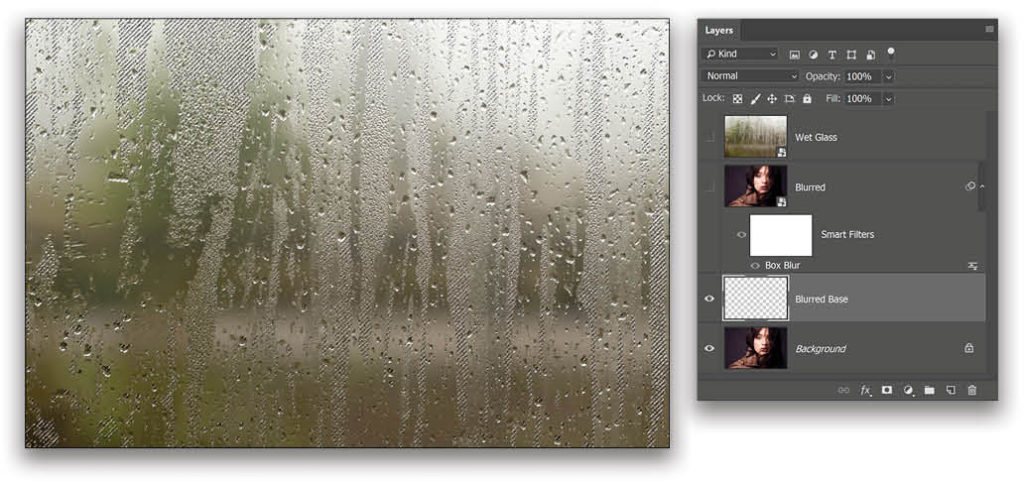
Step Seven: Fill the Wet Areas with a Solid Color
With the selection still active, press D to set the Foreground color to black. Then, fill the selection with black by pressing Option-Delete (PC: Alt-Backspace). Press Command-D (PC: Ctrl-D) to deselect. You can momentarily turn off the Wet Glass and Blurred layers by clicking on their Eye icons.
As you can see, the intensity of black (wet glass) areas is very low, so click on the Blurred Base layer and press Command-J (PC: Ctrl-J) several times to duplicate the layer and make the intensity much stronger.
Merge all the copies by clicking the topmost “Blurred Base” layer, holding down the Shift key, and then clicking the bottommost Blurred Base layer. Everything in between is now selected. Press Command-E (PC: Ctrl-E) to merge these layers.
Step Eight: Apply Blur to the Wet Areas
Select the Blurred layer and turn it back on (click where the Eye icon used to be). Press Command-Option-G (PC: Ctrl-Alt-G) to create a clipping mask. This applies the blurred image in only the wet areas in the layer below.
Step Nine: Desaturate the Texture
Select the Wet Glass layer and turn it back on. Right-click on the layer and choose Rasterize Layer. Press Command-Shift-U (PC: Ctrl-Shift-U)
to desaturate it.
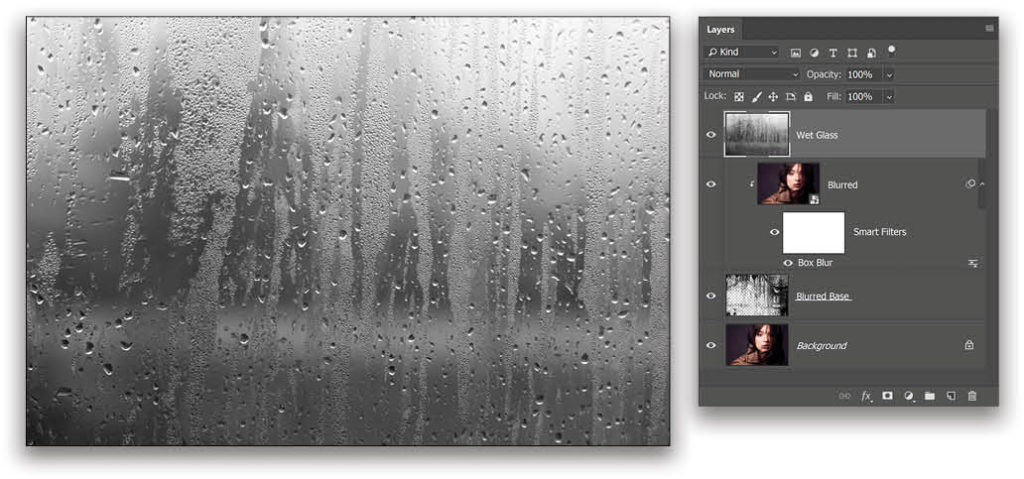
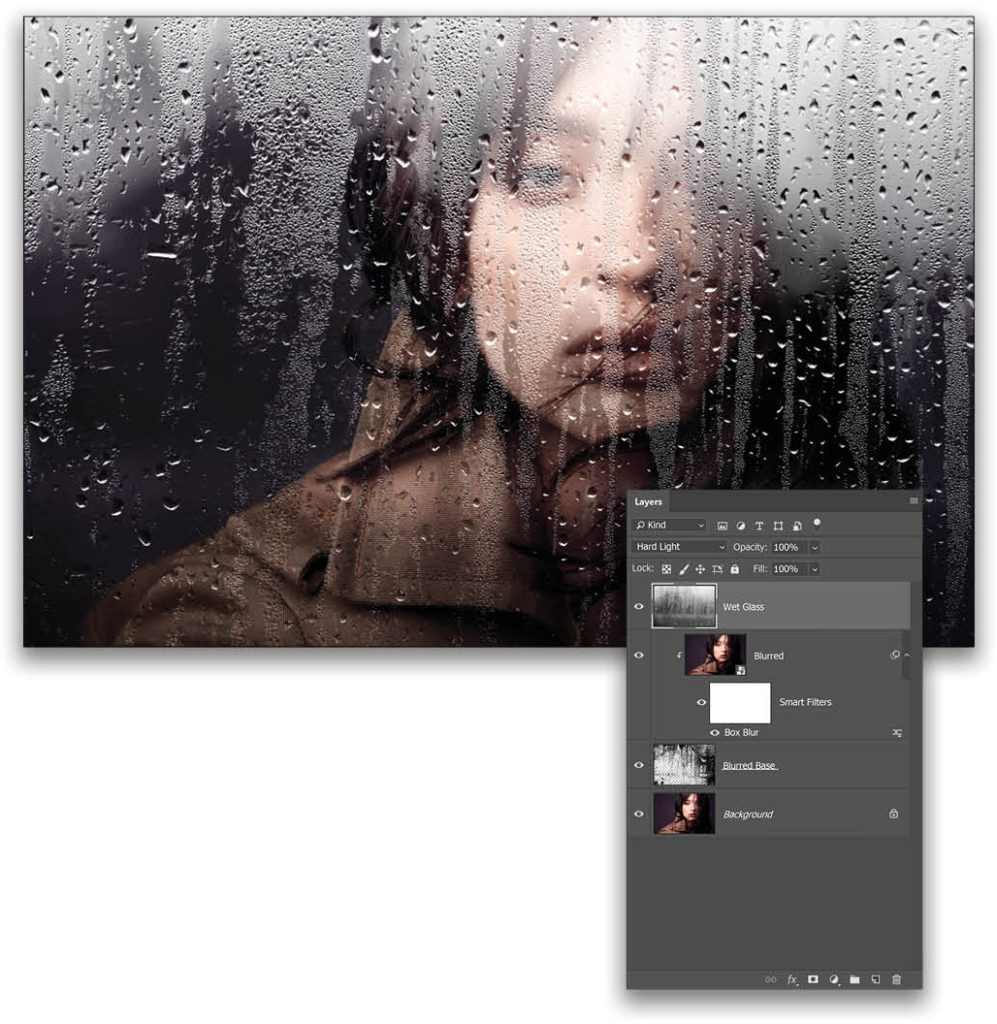
Step 10: Change the Blend Mode to Hard Light
With the Wet Glass layer selected, change the blend mode from Normal to Hard Light. As you can see, the top areas are very bright, so we need to bring them down.
Step 11: Use Levels to Darken Part of the Glass
Click on the Create New Adjustment Layer icon (half-black/half-white circle) at the bottom of the Layers panel and choose Levels. Press Command-Option-G (PC: Ctrl-Alt-G) to create a clipping mask so that the Levels adjustment only affects the Wet Glass layer. Move the bottom-right Output Levels slider to the left and the top-left Input Levels slider to the right, as shown.
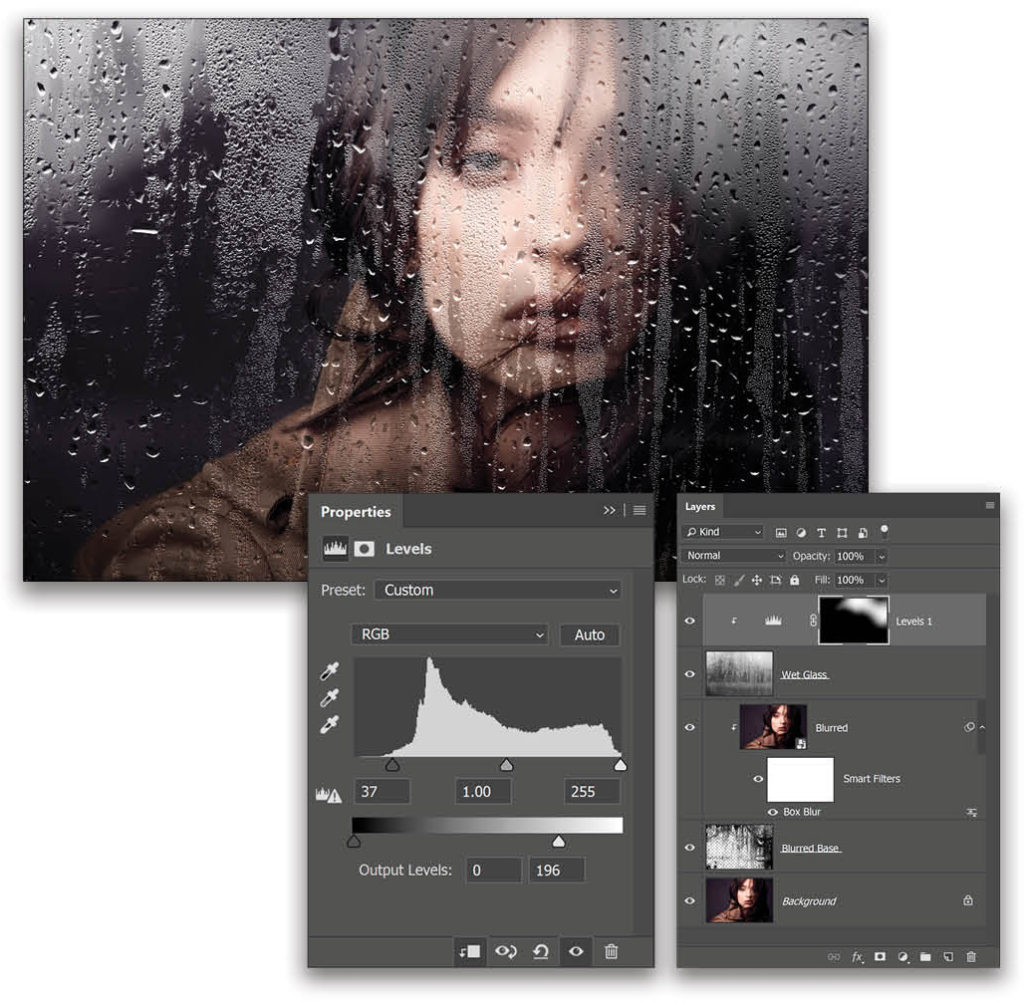
This darkens all the glass when we only wanted to darken the top area. So, select the mask on the Levels adjustment layer, get the Brush tool (B), make sure your Foreground color is set to black, and paint on the dark areas with a soft brush to hide the extra darkening there.
Step 12: Use Levels to Brighten Part of the Glass
Click on the Create New Adjustment Layer icon and choose Levels again. Press Command-Option-G (PC: Ctrl-Alt-G) to create a clipping mask so that the Levels just affects the Wet Glass layer. This time, move the bottom-left Output Levels slider to the right and the top-right Input Levels slider to the left, as shown.
Click on the new Levels 2 adjustment layer’s mask, and paint black with a soft brush on the bright areas that you want to hide.
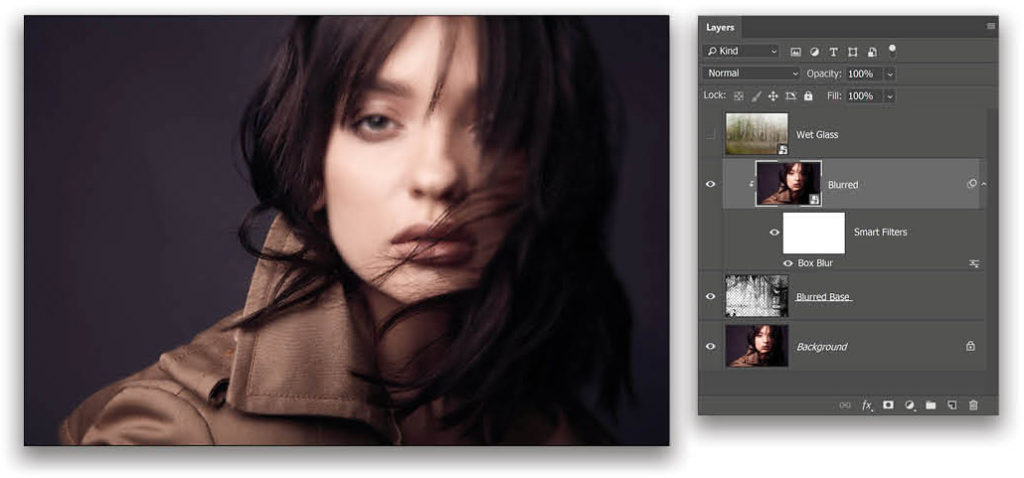
Step 13: Bring Back Sharpness
To bring back the sharpness of the eyes and other essential areas, select the Blurred Base layer. Then, click on the Add Layer Mask icon to create a mask. Select the mask, and paint with black on the eye, nose, and mouth area.
Step 14: Slightly Erase the Wet Texture from the Eyes and Lips
If the texture is disturbing the important features of the face, it makes sense to lighten the effect there a little. Select the Wet Glass layer and add a layer mask to it. With the mask selected, set the Brush tool’s Flow to 5% or less in the Options Bar, and paint black over the features of the face.
Step 15: Add More Blur (Optional)
To create a moodier look, select the Blurred layer and press Command-J (PC: Ctrl-J) to duplicate it. Double-click on the Box Blur smart filter below the layer to reopen the dialog, and increase the Radius to 65 pixels. Select the layer mask and paint black over the areas that you want to be in focus.
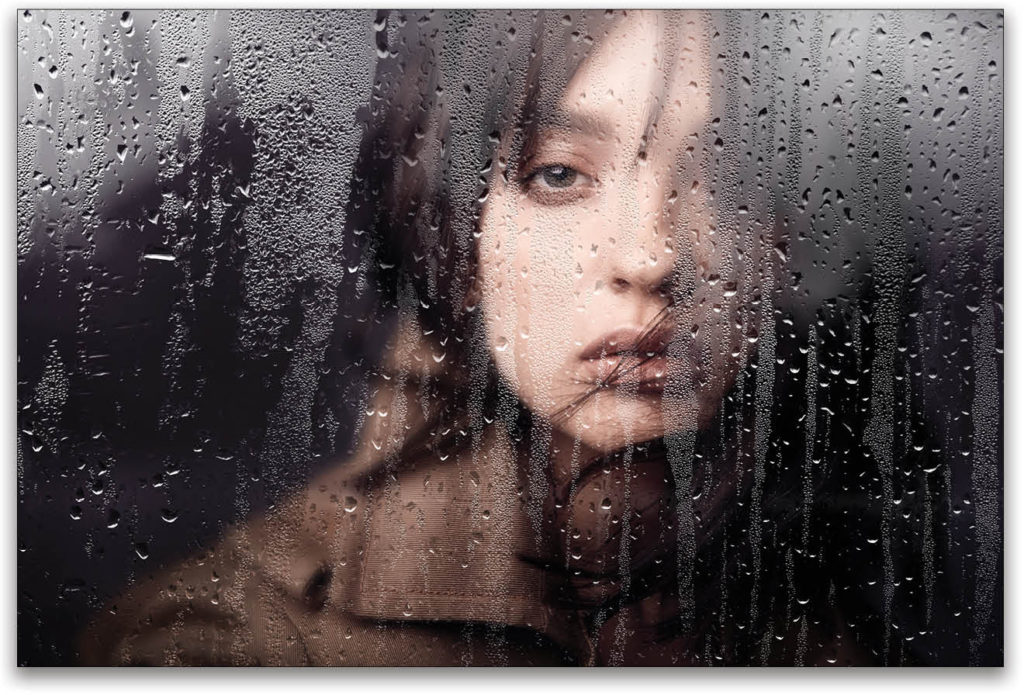
The steps we followed for this effect were purely based on concepts and observation. For instance, we observed that the areas on the glass with mist were blurring anything behind it; therefore, we selected those areas and blurred them using a clipping mask. Also, since the Hard Light blend mode darkens the dark areas, brightens the bright areas, and hides the neutral, it’s the perfect choice of blend modes for the most realistic results for this example. Keep in mind that Hard Light is an extreme version of the Overlay blend mode.
This article originally published in the May, 2019 issue of Photoshop User magazine.


I am trying to follow along with this wt glass look project but I,for some reason, cannot get past step 3. The wet glass photo will not
load onto photoshop onto it’s own layer so I cannot follow the subsequent steps. I am obviously missing something here. If I can
get passed this step I believe I can take it to the end. Can you help me out. Thank you. I hope I am not asking a question that is
epically stupid.