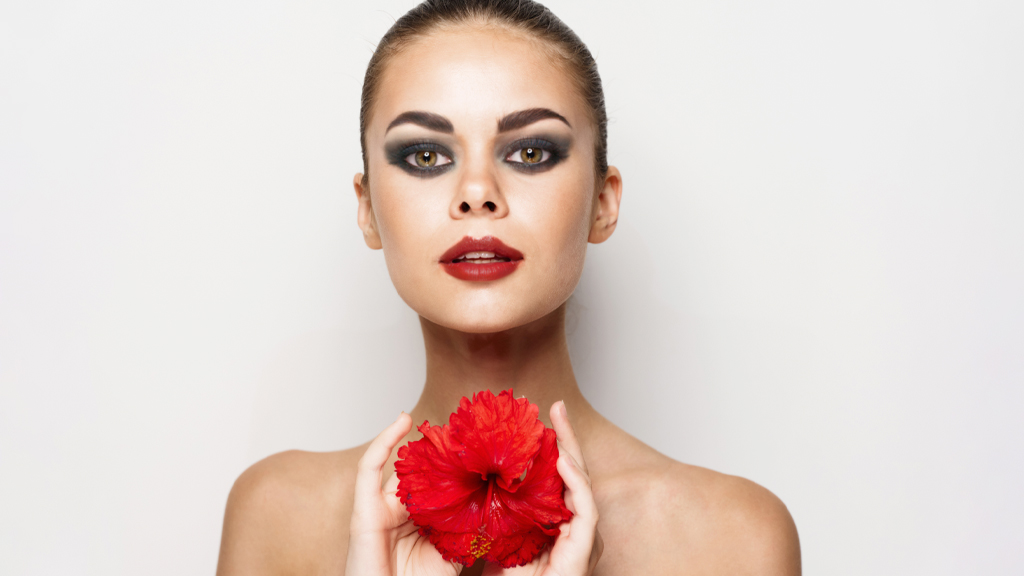
The experimental Makeup Transfer Neural Filter lets you copy eye, eyebrow, and lip makeup from one image and apply it to those same areas in another image (sorry, blush isn’t included). Short of having your own personal makeup artist, this filter’s just the ticket for trying out different looks or for creating a good old-fashioned glamour shot. Read on!
STEP ONE: Choose File>Open and navigate to the two images you want to use, so they open into separate documents. Open the image to which you’ll apply the makeup, and the one from which you’ll copy the makeup (both of the images we’re using here are free from Adobe Stock).
If you’d like to download these images to follow along, click this link for the woman with the flower, log in with your Adobe ID, and click the License for Free button. This will download the image to your computer as well as add it to your Libraries panel (Window>Libraries). Double-click the image in the Libraries panel to open it in Photoshop. Now click this link to find and download the woman with the Halloween makeup, and then open it in Photoshop as well.
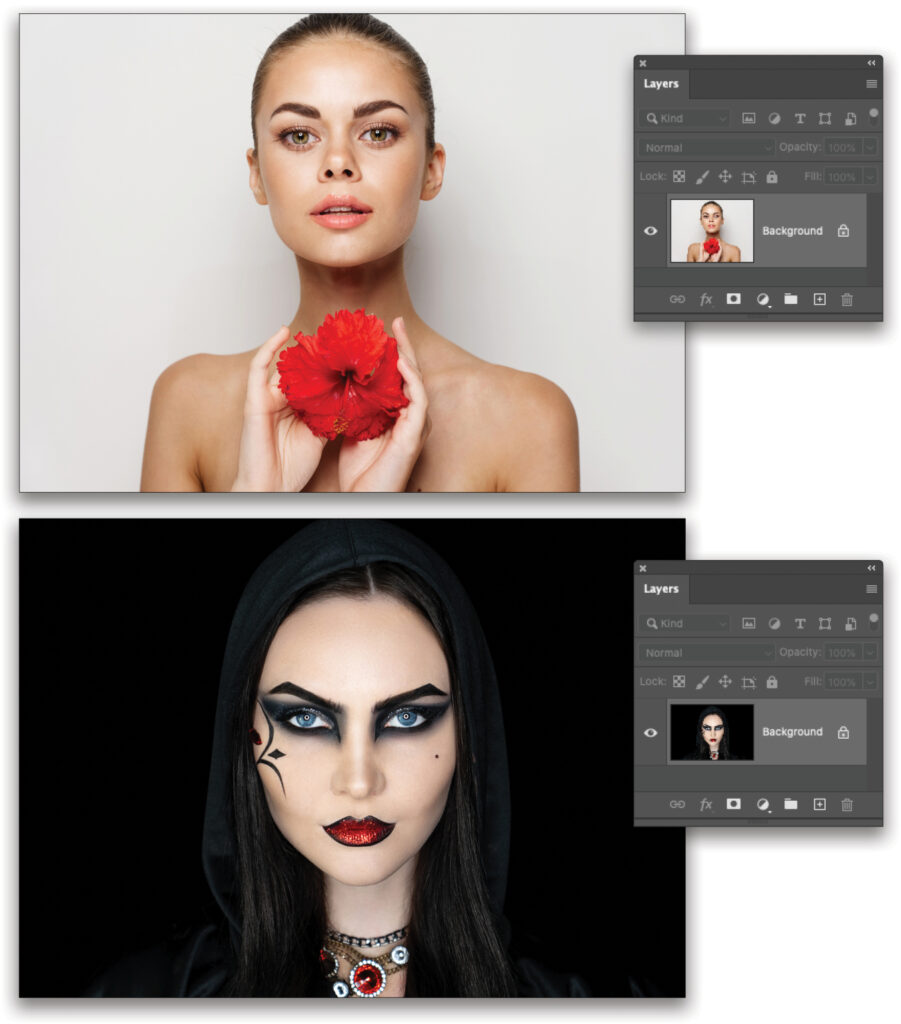
If you’re starting in Lightroom, select two thumbnails in the Library module and then choose Photo>Edit In>Adobe Photoshop 2022. For the Makeup Transfer filter to work well, both images need to have the model looking straight at the camera with their eyes open. Profile shots, tilted heads, or any image where both eyes aren’t open and fully visible—bangs, we’re looking at you!—may not produce good results. It’s also better if the image to which you’re applying the makeup doesn’t have much makeup to start with.
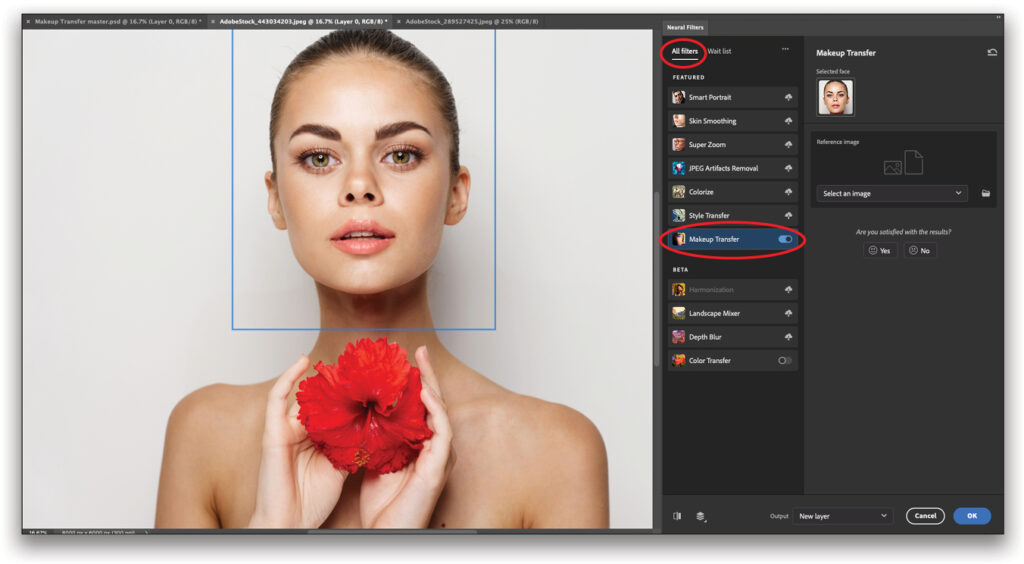
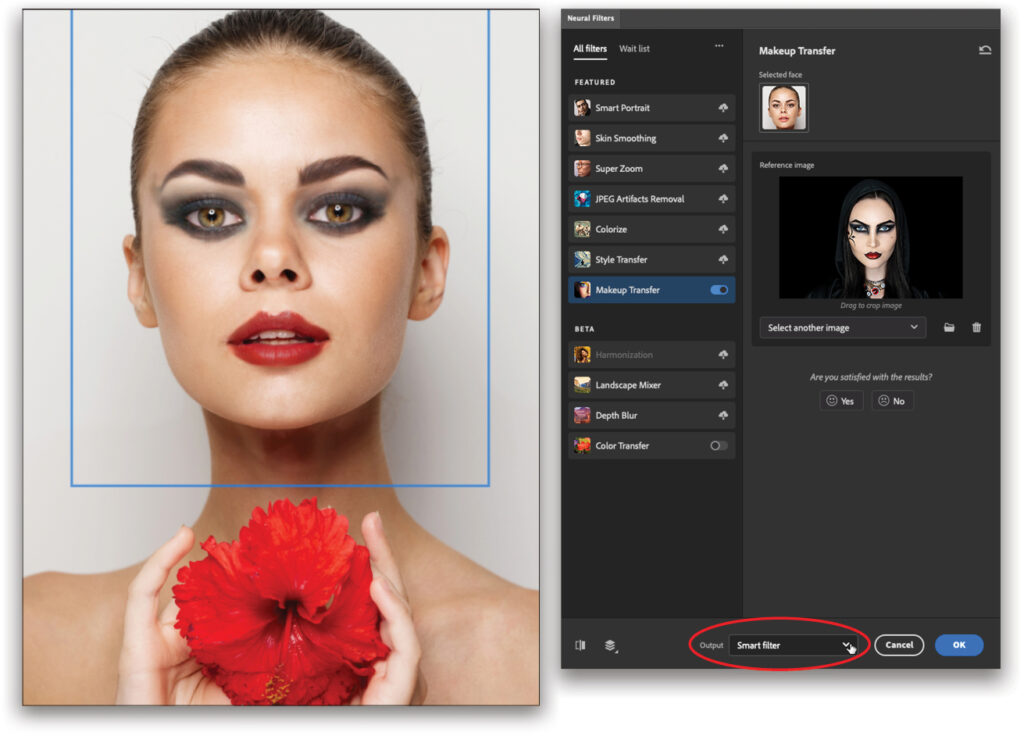
STEP TWO: In the document containing the image to which you want to apply the makeup, choose Filter>Neural Filters. In the workspace that opens, choose All Filters (circled) and in the Featured section, locate Makeup Transfer and click the cloud icon to its right to download it. Once the download is complete, the cloud icon turns into a switch (circled), and it should automatically be turned on. If not, give it a click to turn it on, at which point the switch turns blue.
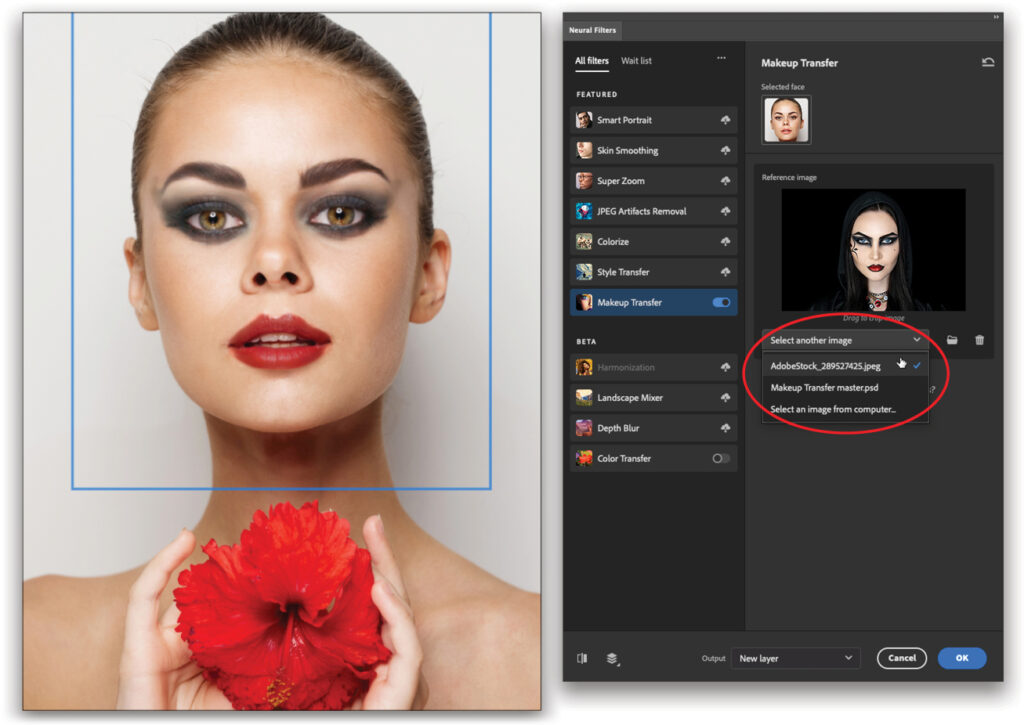
STEP THREE: From the drop-down menu in the Reference Image section (circled), choose the other open image—the one from which you want to copy the makeup. (Alternatively, you can click the folder icon, navigate to an image on your hard drive that isn’t open, and then click Use this Image.) When you do, Photoshop analyzes the reference image and applies the makeup.
Tip: If you want to try out multiple makeup looks, open all the reference images in Photoshop first before launching the Neural Filters, and then use the Reference Image menu to switch back and forth between them. It takes Photoshop a few seconds to switch reference images and do the makeup transfer, but this method is quicker than navigating to each reference photo individually.
STEP FOUR: From the Output drop-down menu near the bottom of the workspace, choose Smart Filter and click OK. This turns your layer into a smart object, which comes with a mask you can use to hide the filter’s effects.
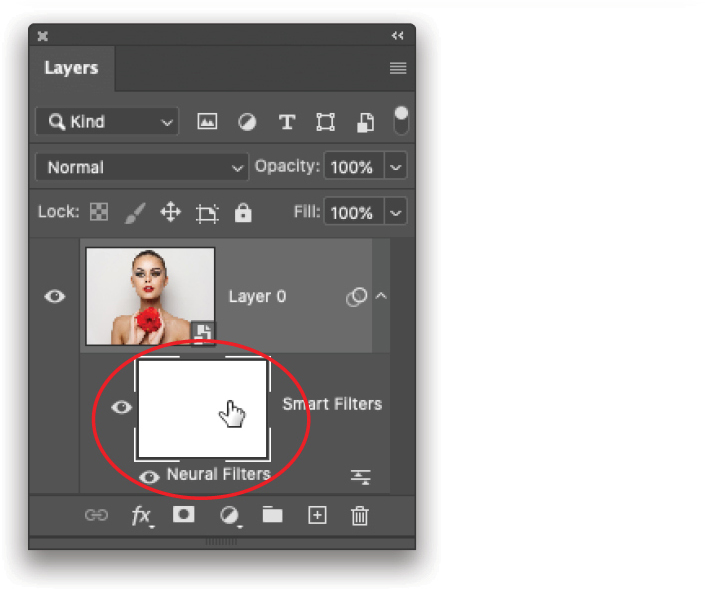
STEP FIVE: Let’s use the aforementioned mask to hide the dark eyeshadow that extends upward beyond her eyebrows. To do that, cruise over to the Layers panel and click to activate the mask (circled). Notice brackets appear on each corner of the mask to indicate it’s now active.
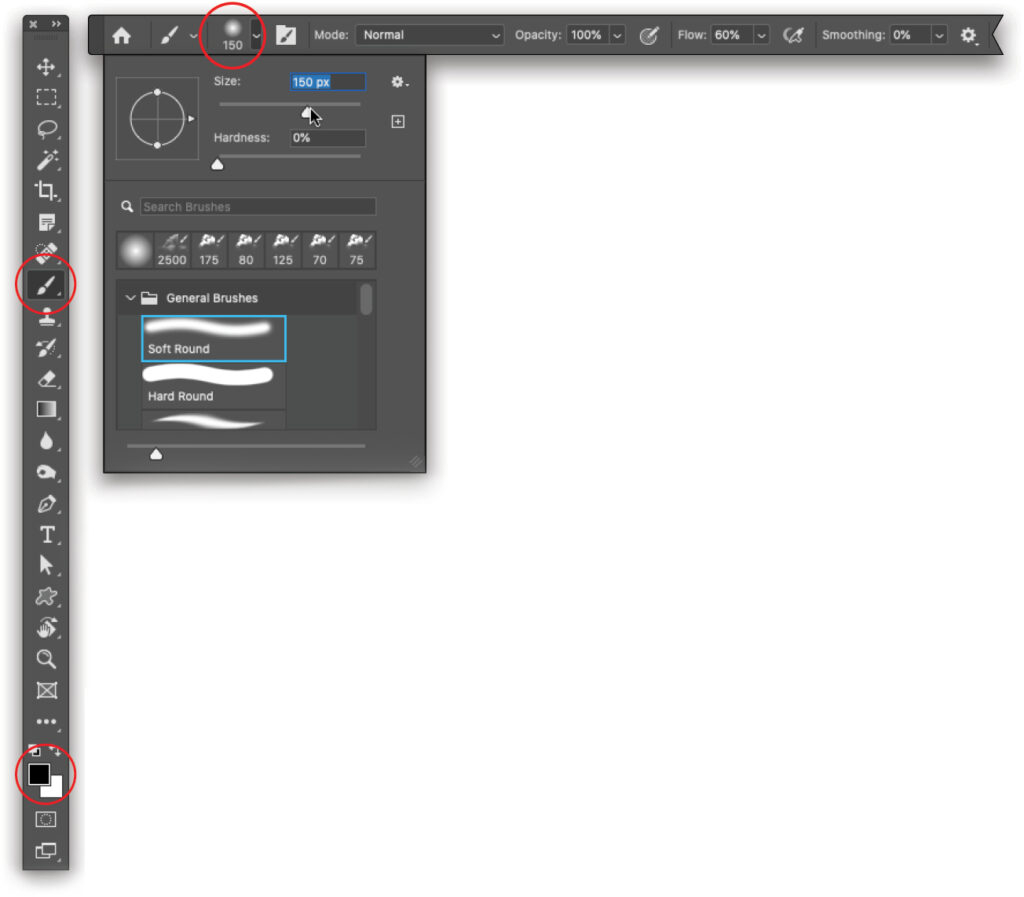
STEP SIX: Press B on your keyboard to grab the Brush tool (circled). In the realm of masks, painting with black conceals and painting with white reveals. So press D to set the color chips at the bottom of the Toolbar (also circled) to the default colors of black and white, and then press X to flip-flop them so black is on top. In the Options Bar, click to open the Brush Preset Picker (circled) and choose the Soft Round brush in the General Brushes folder. Set the Size to around 150 pixels.
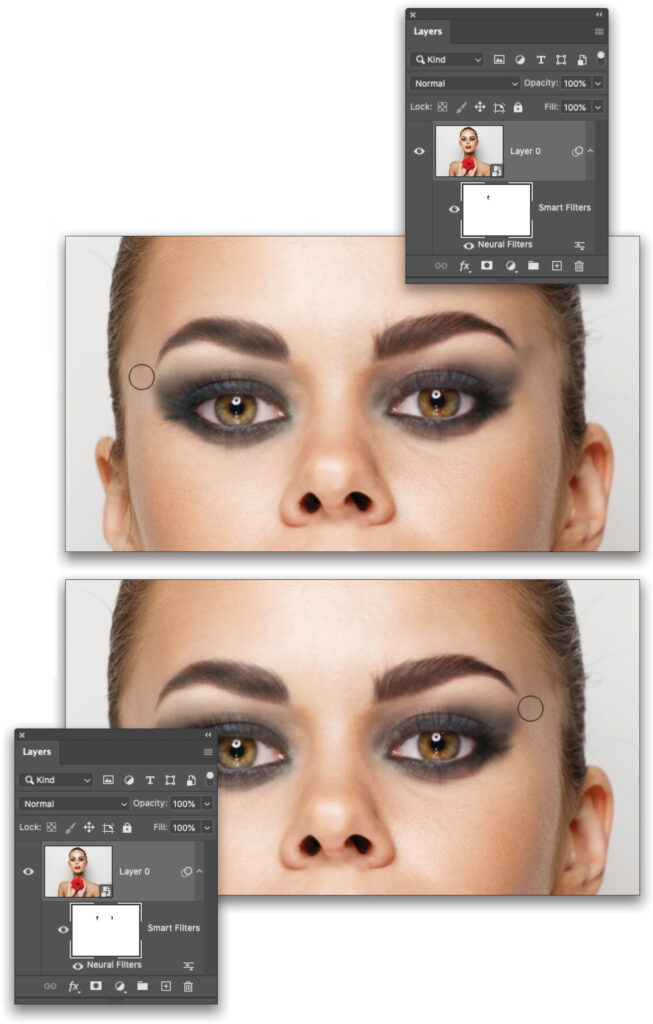
STEP SEVEN: Mouse over to the image and paint to hide the dark eyeshadow near each eyebrow so it looks even. Notice your brushstrokes appear on the mask in the Layers panel.
Tip: If you mess up and hide too much, press X to flip-flop the color chips so white is on top, and then paint back across that area. You can also lighten parts of the makeup by lowering the brush Opacity setting in the Options Bar, and then painting across that area.
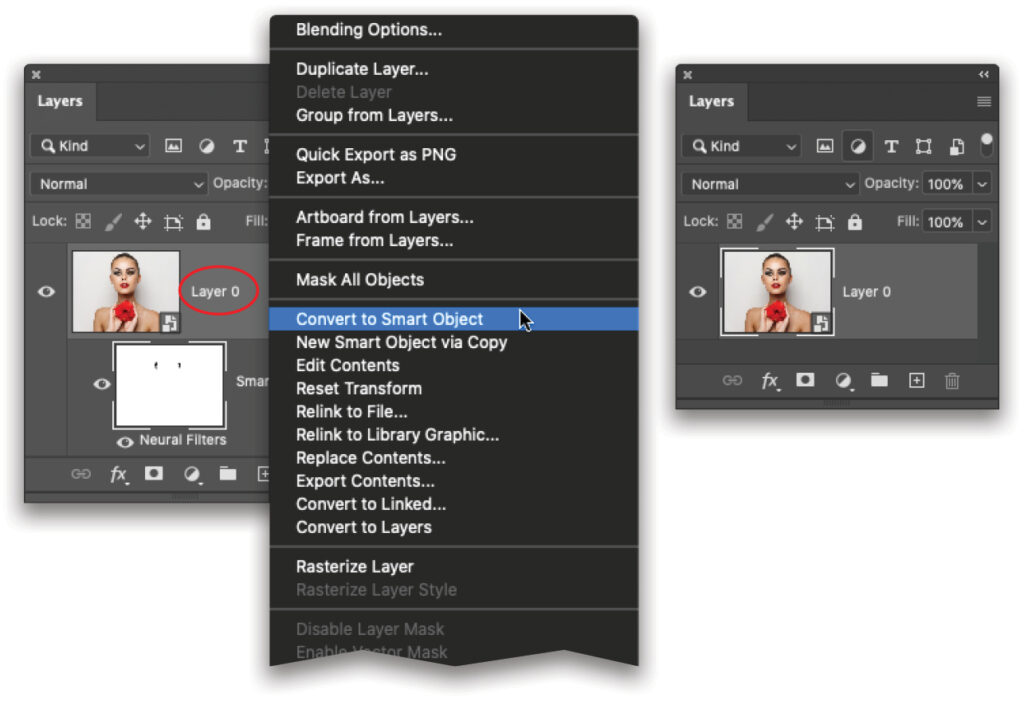
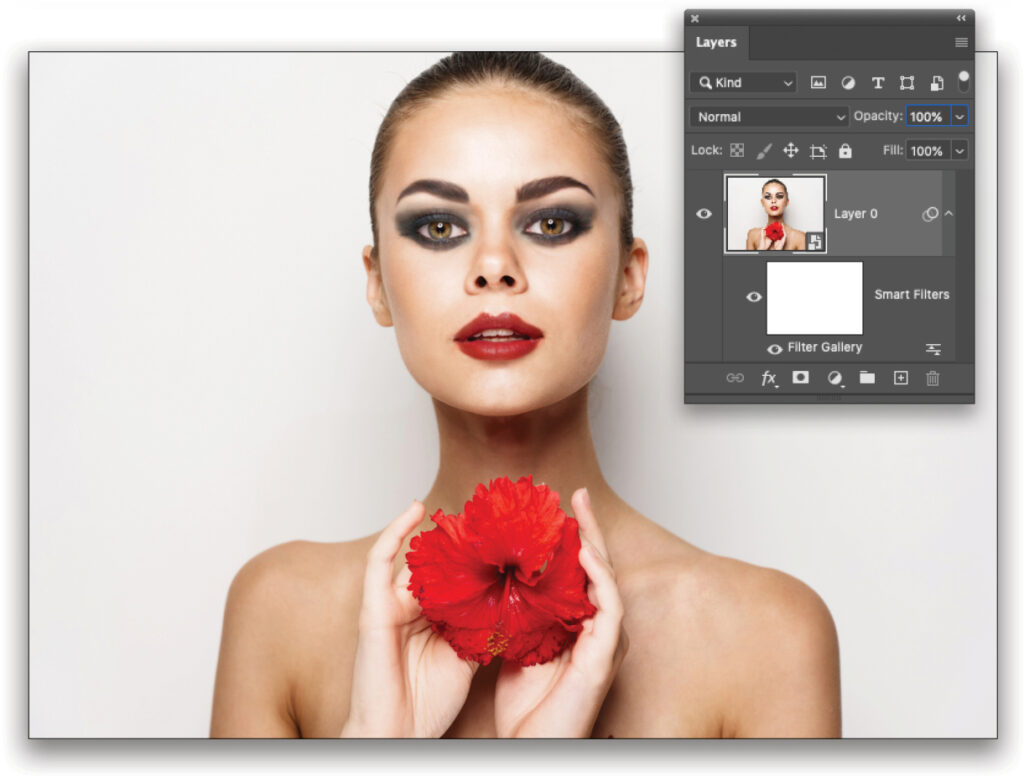
STEP EIGHT: That’s all there is to the makeup technique! Now let’s use a filter to add a glamour glow. Since the mask we already have will apply to all filters you run on this smart object layer, you must first consider whether or not you’ll want to hide some of the glamour glow specifically. To gain a separate mask for that one filter, you need to create another smart object from the existing smart object (a nested smart object, if you will). To do that, Right-click near the layer’s name (circled) and from the menu that opens, choose Convert to Smart Object. When you do, Photoshop tucks the original smart object inside another one. (If you don’t care about hiding any of the glamour glow from part of the image, such as the background, you can skip this step.)
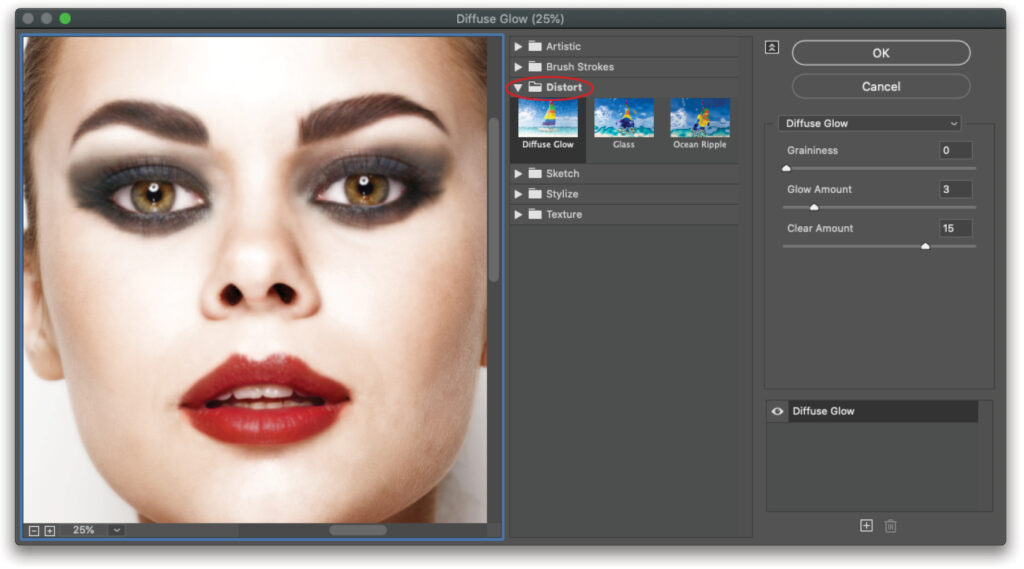
STEP NINE: Choose Filter>Filter Gallery. In the Filter Gallery dialog, open the Distort category (circled) and pick Diffuse Glow. Click the minus icon at the bottom left of the dialog until the zoom is at 25%, and then click-and-drag in the preview until you can see your subject’s face. Set the Graininess slider to 0, Glow Amount to around 3, and Clear Amount to around 15. Click OK.
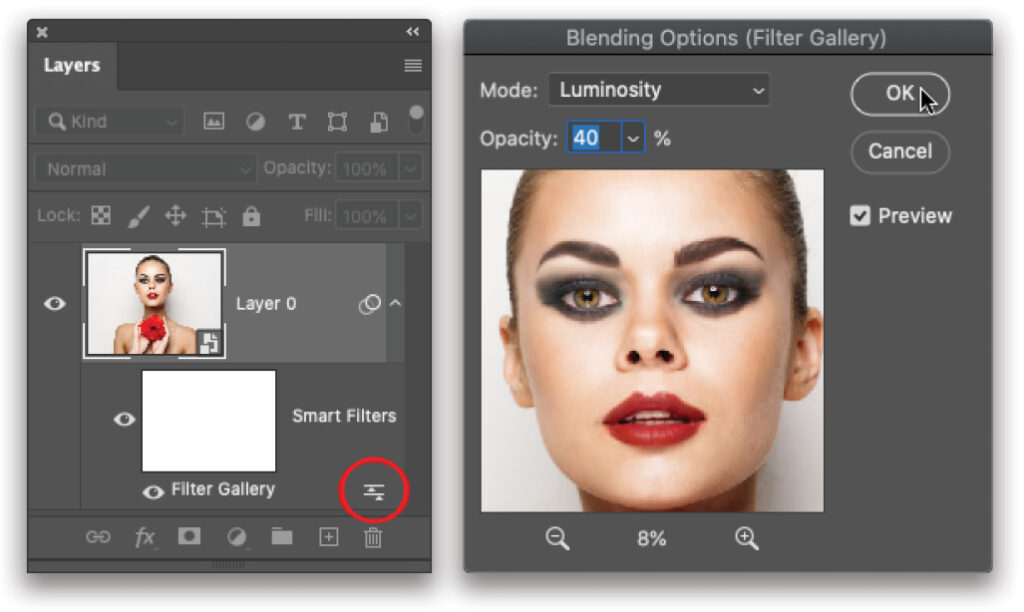
STEP 10: Back in the Layers panel, you’ll see the filter’s name (Filter Gallery, in this case) and a brand-new mask. If you wanted to hide some of the glamour glow, you could use a black brush inside this mask to get it done. Today, let’s simply change the filter’s blend mode and its opacity. To do that, double-click the icon to the right of the filter’s name (circled). In the Blending Options dialog that opens, set the Mode to Luminosity (to keep the photo’s colors from shifting), and then lower the Opacity to around 40%. Click OK.
Here’s a before and after version.
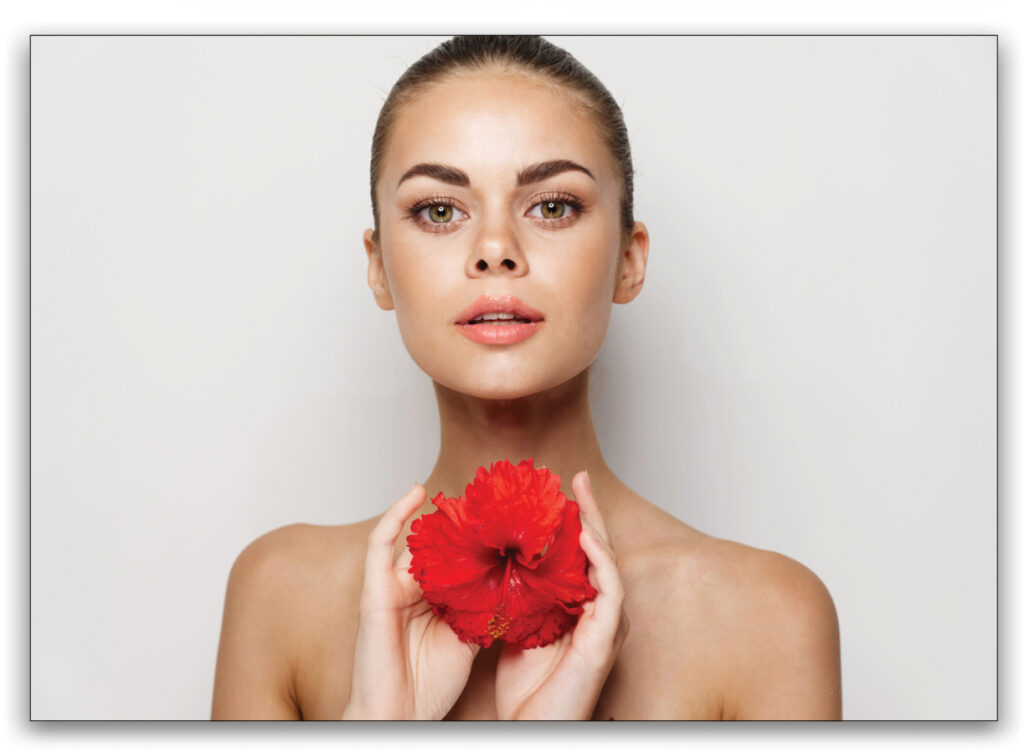
Even though the Makeup Transfer Neural Filter is still in development, and despite the fact that a cheek blush isn’t included, you can use it to apply incredibly realistic makeup in mere minutes. The beauty of using smart filters for this technique is their versatility; not only does your original image remain unharmed, but you can edit both filters. To edit the Diffuse Glow settings, double-click the Filter Gallery filter in your Layers panel. To edit the Makeup Transfer filter, double-click the smart object layer thumbnail to open the original smart object in a temporary Photoshop document. There, double-click the Neural Filters filter in the Layers panel and change the reference image. When you’re finished, choose File>Save in the temporary Photoshop document, close it, and your changes are updated back in your original document.
Slick! Until next time, may the creative force be with you all.
This article originally published in the October, 2022 issue of Photoshop User magazine.
About Photoshop User and KelbyOne
Photoshop User magazine comes out digitally 12 times a year and is part of KelbyOne, the leading educational resource for Photoshop, Lightroom, and photography. Pro members have access to more than 900 video courses and 100 back issues of Photoshop User. To learn more about KelbyOne, click here.


