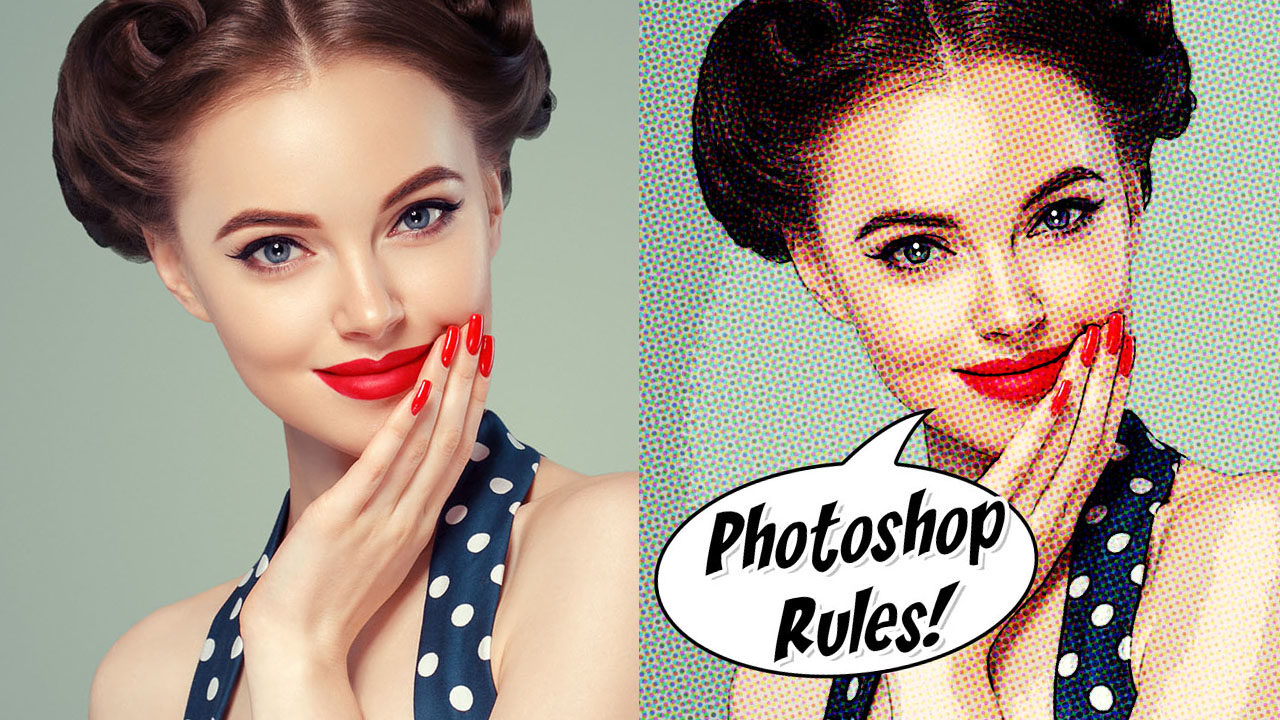
In today’s age of digital media, the push is to create as clear and crisp images as possible. Manufacturers are packing cameras with as many megapixels as humanly possible in order to do away with even the tiniest smidge of pixelation. We love a great high-quality image, but there’s something exciting and nostalgic about an old comic book image, with its Ben-Day dots printing technique, the way those primary colored dots jump off the page, the bubbles of dialog, the animation—all of it! And now with Photoshop, you can take your digital images straight back to the 1950s in no time. Let’s get to it!
STEP ONE: ADJUST IMAGE SIZE
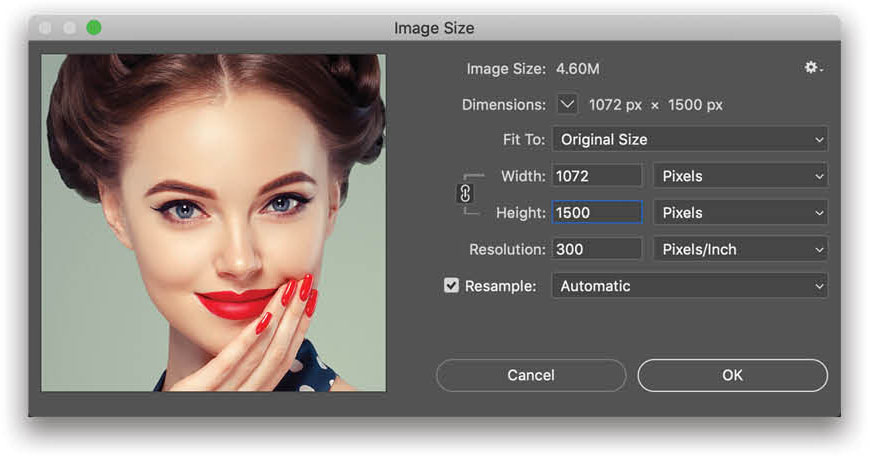
The first thing you want to do after opening your photo in Photoshop is adjust the image size (Image>Image Size). It’s an entirely personal preference how realistic or “comic” you want the final image to appear, and these adjustments have different effects depending on your image size: Smaller images will have a more distorted and heavily “dotted” look, while larger images will be more detailed. For this example, we’re going to set the length of the long edge at 1,500 px.
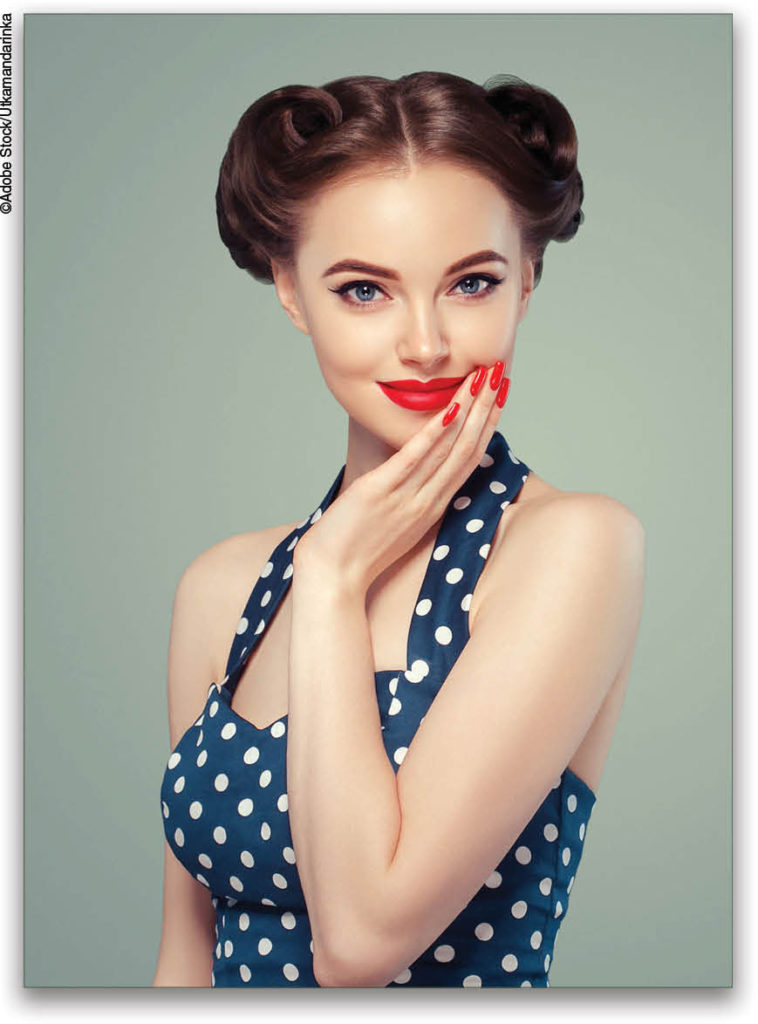
If you’d like to download the low-res watermarked version of this image to follow along, click this link, log in with your Adobe ID, click the Save to Library button, and choose the Library to which you want to save it. Double-click the image in the Libraries panel (Window>Libraries) to open it in Photoshop. In the version we’re using here, we used the Crop tool (C) to crop the image vertically. Next, go to Image>Image Size, turn on the Resample checkbox, set the Height to 1,500 pixels, and click OK. (We normally don’t recommend enlarging images, but this is only for practice purposes.)
STEP TWO: MAKE TWO COPIES OF THE BACKGROUND IMAGE
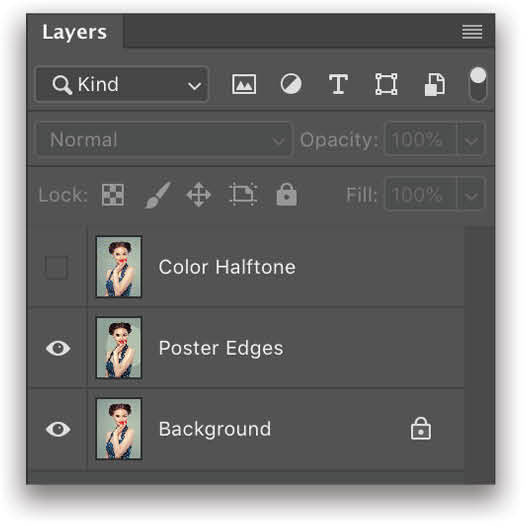
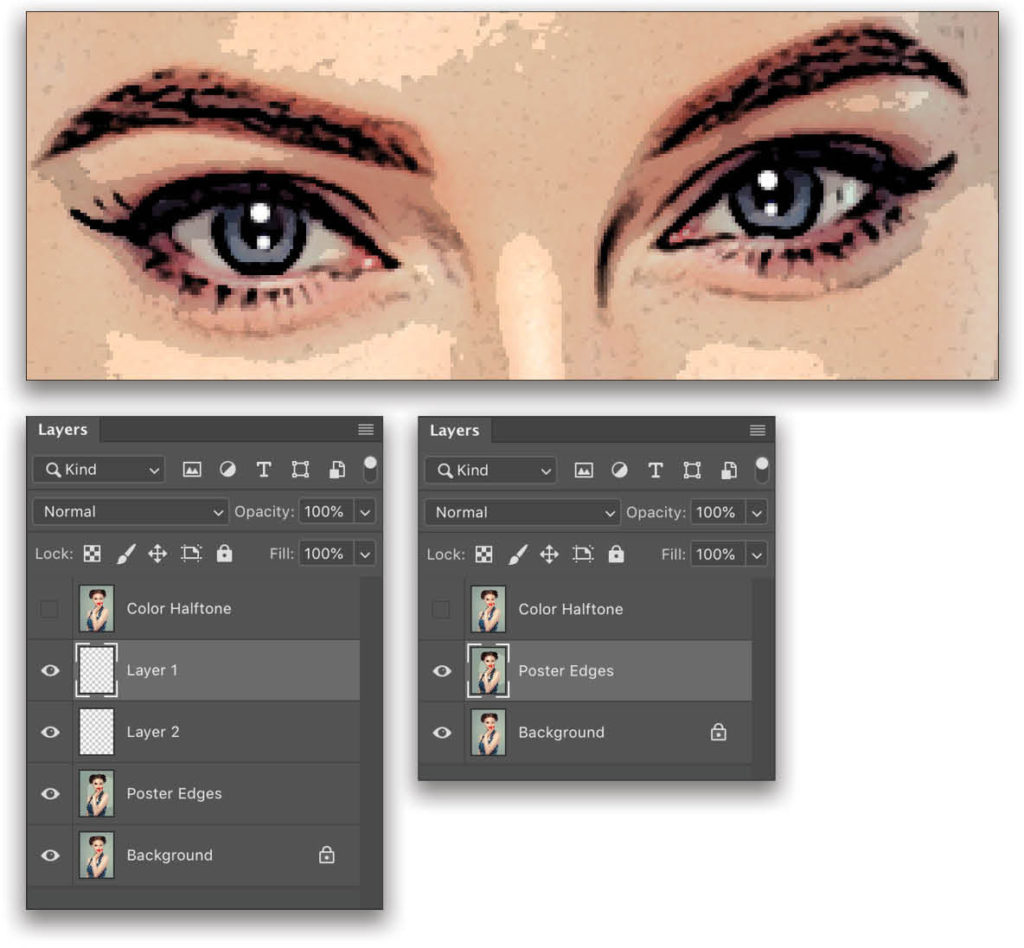
Select the Background layer in the Layers panel, and press Command-J (PC: Ctrl-J) twice, resulting in two identical copies of the image layer. Double-click each of the new layers’ names, and label the middle layer “Poster Edges” and the top layer “Color Halftone.” Then, click the Eye icon next to the Color Halftone layer to render it invisible. Now only the Background and the Poster Edges layers should be visible.
STEP THREE: APPLY POSTER EDGES FILTER
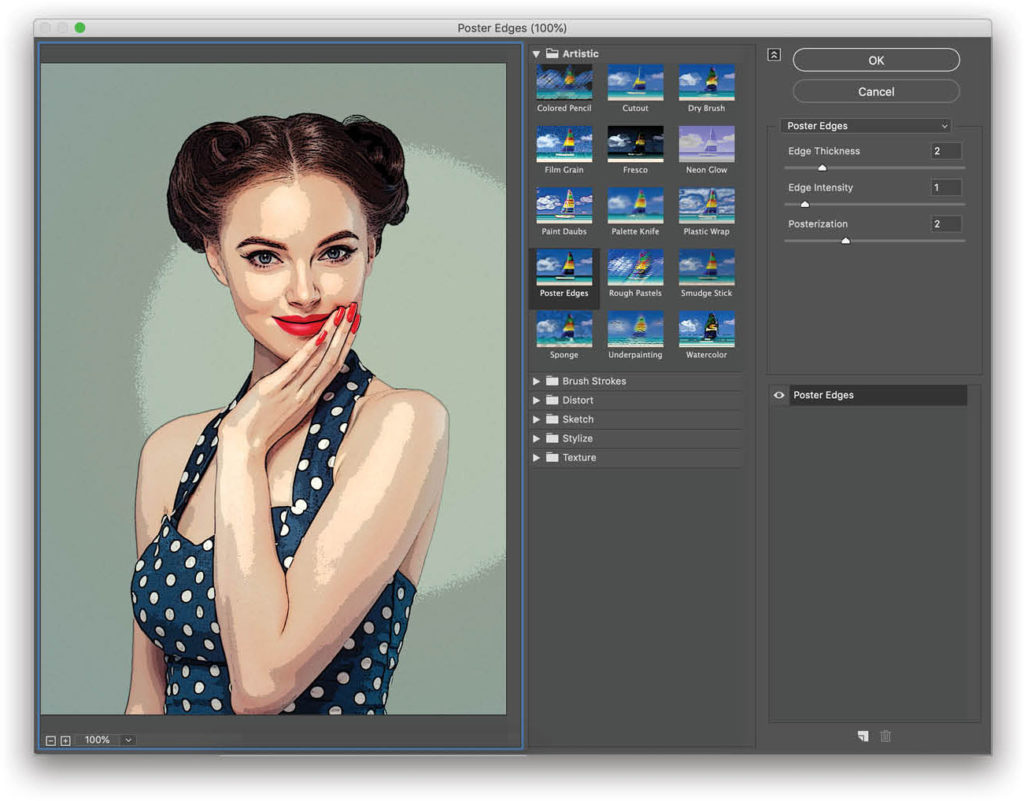
With the Poster Edges layer selected, go to Filter>Filter Gallery. In the Artistic folder, select Poster Edges. Set the Edge Thickness to 2, the Edge Intensity to 1, and the Posterization to 2. Click OK.
STEP FOUR: ADD BACK CATCHLIGHTS
Think back to every comic book image you’ve ever seen. What do the eyes of every character have in common? They pop! At this point in the process, the catchlights
in your image have likely faded a bit. When we make the final adjustments on the Color Halftone layer, they’ll fade even more. Adding them back in now will give your image that extra pop associated with comic book images, and prevent your subject from looking too flat.
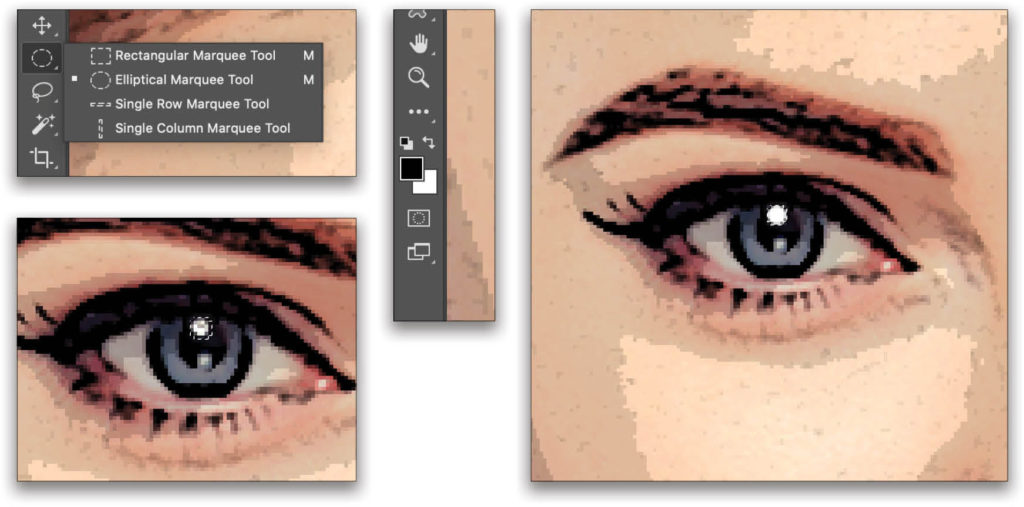
First, with the Poster Edges layer selected, press M to select the Rectangular Marquee tool. Click-and-hold on it in the Toolbar to reveal the additional Marquee tools, and select the Elliptical Marquee tool.
Next, zoom in to the catchlight in one of the eyes. Center your cursor over the catchlight, hold down Shift-Option (PC: Shift-Alt), and gradually drag outward until you’ve created a perfect circle in the size of
the catchlight.
Create a new layer, and press D to set your Background color to white. Then, press Command-Delete (PC: Ctrl-Backspace) to fill the area with white.
STEP FIVE: REPEAT FOR ALL REMAINING CATCHLIGHTS
Before you deselect, press Command-J (PC: Ctrl-J) to copy your first catchlight, and then use the Move tool (V) to situate the copy over the catchlight in the other eye. You may have to zoom in to more than 500% to place it exactly where you want it.
In this image, we technically have four catchlights, so we’ll repeat this process with the bottom two catchlights, as well.
In the Layers panel, we want to merge the catchlights layers with the Poster Edges layer. Do this by selecting your topmost catchlight layer and pressing Command-E (PC: Ctrl-E) to merge it with the catchlight layer below. Repeat until all the catchlight layers are merged with the Poster Edges layer.
STEP SIX: APPLY IMAGE BORDER
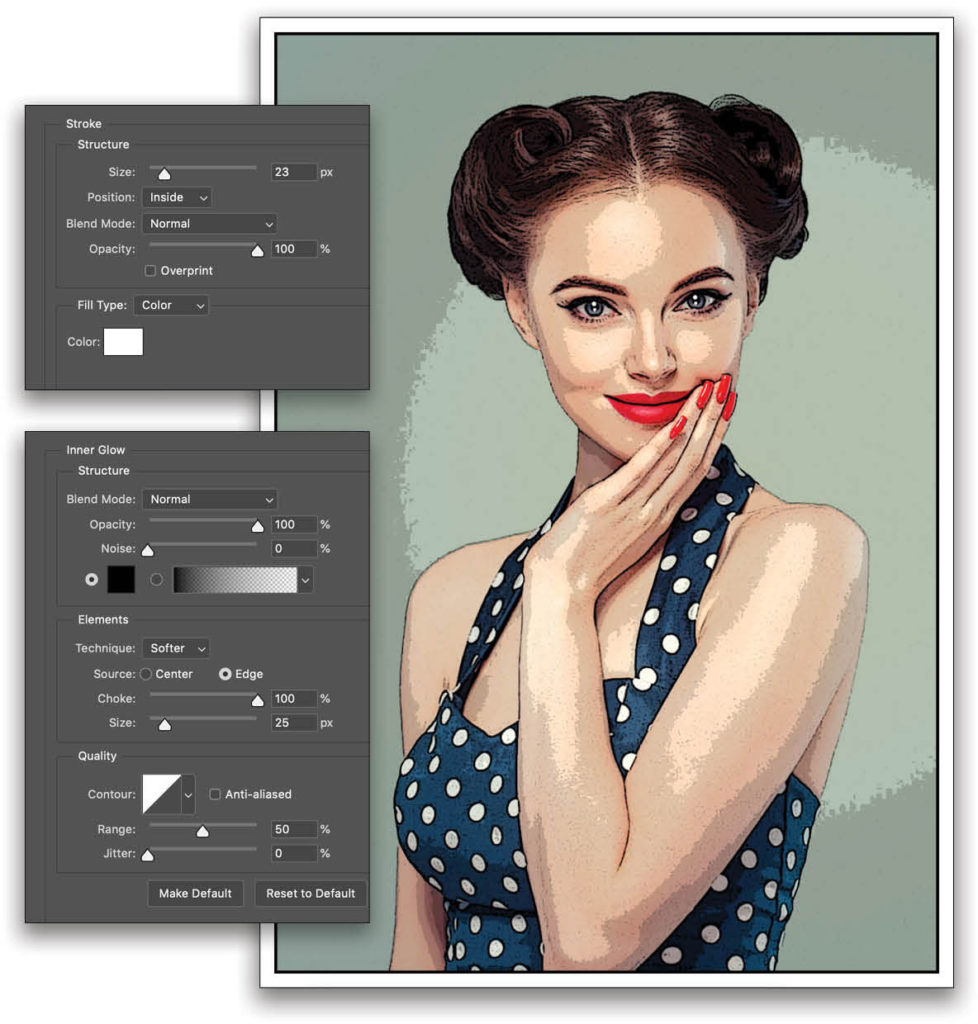
Double-click on the Poster Edges layer to open the Layer Style dialog. Select Stroke from the left-hand list of Styles. Select Color in the Fill Type drop-down menu, and set the Color to white. Set the Size to 23 pixels, Position to Inside, Blend Mode to Normal, and Opacity to 100%.
Next, select Inner Glow from the list of Styles, and change the color to black. Set the Blend Mode to Normal, Opacity to 100%, Choke to 100%, and Size to 25 pixels. The other settings should remain at their defaults, but just make sure they match our example image shown here. Click OK, and there should now be a border surrounding your photograph.
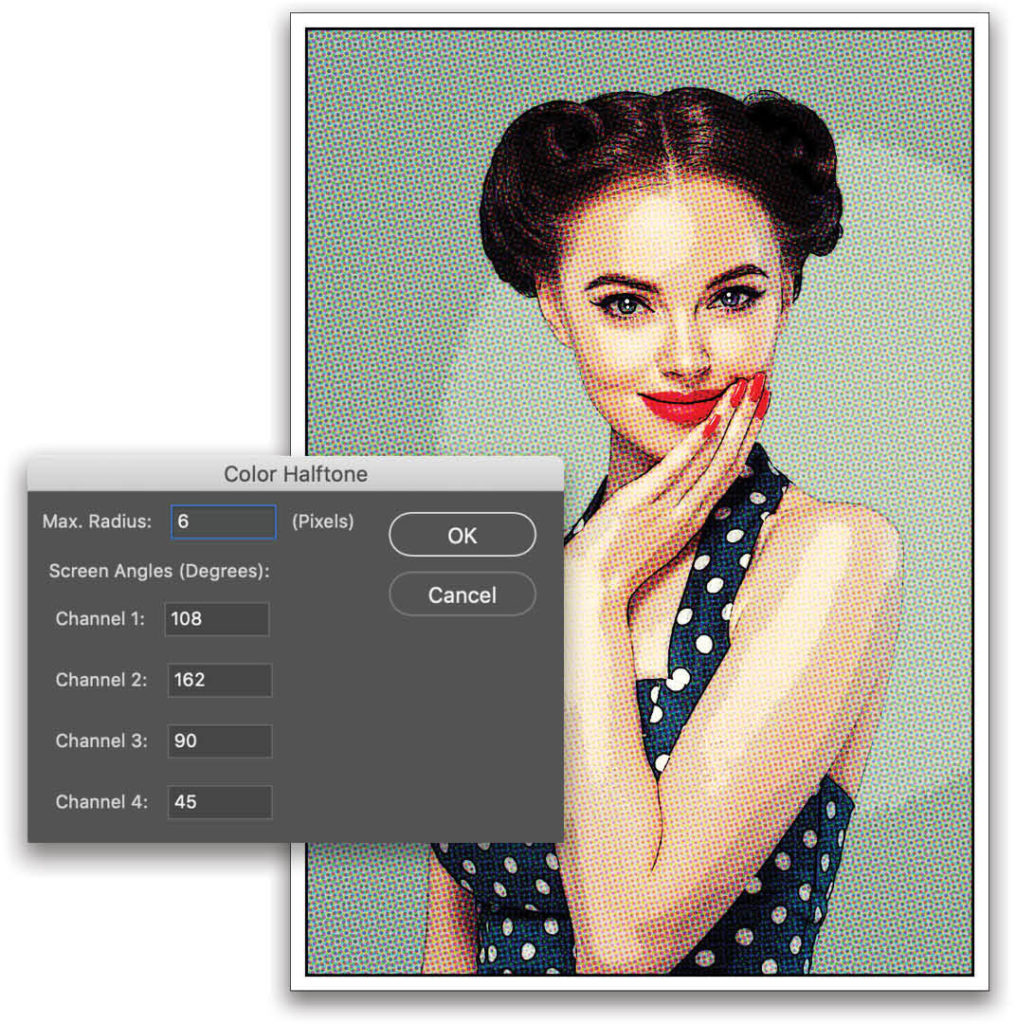
STEP SEVEN: APPLY THE DOTS
Click the Eye icon next to the Color Halftone layer to make it visible. Then, with that layer active, go to Filter>Pixelate>Color Halftone. Set the Max Radius to 6 pixels and leave the rest of the default settings as they are. Click OK.
At this point, your image will be covered in those tiny telltale comic book dots. With the Color Halftone layer still selected, change the blending mode near the top left of the Layers panel from Normal to Soft Light. And look at that! Your image has gone from portrait to comic book in no time!
STEP EIGHT: ADD THE TALK BUBBLE
Of course, no comic book image is complete without a bubble showing what the character is saying or thinking. In the Toolbar, click-and-hold on the Rectangle tool (U), and select the Custom Shape tool. In the Options Bar at the top, make sure the drop-down menu on the left is set to Shape, and then click on the Shape thumbnail to open the Custom Shape Picker. In the default set of shapes, choose the talking bubble. Then, press D then X to set white as your Foreground color, and drag the shape across your image to the approximate size you’d like it to be. Don’t worry if it’s not perfect, we’re going to be doing a few adjustments to get it there.
First, press Command-T (PC: Ctrl-T) to Free Transform the talk bubble. If you Right-click within the bubble, you’ll be able to flip it horizontally or vertically, stretch it, and a few other things to get it to the exact shape you want. We’ve flipped ours both horizontally and vertically, and stretched it a bit so that the main point is directed at her mouth and the bubble itself is in a position with which we’re satisfied. Press Enter once you’re happy with your changes.
Next, double-click on the shape layer to open the Layer Style dialog. Select Stroke, and change the color to black. Set the Size to 4 pixels and the Position to Inside. Click OK.

STEP NINE: ADD TEXT
Now for the fun part: let’s add some text! Select the Type tool from the Toolbar by pressing the letter T. Select a comic book font from your font list. We’re using a font called Yikes!, but another great option is DigitalStrip BB. Both are available as online downloads for free.
Hold the Shift key and click inside the talk bubble (if you don’t hold the Shift key, Photoshop will add your type to the path of the bubble). Type your text in the color of your choice, and use Free Transform to situate it how you like inside the bubble. We’ve chosen black, but think back to your favorite comic books—many of them used colors to emphasize certain words. Don’t be afraid to experiment!
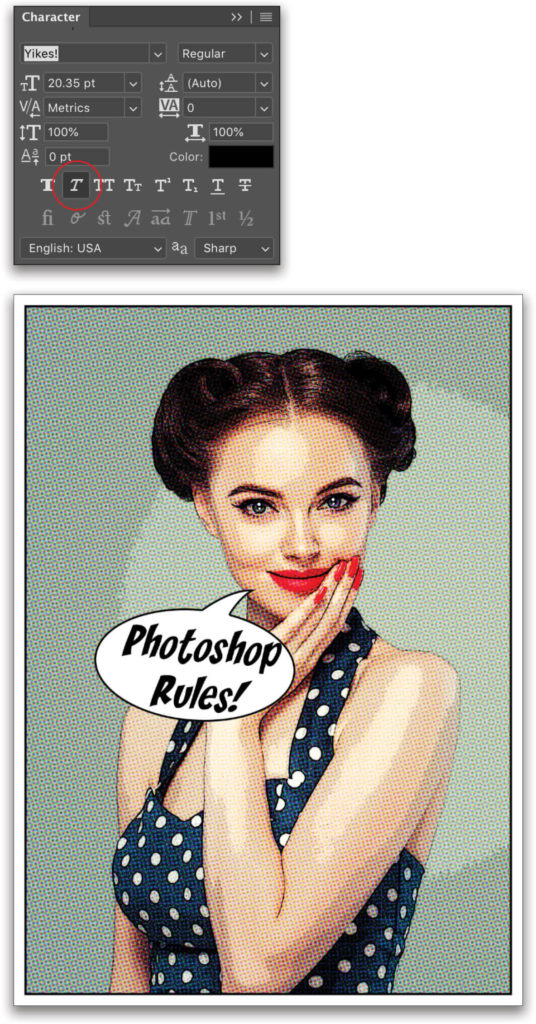
In this example, we need to make one more change to the text: With the text selected, we’ve opened the Character panel by going to Window>Character, and then selected the Faux Italic option (the second T in the row of Ts near the bottom) since the Yikes! font doesn’t come with an italic option on its own.
STEP 10: MAKE THE TEXT POP!
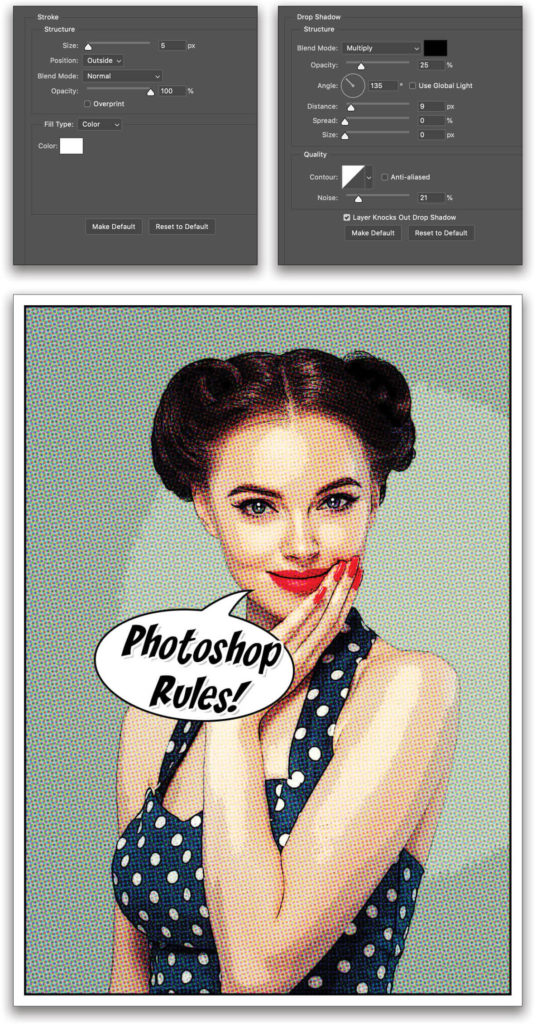
There’s something special about comic book text, and if you look closely you’ll see it often has a slight shadow that helps it jump off the page! We’re going to do the same here. Double-click on your text layer to open the Layer Style dialog. Click Stroke, and set the Color to white and the Size to 5 pixels. Make sure the Position is set to Outside.
Next, click Drop Shadow. Set the color to black and the Blend Mode to Multiply. Set the Opacity to 25% and the Angle to 135°. The Distance should be around 9 pixels, but feel free to adjust it to your liking. The other settings (Spread and Size) should remain at 0. Click OK.
Kapow! Zap! Kaboom!
Take that, boring old digital photos! A few minor adjustments and your images go from standard photographs to comic book pop art in no time. And there’s no need to stop there: Play with the saturation levels
and overlays to give your photo some retro flair, and tinker with vibrance and hue settings to add pops of color. Download your favorite comic book font and get to telling your stories. The options are endless, as you can already imagine!
This article originally published in the April, 2019 issue of Photoshop User magazine.


Thank you. I’ll give a try.
Hello!
I have tried this tutorial but I have not found the Comic Shapes in my PS 2020. I just can see four categories, Trees, Boats, Wild animals and Flowers.
I have the mensual paid suscription of PS from Adobe. No pirate versión…
Thanks in advance, José Manuel
Hi, José! Try restoring default shapes? Up in the options bar (with the custom shape tool selected) click on the little down arrow next to the custom shape symbol to open the palette, then on the little gear symbol to get the flyout menu and select restore default shapes. Hope this helps!
If the above doesn’t work try this: from the Shapes panel itself (Window>Shapes) you can use the hamburger menu to get the flyout menu and choose Legacy Shapes and More and see if that helps.