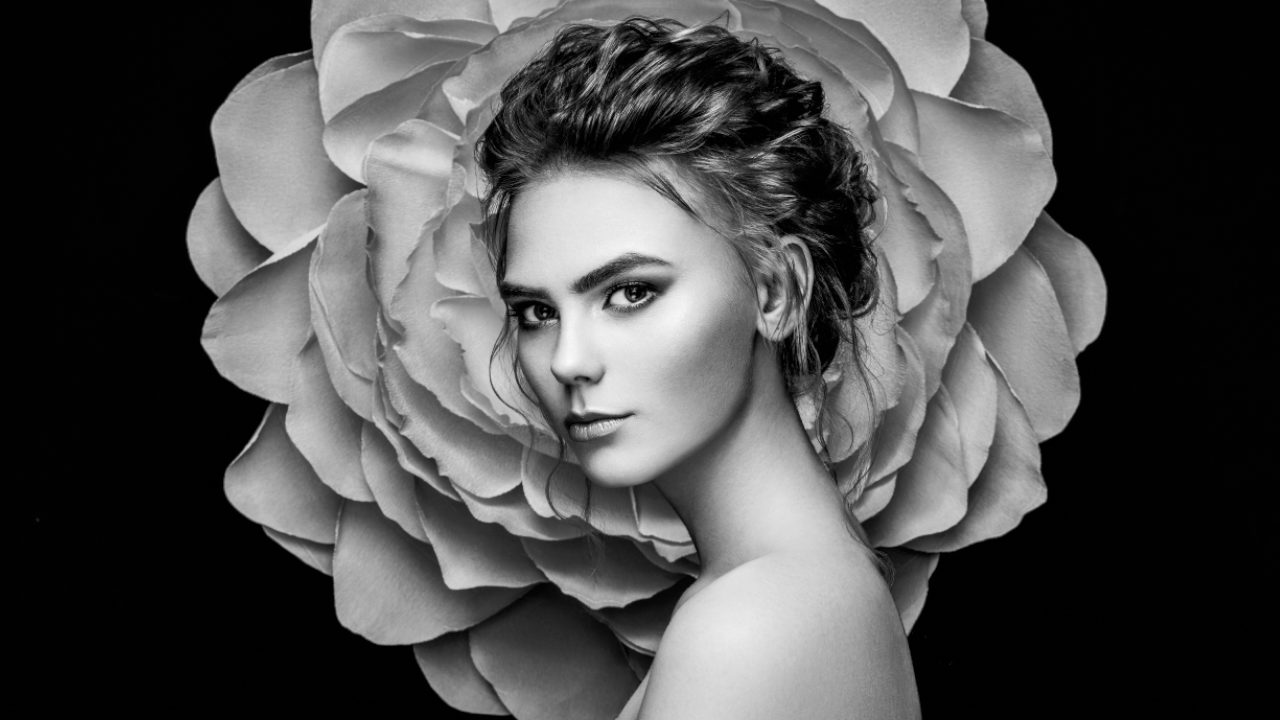
Turning a color photo into a black-and-white is a fun and useful technique to learn, plus it never goes out of style. Not only does the process create a unique piece of art, it can turn back time for a vintage look, as well as hide color problems. In this column, you’ll learn four different methods, all without harming your original.
Desaturate
You’ve probably heard the saying, “You get what you pay for.” In Photoshop, that means, “The quickest method ain’t always the best!” In other words, simply desaturating an image may not always produce the finest results, but it’s worth knowing about.
Step One: Choose File>Open and navigate to the image you want to open in Photoshop. If you’d like to download the low-res watermarked version of this image to follow along, click this link, log in with your Adobe ID, and click the Save to Library button. Double-click the image in the Libraries panel (Window>Libraries) to open it in Photoshop.
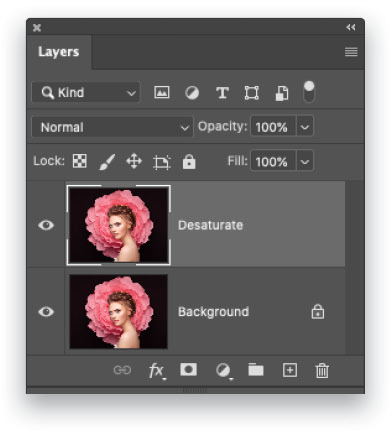
Duplicate the Background layer by pressing Command-J (PC: Ctrl-J). That way, the adjustment we’re about to make happens to the duplicate layer and not the original. If you don’t like the effect, you can simply delete the duplicate layer. If your image is comprised of multiple layers, activate the topmost layer and press Shift-Option-Command-E (PC: Shift-Alt-Ctrl-E). Alternatively, press-and-hold Option (PC: Alt) as you choose Merge Visible from the Layers panel’s flyout menu at the top right. This combines all visible layers into a brand-new layer, leaving the original layers intact. Either way, double-click the name of the new layer in the Layers panel and enter “Desaturate.”
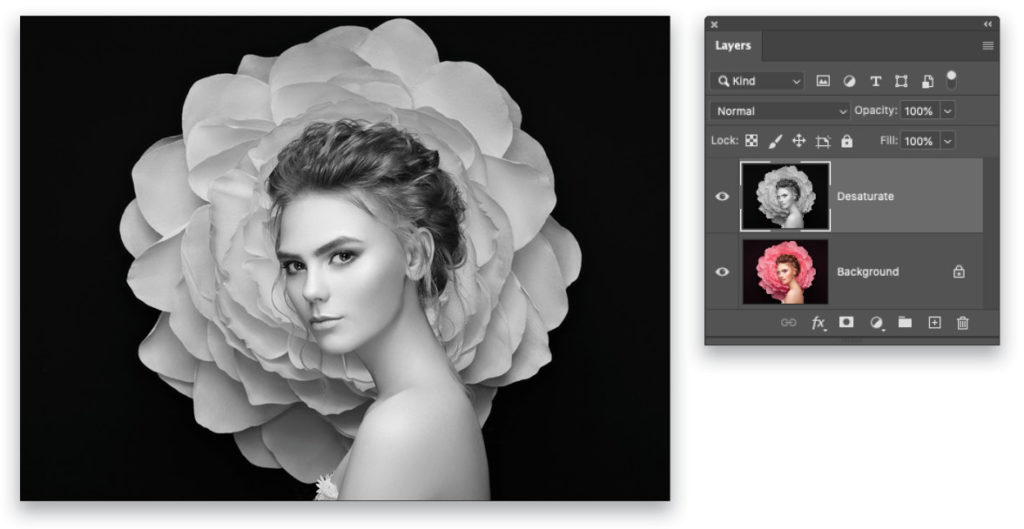
Step Two: Choose Image>Adjustments>Desaturate, or press Shift-Command-U (PC: Shift-Ctrl-U). Photoshop drains the color from your image, leaving you with a black-and-white. Told you it was quick!
Step Three: To adjust the contrast, click the half-black/half-white circle at the bottom of the Layers panel (circled) and choose Brightness/Contrast.
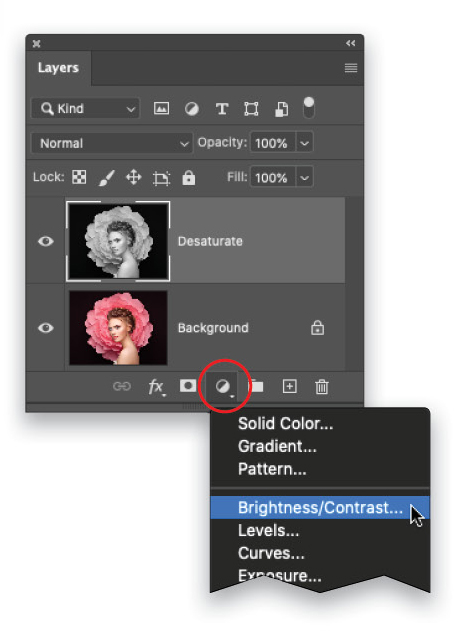
Step Four: In the Properties panel that opens, adjust the sliders to your liking.

Tip: Alternatively, you can adjust contrast in certain areas by using the Dodge and Burn tools (O). You can check out my article on dodging and burning in the September issue of Photoshop User by clicking here.
Black & White Adjustment Layer
This method gives you a set of sliders that you can use to adjust contrast.
Step One: Hide the layers named Desaturate and Brightness/Contrast 1 by turning off their visibility Eye icons in the Layers panel (circled). You should see the original full-color image.
Step Two: With the top layer active in the Layers panel, click the half-black/half-white circle at the bottom of the Layers panel (circled) and choose Black & White.
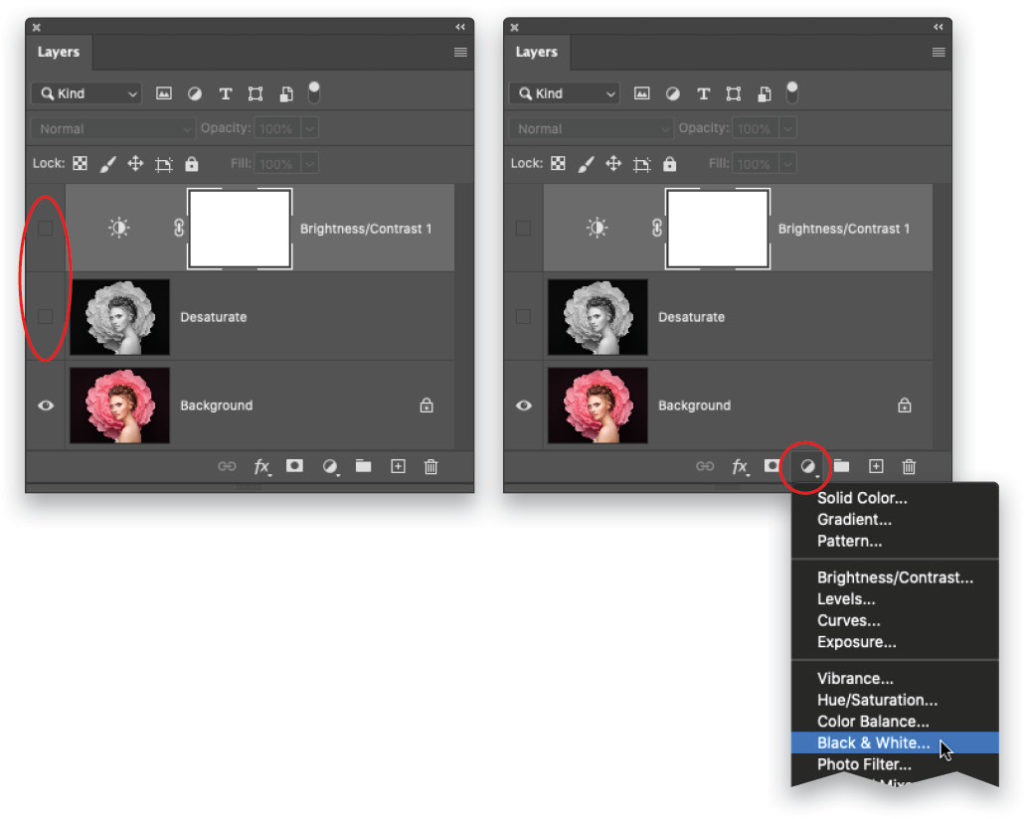
Step Three: In the Properties panel that opens, adjust the sliders to your liking. Drag a particular color’s slider to the left (toward black) to make areas that include that color darker, or to the right (toward white) to make areas that include that color lighter (the colored bars under each slider give you a clue as to what dragging in each direction does to your image).
Or, instead of using the sliders, you can tweak a certain color by dragging atop the image itself. To do that, click the on-image adjustment tool (circled) near the top left of the Properties panel, mouse over to the image, position the cursor atop the area you want to adjust, and then click-and-hold your mouse button. The cursor turns into a pointing hand with an arrow on each side (also circled) to indicate that you can drag from side to side to adjust that color; drag left to darken or drag right to lighten.
Tip: The Preset drop-down menu near the top of the Properties panel has a slew of useful canned settings—just choose each one to see what it looks like.
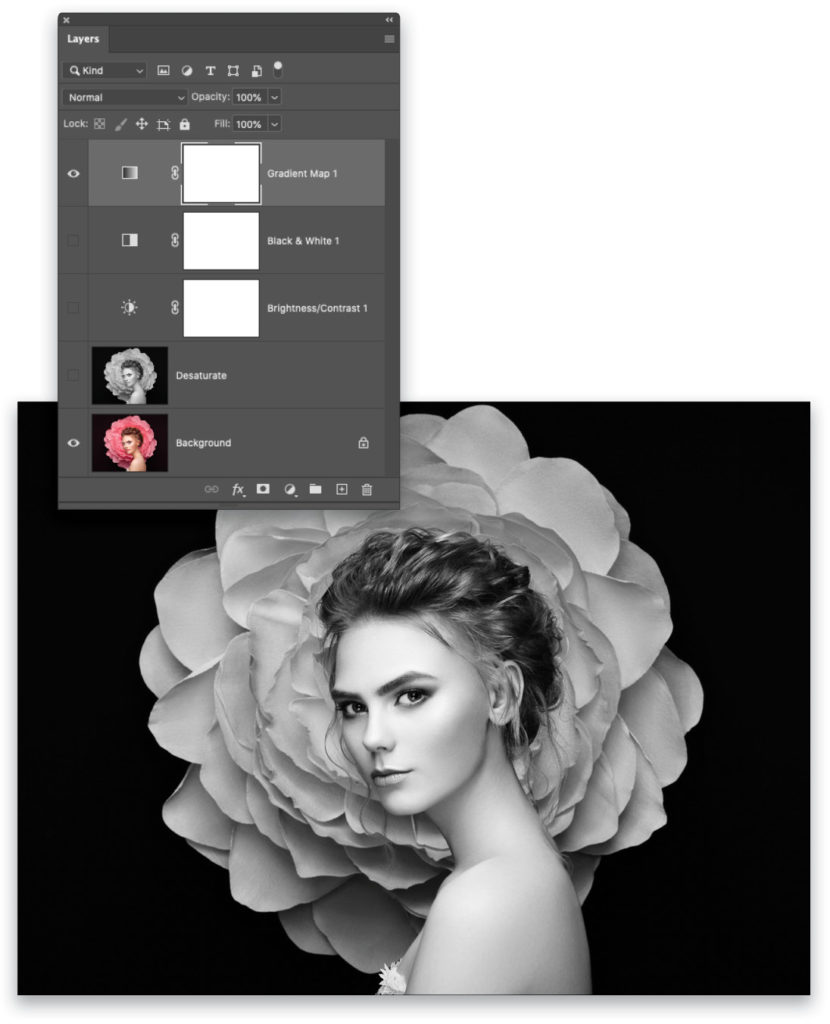
Gradient Map Adjustment Layer
This method doesn’t give you any sliders to adjust, but it often produces a beautiful, high-contrast, black-and-white right from the start.
Step One: Hide the layer named Black & White 1 by turning off its visibility Eye in the Layers panel (circled). Click on the layer thumbnail of the Black & White 1 layer so it’s active and not its mask.
Step Two: Take a peek at the color chips at the bottom of your Toolbar (circled) and press the D key on your keyboard to set them to the default of black and white. The Foreground color should be black. If it’s white, that means the layer mask of the Black & White 1 layer is still active. Just press X to flip-flop them so black is on top.
Step Three: Click the half-black/half-white icon at the bottom of your Layers panel and choose Gradient Map.

Step Four: Photoshop turns your image into a high-contrast black-and-white by mapping the shadows in your image to your Foreground color chip (black) and your highlights to the Background color chip (white).
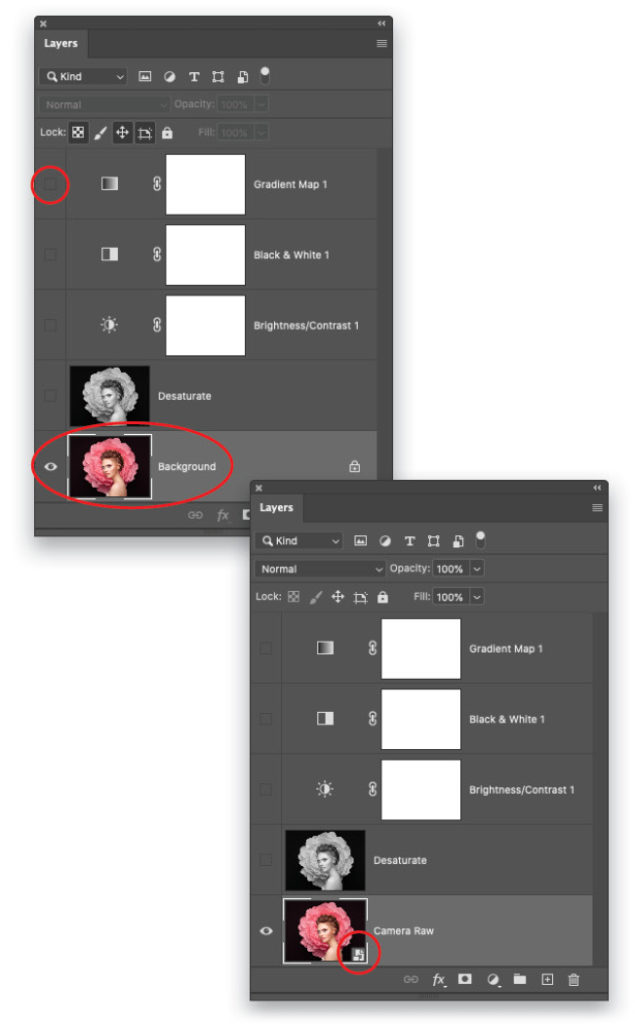
Camera Raw Filter
Another way to convert a color photo to black-and-white is to use the Adobe Camera Raw Filter. It includes a handy set of powerful sliders to adjust contrast, an on-image contrast-adjustment tool, plus a gorgeous set of built-in presets.
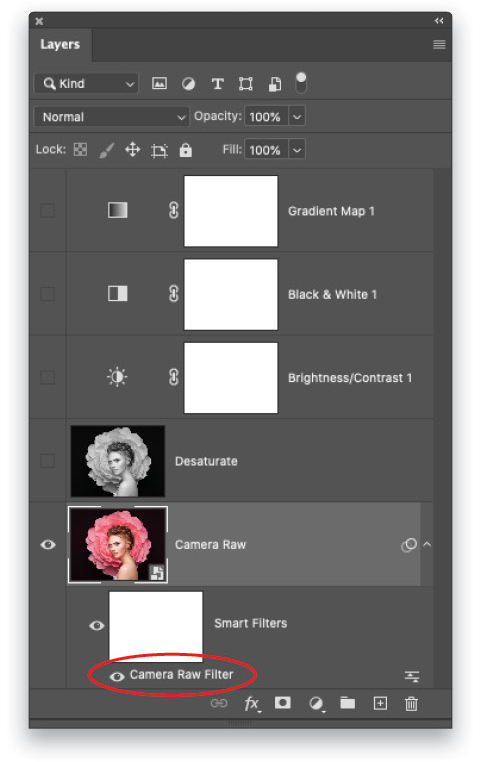
Step One: Hide the layer named Gradient Map 1 by turning off its visibility Eye in the Layers panel (circled). Now click to activate the full-color image layer, named Background here (also circled).
Step Two: Choose Filter>Convert for Smart Filters. This puts a protective wrapper around the image layer so the filter we’re about to run happens to the wrapper and not what’s inside (so to speak). Notice the little smart filter badge on the layer thumbnail (circled). Double-click the layer’s name and enter “Camera Raw. “
Step Three: Next, choose Filter>Camera Raw Filter, which opens to the Edit workspace. At the upper right, click the B&W button (circled). Expand the B&W Mixer panel and adjust the sliders to your liking. Alternatively, you can use the on-image adjustment tool (also circled) called the Targeted Adjustment tool (T), and then click-and-drag atop your image to adjust contrast for specific colors, just like we did earlier with the Black & White adjustment layer. Drag left to darken or right to lighten (the cursor is also circled here).
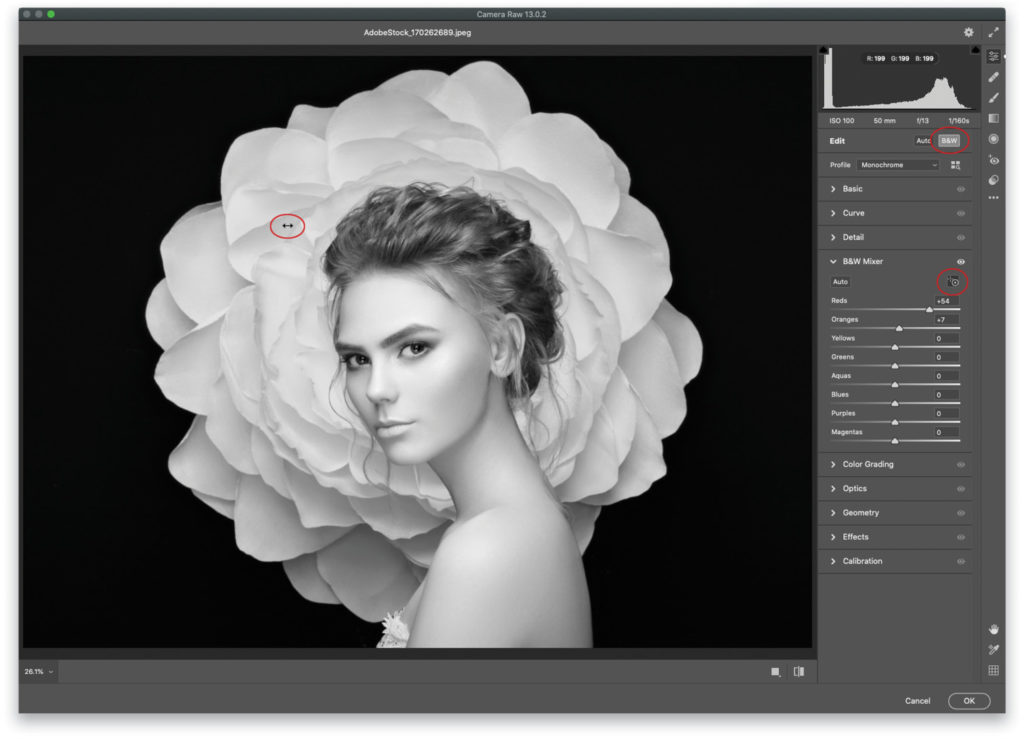
Step Four: Now let’s look at the built-in presets. In the toolbar at the upper right, click the Presets workspace icon (circled) or press Shift-P. Expand the B&W section and point your cursor atop each one to see a preview. To apply a preset, give it a swift click (B&W Punch was used here). When you’re finished, click OK at the bottom right to close the Camera Raw Filter.
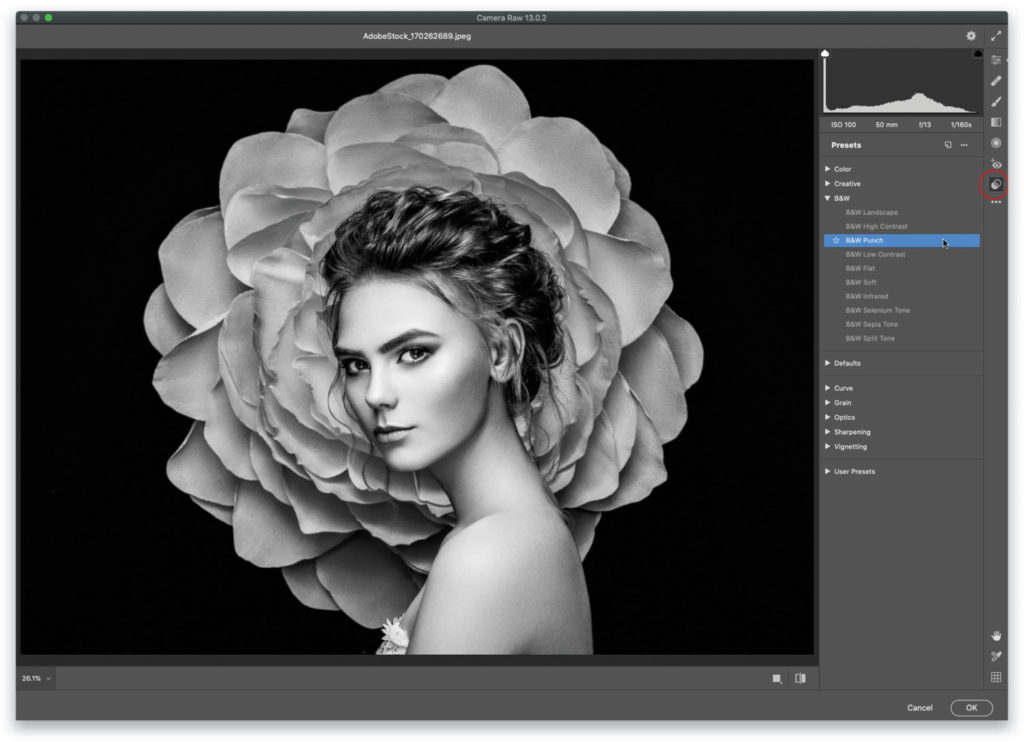
Note: Applying a preset overrides any manual adjustments you made in the Edit workspace’s B&W Mixer panel.
Step Five: One of the benefits of using smart filters is the ability to reopen a filter for more tweaking. To do that, simply double-click the filter’s name in your Layers panel (circled).
As you can see, each method produces a slightly different look; simply pick the one that works best for you. Until next time, may the creative force be with you all!
This article originally published in the March, 2021 issue of Photoshop User magazine.


