
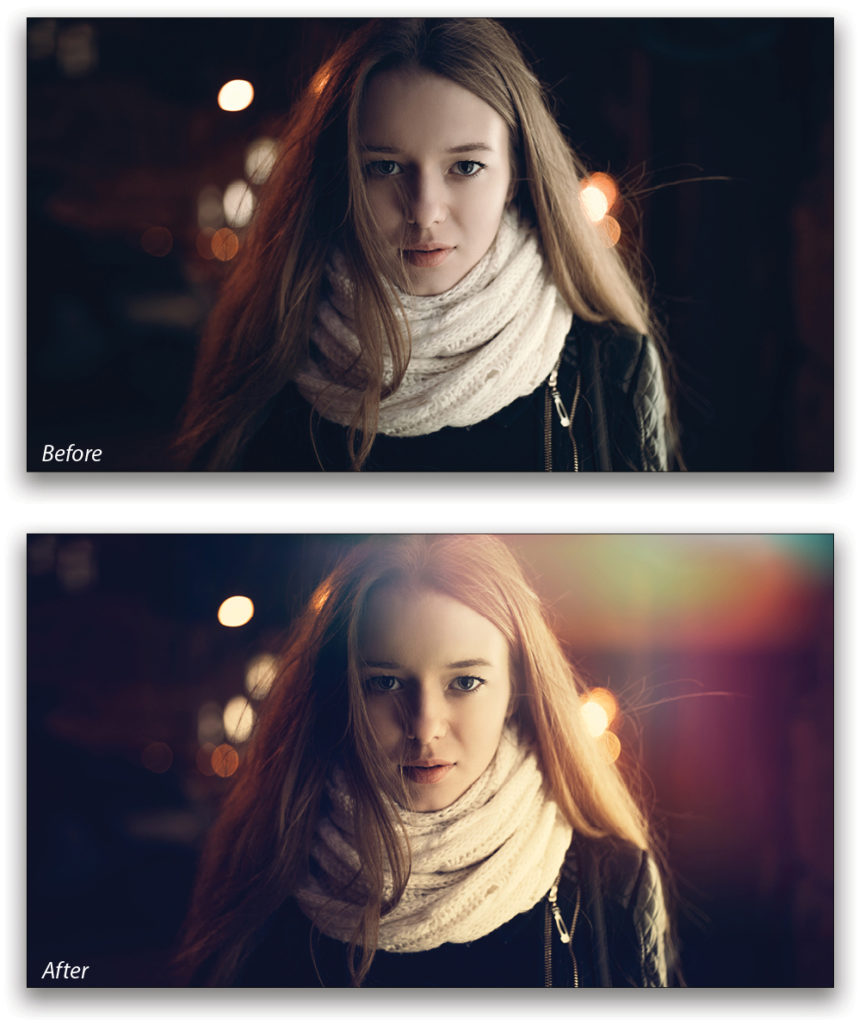
Creating a cinematic effect involves stylizing your image in a way that captures a mood. In this issue, let’s learn one of the simplest ways to give your images an impactful cinematic feel by using the power of Blend If and blend modes in Photoshop. This method gives you freedom to mix and match colors and create your own color combinations.
The technique is divided into three broad steps:
- Adding color to highlights
- Adding color to shadows
- Adding overlays
It’s that easy, so let’s jump right in!
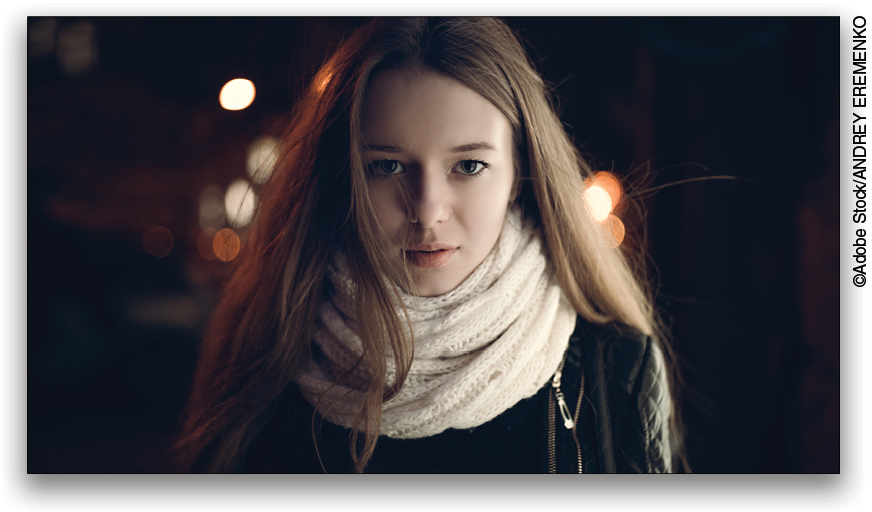
Step One: Open an Image
Let’s start by opening an image in Photoshop. If you wish to follow along with the image we’re using here, you can download the JPEG preview for free or license the full-resolution version from Adobe Stock by clicking this link. To download the preview version, log in with your Adobe ID, and click the cloud-with-an-arrow icon next to Save Preview to My Library. The image will appear in your Libraries panel (Window>Libraries) in Photoshop.
If you’re using your own image, go to File>Open, locate your image, and then click Open, or if you’re working in Application Frame mode in Photoshop, go to Finder (PC: Explorer), locate your image, and drag-and-drop it into Photoshop. If you downloaded the image from Adobe
Stock, you can load it from the Libraries panel by double-clicking it. To make it a little easier to work with the Adobe Stock preview image, you can increase its resolution. (We normally don’t recommend enlarging images, but this is only for practice purposes.) Go to Image>Image Size, turn on the Resample checkbox, set the Resolution to 100 ppi, and click OK.
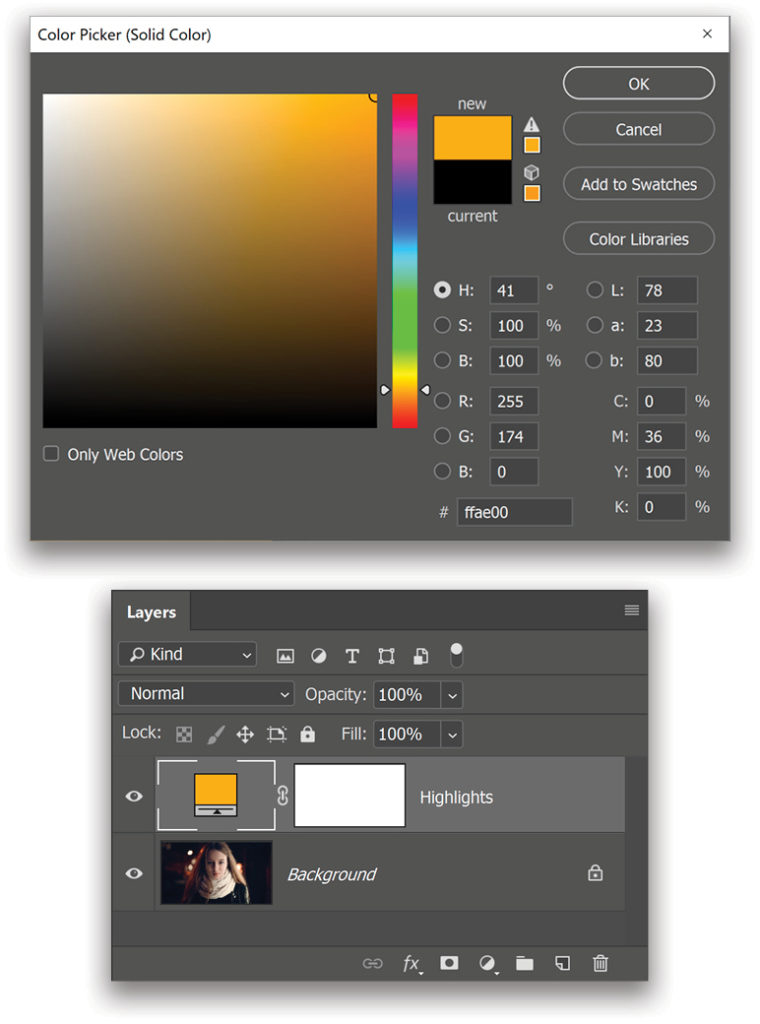
Step Two: Create a Solid Color Adjustment Layer for Highlights
Click on the Create a New Adjustment Layer icon (half-black, half-white circle) at the bottom of the Layers panel, and choose Solid Color. For this example, let’s choose a bright-orange color (R: 255, G: 174, and B:0), and click OK to close the Color Picker. Double-click on the name of the layer in the Layers panel, and rename it “Highlights.” Note: We don’t have to stick to this color; we can always change the color at any point in the editing process.
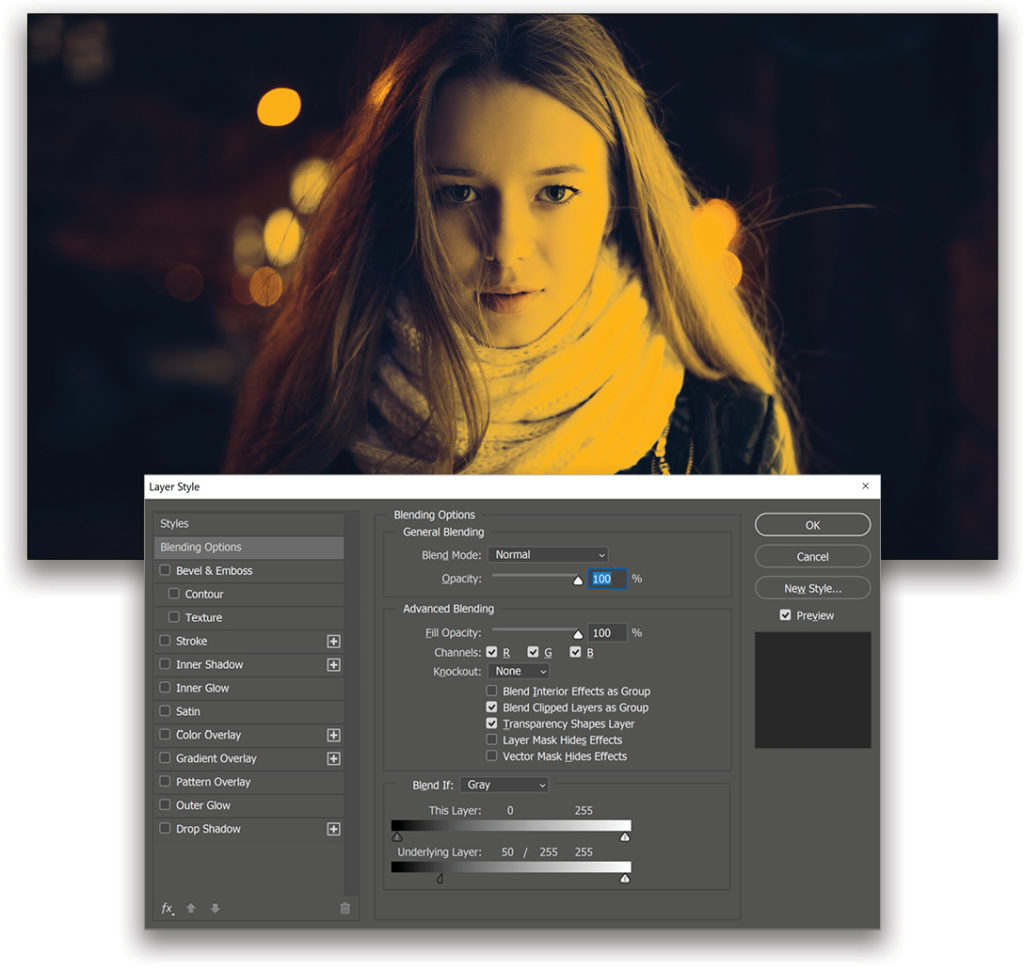
Step Three: Use Blend-If to Limit the Color to the Highlights
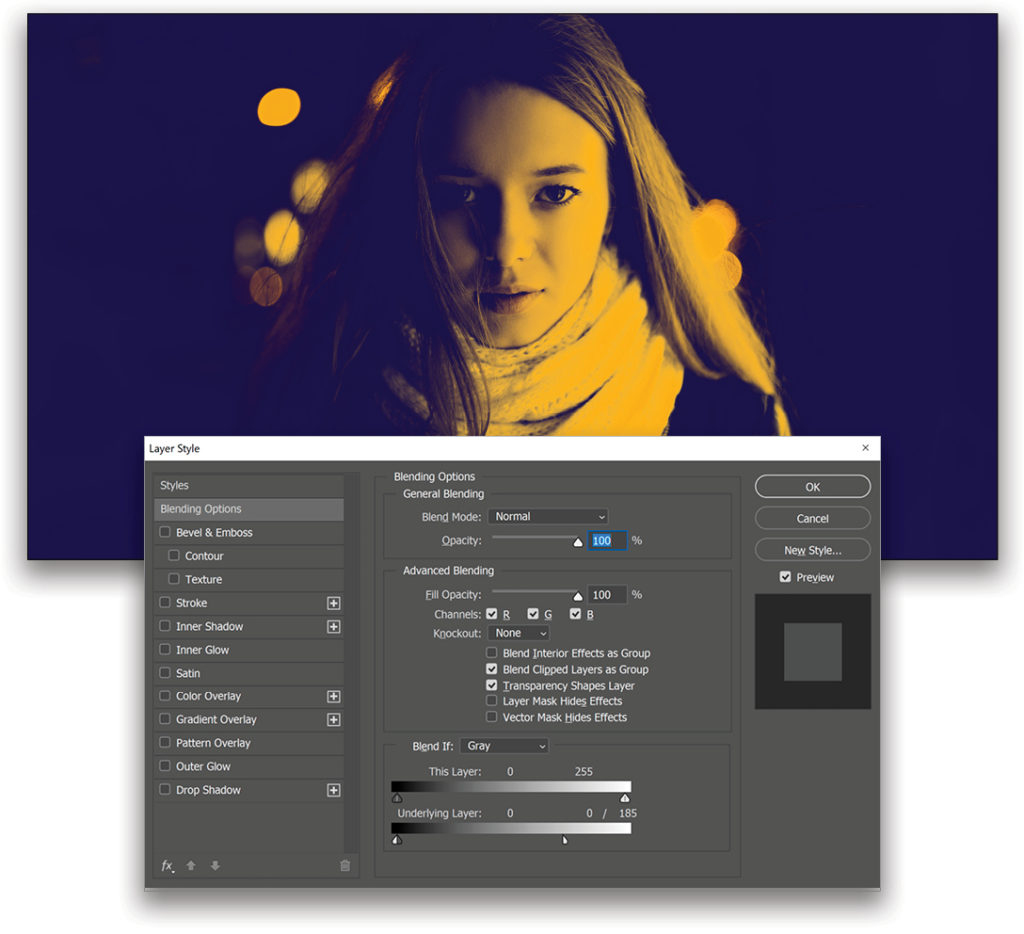
Right-click on the Highlights layer and choose Blending Options at the top of the menu. In the Blend If section of the Layer Style dialog, drag the left slider below Underlying Layer to the right. As you drag the slider, the orange color is being hidden from the dark areas of the image; however, the transition is very harsh.
To solve that, hold the Option (PC: Alt) key and click on the left slider to break it apart. Now drag the two separate pieces of the slider further away from each other to make the transition smoother. For this image, we’ve set the position to 50/255, which means the left half of the slider is at 50, and the right half is at 255. Note: The sliders are scaled from 0–255, where the left end is 0, and the right end is 255. Once you’re satisfied with the result, click OK.
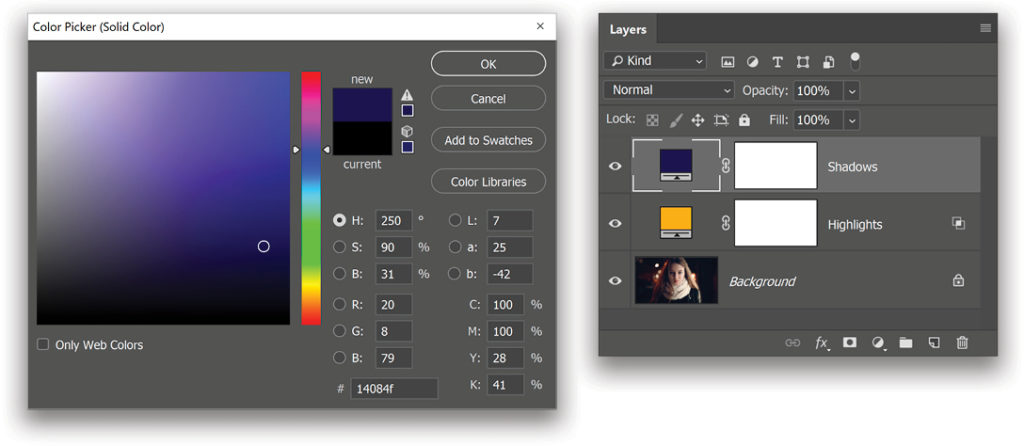
Step Four: Create a Solid Color Adjustment Layer for Shadows
Click on the Create a New Adjustment Layer icon, and choose Solid Color again. This time, let’s set it to a dark-blue color (R: 20, G: 8, and B: 79), and click OK. Double-click the name of this layer, and rename it “Shadows.”
Step Five: Use Blend-If to Limit the Color to the Shadows
Just as we did with the highlights, Right-click on the Shadows layer and choose Blending Options. We’ll do the opposite this time. In the Blend If section, drag the right slider below Underlying Layer to the left. Notice the blue color is being hidden from the bright areas of the image, revealing the orange.
To make the transition smoother, hold the Option (PC: Alt) key and click on the right slider to break it apart. For this image, we moved the sliders to 0/185. Once you’re satisfied with the result, click OK.
Step Six: Reduce the Opacity of Highlights and Shadows
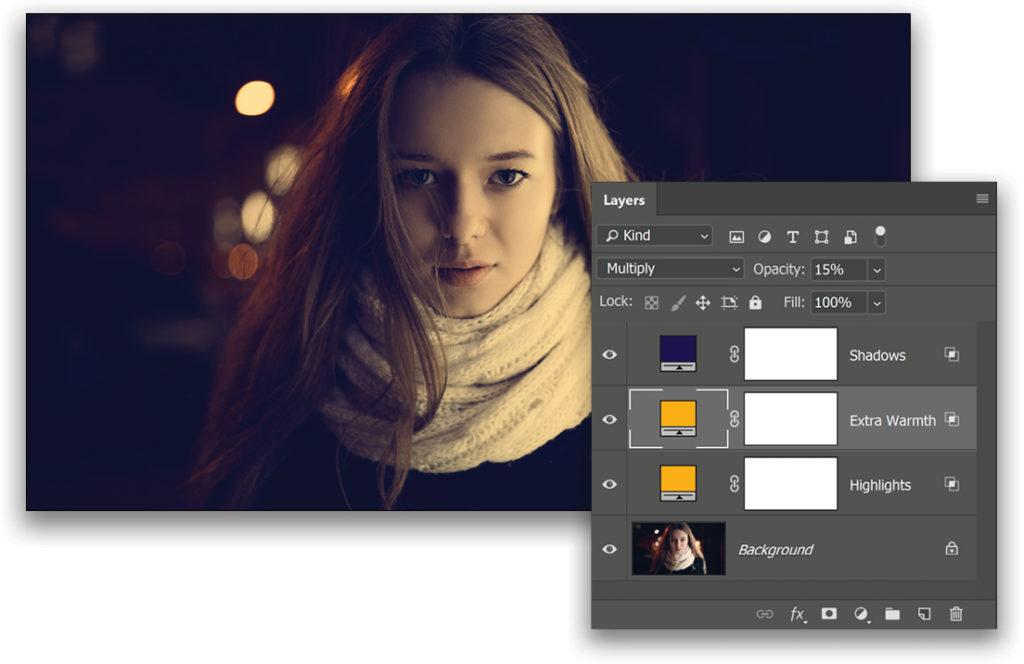
Select the Shadows layer in the Layers panel and reduce its Opacity to 35%. Then, select the Highlights layer and set its Opacity to 25%.

Step Seven: Add More Yellow to the Highlights
To get warmer and more natural highlights, click on the Highlights layer in the Layers panel to make it active, and press Command-J (PC: Ctrl-J) to make a copy of the layer. Name the new layer “Extra Warmth.” Change the blend mode of this layer to Multiply near the top left of the Layers panel, and set the Opacity to 15%. This makes it look much more natural.
Explanation: Multiply is a blend mode that makes things darker, but in this case, we can apply it to the highlights as we chose the brightest shade of orange, so the Highlights would be rendered more naturally.
Step Eight: Add a Light Leak Overlay
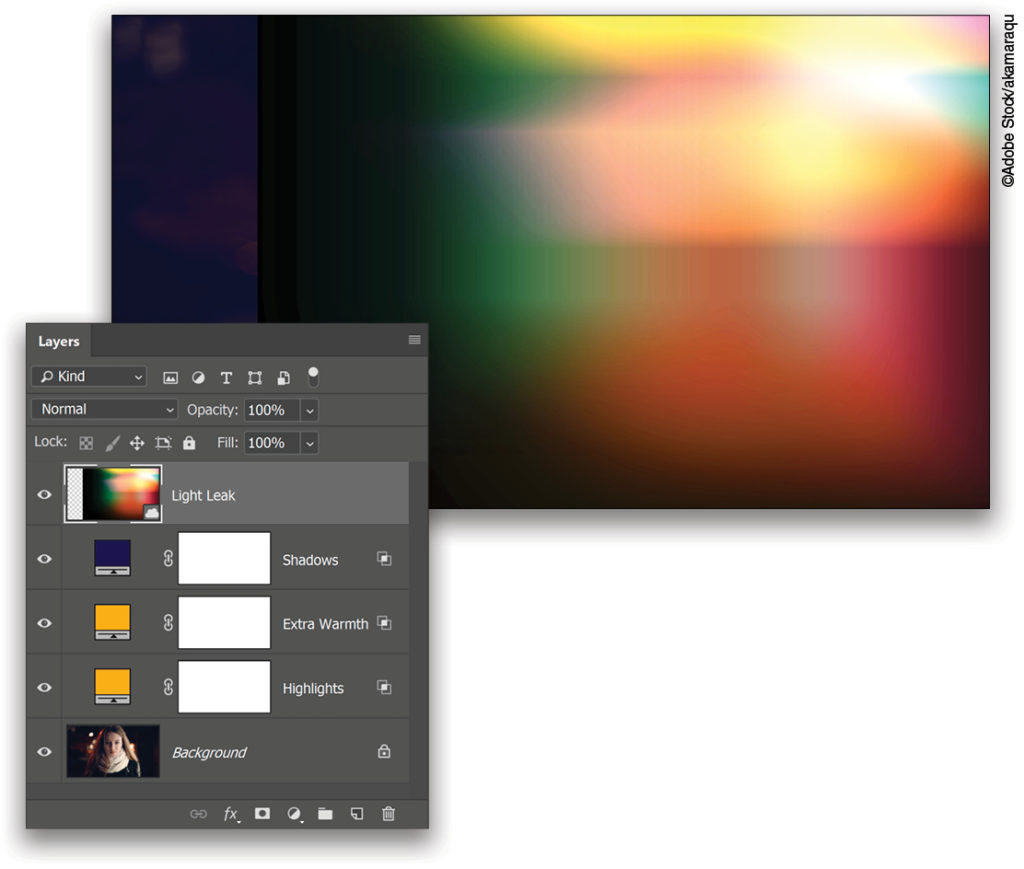
You can find tons of stock overlays on the Internet or create your own. The one we’ll be using here can be downloaded from this link.
Once downloaded, drag-and-drop the overlay from your Finder (PC: Explorer) to your canvas, or you can drag-and-drop the overlay from the Libraries panel if you saved it there from Adobe Stock. Adjust its size and position using the control handles and press Enter. Double-click on the name of the overlay layer and change it to “Light Leak.” Make sure this layer is at the top of the layer stack.
Step Nine: Change the Blend Mode to Screen
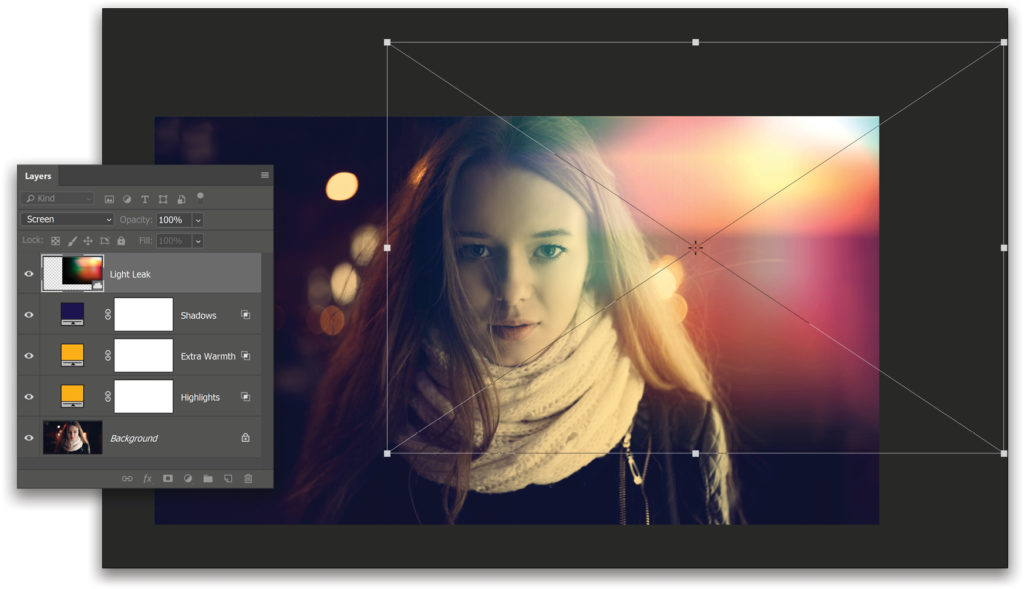
Change the blend mode of the Light Leak layer to Screen. Press Command-T (PC: Ctrl-T) to enter Free Transform. Adjust the position of the overlay to taste, and press Enter to commit the transformation.
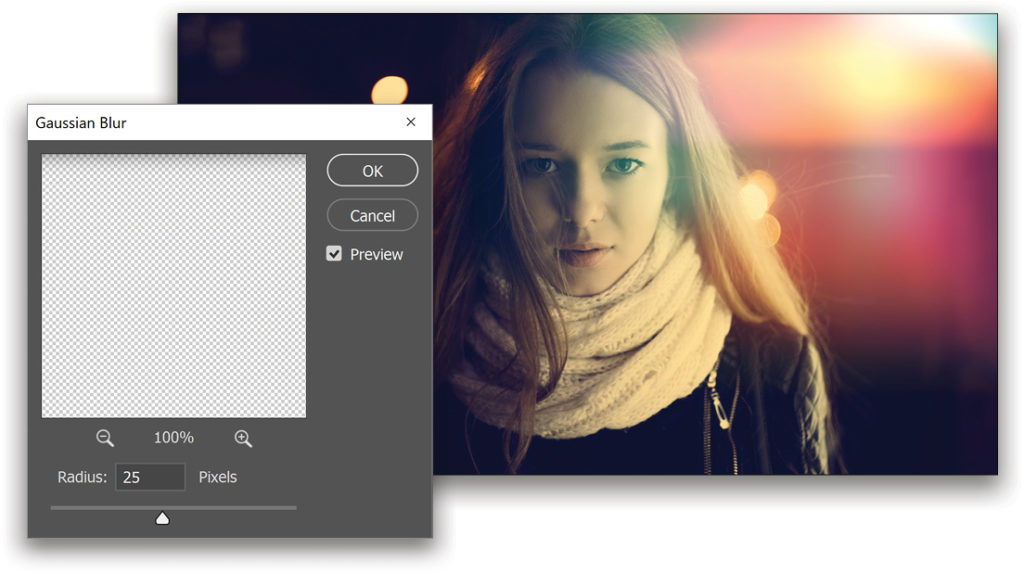
Step 10: Add Gaussian Blur
To make the overlay smoother and remove some banding from the image, with the Light Leak layer active, go to Filter>Blur>Gaussian Blur. Set the Radius to 25 pixels, and click OK.
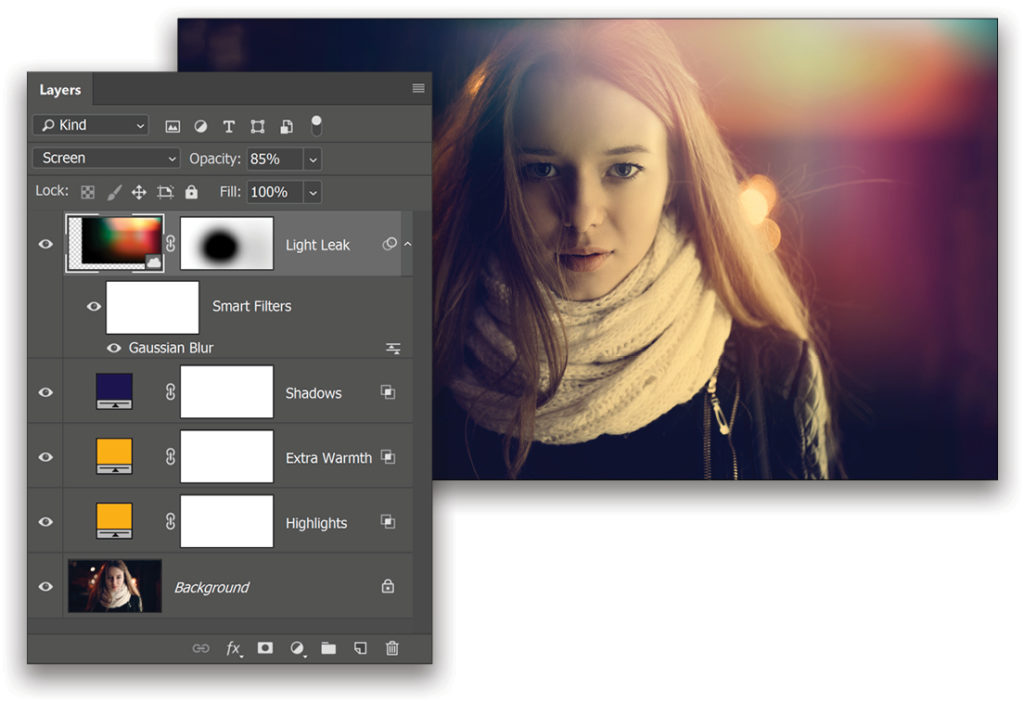
Step 11: Mask Away the Light Leak from the Face
With the Light Leak layer selected, click on the Add Layer Mask icon (circle in a square) at the bottom of the Layers panel. Switch to the Brush tool (B), set it to a soft round brush, and press X until the Foreground Color is black. Paint away the light leak from over the face. Reduce the Opacity of the Light Leak layer to 85%.
Step 12: Readjustment (Optional But Very Important)
Here’s the most important step. No matter how simple it may sound, it’s essential that you take a short break and then come back to the image. It will help you to see any changes you need to make to the colors or opacity. Everything done here is nondestructive, so we can change anything at any time.
As I look at this image, I feel like making the highlight color warmer. So, double-click the thumbnail of the Highlights layer and change the color to R: 255, G: 126, and B: 0. Click OK.
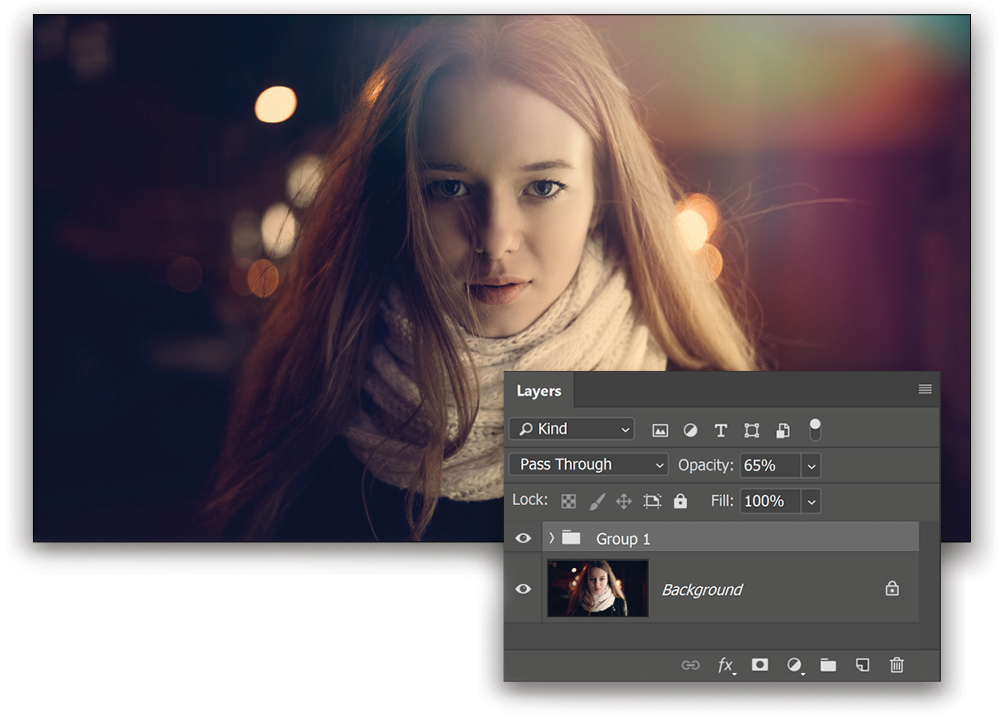
Step 13: Reduce the Overall Opacity
As humans, we tend to go a little over the top. So, to dim down the entire effect, click on the bottommost adjustment layer (Highlights), hold down the Shift key, and click the topmost layer. Now all the layers above the Background layer are selected. Press Command-G (PC: Ctrl-G) to create a layer group and decrease the Opacity of the group to 65%.
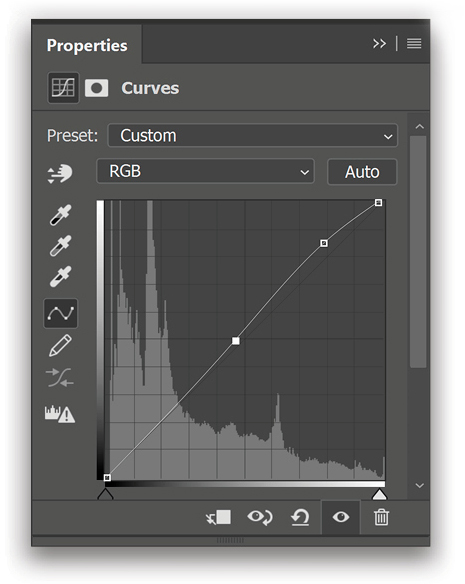
Step 14: Add a Curves Adjustment Layer
To add some extra punch, click on the Create a New Adjustment Layer icon and choose Curves. In the Properties panel, click on the upper-right side of the curve to add a point. This section of the curve represents the highlights, so bring it up. Since this also brings up the shadows, create a point near the middle of the curve and bring it back down to the normal position, as shown here.
The great thing about this technique is you can try as many color combinations as you want. I encourage you to experiment and play with different colors, not only for highlights and shadows, but you can also use the same technique to add color to midtones. A good tip is to explore color palettes in the Explore tab of the Adobe Color Themes panel Window>Extensions>Adobe Color Themes). You can also use Adobe Color Themes to follow color rules such as Triad, Complementary, Analogous, etc., to create combinations that look good together. In the end, don’t forget that the Opacity slider will always be your best friend.
This article originally published in the February 2019 issue of Photoshop User magazine.


