I find my deepest sense of inspiration by telling stories that are sparked by the many magical wonders of childhood. For my subjects and me, fun collaborations are where the magic begins. Children are the best creative directors in the world, and I love helping them bring their ideas to life through every stage of the process: from concept to photo shoot to the final image.
We should all allow ourselves to step out of reality from time to time and let the magic of imagination take over. My kids and I practice this at home regularly. We have an incredible creative bond, and our photo adventures have helped them discover their own artistic voice. These projects also have helped me develop my personal style, and have shaped the way I work with my clients.
In this article, I’m going to walk you through the steps we take when we create these magical images. This process isn’t much different from my approach when I’m planning a photo shoot with my clients. Compelling images tell a story, and you, as an artist, are a storyteller.
Planning
One of the main steps we take when creating these images is our brainstorm sessions. The concepts behind our pictures come from different sources: It could be from a song, a prop, a movie, a book, an idiom, or my kids’ imagination. Inspiration is everywhere, you just have to learn to see everything around you in a creative way.
After we commit to an idea, we discuss the details of the image through storytelling.
Storytelling
You can bring these concepts to life by using storytelling, which is a great tool that will engage your kids’ imagination and creativity, and stimulate their emotions and empathy. Simple phrases like “Once upon a time…” work like a charm. You’ll be amazed by the stories your kids will come up with in these storytelling sessions.
You can prompt them with storytelling elements, such as:
Setting: Where the story takes place, the environment, the weather, etc.
Characters: Their roles and purpose. This part is always great fun! Kids always get super-creative thinking about their roles.
Plot: The challenge in the story
Theme: This is the central idea of the story: love, grief, courage, escape, freedom, loneliness, fear, survival, etc.
Symbolism: Turning something ordinary into something that goes beyond the literal.
Emotion: Compelling visuals that make the audience feel something.
Sketching
After coming up with a story in our storytelling session, we sketch it. Sketching helps us to visualize how the final image is going to look. It helps me plan the lighting, poses, color palette, and elements that I’ll add later in Photoshop. It also works as a visual aid for my kids at the moment of the photo shoot.
Tip: The more the kids are involved in the planning process, the more excited they’ll be at the moment of the photo shoot. It always amazes me to see their commitment to creating the right poses to sell the story. (This also works when you’re working with adults.)
Color
I love color! Bright, vibrant, and saturated colors! Color is a dominant element in photography and can be used to express emotion.
Studying color and how to use the color wheel properly to your advantage can make a huge improvement in your photography. I usually plan my color palette in advance, and sometimes I even make tonal adjustments in Photoshop to make sure the colors are all playing harmoniously. Colors can help you tell a story. Learn each color’s emotional and psychological meaning and characterization, and use them accordingly. Watch movies to see how colors are used in filmmaking to convey a story.
Humor
Laughter creates a positive emotional connection with the audience; it’s memorable, contagious, shareable, and relatable. Humor is an element you’ll find in most of my images, as I love to make people laugh, and creating funny pictures really improves my mood.
Okay, now you have an idea, a story, and a sketch, what do you do next? This is when the sketch comes in handy! It will help you visualize the image and plan the photo shoot.
Most of the work I do involves Photoshop composites, so the elements are shot separately and put together later. Sometimes I already have the background image, and other times, I build the background after I shoot my subjects. It really doesn’t matter which comes first, as long as you have a clear idea of what you’re trying to accomplish; but, you have to make sure to shoot the pictures at the same angle and perspective, so the composite makes sense when you put it together. Let’s look at a few examples.
Racing Snails
This picture was my five-year-old daughter’s idea: She said that she wanted us to be racing in an image. I asked her what we were going to be racing, and she said snails! Then, she said she had to be winning (obviously), with her brother second, and I was last, of course!
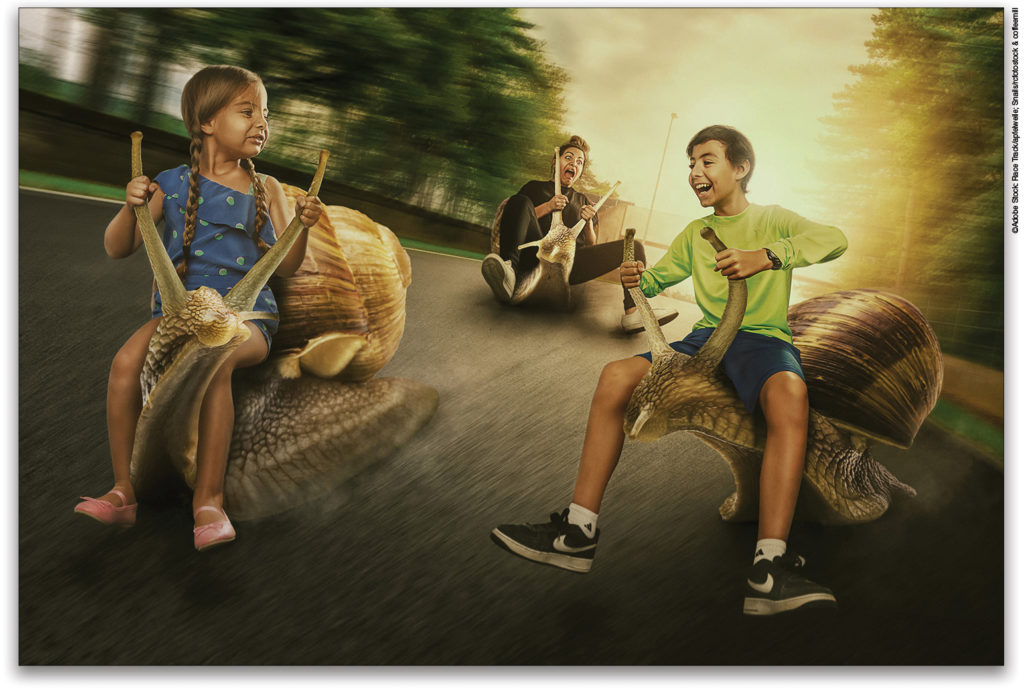
First, I built the background image of a race track and added three snail images I got from Adobe Stock. Then, the kids took pictures of us, each sitting on an apple box, keeping in mind the angles and perspectives of the elements in the background image.

To Infinity And Beyond
We saw this huge firecracker at Spectacular Themes, a prop house I’m partnered with, and right away, we wanted to use it for a picture. It reminds me of the adventures I used to have with my brother and cousins in my grandma’s backyard.
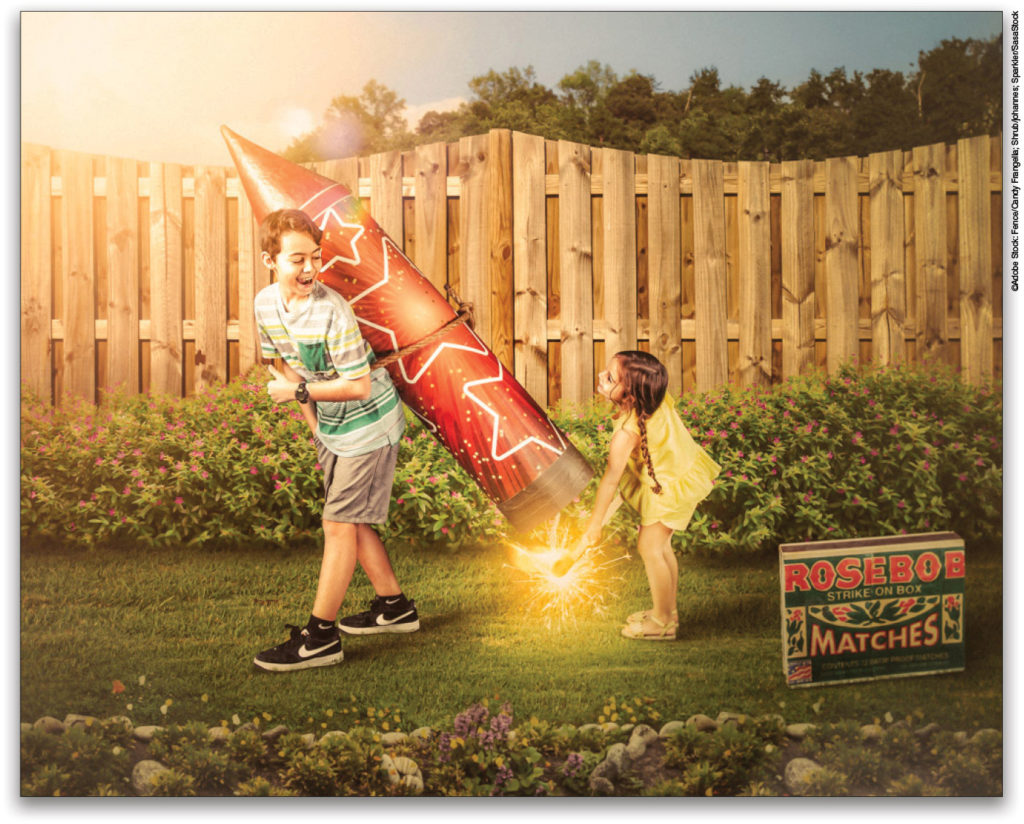
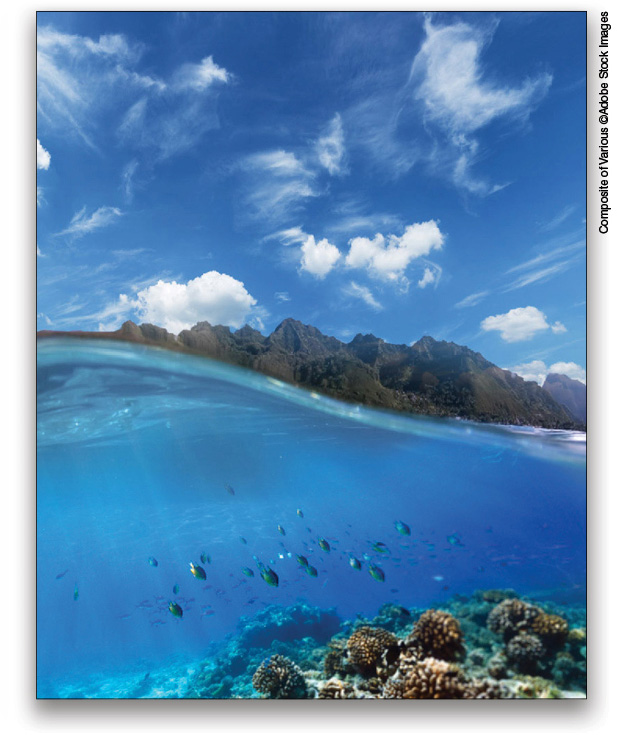
In this example, I shot the subjects first and later built the background image with Adobe Stock.
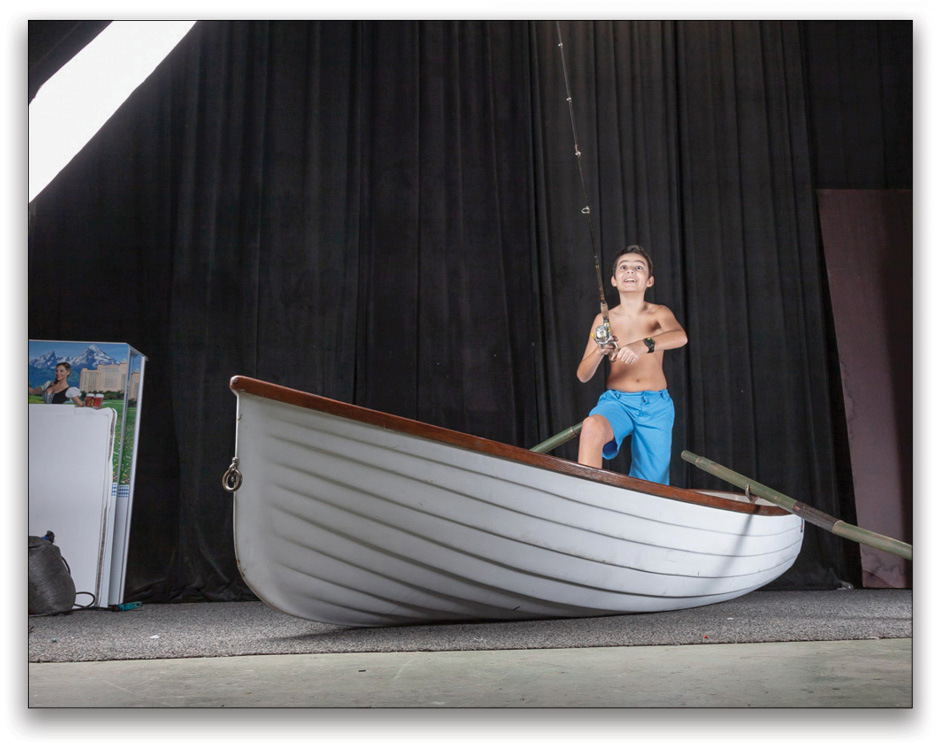
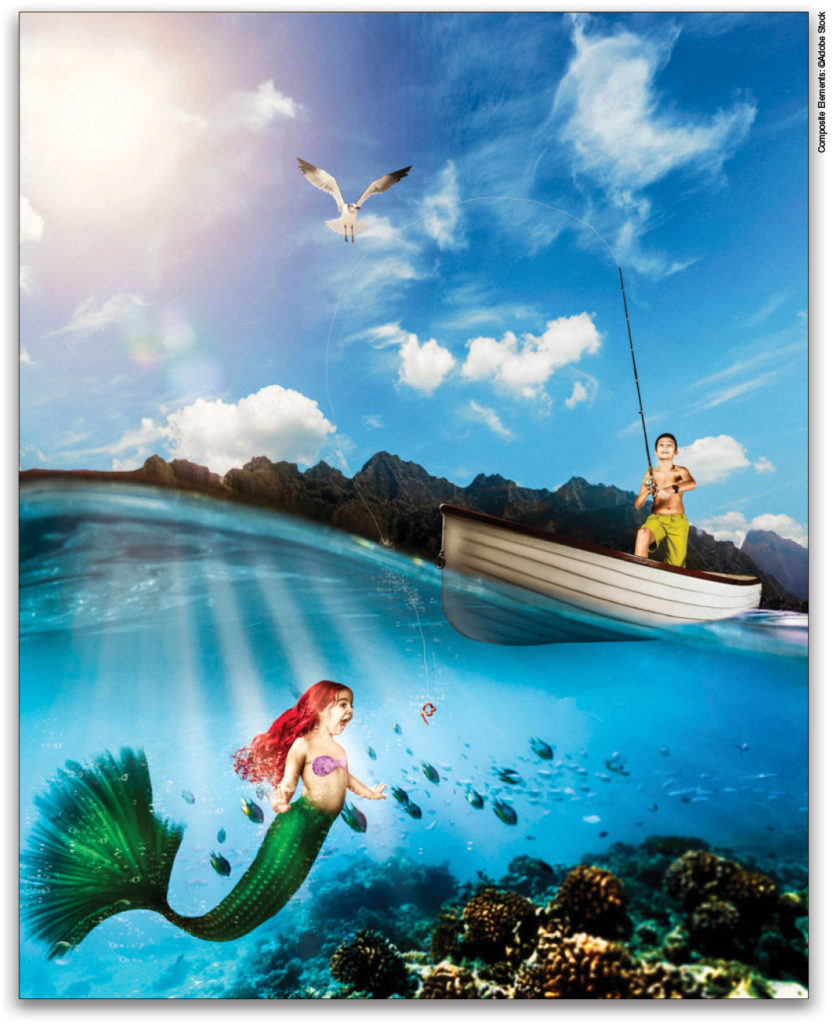
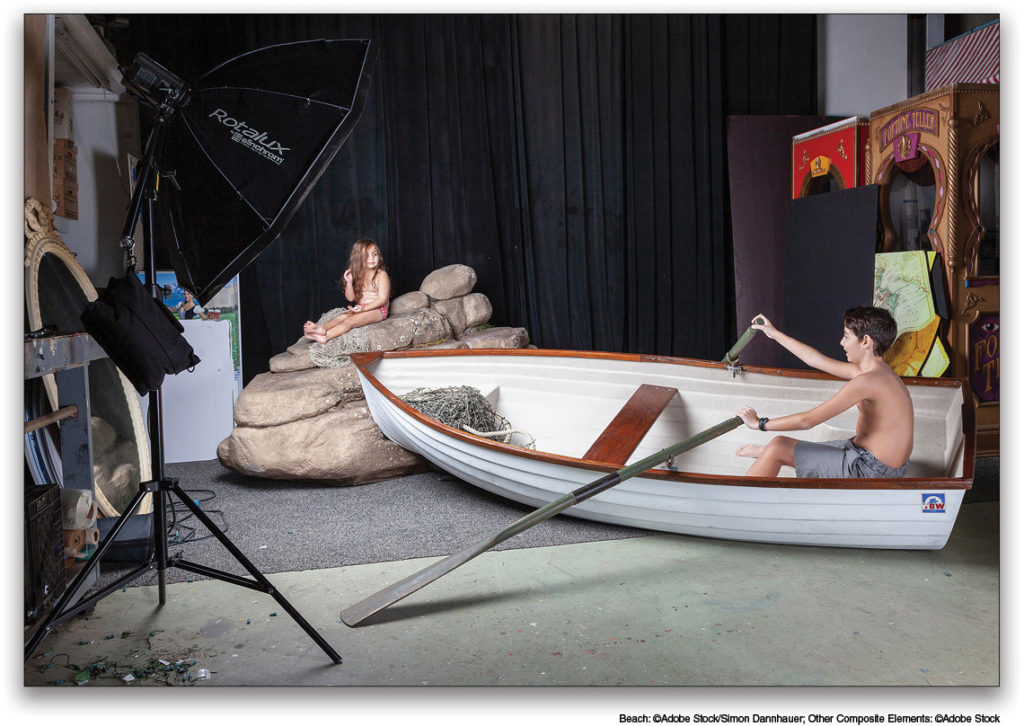
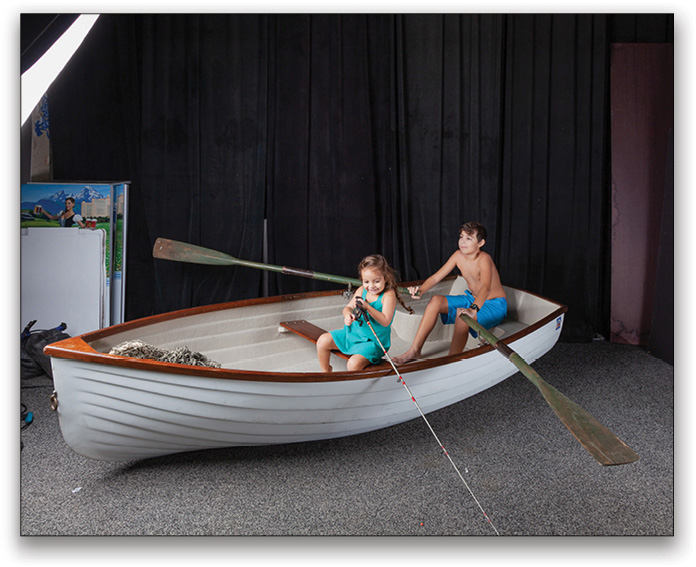
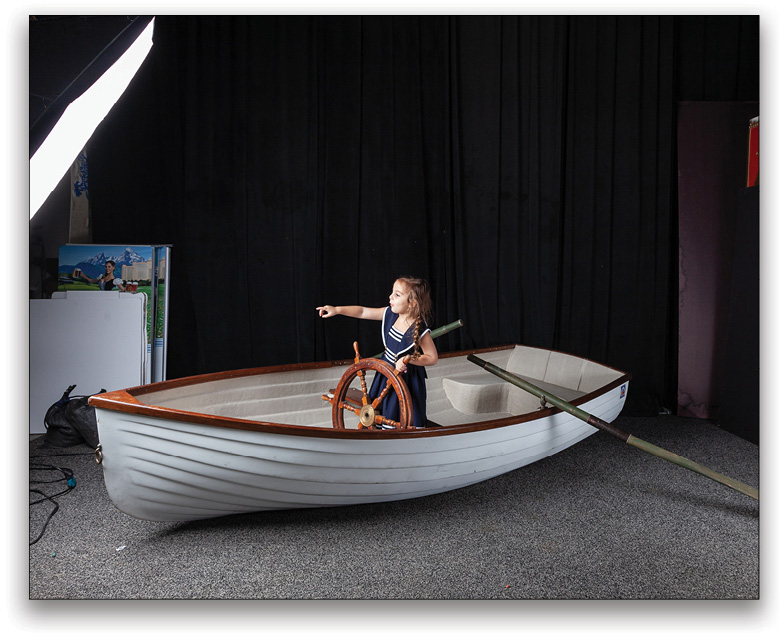
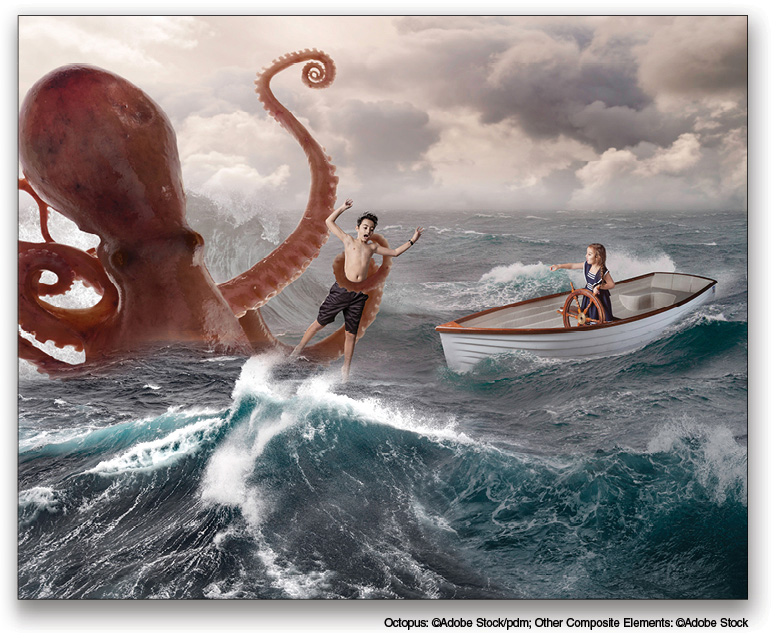
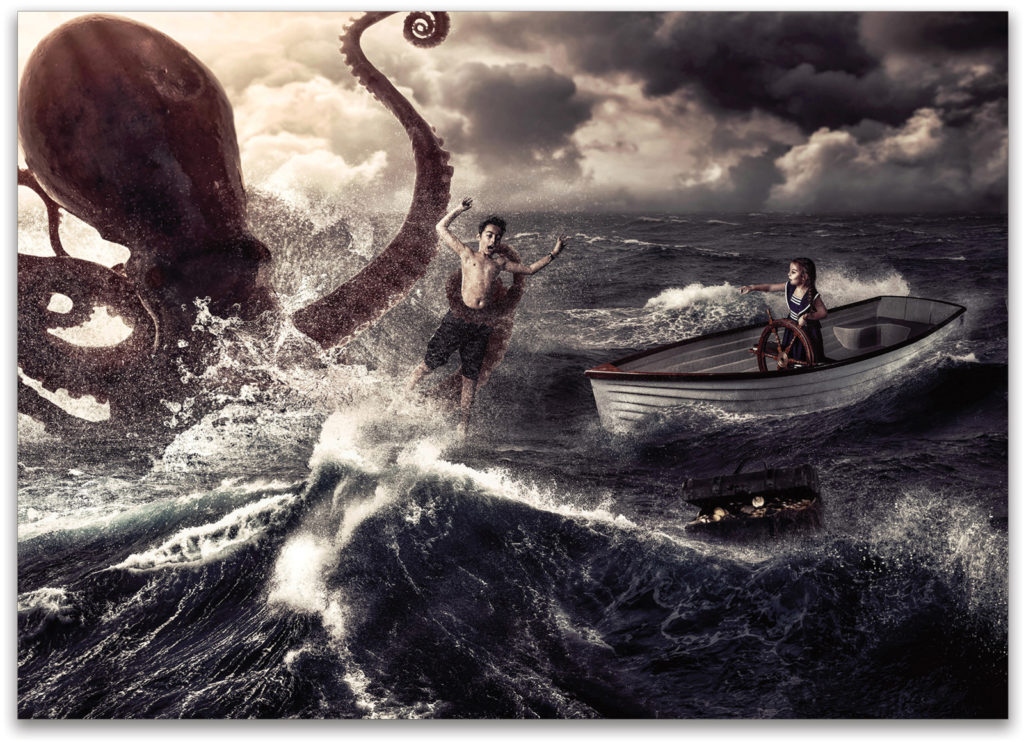
The Boat
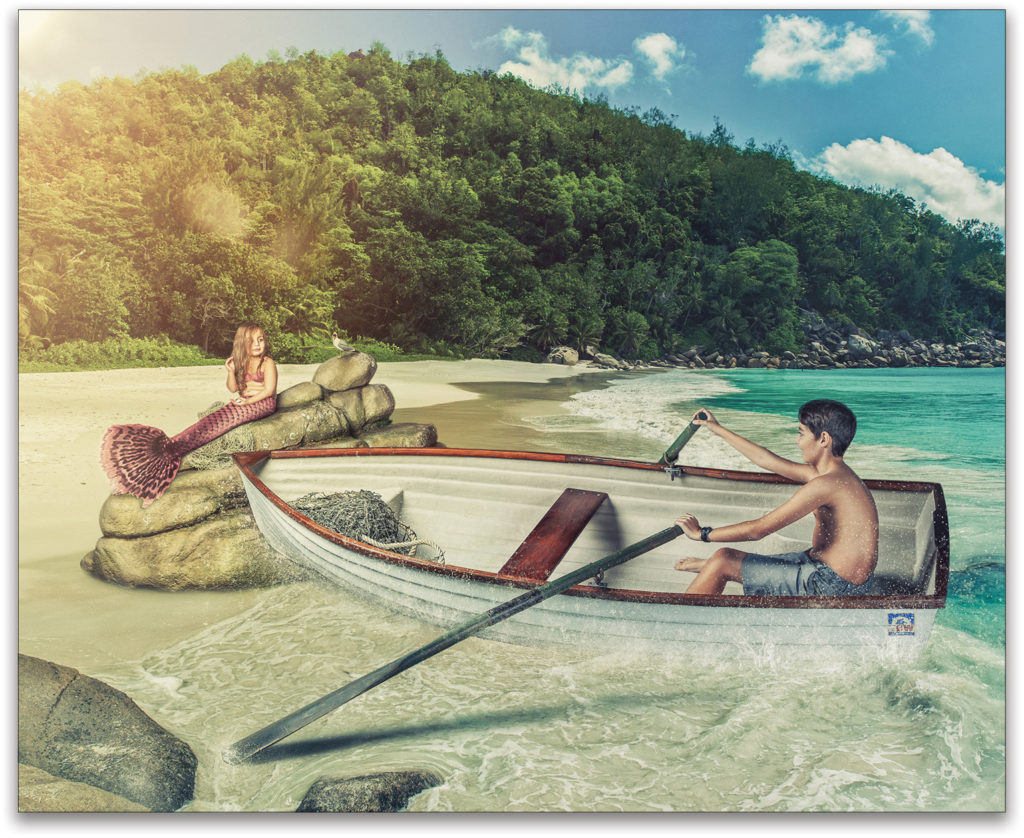
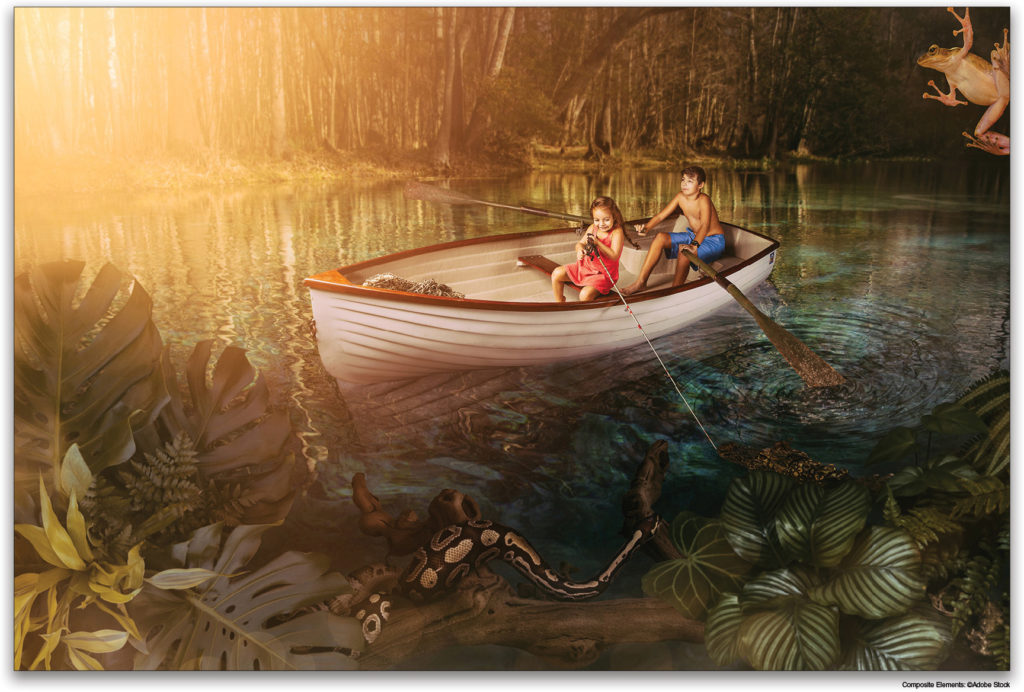
These images were all shot on the same day using the boat as inspiration. Pick one thing around you and try to come up with different ways to shoot it. It’s a great exercise to help you see creatively. My kids and I came up with four different stories using this same prop.
1. Under the Sea: Like pretty much every five-year-old girl, my daughter is obsessed with mermaids, so it was obvious that she’d ask to be a mermaid in a picture. To make this concept work, I needed to have part of both worlds, under and over the water; so I placed my camera on a Platypod on the floor and shot my son on the boat from a low angle. The rest was pure Photoshop magic!
2. Mermaid Encounter: Here’s another mermaid-themed image using the same boat.
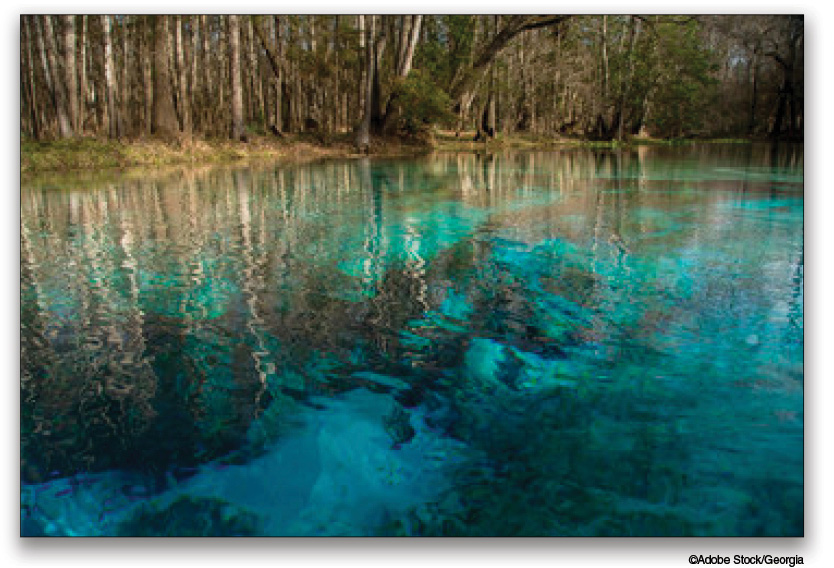
3. Florida Springs: For this one, we wanted to do something Florida-themed, so we added frogs, snakes, alligators, and the beautiful springs.
4. The Kraken: My son has been obsessed with the Kraken since he was little, so he chose that to be the theme for one of our boat pictures.
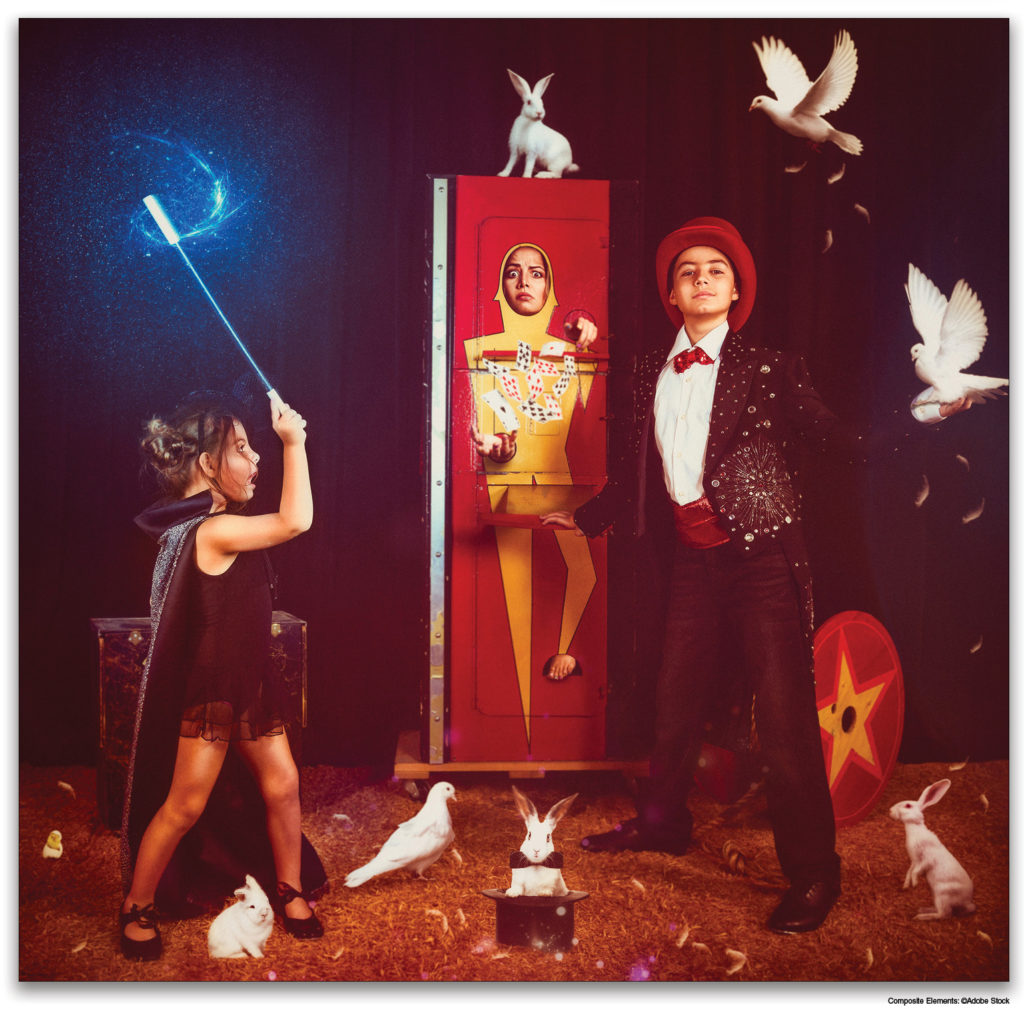
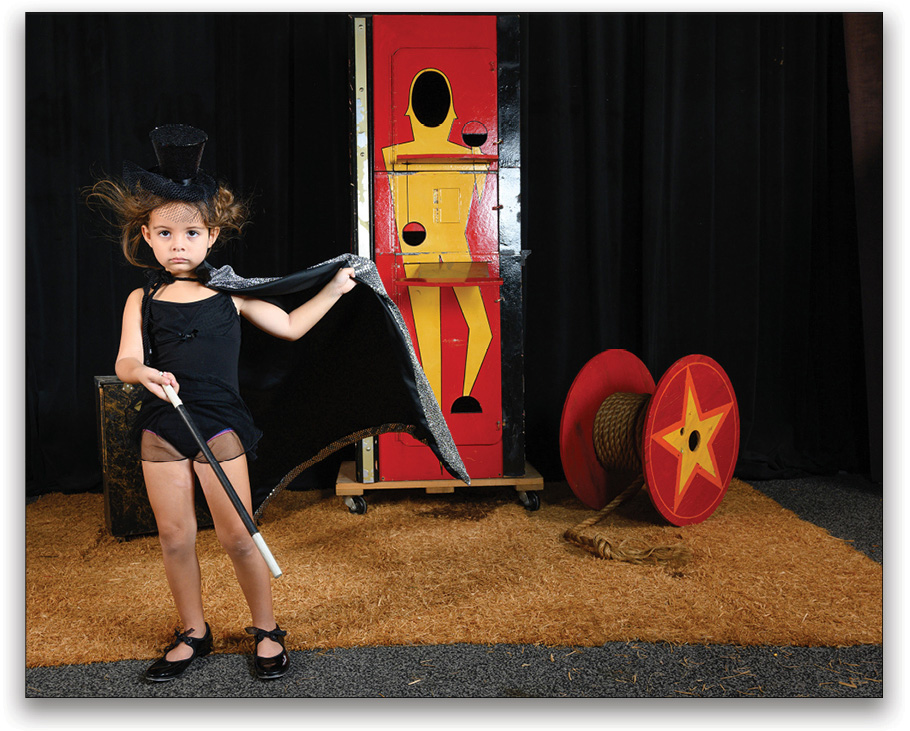
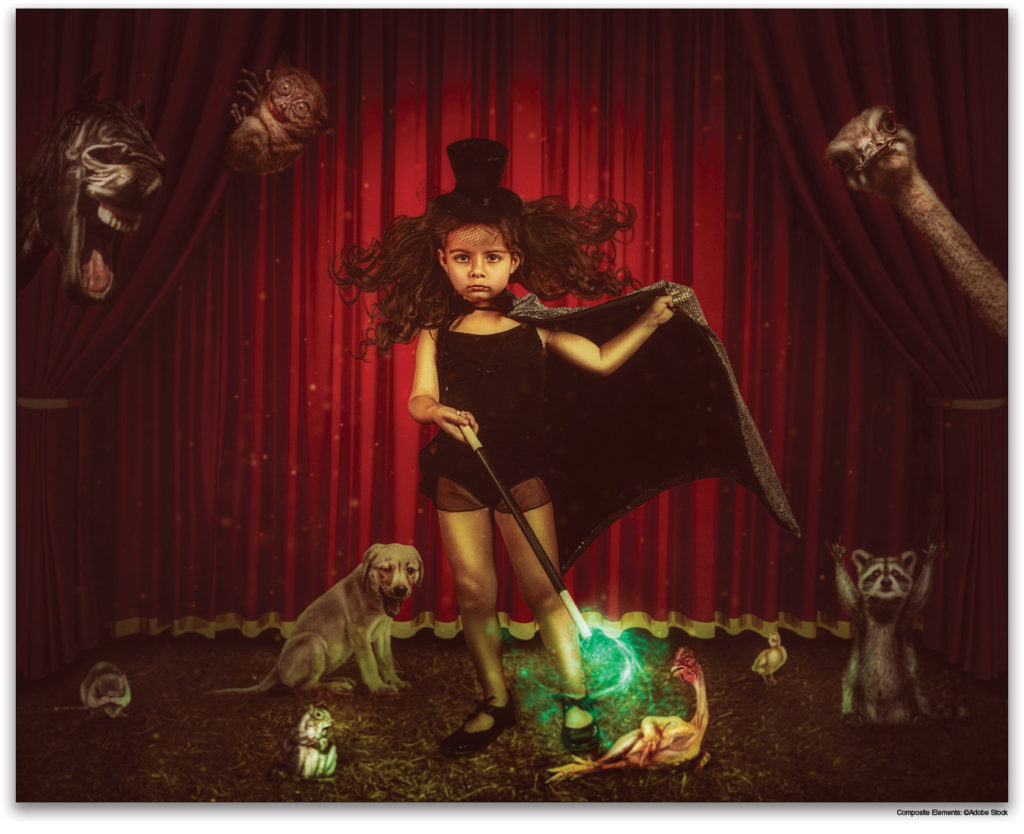
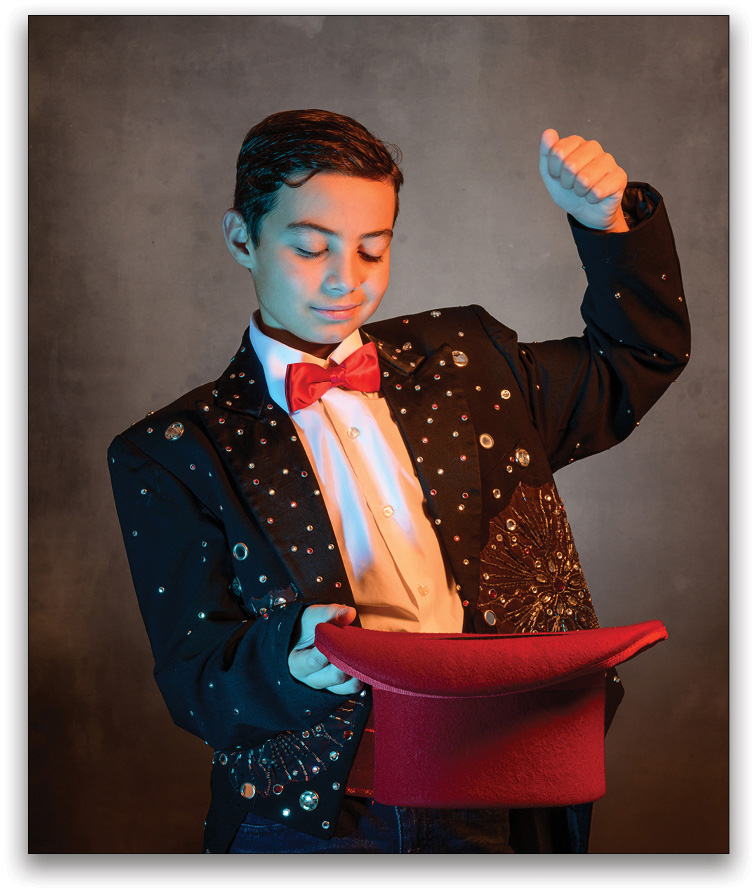
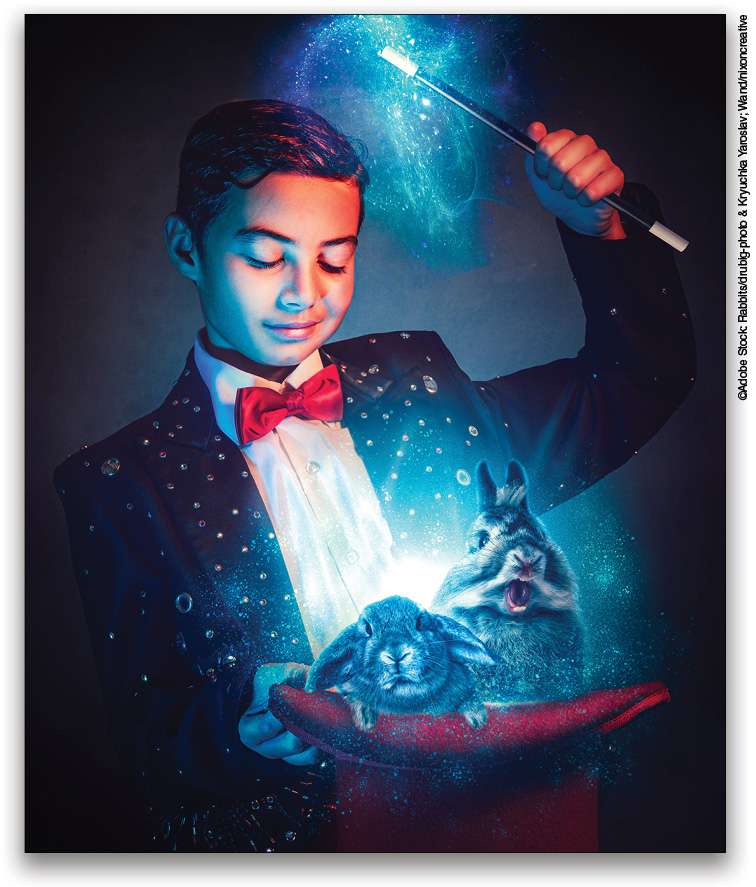
The Magicians
For this project, we borrowed a couple of magician outfits from Winfield Murdock and set up a few props in a corner in Spectacular Themes.
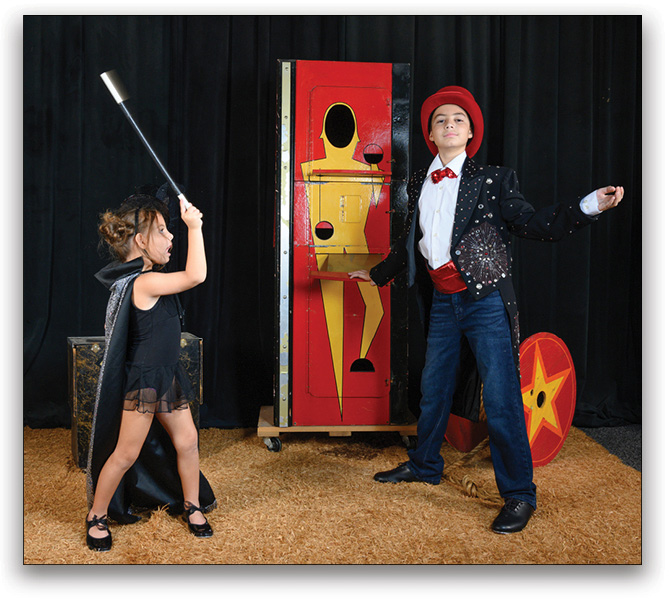
1. Magic Family: This was a pretty simple composite. I just added myself in the picture, a few animals, and special effects.
2. Norah’s Magic: I loved how fierce Norah looked in this picture. When I asked her what she wanted to do with it, she said she wanted to have a magic show with lots of animals.
3. Enzo the Magician: This was another simple one. I just added rabbits, some special effects, and voilà!
Idioms
We just started this new series during quarantine, based on popular idioms:
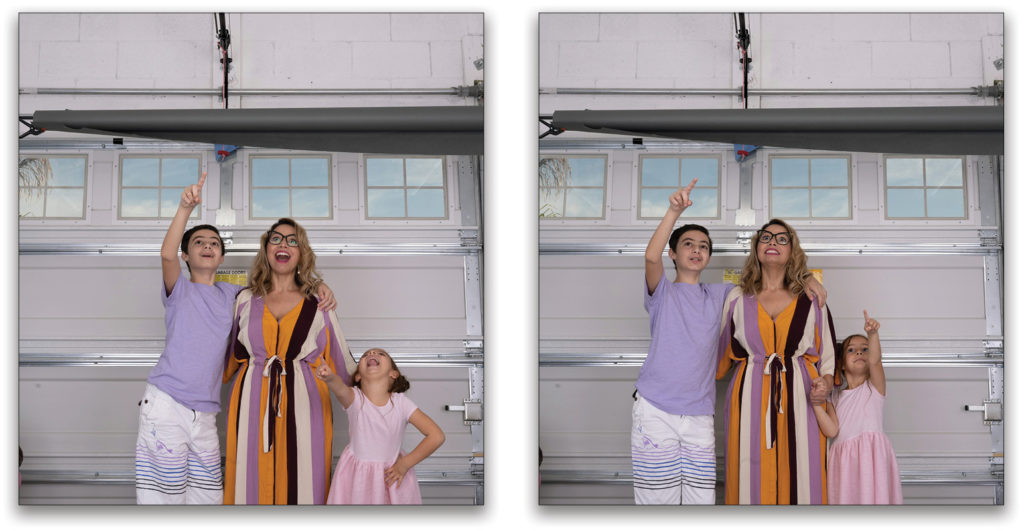
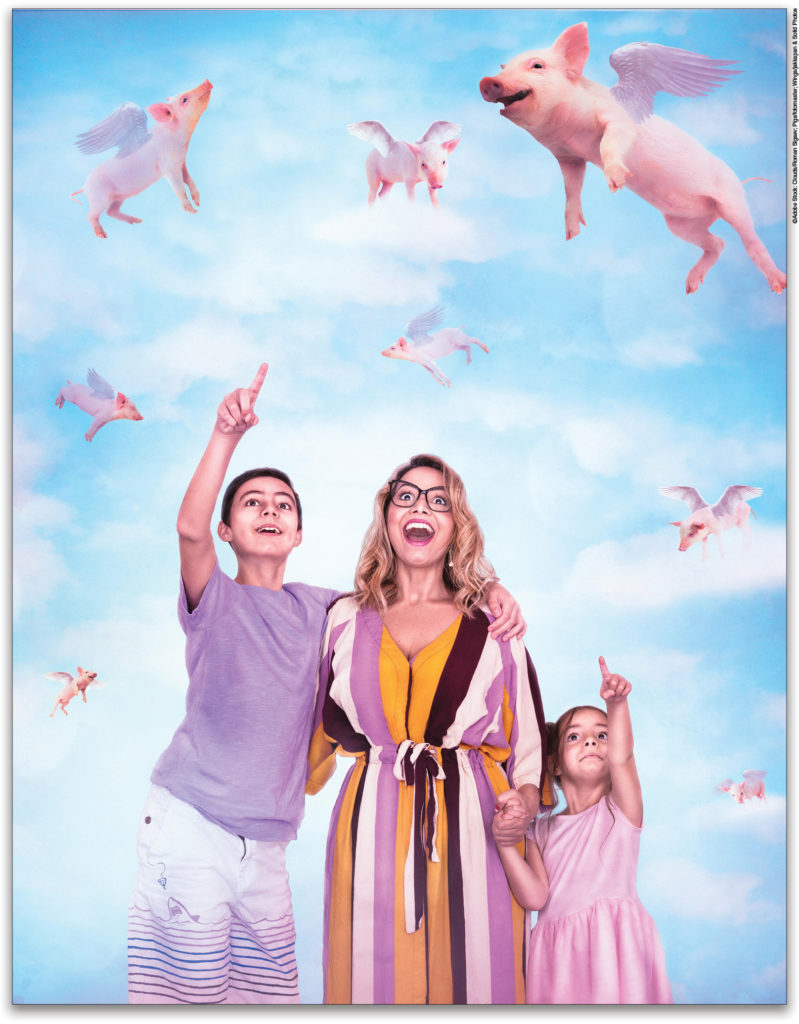
1. When Pigs Fly: This was pretty easy to shoot and put together. I didn’t even bother to use a gray seamless; I just shot it against our garage door. I knew I wanted to use pastel colors, so I looked around our closets to see what I could find to coordinate our outfits; however, putting wings on these pigs was a little time-consuming (see next page).
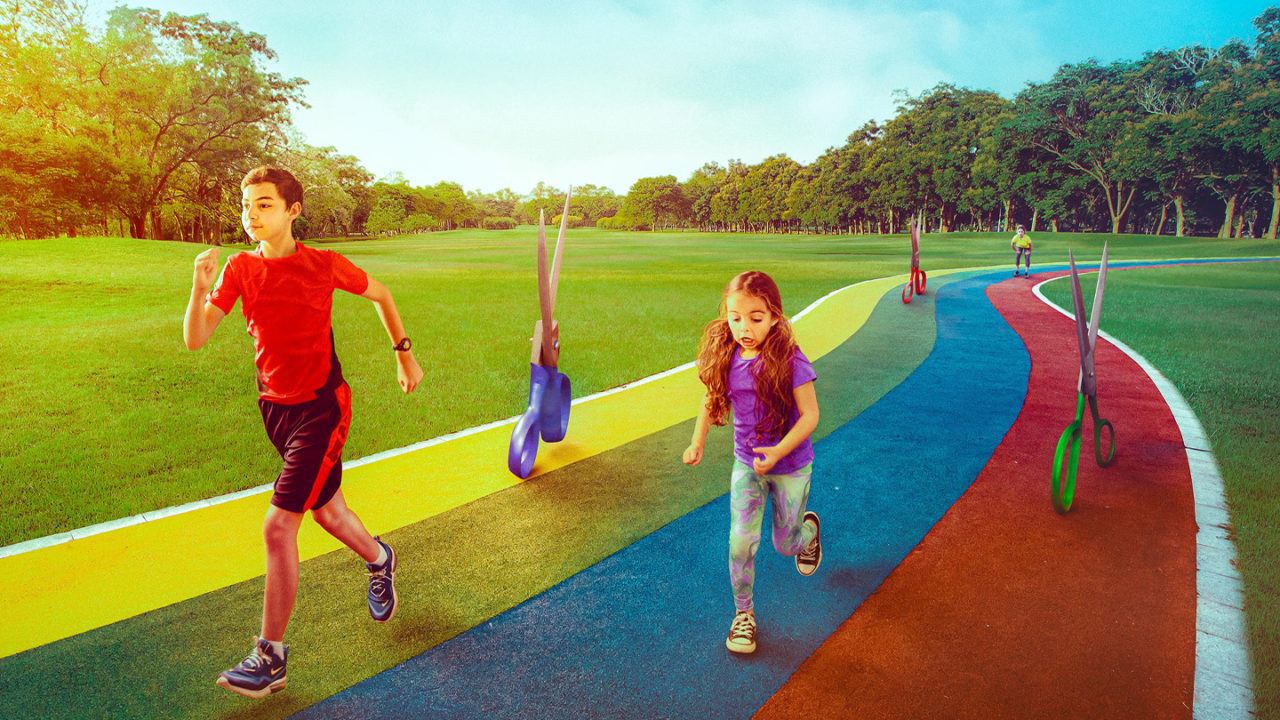
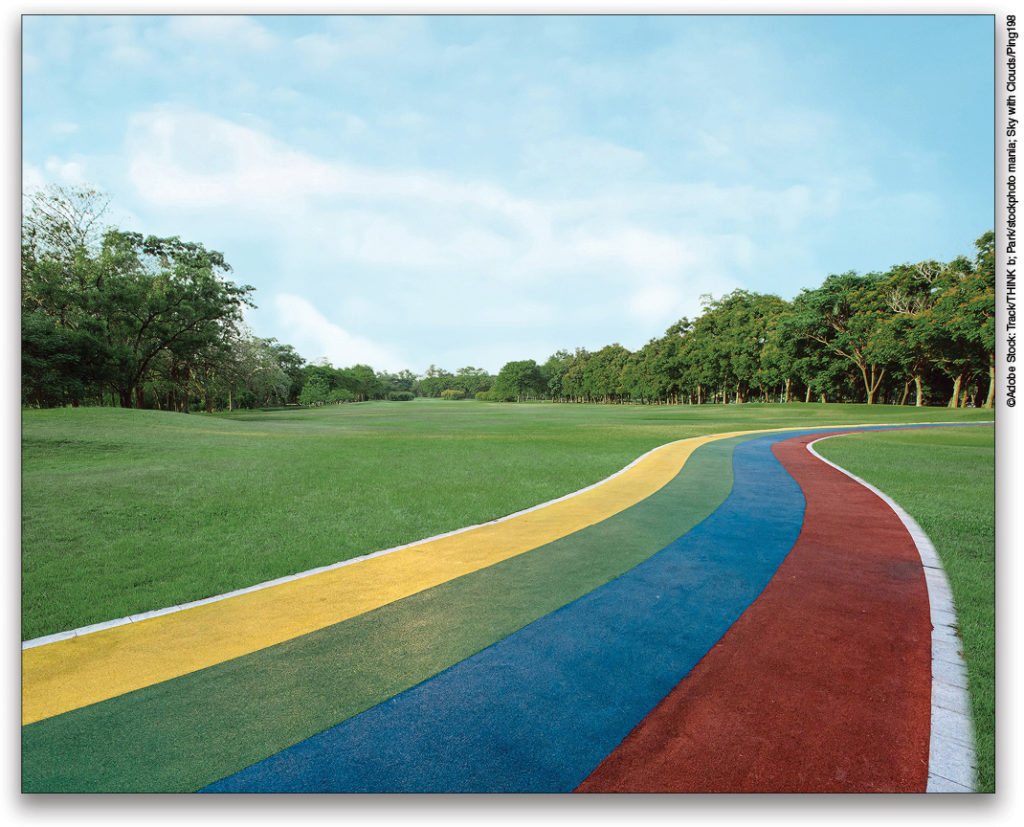
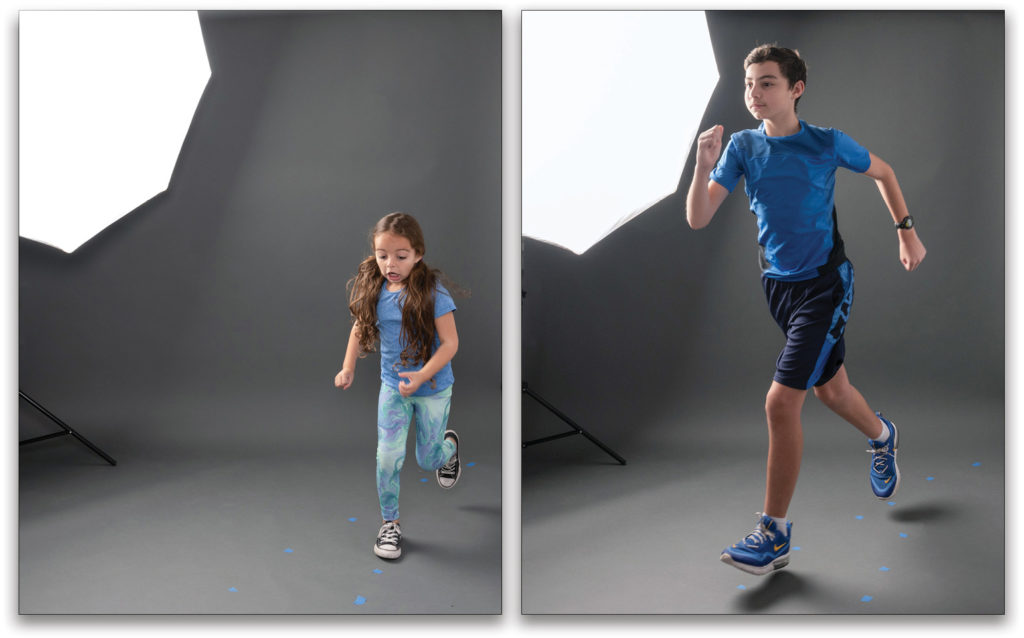
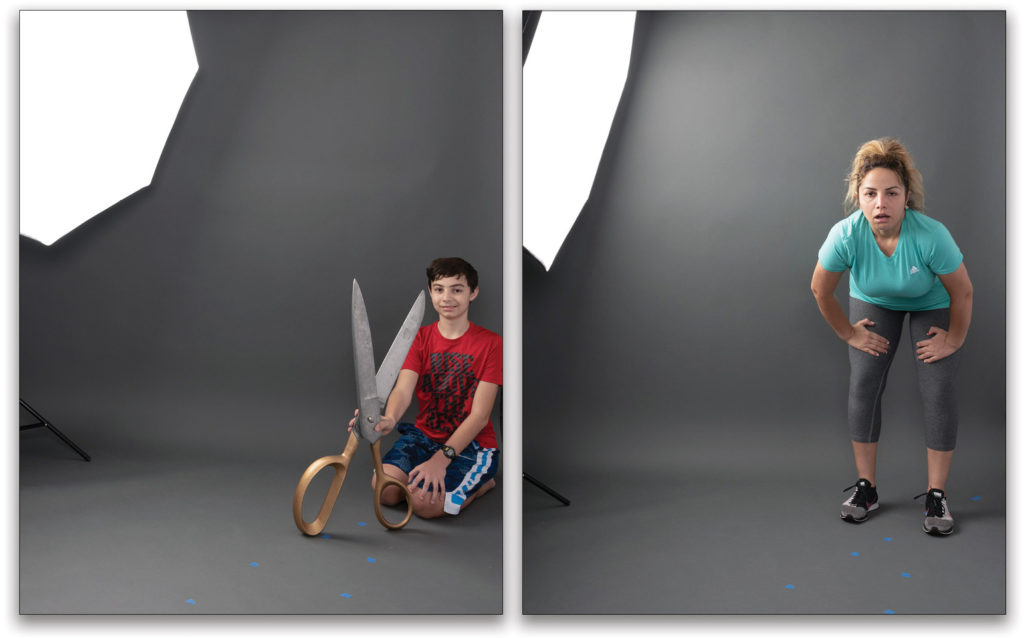
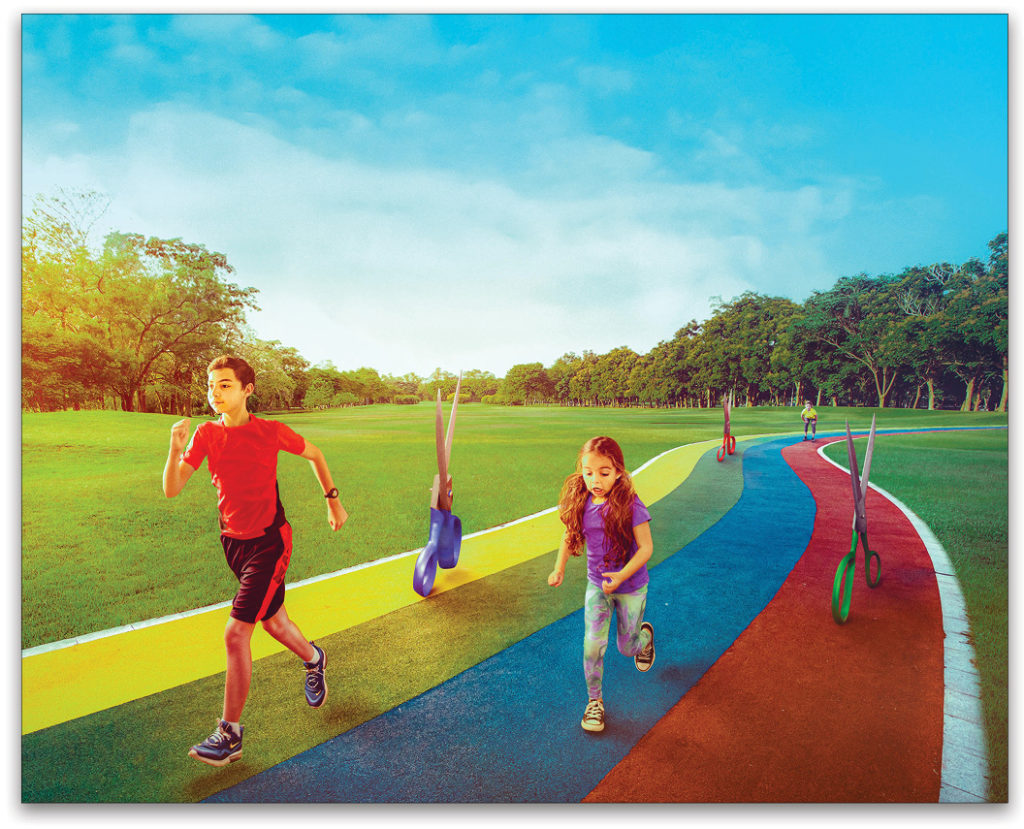
2. Running with Scissors: I first envisioned this picture on a proper running track, but then I found and fell in love with this colorful path. This background is a combination of three different Adobe Stock images.
When I finished putting it together, I set up a gray seamless paper and a couple of Elinchrom ELC lights in my garage. To make sure the kids were running at the right angle, I made a little trail with tape on the floor. Then we took a few pictures of an oversized pair of scissors and, of course, a not-so-pretty picture of me!
When I started compositing the image, I wasn’t too happy with the colors, so I made a few changes to the colors of our outfits and added colors to the scissors.
We grow as artists by creating personal work and experimenting with our craft. Make it a habit to take time to create for yourself, whether it’s on your own or in collaboration with your family. The images that I create with my kids are ours to display on the walls and treasure for years to come. I grow and learn so much with every single one of them, and I learn all these techniques by playing. Then, I can apply these techniques to the images I create for clients.
This article originally published in Lightroom Magazine, Issue 60.


So love these! I have been wanting to get into this type of photography, just can’t seem to find the time. Seeing this article makes me want to put it at the top of my list now!