While I was stateside last year for Photoshop World 2017 in Orlando, I took the opportunity, as always, to make the most of the trip. I had the pleasure of visiting Antelope Canyon in Arizona, and it was great that the guide was throwing around photographic advice to everybody, having had so much experience in the conditions of the canyons, but I wanted to make sure I got something different than everybody else. With this tutorial, I’ll show you how I used two shots from that trip to create something unique with Adobe Photoshop.
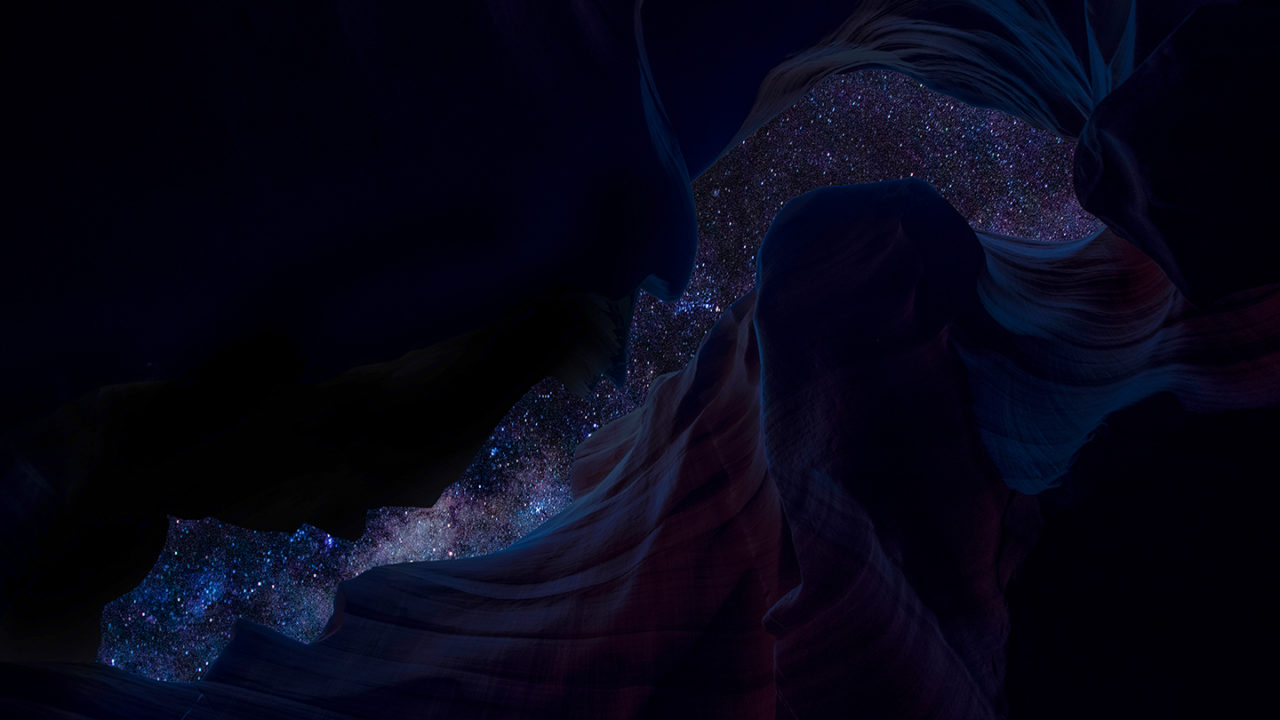
Let’s walk through how I turned a midday shot of Upper Antelope Canyon into a middle of the night, moon-glowing, Milky-Way-popping glance at the night sky.
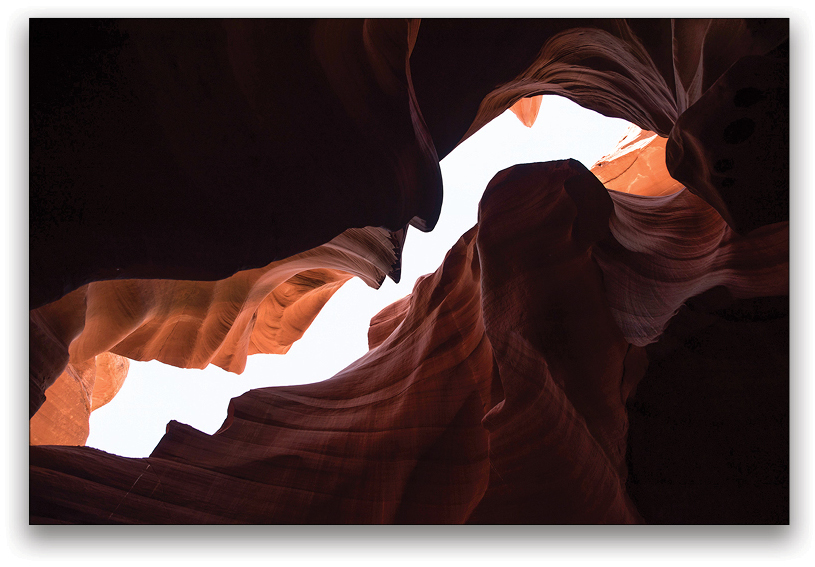
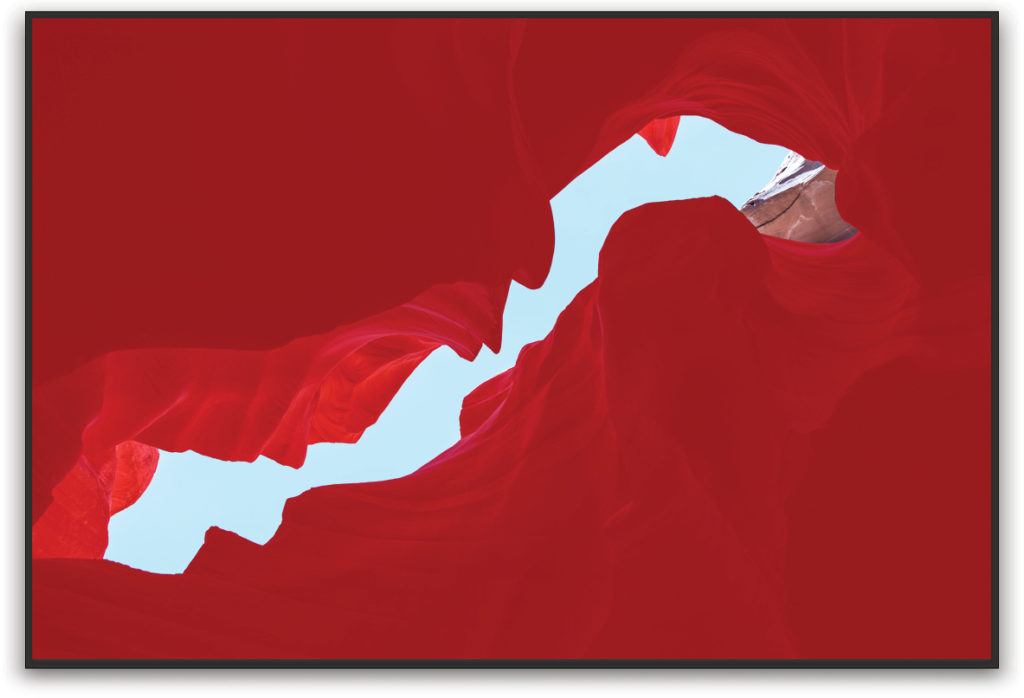
Here’s where we’re starting: The canyon catches the light and funnels it around, bouncing it off some of the sandstone walls to be absorbed by others. The highlights and shadows are pretty cool, and the overexposed sky that so often results from shots taken here due to the high contrast, can be used to our advantage when we get to the selection stage.
[KelbyOne members may download the files used in this tutorial here. All files are for personal use only.]
Step One:
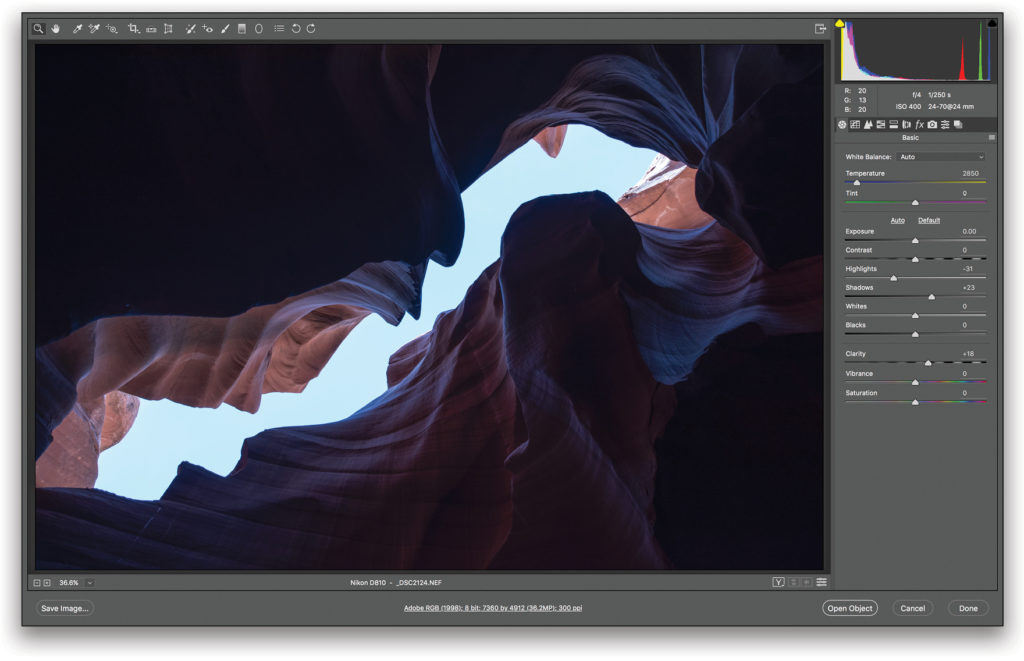
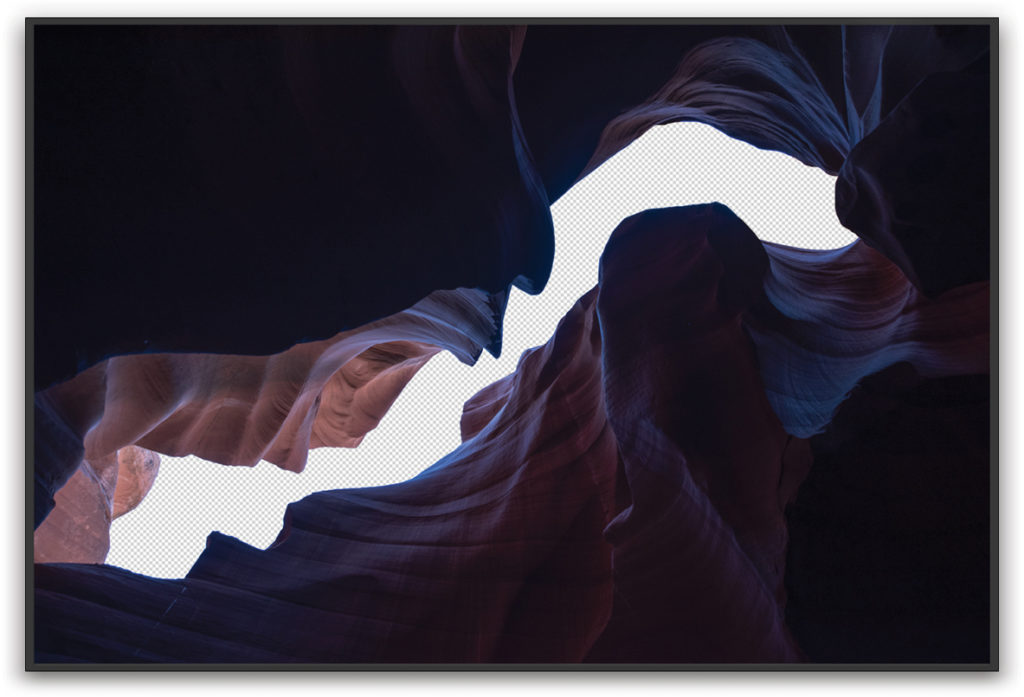
If you’re starting with a RAW file, first open your image into Adobe Camera Raw. If you’re using the practice files, open the Canyon.jpg image from the download folder, and then go to Filter>Camera Raw Filter (or press Shift-Command-A [PC: Shift-Ctrl-A]). We need to give the canyon walls the feel of a cool, dark night, so set your sliders to reflect the blue, dull light of the moon by cranking the Temperature slider all the way down to –50 (2850 if you’re using a RAW file), then decrease the Highlights and boost the Shadows to even out the tones. We’re taking out the contrast because a nighttime shot should have pretty even light in the canyon. To make sure you don’t lose too much contrast in the midrange tones when you make these adjustments, give the Clarity slider a little push, which will also assist in retaining some of the detail. Once you’re happy with the look, click OK (or Open Image) to return the image to Adobe Photoshop.
Step Two:
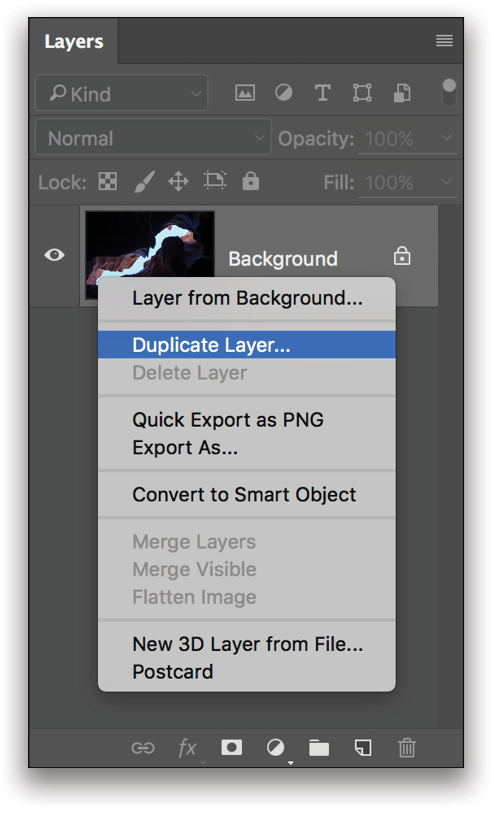
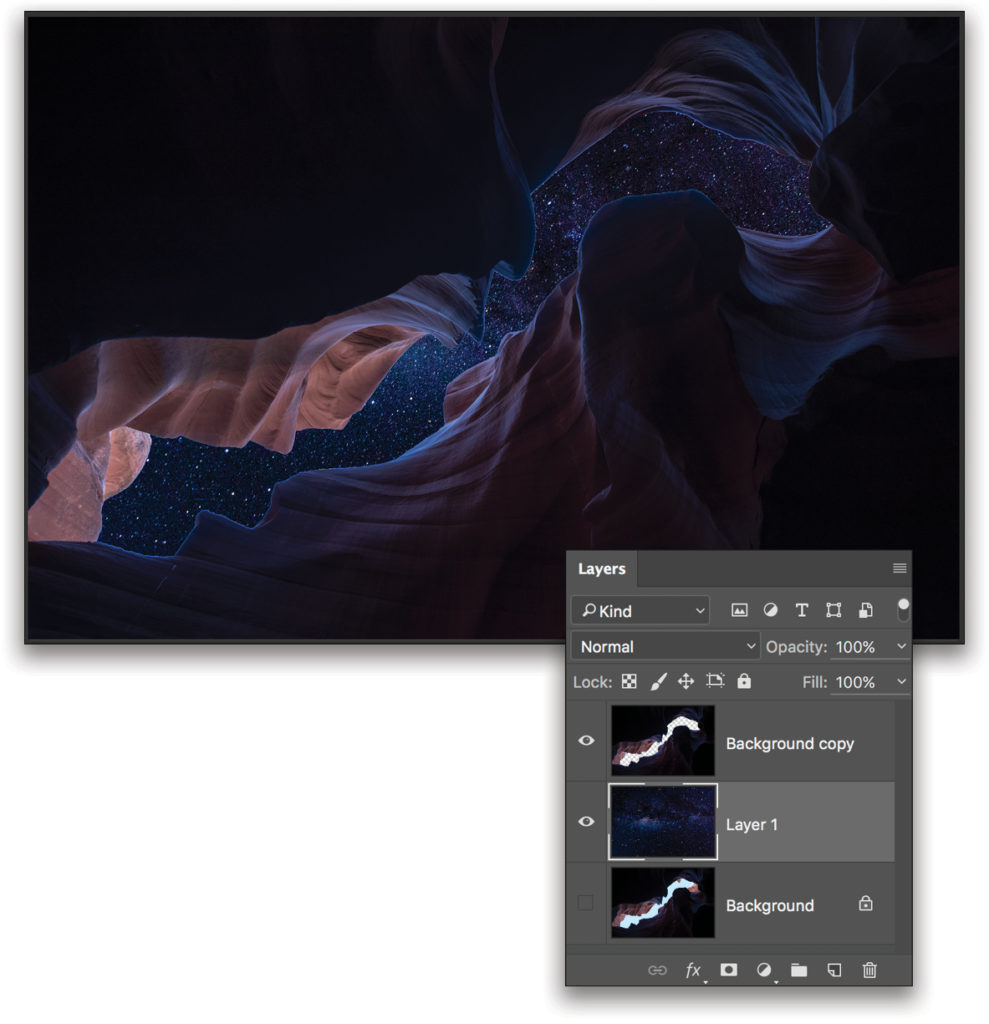
In order to protect the original image, we need to duplicate the Background layer to give us a working version. Right-click on the Background layer in the Layers panel, select Duplicate Layer, and click OK in the resulting dialog. The new layer, entitled “Background copy,” will appear above the original layer and will be the image on which we’ll work. Click the Eye icon next to the original Background layer to hide it.
Step Three:
This step is all about finding the boundaries of the sky so we can remove it and fill it in with the night image. Using the Quick Selection tool (W), paint over the sky to select it; this should be nice and easy with the high contrast between the sky and canyon. One thing we need to consider are the bright highlights catching the two overhanging sections of rock at the top right of the canyon. These areas won’t complement our nighttime feel, so they need to go too, which will also give us more visible starry sky. Just include them in the selection. If you select areas that you don’t want selected, press-and-hold the Option (PC: Alt) key, and paint to remove those areas from the selection. To check your selection, you can enter Quick Mask mode by pressing Q. This will place a red overlay on the non-selected areas. Press Q again to go back to your selection.
Step Four:
When you’re happy with your selection, press Delete (PC: Backspace) to remove the selected sky, and then press Command-D (PC: Ctrl-D) to deselect.
Step Five:
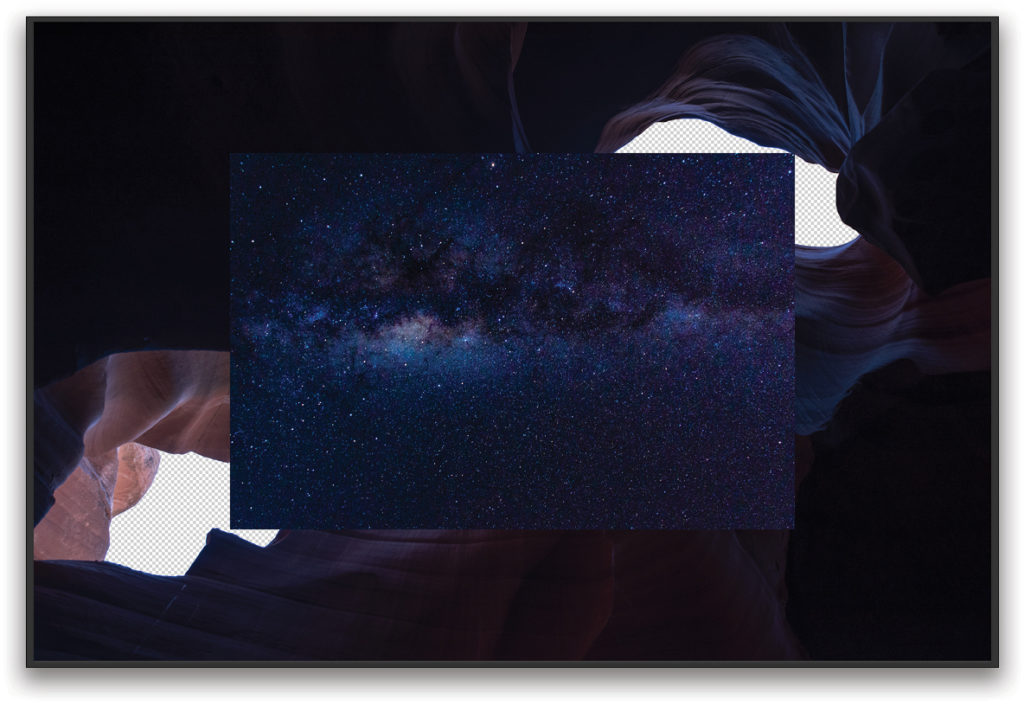
Now we can copy-and-paste our starry night sky in as a new layer. Open the Night Sky.jpg image, press Command-A (PC: Ctrl-A) to Select All, and Command-C (PC: Ctrl-C) to copy it. Switch to the canyon image, and press Shift-Command-V (PC: Shift-Ctrl-V) to paste the sky in the center of the document.
Step Six:
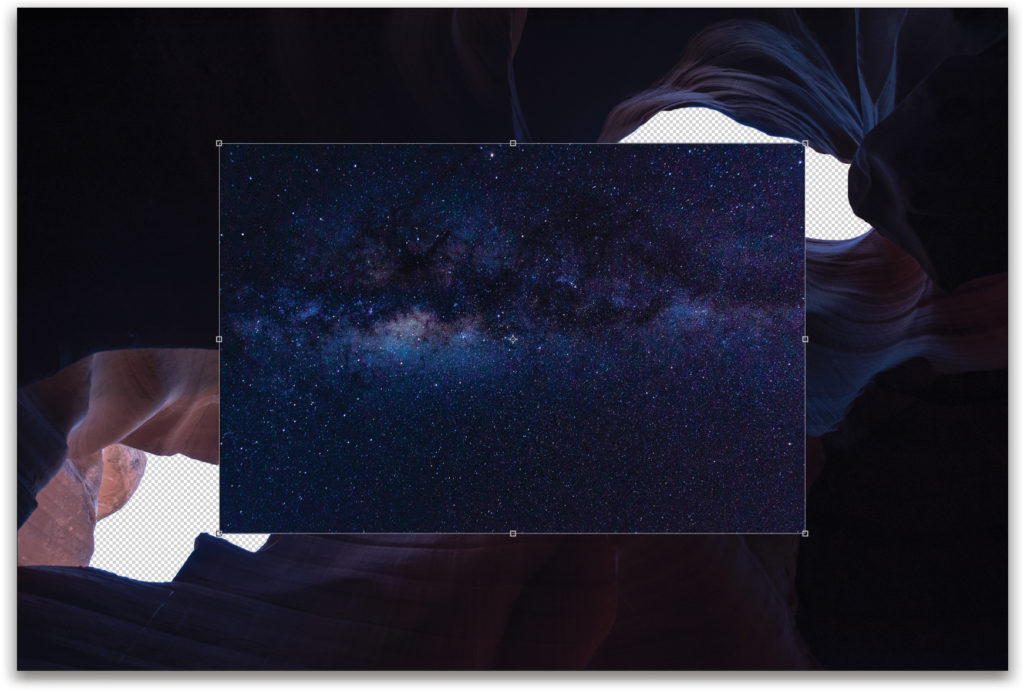
Once it’s pasted in, we need to resize it to fit the background image, so press Command-T (PC: Ctrl-T) to enter Free Transform.
Step Seven:
To keep the proportions and to resize the night sky layer from the center outward, hold Shift-Option (PC: Shift-Alt) while dragging out a corner point. Once the night sky fills the image, press Enter to commit the transformation. We need to move the night sky layer to the middle of the layer stack by clicking-and-dragging it in the Layers panel, which will leave the stars shining through the gap we removed in the image. The edges will look highly contrasted now, but we’ll tackle that problem soon.
Step Eight:
With our starry sky now filling the image, we can use Free Transform again to rotate and move it so it better suits our image. Click-and-drag inside the bounding box to reposition the stars; move outside the bounding box, where the cursor will change to a curved double-headed arrow, and click-and-drag to rotate the stars. We have a relatively small window in comparison to the size of the sky, so we can move the star layer around quite freely to see where it looks best. When you’ve found a position with which you’re happy, press the Enter key to exit the Free Transform tool.

Step Nine:
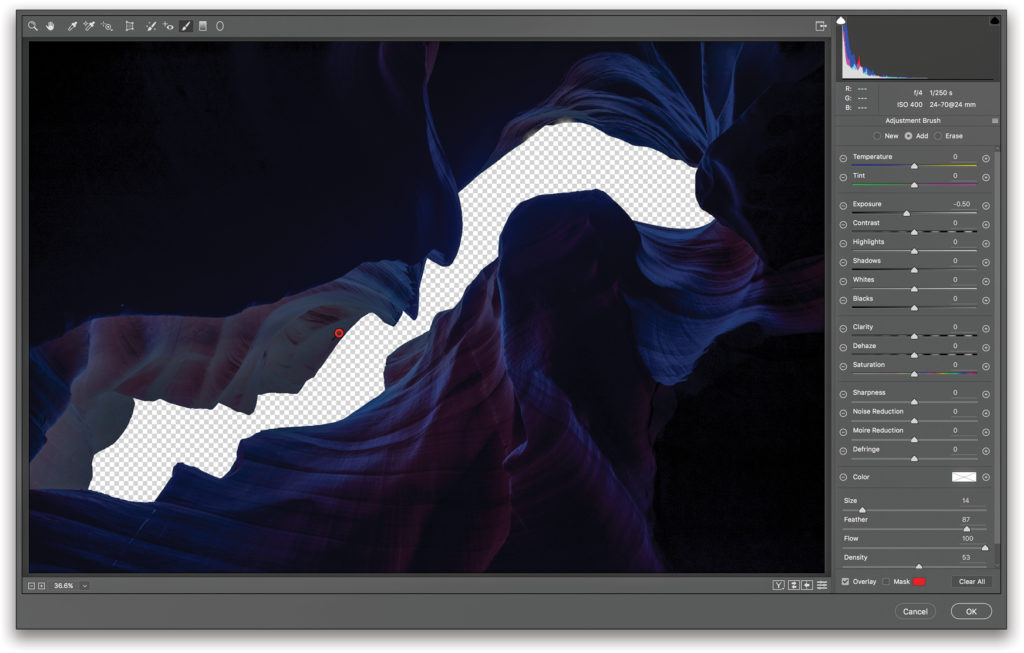
Now the sky is in place, we can better match the tones and colors in the canyon to that of the sky for a more natural look and feel. With the top layer active, open the Camera Raw Filter again. We can make simple changes to the layer to turn this portion of the image from day to night. First, lower the Exposure in the Basic panel to darken the overall image. Switch to the Adjustment Brush (K), lower the Exposure, and then paint the brighter, higher areas of the canyon walls to better match the lower sections of the canyon, which are darker. In the Basic panel, use the Temperature slider to add more blue into the canyon. Click OK.
Step 10:
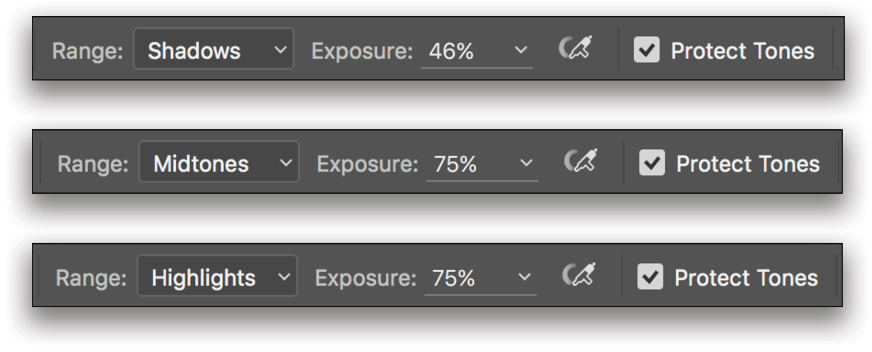
Now it’s time for our creative judgment to come into play. We’re going to use the Burn tool (press Shift-O until you see the hand forming an O in the Toolbar) to darken areas of the canyon even more. In the Options Bar, select a medium-sized brush, set the Range to Highlights, and the Exposure to around 75%. Paint the walls of the canyon to darken the areas that are still unrealistically bright, bearing in mind that any light falling into the canyon would be cast by the moon. Also brush over the bright areas along the fringes of the rock where it meets the sky. This dulls the highlights, creating a much more realistic seam than the stark contrast that currently sits there.
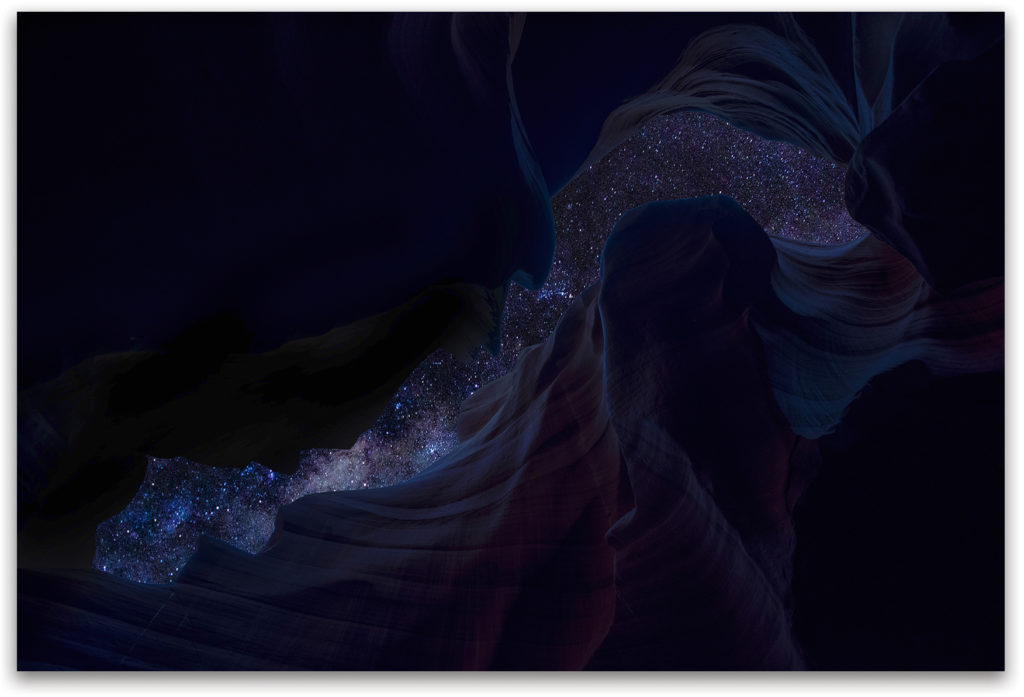
Setting the Range to Midtones and Shadows and the Exposure to around 45%, brush over darker areas to help make the composite image look as if you’d taken the photo at night, losing definition in the shaded areas where the light of the moon wouldn’t fall, yet retaining a crushed or dull black look rather than having absolute black, giving our image a much more pleasing look. This burn technique comes down to using your eye and your judgment to know when to stop, correcting any errors where you may have gone too far.
Tip: When using the Burn tool, it’s a good idea to go gradual. Don’t set the Exposure slider at 100%, but keep it low, and apply it gradually, going over areas several times to build the effect.
Once you’re happy with what you’ve created, simply save your creation. From here, the only task is convincing your friends that you were actually at Antelope Canyon during the night with your awesome starry creation!
This article originally published in the January, 2018 issue of Photoshop User magazine.


