
Tip: This technique works better if your subject is on a solid white or light-colored background; if it is, the background disappears. If you’re a portrait photographer, you may want to shoot with this technique in mind (great for glamour or high-school senior clients!).
Step One:
In Photoshop, choose File>Open and navigate to a photo. Duplicate the image layer by pressing Command-J (PC: Ctrl-J), double-click the layer’s name in the Layers panel, and rename it “face.” If your image consists of multiple layers, select the topmost layer and then press Shift-Command-Option-E (PC: Shift-Ctrl-Alt-E) to merge visible layers into a new one. Turn off the visibility icon of the original layer(s).

In Photoshop, choose File>Open and navigate to a photo. Duplicate the image layer by pressing Command-J (PC: Ctrl-J), double-click the layer’s name in the Layers panel, and rename it “face.” If your image consists of multiple layers, select the topmost layer and then press Shift-Command-Option-E (PC: Shift-Ctrl-Alt-E) to merge visible layers into a new one. Turn off the visibility icon of the original layer(s).
To obtain the stock image used in this exercise so you can follow along, download the watermarked preview from Adobe Stock directly to your Libraries panel (Window>Libraries) by clicking on the link for the image below. When the Adobe Stock web page opens, make sure you’re logged in to your Adobe account, then to the right of the image, you’ll see the option to Save Preview to My Library (you can click on My Library to select a different library or download option). Click on the cloud-with-an-arrow icon, and the preview image will automatically be downloaded to your Libraries panel in Photoshop. Simply double-click an image in the Libraries panel to open it in Photoshop.
Step Two:
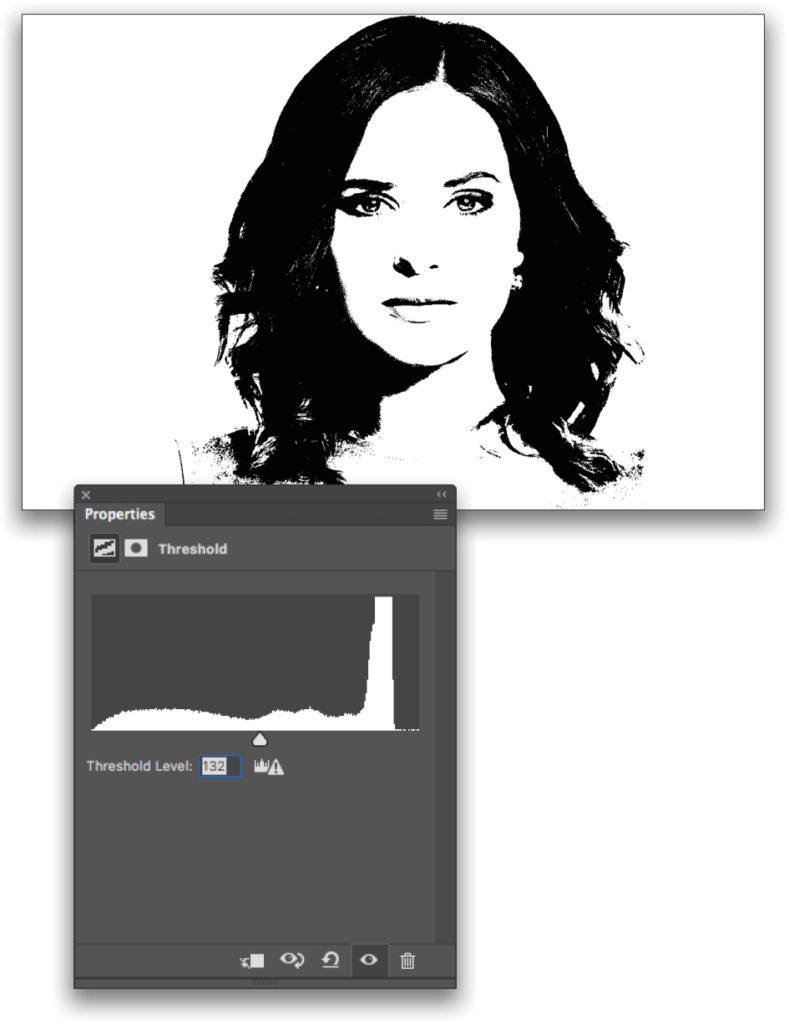
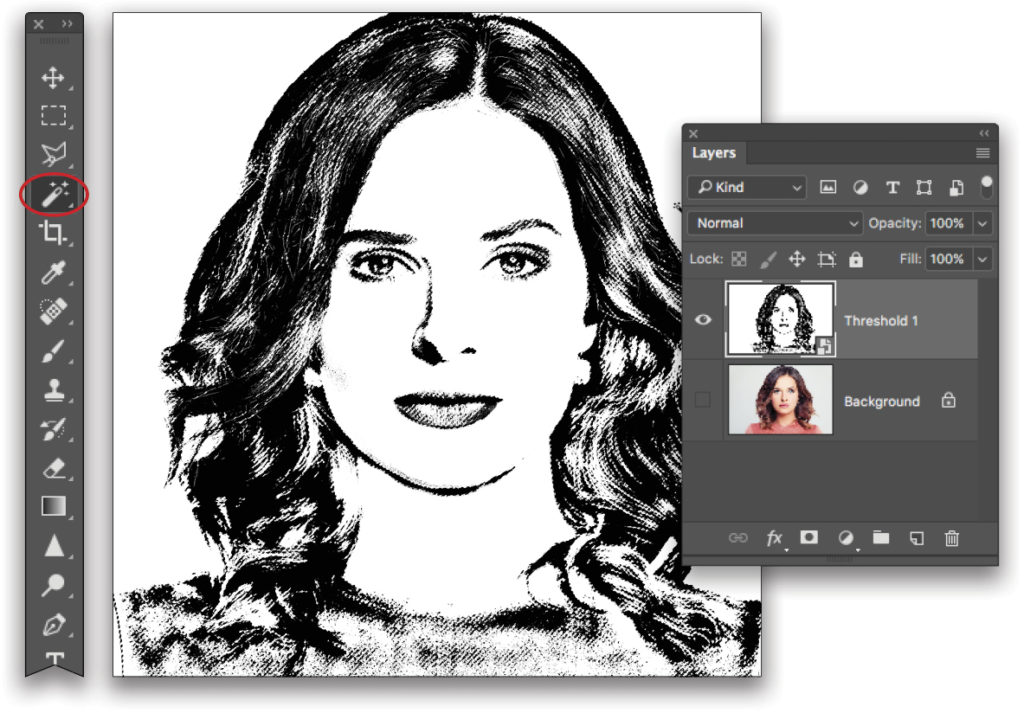
Click the half-black/half-white circle at the bottom of the Layers panel and choose Threshold. Photoshop turns your shadows black and your highlights white. In the Properties panel that opens, drag the slider right to increase shadows (making it more black), or left to increase highlights (making it more white). A value of 132 was used here.
Step Three:
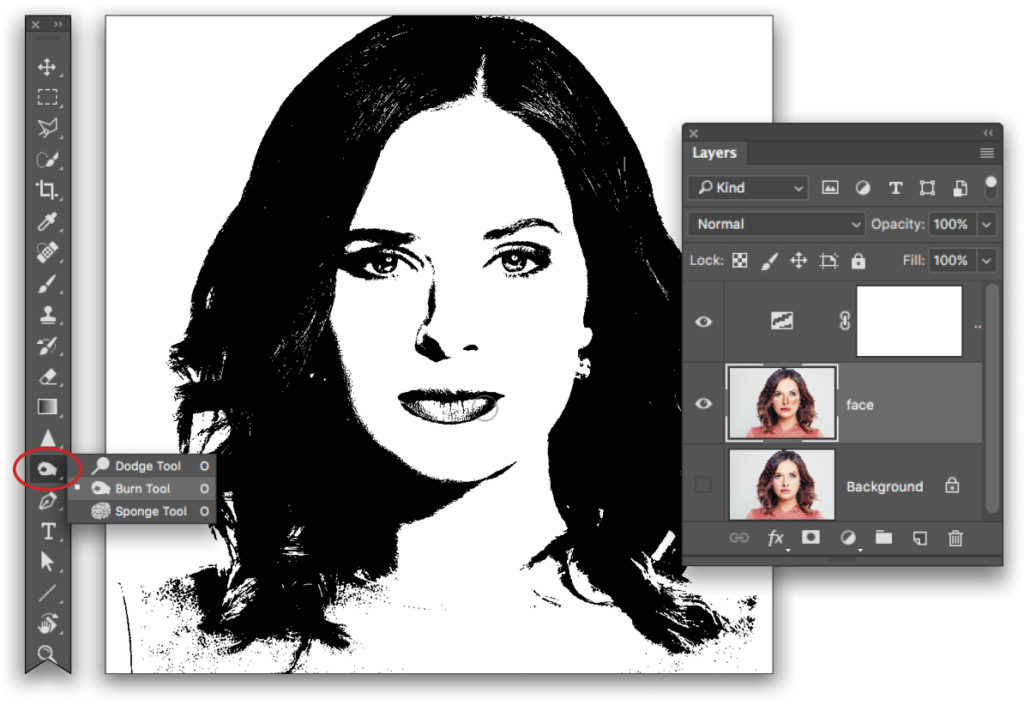
To darken areas that have lost detail, grab the Burn tool from the Toolbar (circled). In the Layers panel, activate the face layer and then paint across the sides of her nose, lips, and shirt to darken them.
Step Four:
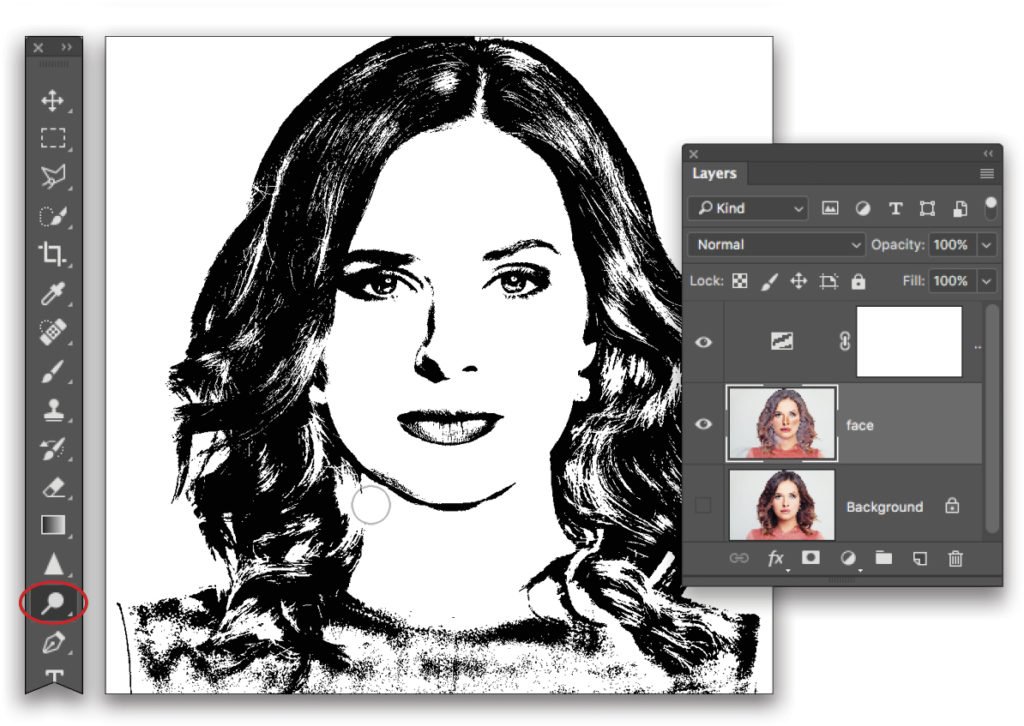
To lighten areas that are too dark, press Shift-O twice to grab the Dodge tool (circled) and then paint across her hair, neck, and left eye to lighten those areas. Switch between burning and dodging as often as you like to produce the look you want.
Tip: While using either the Dodge or Burn tool, you can press-and-hold the Option (PC: Alt) key to temporarily switch to the other tool.
Step Five:
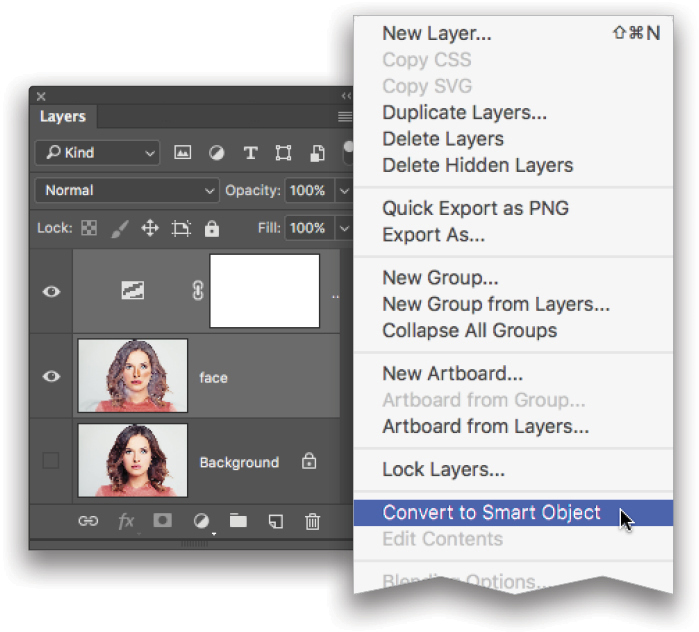
In the Layers panel, Shift-click the adjustment layer so
it and the face layer are active. From the Layers panel flyout menu (circled), choose Convert to Smart Object. Photoshop sandwiches both layers into a smart object.
Tip: If you want to edit your original layers later, double-click the smart object thumbnail in the Layers panel and Photoshop opens them in a new, temporary document. Make your changes, choose File>Save (not Save As!) and close the temporary document. When you do, your changes appear back in the original document.
Step Six:
Grab the Magic Wand from the Toolbar (circled), click any solid black area, and then choose Select>Similar. Photoshop grabs all the black pixels in the smart object.
Step Seven:
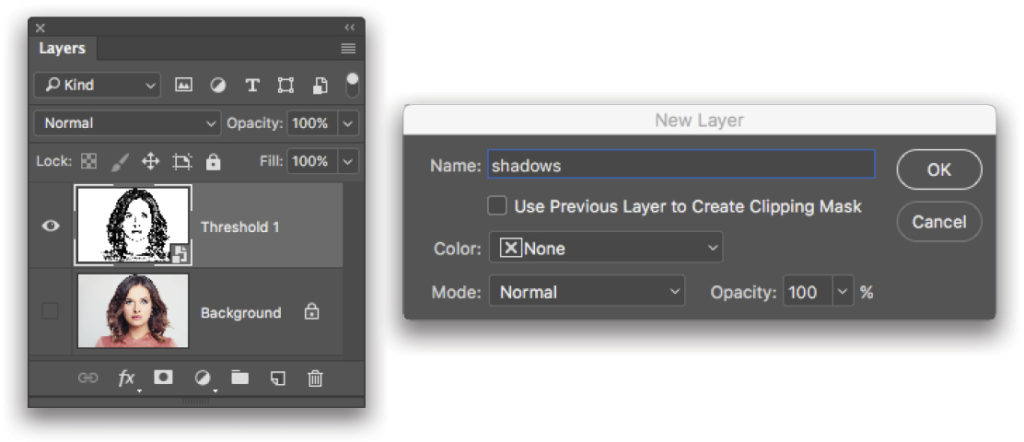
Option-click (PC: Alt-click) the half-black/half-white circle at the bottom of the Layers panel (circled) and choose Solid Color. In the resulting dialog, enter “shadows” in the Name field and click OK.
Step Eight:
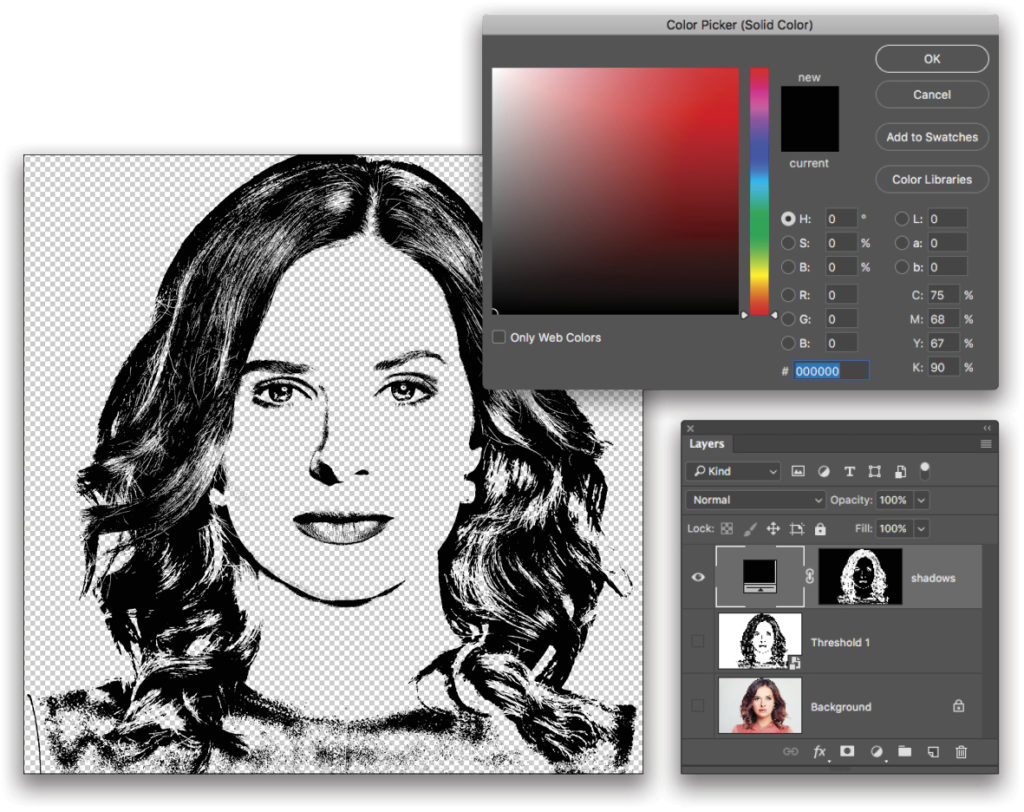
Choose black from the Color Picker that opens and click OK. This puts all the black onto a single layer with transparency so the colored background you’ll add in the last step will be visible beneath them. Click the Eye icon for both the Threshold layer and the original photo layer to turn off their visibility. Now you’re ready to start adding color!
Step Nine:
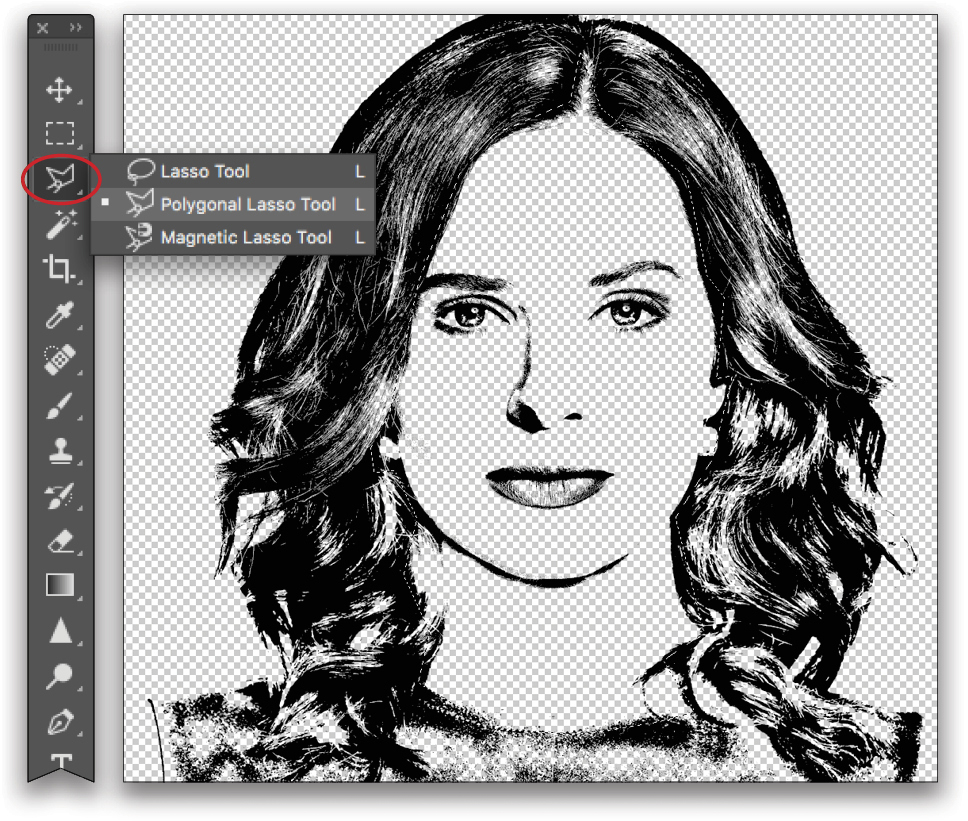
Grab the Polygonal Lasso tool (circled) and draw a blocky selection around the model’s face and neck. To do that, click once where you want the selection to start (anywhere just inside the hairline, which is circled here) and then click again each time you need to change angles. Don’t worry about being precise; the point is to make it blocky. When you’re finished, point your cursor at the first click you made, and when you see a degree symbol appear next to the cursor, click once to close the selection.
Step 10:
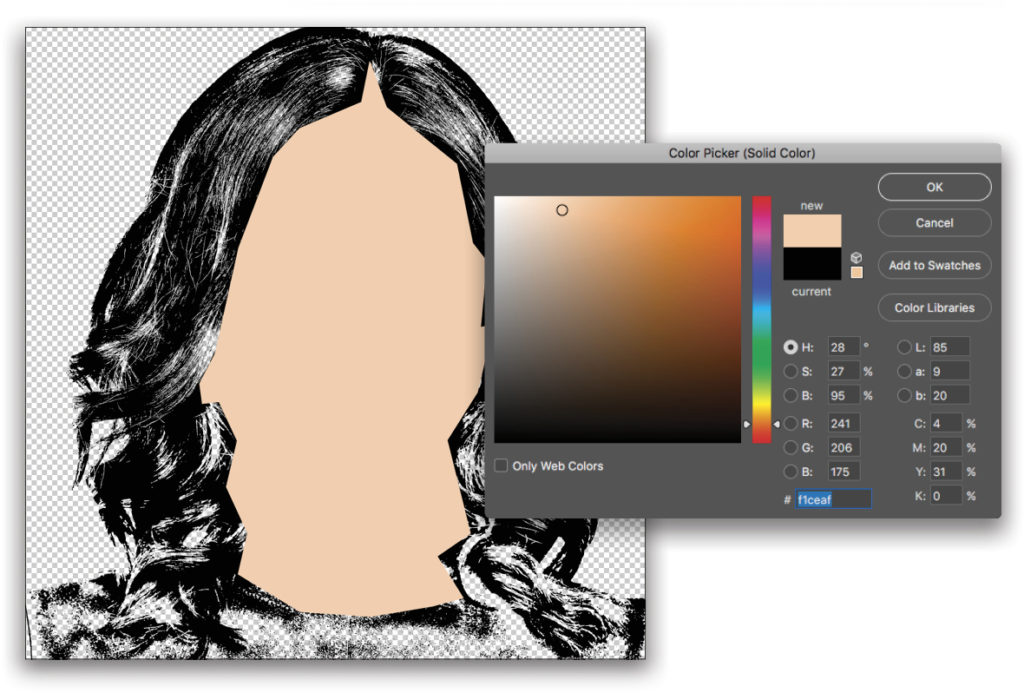
Option-click (PC: Alt-click) the half-black/half-white circle at the bottom of the Layers panel and choose Solid Color. Enter “skin” in the name field of the dialog that opens and click OK. In the Color Picker that opens, pick a peachy color (#f1ceaf) and click OK.
Step 11:
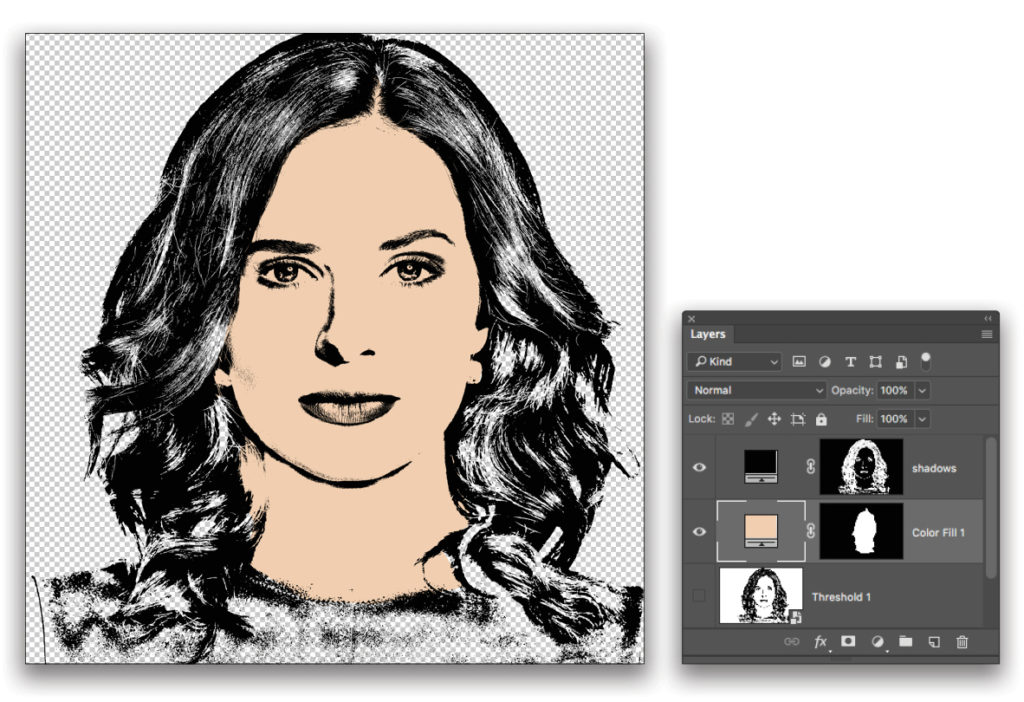
Drag the new Color Fill layer below the shadows layer in the Layers panel.
Step 12:
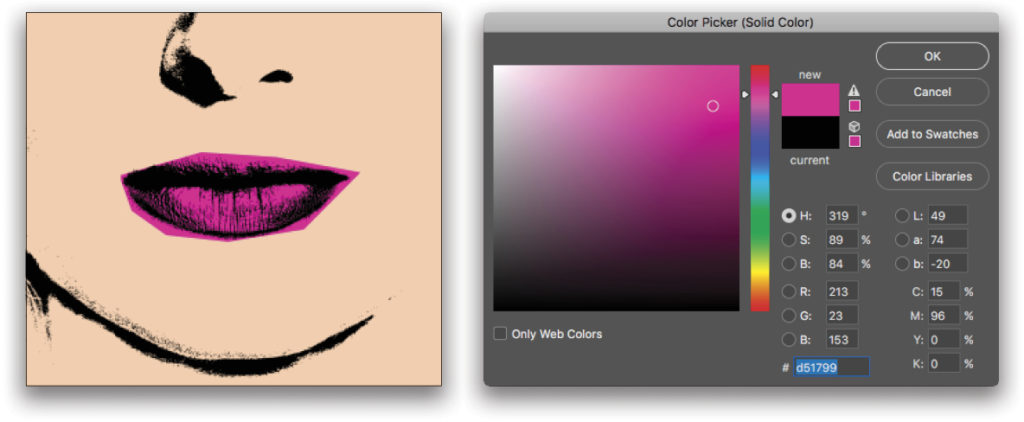
Use the Polygonal Lasso tool to create a selection around the lips. Remember, you want to make the colored areas blocky, so don’t be afraid to make your selection go outside her lips. Option-click (PC: Alt-click) the half-black/half-white icon at the bottom of the Layers panel and choose Solid Color. In the resulting dialog, enter “lips” in the Name field, and click OK. In the Color Picker that opens, pick a hot pink (#d51799), and click OK.
Step 13:
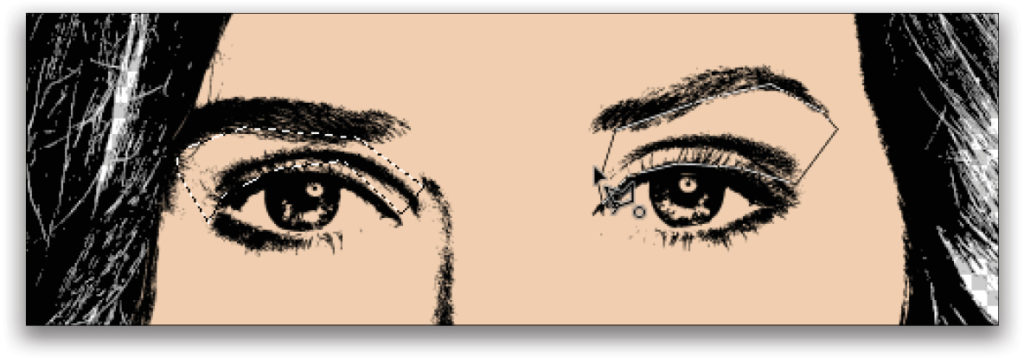
Use the Polygonal Lasso tool to create a selection around the lid of one eye in order to add eye shadow. Close the selection, mouse over to the other eye, and Shift-click to put the tool into Add to Selection mode. Release the Shift key and then keep clicking to select the right eyelid.
Step 14:
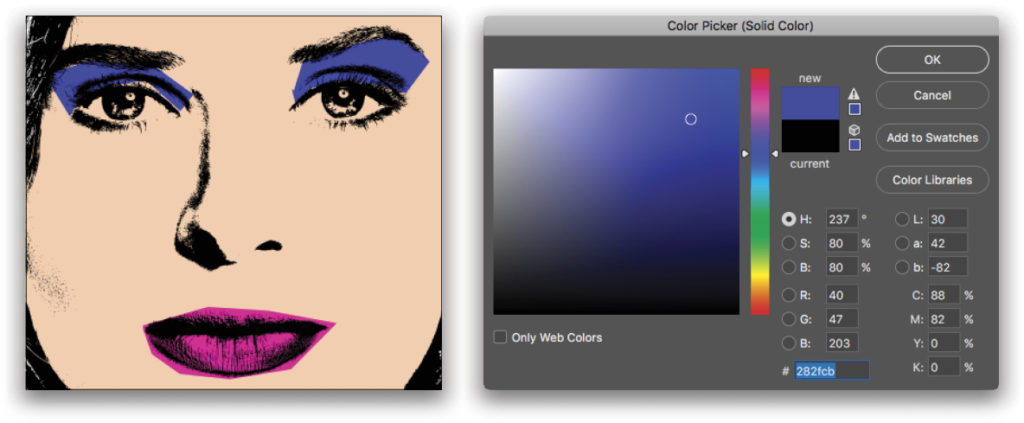
With both eyelids selected, Option-click (PC: Alt-click) the half-black/half-white circle at the bottom of the Layers panel and choose Solid Color. Enter “eye shadow” into the name field, and in the Color Picker, choose a bright blue (#282fcb).
Step 15:
Repeat the previous steps to colorize each iris, hair, and blouse.
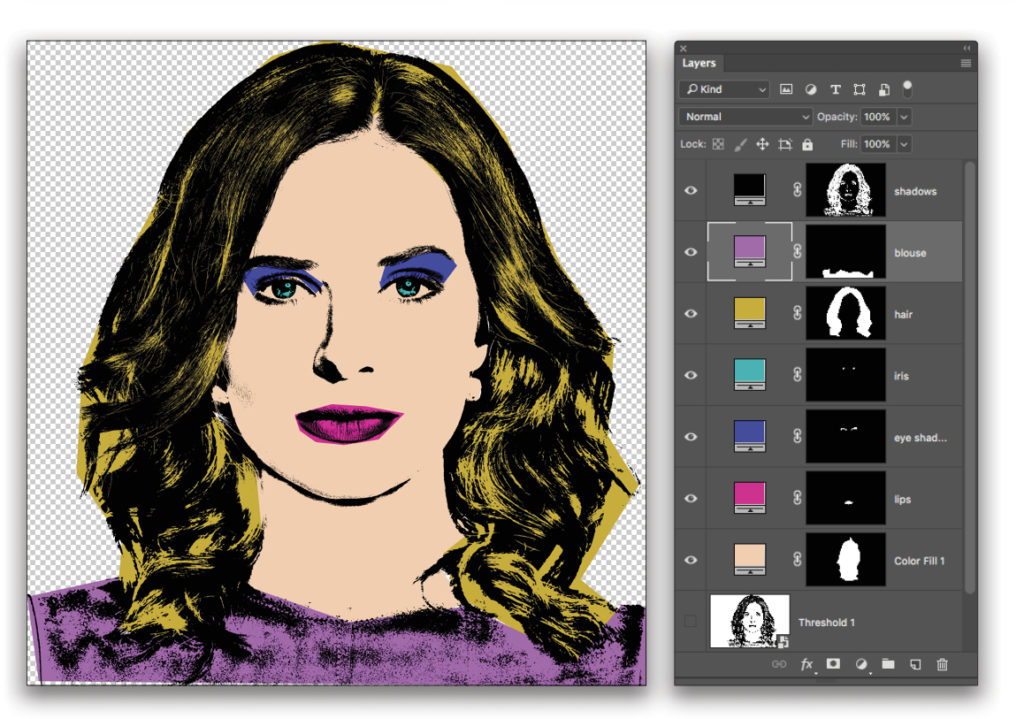
Step 16:
Create a new background for the whole shebang by adding yet another Solid Color fill layer named “background.” Choose a bright color from the Color Picker that opens, and then drag the layer below the skin layer so it becomes the background of the whole piece.
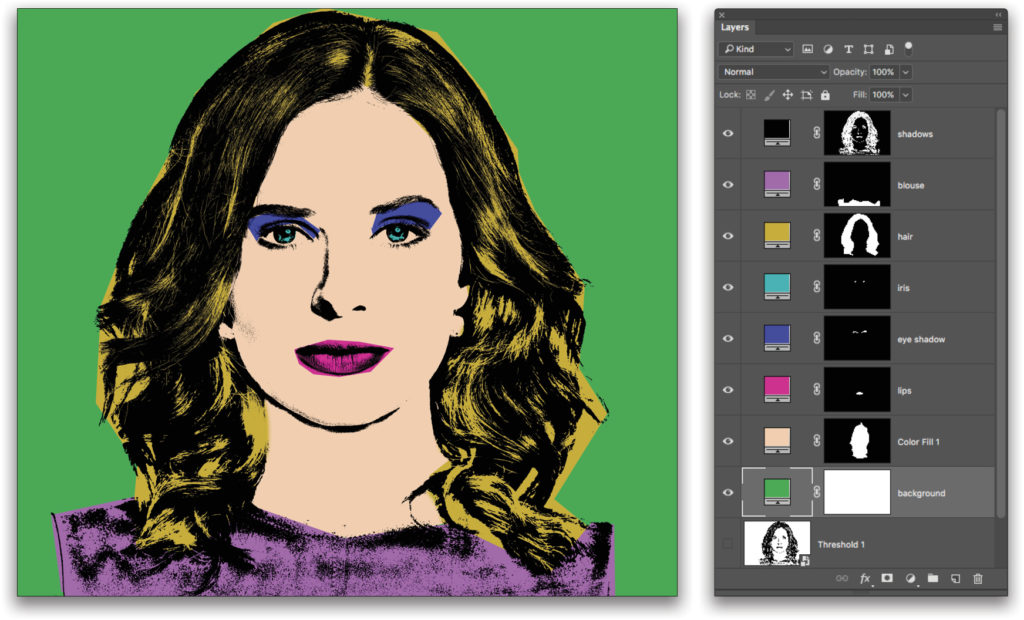
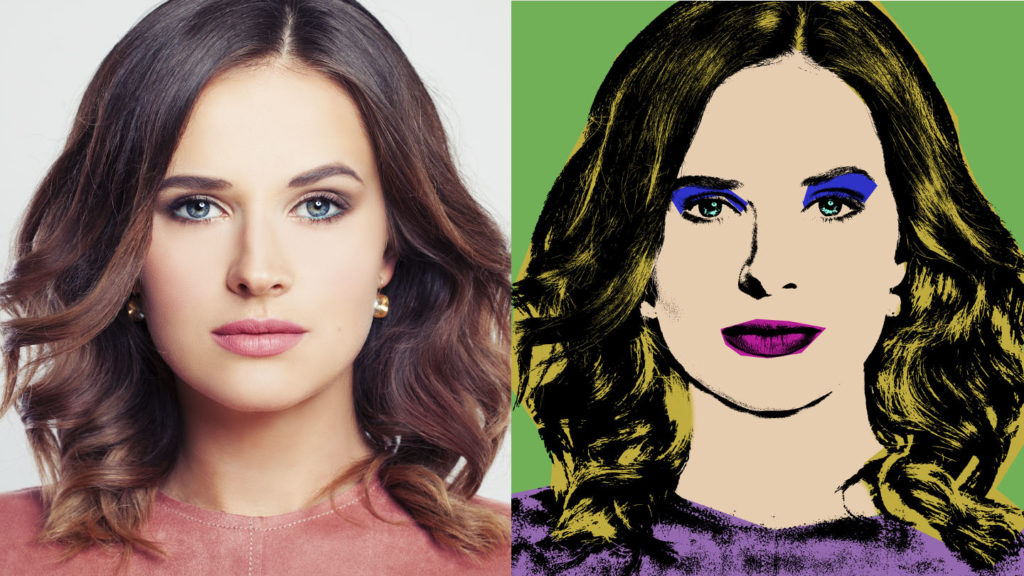
As you can see, this technique is eye-catching and unique. It’s incredibly flexible, too. To change any of the colors, simply double-click a Solid Color fill layer and choose a new color from the Color Picker that opens. To reveal or conceal more color on any layers, activate that layer’s mask (the thumbnail to the right of the colored square in the Layers panel). Use the Polygonal Lasso to select something and choose Edit>Fill. To reveal more color, set the Contents drop-down menu to White and click OK. To conceal color, set the Contents menu to Black (when you’re editing a layer mask, black conceals and white reveals).
Bonus Technique
For the adventurous among you, try making five more, different-colored versions of this portrait in order to create two rows of three portraits. Here’s how to do it:
Step One:
Click the top Solid Color fill layer (including the shadows layer), Shift-click the bottom Solid Color fill layer, and press Command-G (PC: Ctrl-G) to stuff them into a group. Duplicate the group five times by pressing Command-J (PC: Ctrl-J).
Step Two:
Because you used Solid Color fill layers, changing the colors used in each group is as simple as expanding the group and double-clicking a layer’s thumbnail to reopen the Color Picker. Because the duplicated layer group is positioned on top of the original, turn the visibility of each group off or on while you’re changing colors.
Step Three:
Once you’ve created several versions of the portrait, you’ll need to rasterize the background Solid Color fill layer for each group before you enlarge the canvas, otherwise, the fill layer will fill the entire canvas. So Right-click on the background Solid Color layer in each group and choose Rasterize Layer.
Step Four:
Now you can enlarge your canvas (Image>Canvas Size). Set the Width to 300% and the Height to 200%, and click OK. Now use the Move tool (V) to position the layer groups next to one another.
Until next time, may the creative force be with you all!
This article originally published in the April, 2018 issue of Photoshop User magazine.


