I’m baaack! I’m so thrilled to be writing another article here in Photoshop User, and you guys are in for a treat this issue. I have a super-simple and quick way to add customized punch and contrast to your subject’s eyes. The awesome thing about this method is that it pulls directly from the eyes in the photograph to create an intricate dimension like you’ve never seen. And did I mention it’s super easy?
Most of the time when people accentuate eyes using Photoshop, all they do is broadly brighten the color in the iris. If you’re a little more advanced, you know to lighten only the area on the side of the iris opposite the catchlight. But what if you could get even more specific and intricate? In this article, we’re going to power-boost your eye-retouching skills. I may even include something at the end of the article to sweeten the pot as a thank you for being such a loyal reader! So keep reading; I can guarantee you won’t be disappointed.
Note: Before we start, I’d be remiss if I didn’t tell you that this technique works best on eyes that have native contrast in them to begin with.
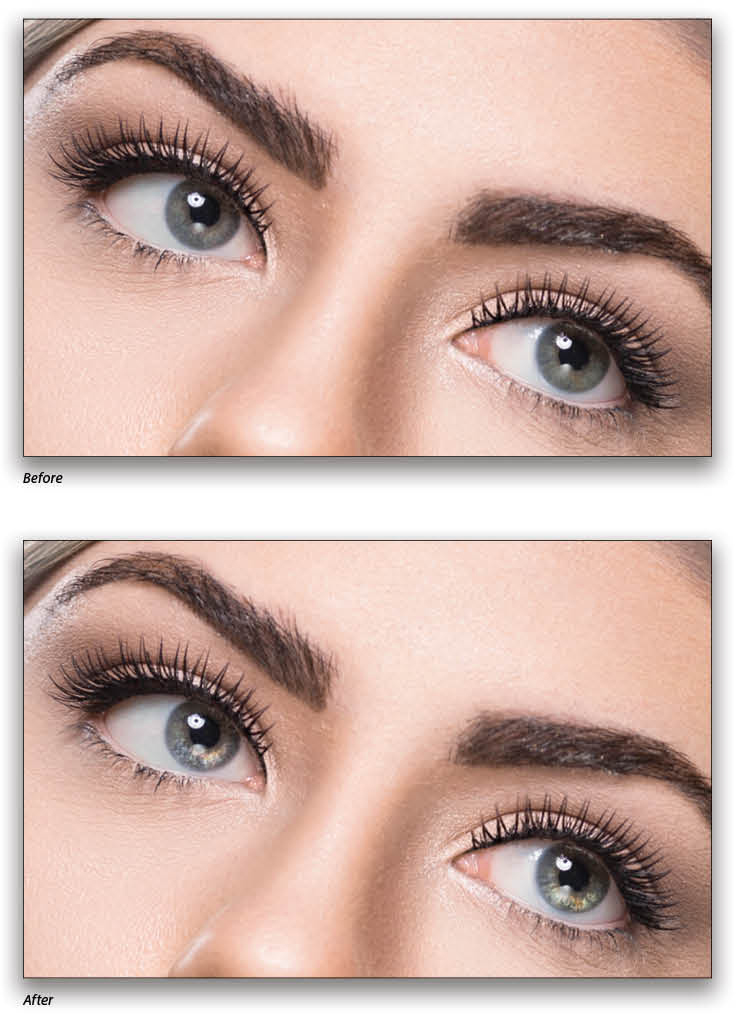
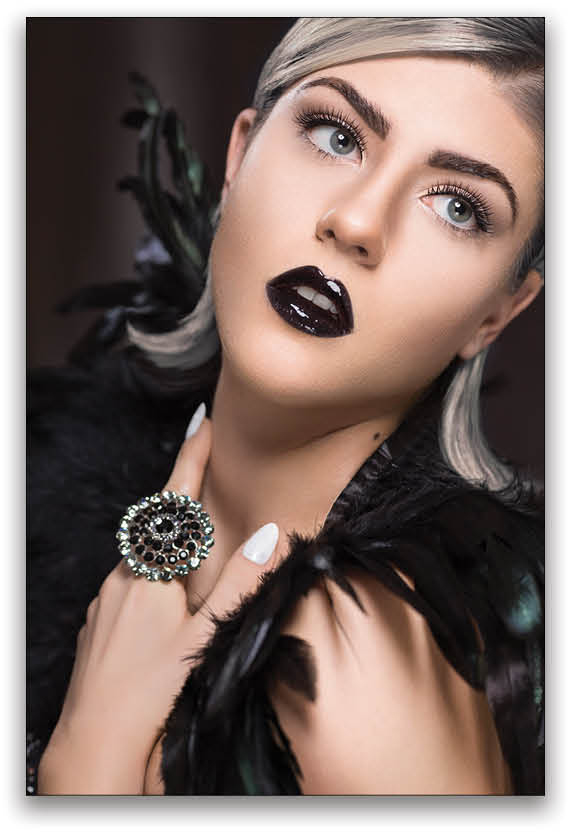
Step One: Here’s our preliminary image and, as you can see, the eyes need a little bit of help. (KelbyOne members can click here to download this image and follow along.)
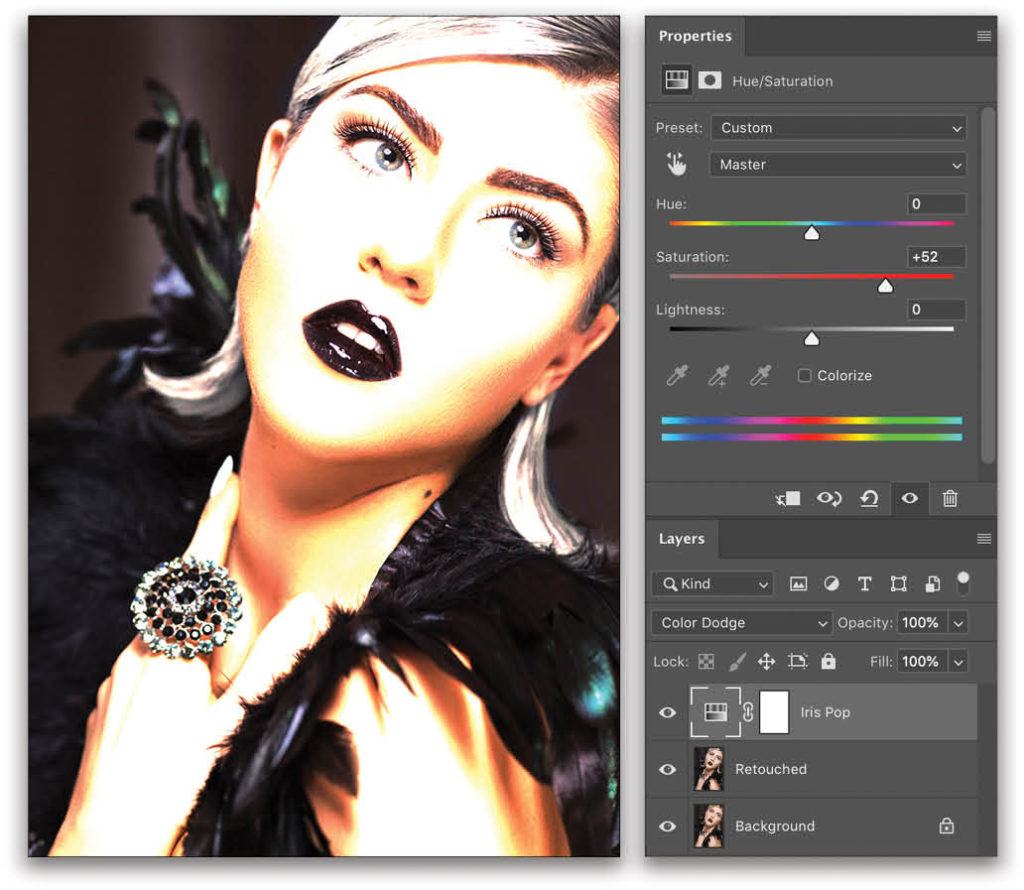
Step Two: The first thing we’re going to do is create an adjustment layer. There are a few different adjustment layers you could use (such as Brightness/Contrast, Curves, or Levels) but my go-to adjustment layer is Hue/Saturation. Open the Adjustments panel (Window>Adjustments) and click on the Hue/Saturation icon (the first icon in the second row).

Step Three: Since we follow best practices as Photoshop users (well, sometimes), we’ll give our layer a meaningful name. Double-click the layer’s name in the Layers panel, and rename it “Iris Pop.” Next, change the blend mode of the layer from Normal to Color Dodge. And finally, change the Saturation of this adjustment layer from 0 to +52 in the Properties panel (Window>Properties). Here’s what your image should look like.
Step Four: Here’s where things get interesting. We want to isolate the area of this effect to the eyes. To do so, you might think that we’re going to invert the mask from white to black and then paint in the effect. Sadly, you’re mistaken. If you’ve read any of my other articles, you know that I’d rather go to the dentist then do freehand masking so, whenever possible, I rely on Photoshop to do most of the work for me.
Double-click to the right of the Iris Pop layer’s name in the Layers panel to bring up the Layer Style dialog. (Tip: If you prefer using the top menus to access features, you can get to the Layer Style dialog by going to Layer>Layer Style>Blending Options.)
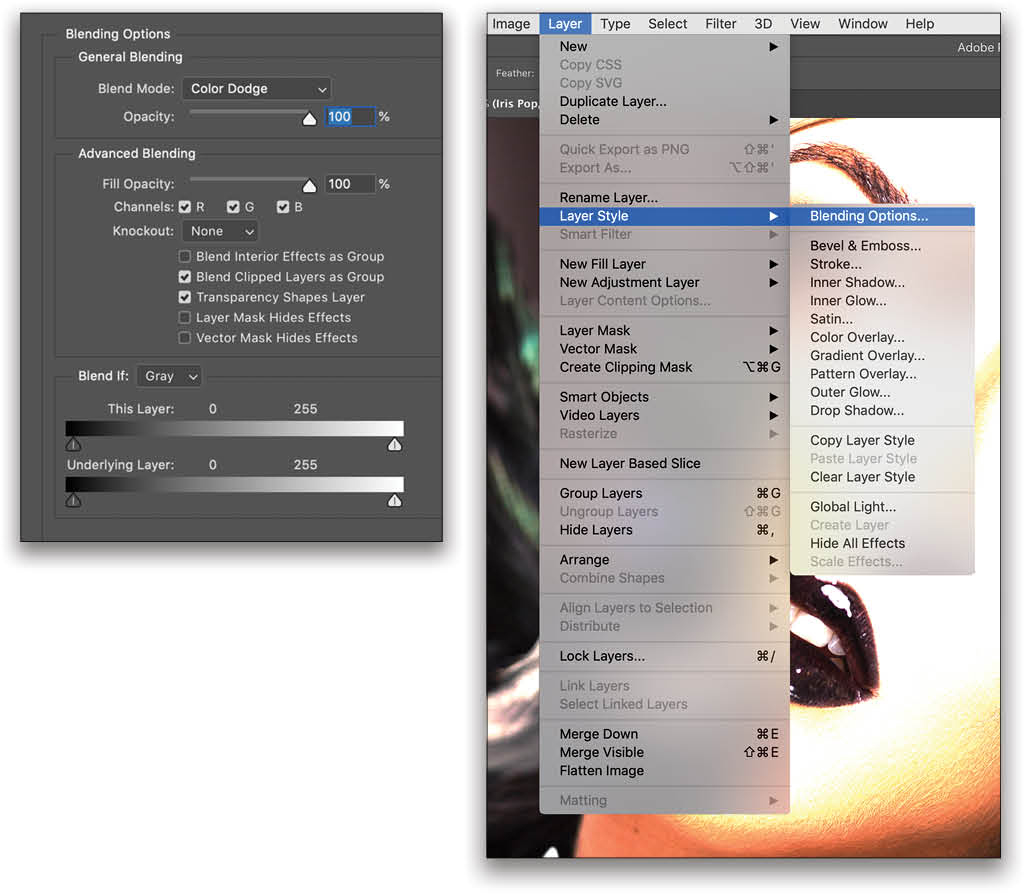
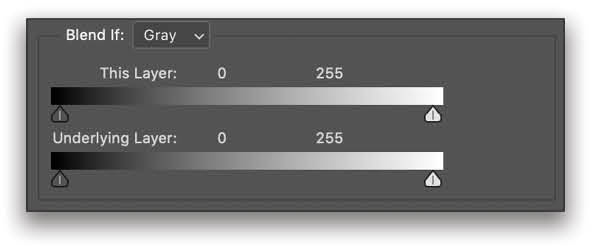
Step Five: Now comes the fun part. We want to use the Blend If sliders at the bottom of the Layer Style dialog to isolate the lightest colors in the model’s irises. The way these two sliders work is that they assign a brightness/darkness value to every pixel in your layer and put them on a linear graph from darkest tones (on the left) to brightest tones (on the right). Because our adjustment layer (the Hue/Saturation Iris Pop layer) doesn’t actually have any pixels on it (it just modifies pixels on the layers below it), we want to use the Underlying Layer sliders, which in this case targets the image layer.
Step Six: Now, drag the dark and white sliders on the Underlying Layer toward each other. Again, we’re trying to isolate the brightest areas of the iris. I pulled my slider arrows to 101 and 133. As you can see, the Color Dodge effect has been severely constricted in where it’s visible on the image layer.
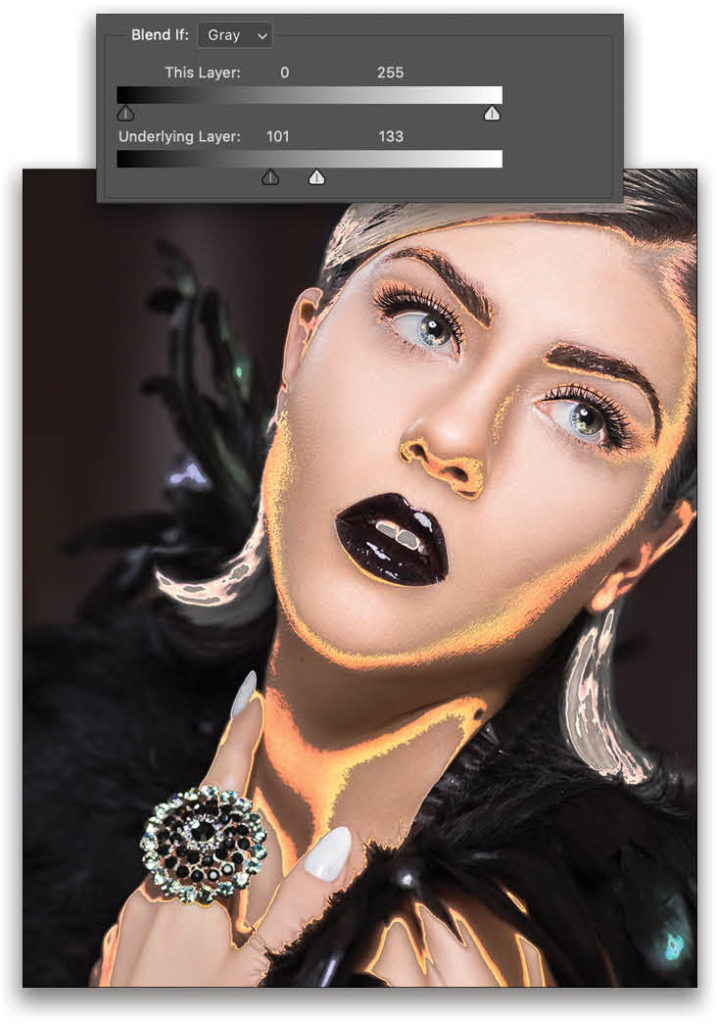
Step Seven: One problem is glaring us in the face, though: those edges. Yikes! Let’s fix that. If you hold down the Option (PC: Alt) key and click on one of the sliders below Underlying Layer in the Layer Style dialog, the slider will split in half. Now you can position each half of the slider to blur the edge of the effect from where it’s completely visible to where it’s no longer invisible (very similar to feathering the edges of a mask). Here are my slider values after I split both sliders: 87/109 and 152/168. Click OK, and check out how intricate these striations look within the iris!

Step Eight: We’re getting close to the end, but we have a few more steps before we’re finished. We need to think about how we’re going to have this cool effect only show up on the irises and not on the rest of the image. So even though Photoshop has done most of the work for us, we’re at the point where we have to do some manual masking.
Start by clicking on the Iris Pop layer mask’s thumbnail in the Layers panel to make it active (the mask thumbnail should have white lines around each of its corners). Press Command-I (PC: Ctrl-I) to invert the mask. The mask will turn black, meaning none of the Hue/Saturation effect will be visible on the image.
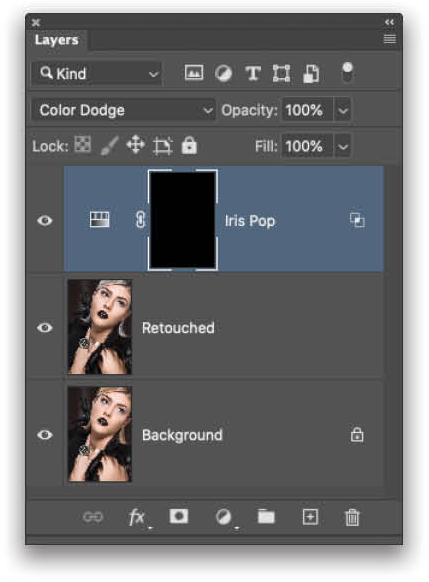
Step Nine: Our last step is painting in the effect. So grab the Brush tool (B) and get painting! Make sure you’re painting with a soft round brush tip set to white (press D), and change the Opacity of the Brush tool from 100% to 30% by tapping the 3 key on your keyboard. Use the Bracket keys on your keyboard to quickly change the size of your brush so it’s about the width of the iris. Paint in the effect on the opposite side of the iris from where the catchlight is (the lower-right third of each iris). Here’s what the effect and its mask look like now.

Step 10: If you feel the effect is still too strong, you can decrease its intensity by lowering the Opacity of the Iris Pop layer in the Layers panel. Personally, I like it punchy, so I’ll leave it at 100% Opacity.
In closing, I hope you start to realize the true power that lies within the Layer Style dialog and the Blend If sliders. It allows you to create insanely intricate masks with almost no work from you!
Okay, okay, I know I promised you some goodies at the end of the article, so here they are. As a KelbyOne member, you can watch this technique in action in Lesson 7 of my Electrifying Eyes course. And finally, I’ve included an action which will set up the Hue/Saturation adjustment layer; all you have to do is tweak the Blend If sliders each time you use the action to accurately isolate the striations in each model’s eyes. You can download this action for free by clicking here, and if you want to download more of my free actions, check out SharkPixel.com. After you download an action, simply double-click the file to load it into Photoshop’s Actions panel (Window>Actions).
This article originally published in the May, 2020 issue of Photoshop User magazine.


