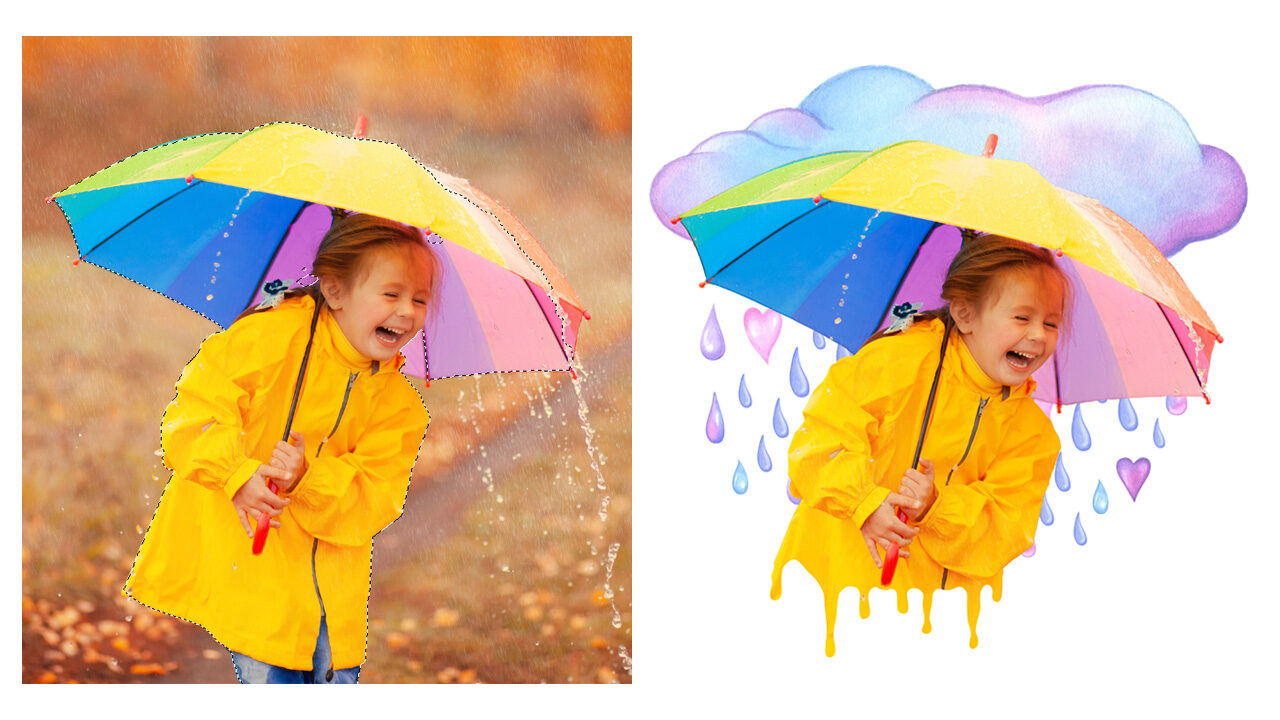
Let creativity rain down upon you by using a downloadable vector shape as a drippy photo frame!In this tutorial, you’ll learn how to isolate a subject onto a new layer, add art to your document, and then use the drip shape inside a layer mask. Read on for some fantasy art fun!
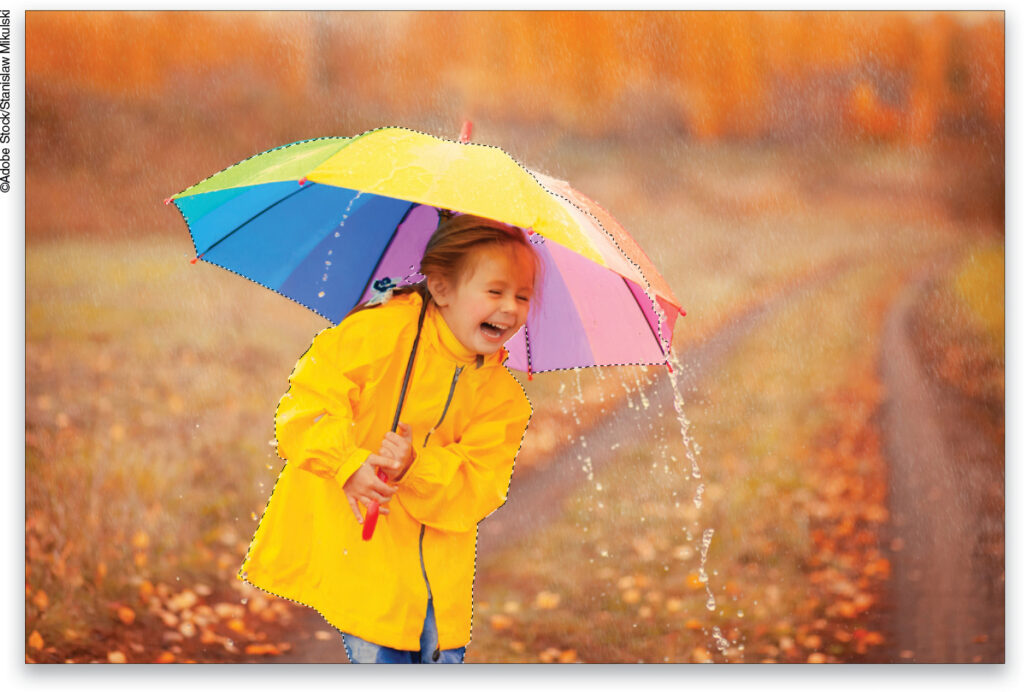
STEP ONE: Open a photo in Photoshop. (If you’re starting in Lightroom, select a thumbnail in the Library module and then choose Photo>Edit In>Adobe Photoshop 2021.) Choose Select>Subject and Photoshop places marching ants around the main subject in your image.
If you’d like to download the low-res watermarked version of this image to follow along, click this link, log in with your Adobe ID, and click the Save to Library button. Right-click the image in the Libraries panel (Window>Libraries) and choose Edit to open it in Photoshop.
To make it easier to work with the image, increase the resolution of the practice file. (We normally don’t recommend enlarging images, but this is only for practice purposes.) Go to Image>Image Size, turn on the Resample checkbox, select Preserve Details 2.0 from the Resample drop-down menu, set the Width to 3,000 pixels, and click OK. Then go to Select>Subject as described above.
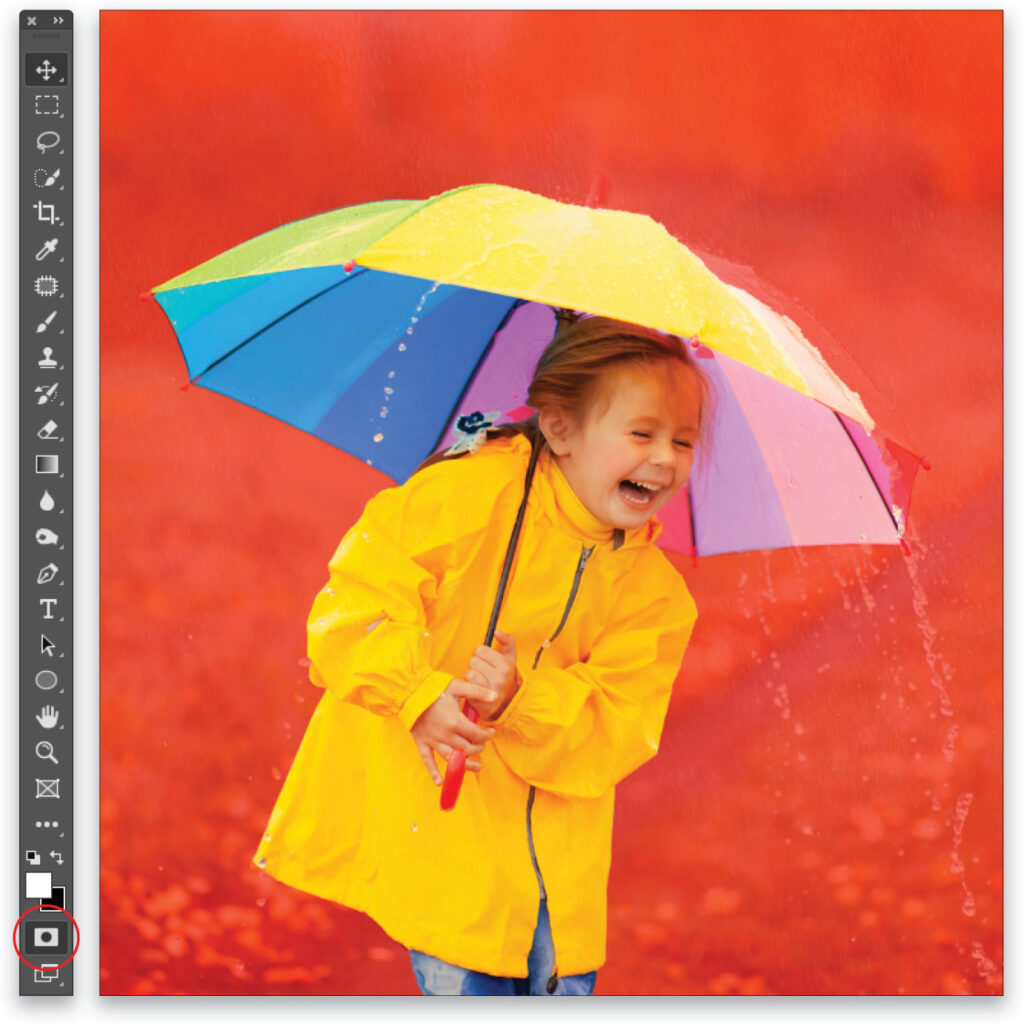
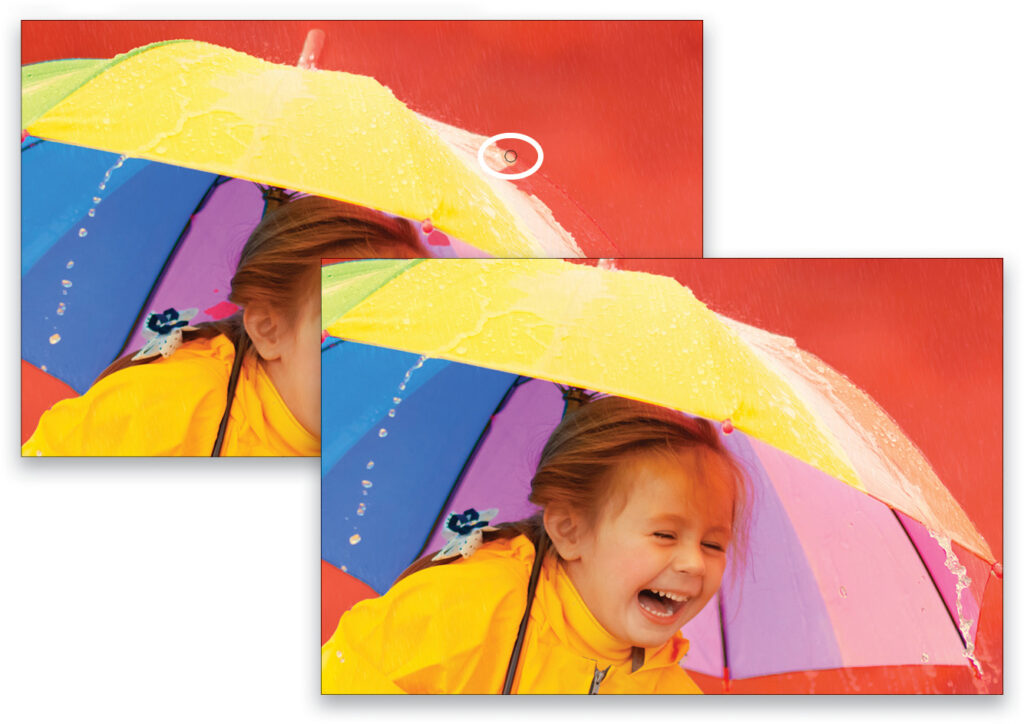
STEP TWO: There are many ways to clean up a selection, but today let’s use Quick Mask mode. Click its icon near the bottom of the Toolbar (circled) or press Q to turn it on. The area outside the selection becomes red and the area inside the selection is in full color. In this example, we need to add some of the umbrella to the selection, which we can do by painting across that area with a white brush. Note: If your selected subject has the red overlay, double-click the Quick Mask mode icon in the Toolbar to open the Quick Mask Options. Select Masked Areas for Color Indicates, click OK, and then re-enter Quick Mask mode.
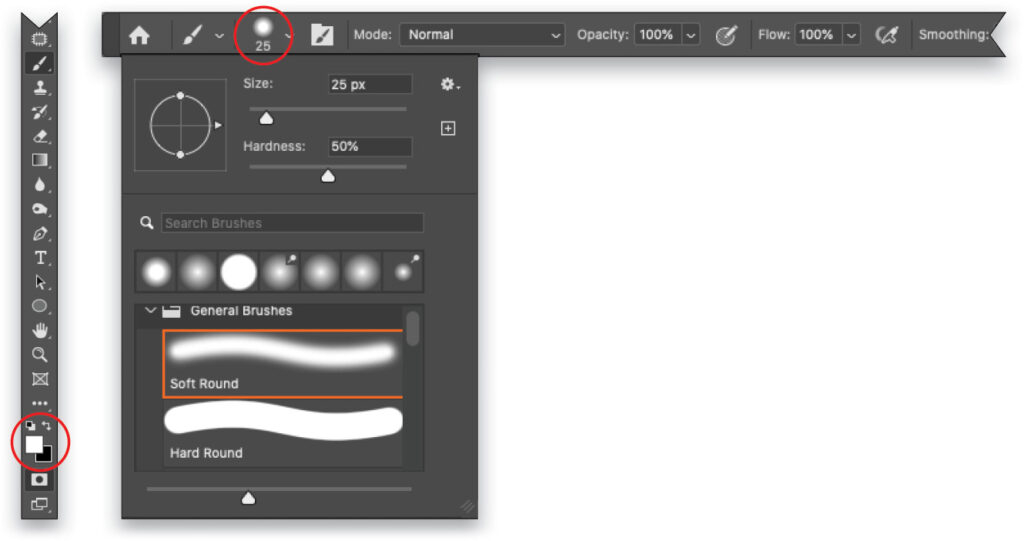
STEP THREE: Press D to set the color chips at the bottom of your Toolbar (circled) to the default colors of black and white, and press X until white hops on top. Press B to grab the regular Brush tool (also circled) and in the Options Bar, use the Brush Preset Picker (circled) to pick the Soft Round brush in the General Brushes folder. Set the Size to around 25 pixels and the Hardness to around 50%, and then make sure the Mode is set to Normal and Opacity is 100%.
STEP FOUR: Brush across any areas in red that should be included in the selection (the brush cursor is circled in white here). To remove an area from the selection, press X to flip-flop your color chips so black is on top and then paint across that area.
Tip: You can press Command-+ or – (PC: Ctrl-+ or –) to zoom in and out of the image, and then Spacebar drag to reposition it. This is helpful when you’re working on fine details.
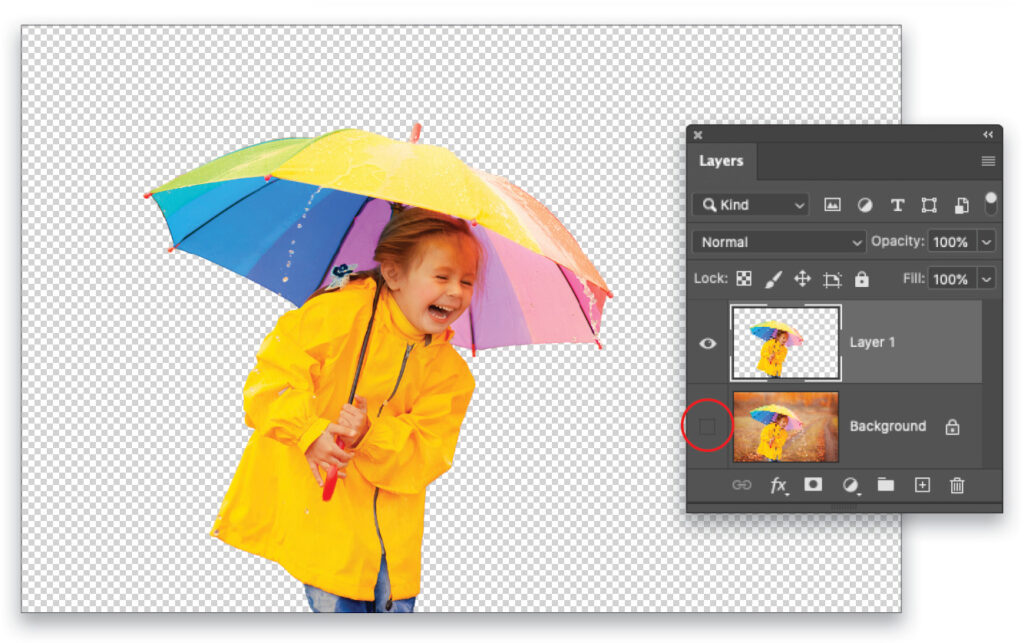
STEP FIVE: Press Q to turn off Quick Mask mode and then press Command-J (PC: Ctrl-J) to copy the selection onto a new layer. Hide the original layer by turning off its visibility Eye icon (circled) in the Layers panel.
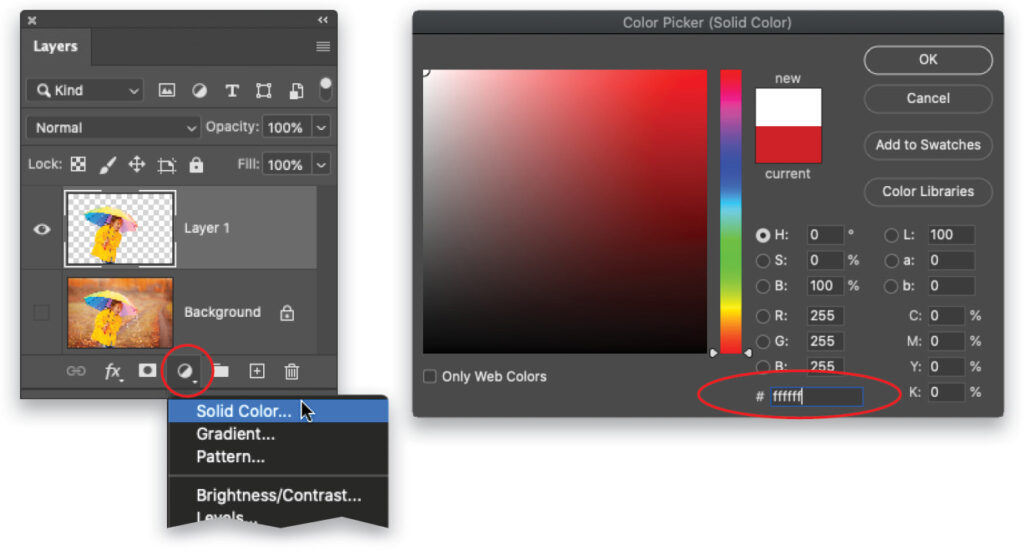
STEP SIX: Let’s add a new white background, which will make the masking we’re about to do a little easier. To do that, click the half-black/half-white icon at the bottom of the Layers panel (circled) and choose Solid Color. In the Color Picker that opens, enter FFFFFF into the # field (also circled) and click OK.
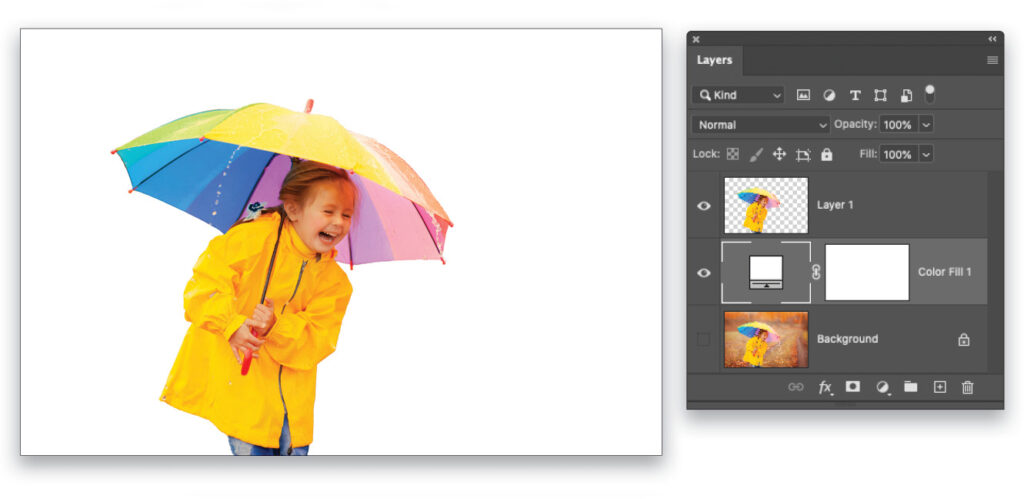
STEP SEVEN: In the Layers panel, drag the layer named Color Fill 1 beneath the subject layer.
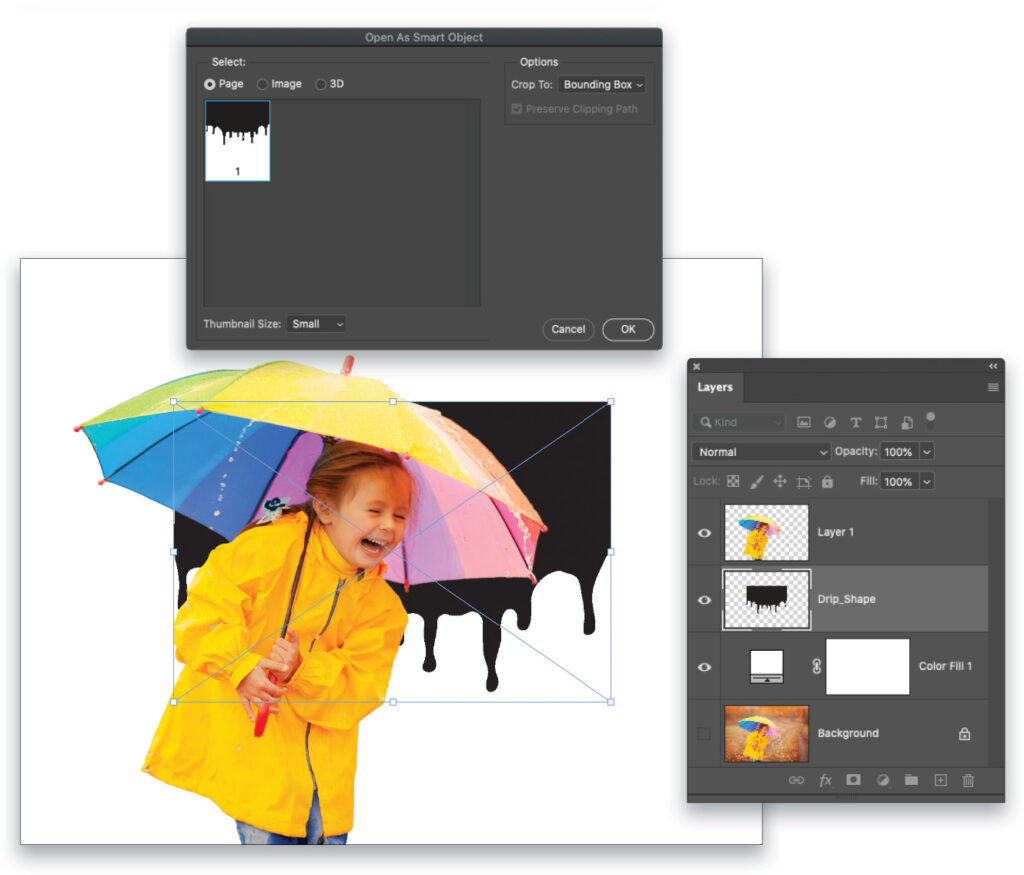
STEP EIGHT: KelbyOne members can download the Drip_Shape.ai file by clicking here. After the file has downloaded, then choose File>Place Embedded. In the dialog that opens, navigate to the file—it’s likely in your Downloads folder—and click Place. In the Open As Smart Object dialog that opens, leave everything at the default settings and click OK. Photoshop adds a Drip_Shape layer to the Layers panel.
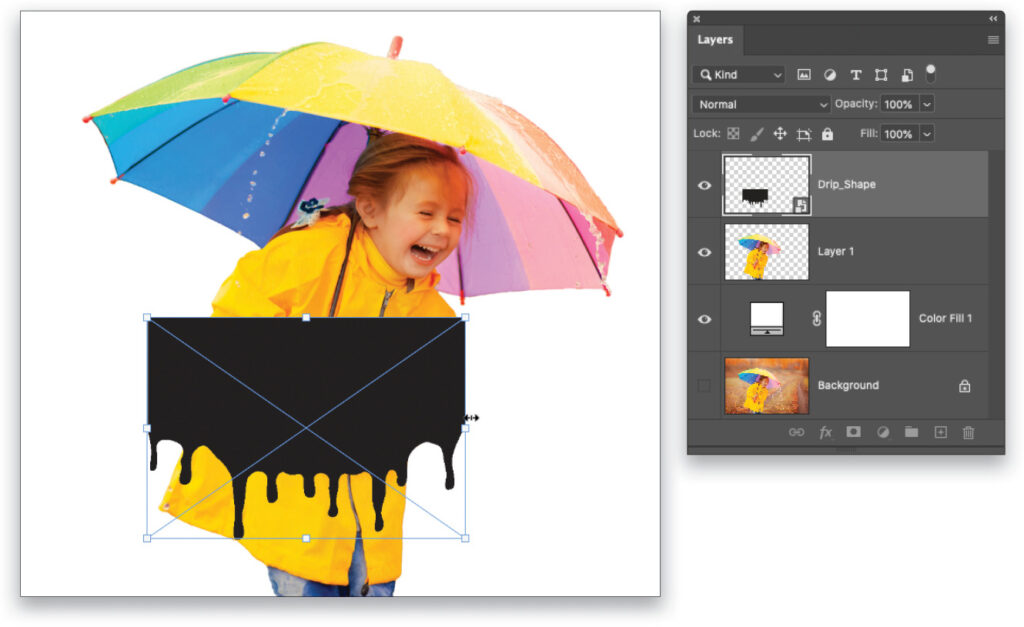
STEP NINE: In the Layers panel, drag the drip shape layer above the subject layer. Press Command-T (PC: Ctrl-T) to summon Free Transform. Click within the resizing box and drag to reposition the drip shape so it’s on her raincoat. Now use the white square handles in the middle of each side to resize the drip shape so the top-right corner is just outside her left shoulder and all but the far-left and far-right drips fit onto her raincoat (make sure no drips go past her raincoat). Press Enter or click the checkmark in the Options Bar when you’re finished.
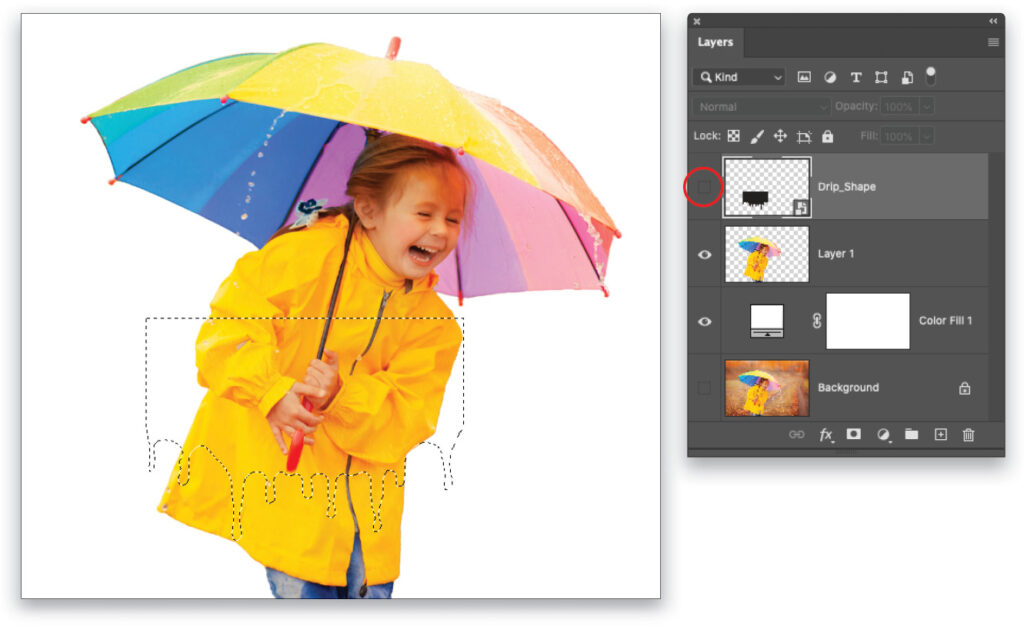
STEP 10: Command-click (PC: Ctrl-click) the Drip_Shape’s thumbnail in the Layers panel to load it as a selection and then turn off the visibility Eye icon (circled) for the Drip_Shape layer.
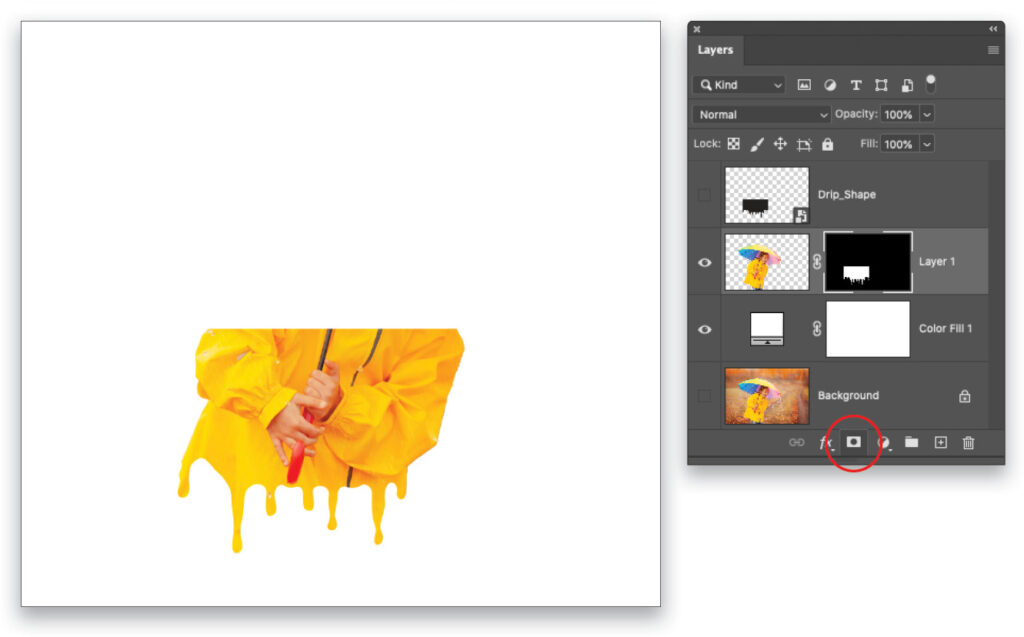
STEP 11: Click to activate the subject layer and then click the circle-within-a-square icon at the bottom of the Layers panel (circled) to add a layer mask.
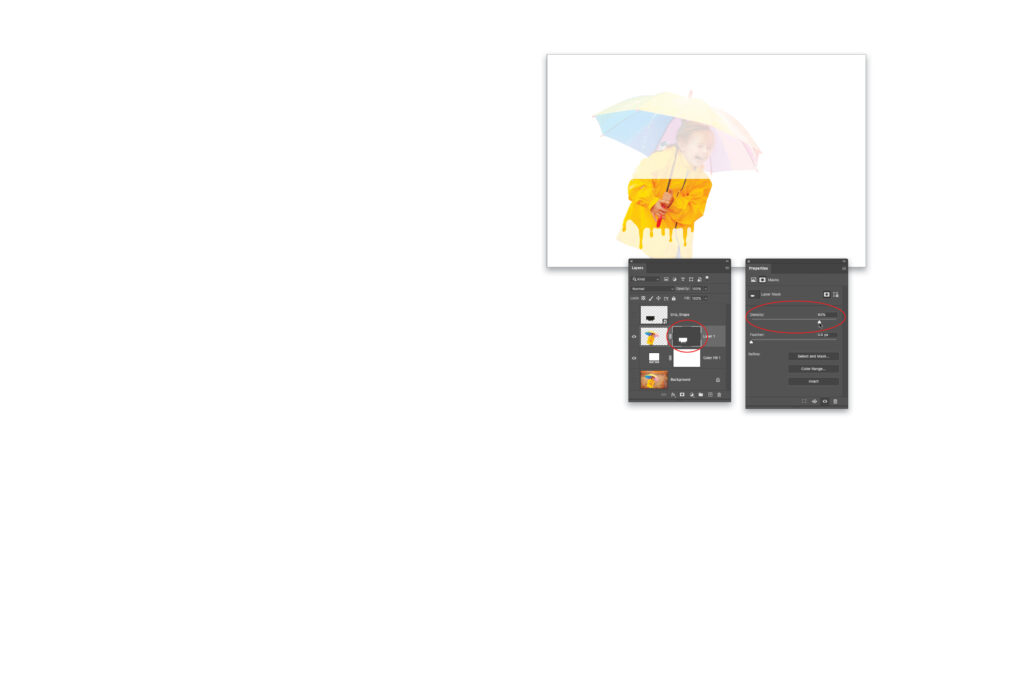
STEP 12: Now let’s edit the mask so we can see the rest of the subject. Double-click the layer mask thumbnail (circled) in the Layers panel. If this is the first time you’ve ever double-clicked a layer mask, Photoshop will ask if you want to Enter Select and Mask or View Properties. Once you make a selection, you won’t see this dialog again, but you can change this behavior anytime you want in Photoshop (PC: Edit)>Preferences>Tools. We have ours set to open the Properties panel. If you end up in the Select and Mask workspace when you double-click the layer mask, just press Esc and manually go to the Properties panel (Window>Properties). Once you’re in the Properties panel, lower the Density slider (also circled) to around 80% so you can see the rest of the subject.
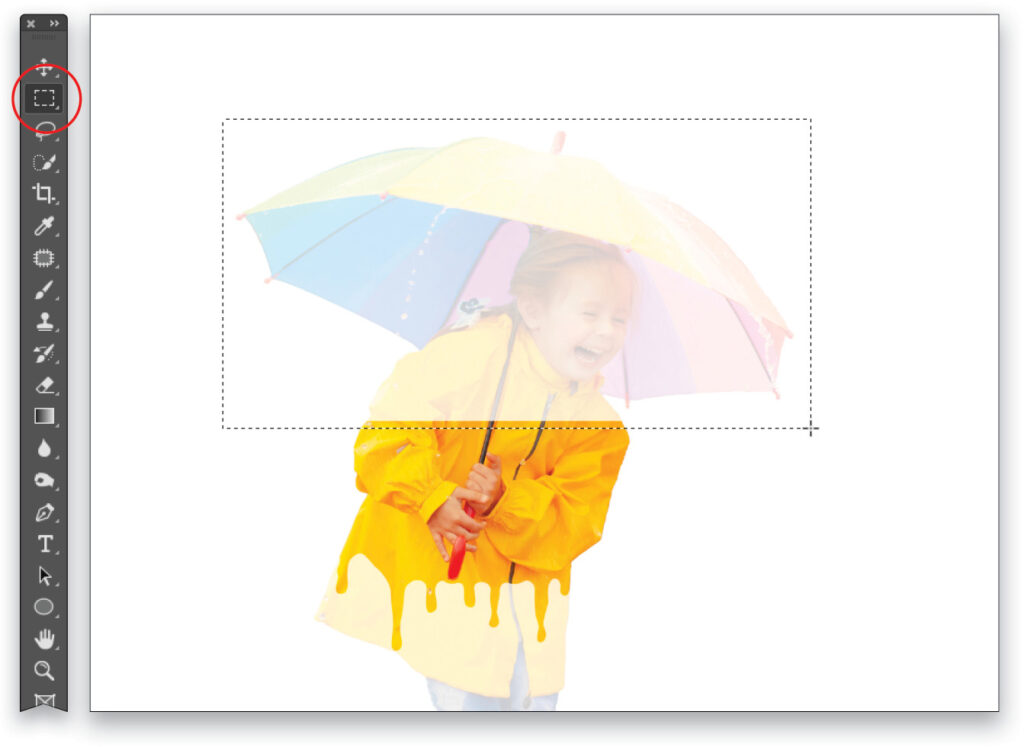
STEP 13: Press M to grab the Rectangular Marquee tool (circled) and then drag to draw a rectangular selection around the top half of the subject. Make sure it extends into the area of the raincoat that’s 100% visible.
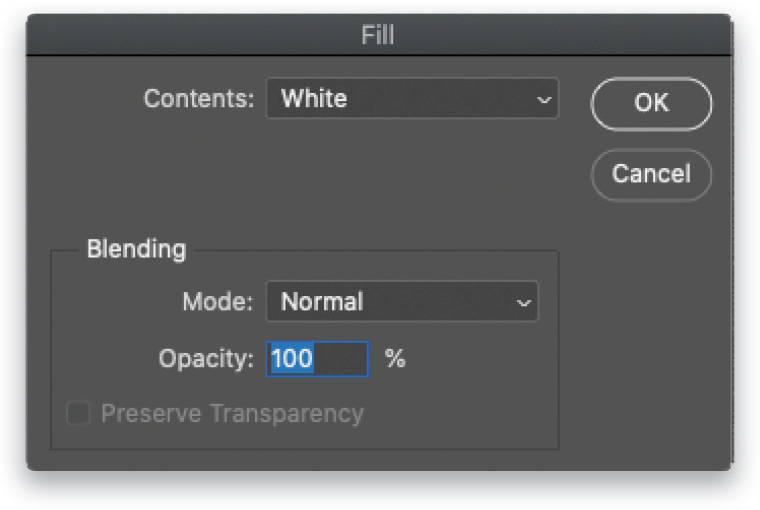
STEP 14: With the mask still active in the Layers panel, choose Edit>Fill. In the dialog that opens, choose White from the Contents drop-down menu and click OK.
STEP 15: Choose Select>Deselect to get rid of the selection. In the Properties panel, increase the Density slider back to 100%.

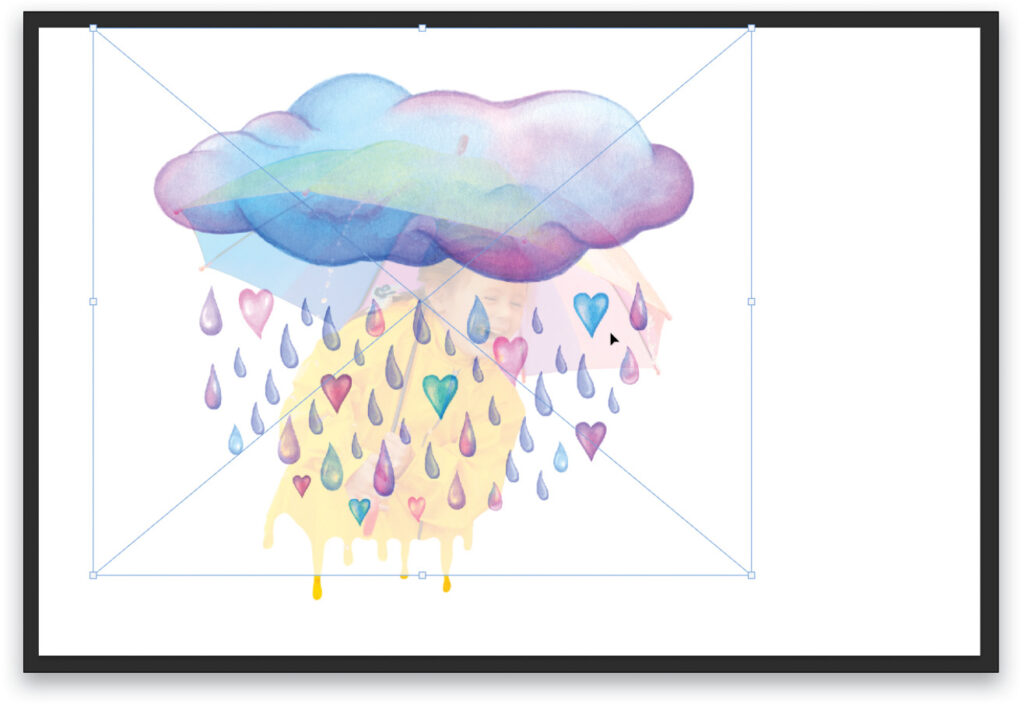
STEP 16: Now let’s add a piece of background art. Choose File>Place Embedded. In the dialog that opens, navigate to the file you want to use and click Place. If you want to use the low-res version of the Adobe Stock image that we’re using, click here and then click the Save to Library button. In Photoshop, drag the image from the Libraries panel into your working file.
When the art appears with resizing handles, lower its layer Opacity (circled) in the Layers panel a little so you can see the subject.
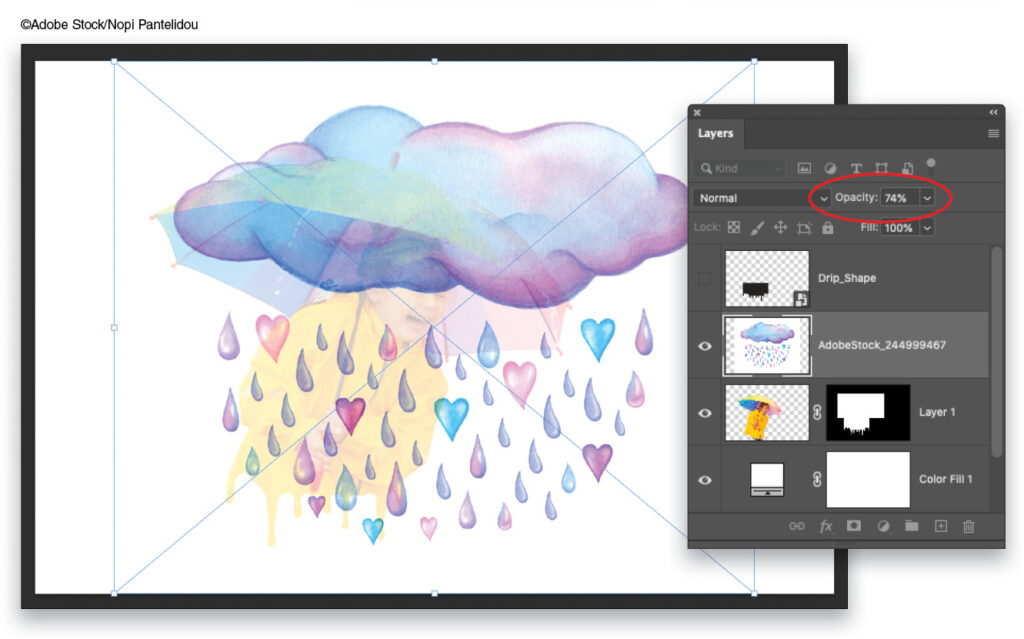
STEP 17: Resize and position the art so the raindrops don’t go past the raincoat drips. You can drag a corner handle to resize it, and drag within the box to reposition it to your liking. Press Enter to commit the transformation.
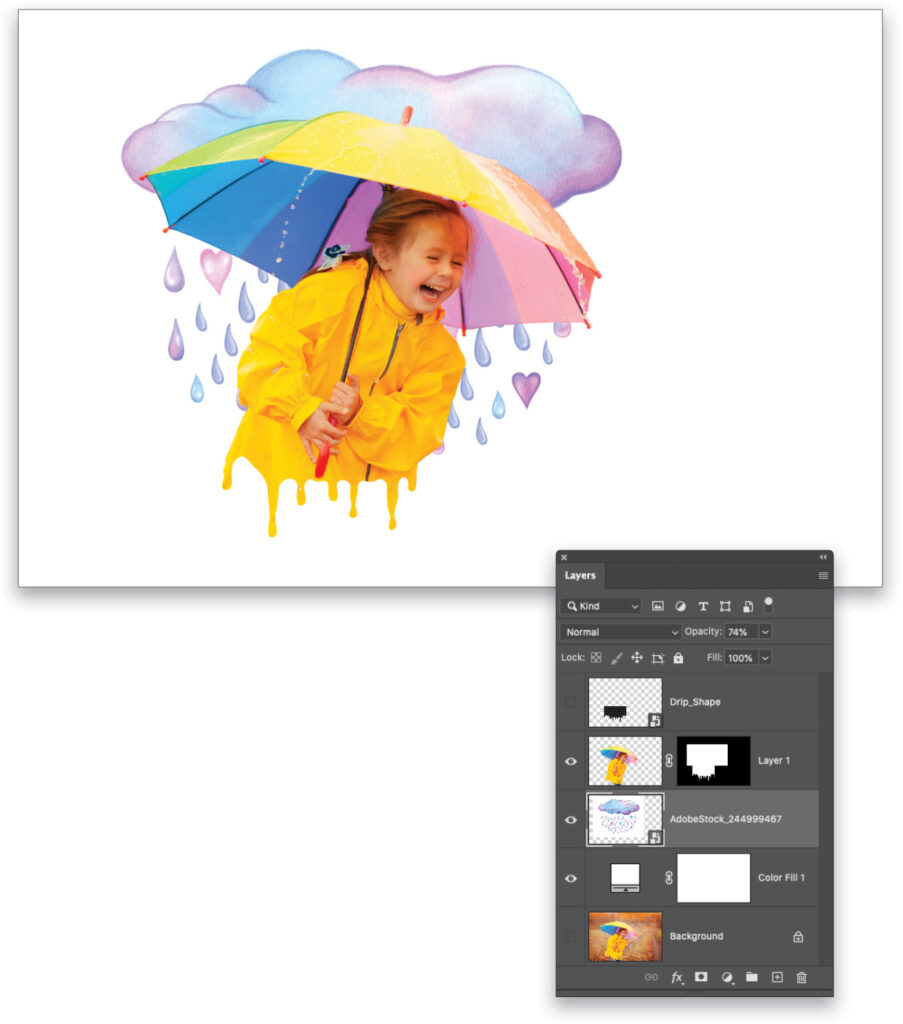
STEP 18: In the Layers panel, drag the new art layer beneath the subject layer. We opted to leave the clouds and raindrops at the lowered Opacity. Here’s the final result:
What a fun technique! There are many vector shapes for download on the Internet, though you should check the licensing to make sure a shape is legal for you to use (there are also shapes available on Adobe Stock). And of course, you can use the Pen tool (P) to draw your own! Until next time, may the creative force be with you all.

This article originally published in the September, 2021 issue of Photoshop User magazine.
About Photoshop User and KelbyOne
Photoshop User magazine comes out digitally 12 times a year and is part of KelbyOne, the leading educational resource for Photoshop, Lightroom, and photography. Pro members have access to more than 900 video courses and 100 back issues of Photoshop User. To learn more about KelbyOne, click here.


