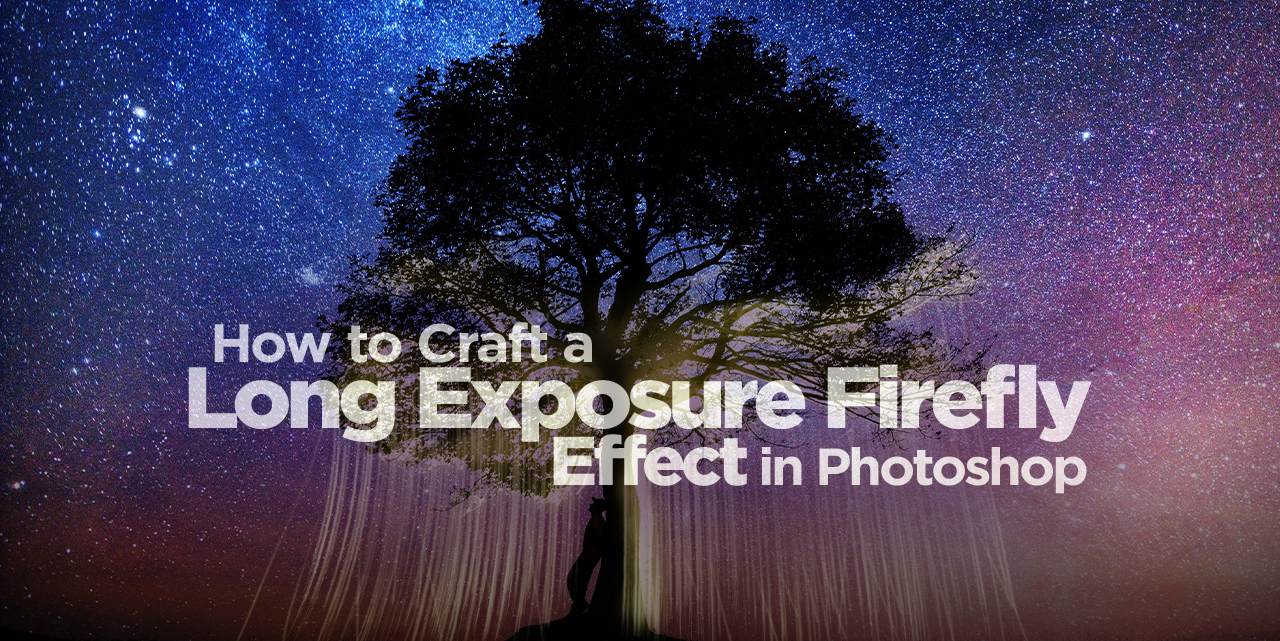
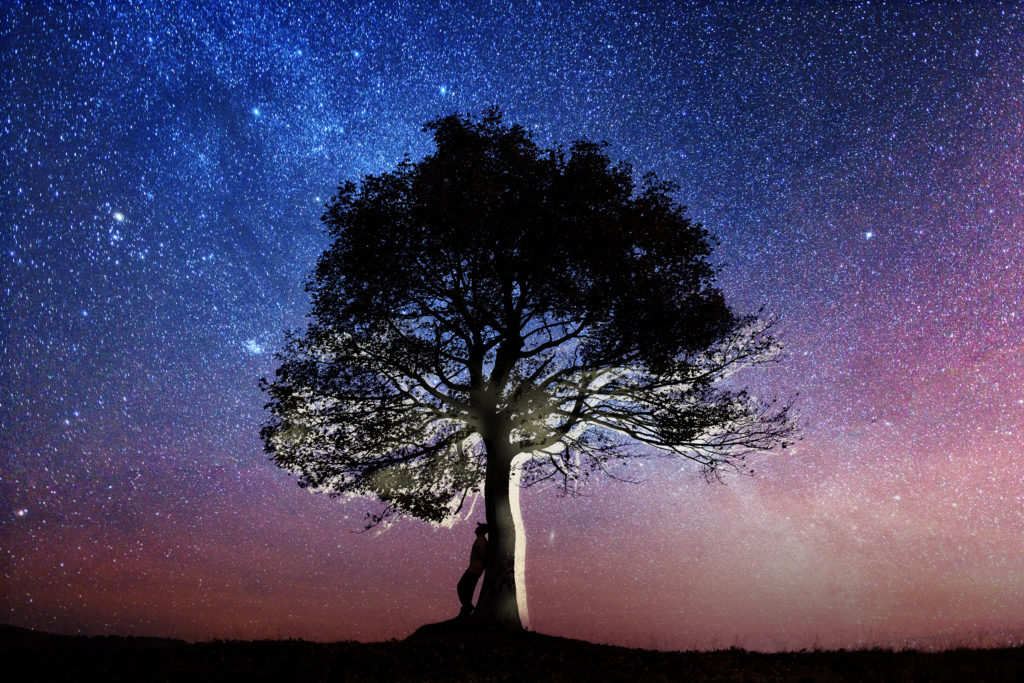
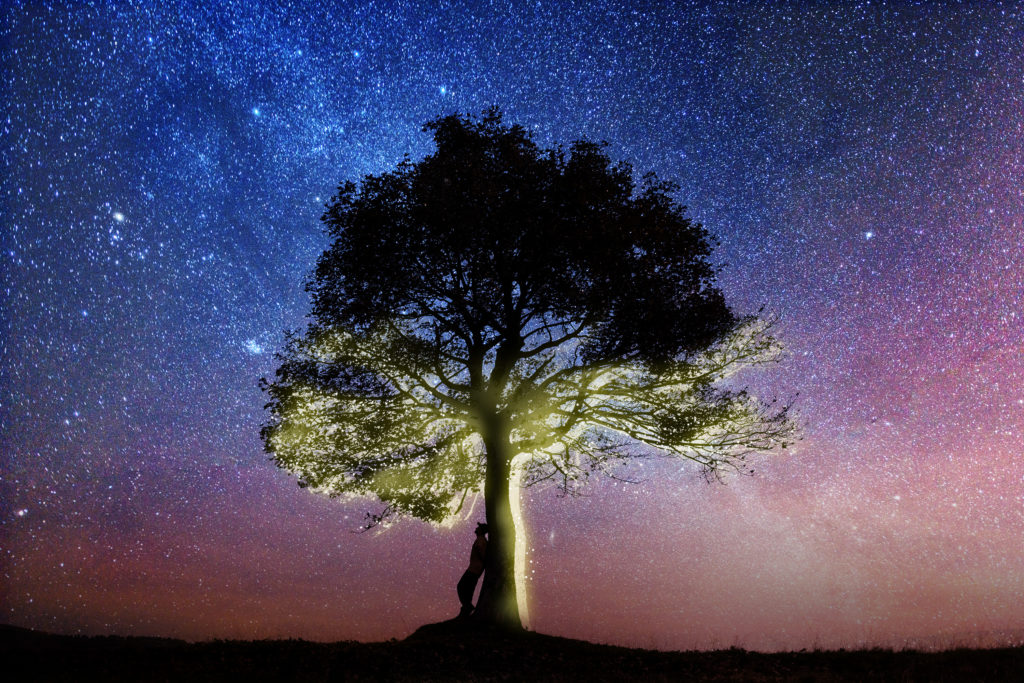
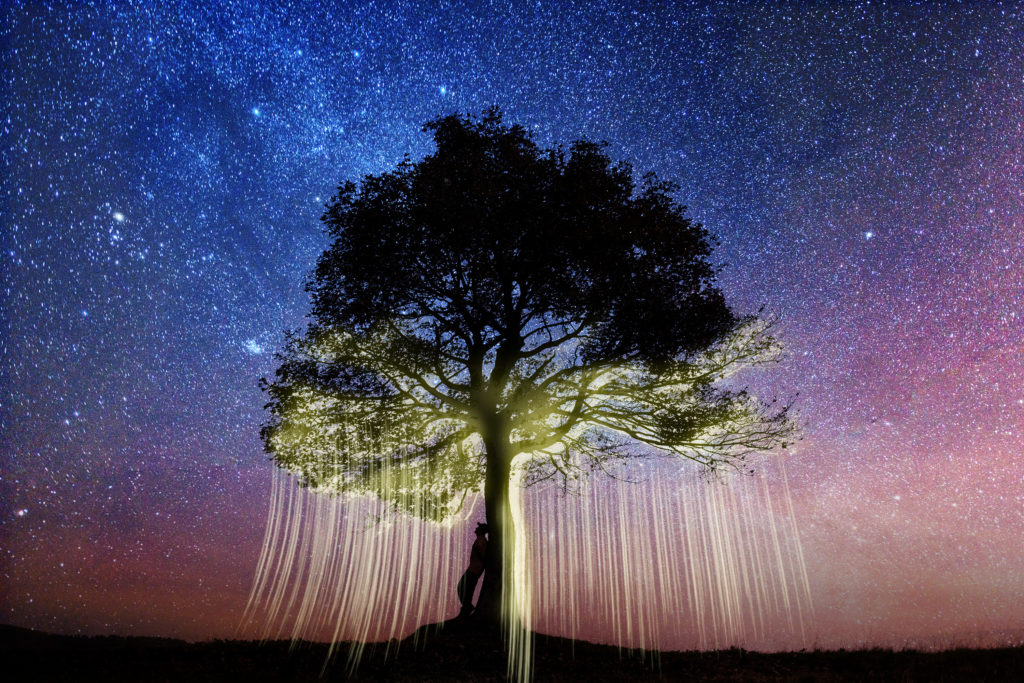
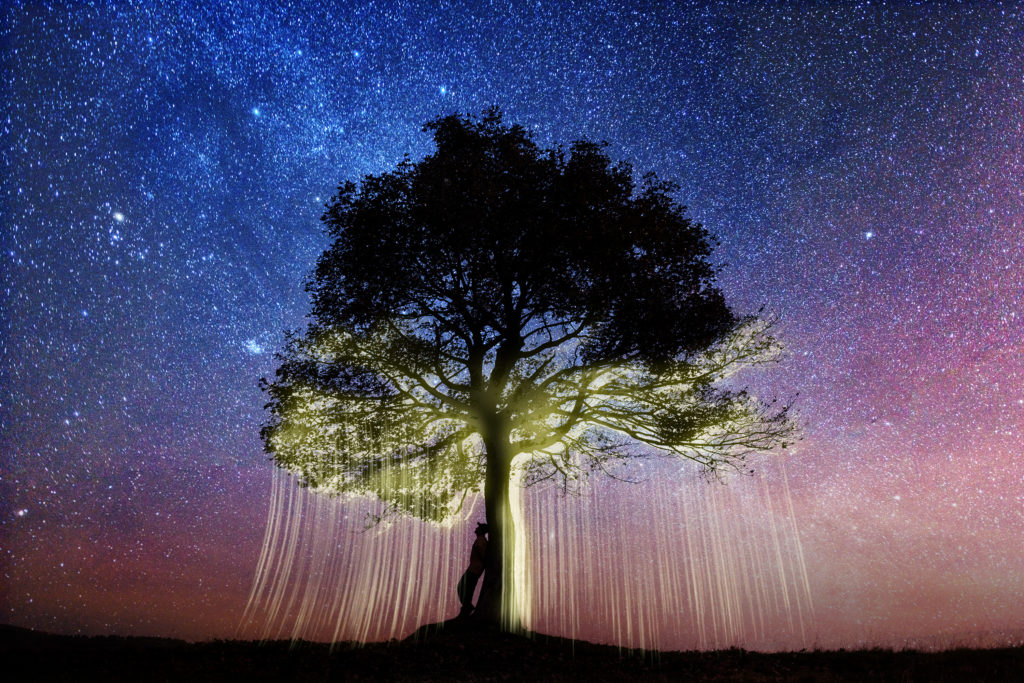
One of the great childhood joys of summertime is finding fireflies, or lightning bugs as they may be known regionally. In an honest effort to recapture some of that same summertime bliss, photographers have created wonderfully beautiful images by using long exposure settings to capture the flights of the little electric insects. Of course, if your area doesn’t have these critters, or perhaps if it’s just the wrong time of year, what recourse do you have? Well, Photoshop of course!
In this project, we’ll explore some techniques to re-create those glowing images with a bit of brushwork and filter fun.
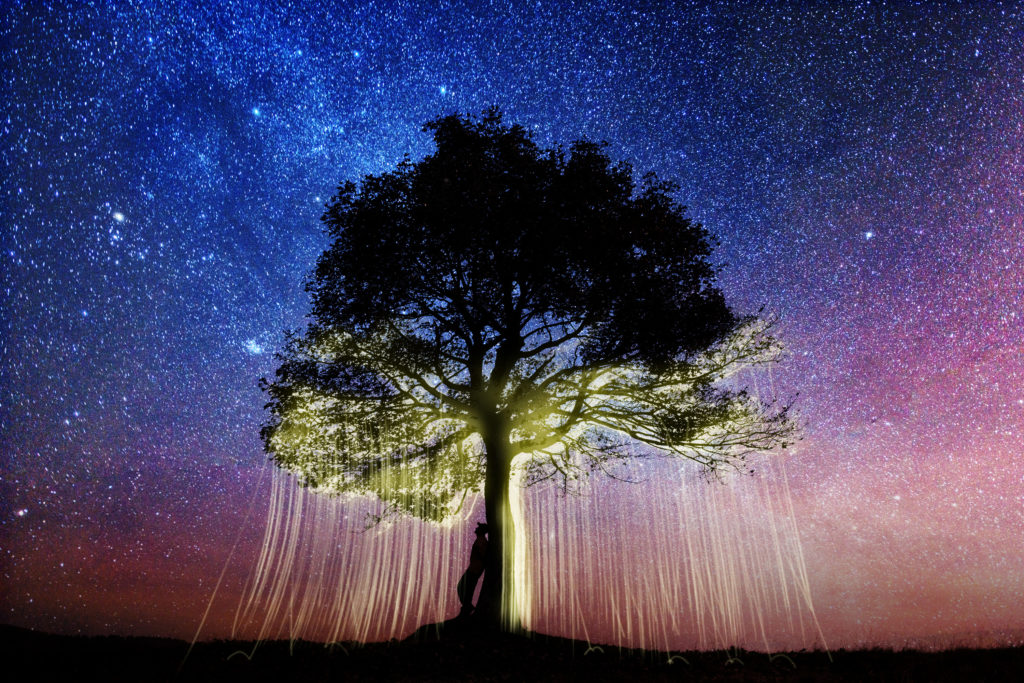
Step One:
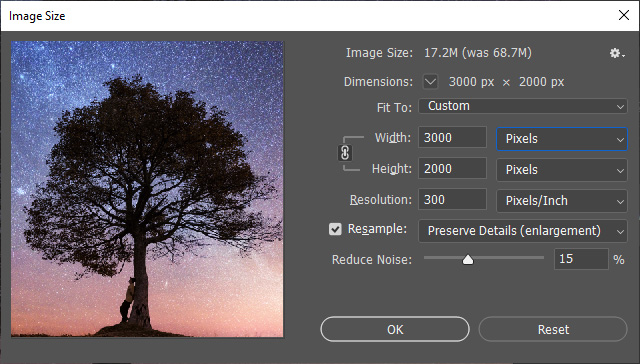
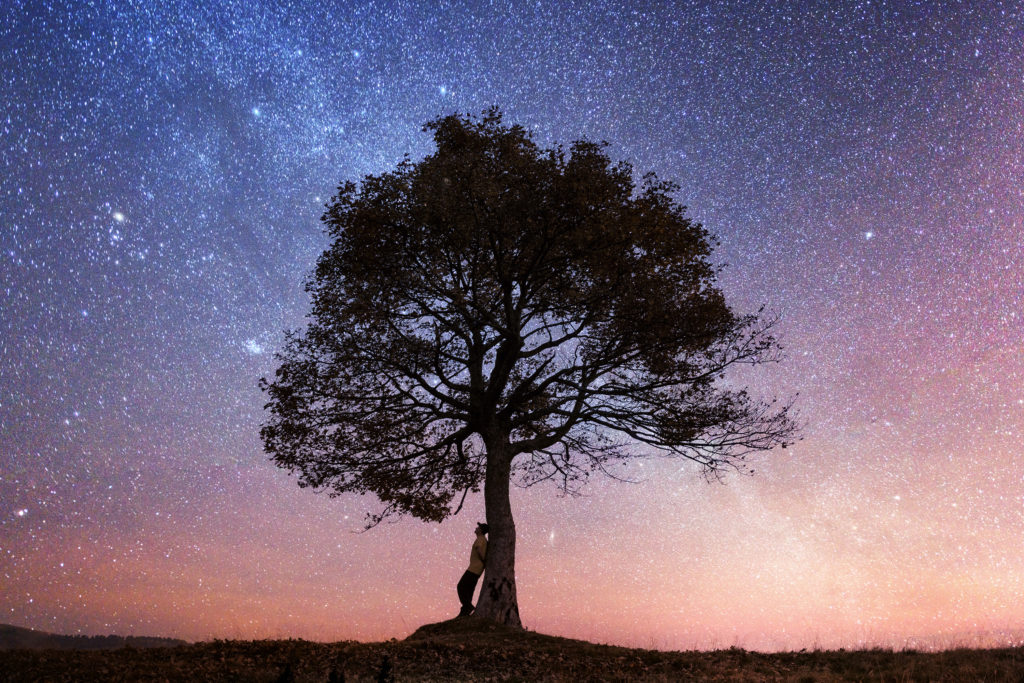
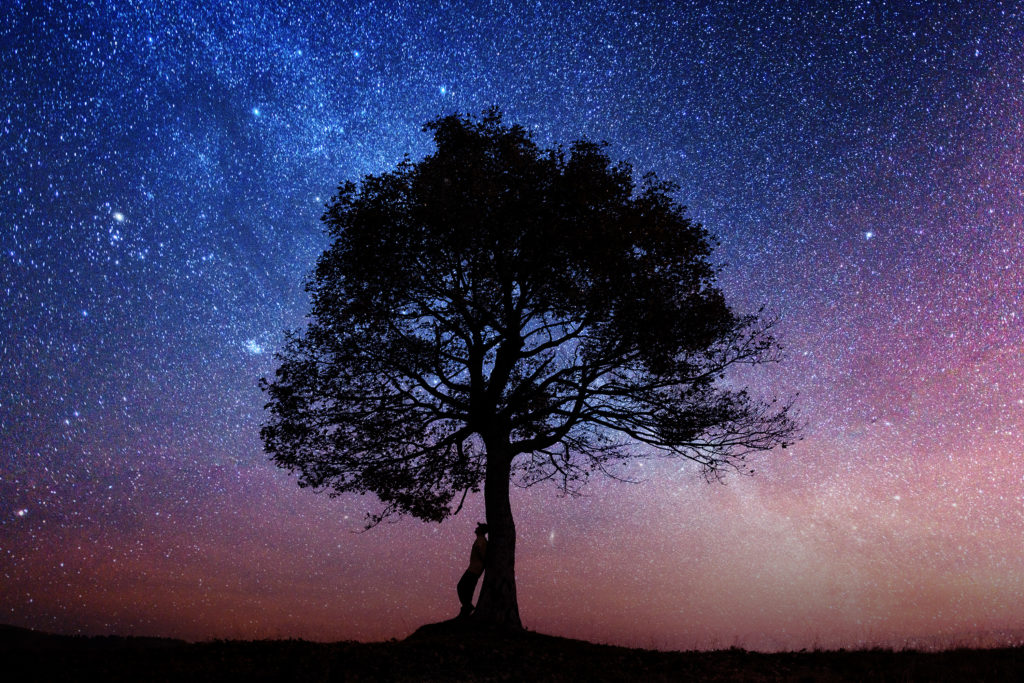
Open an image of an evening tree. For this project, we used an Adobe Stock image. If you’d like to download the low-res watermarked version of this image to follow along, click this link, log in with your Adobe ID, and click the Save to Library button. Right-click the image in the Libraries panel (Window>Libraries) and choose Edit to open it in Photoshop.
To make it easier to work with the image, increase the resolution of the practice file. (We normally don’t recommend enlarging images, but this is only for practice purposes.) Go to Image>Image Size, turn on the Resample checkbox, select Preserve Details 2.0 from the Resample drop-down menu, set the Resolution to 300 PPI and the Width to 3,000 pixels, and click OK.
Step Two:
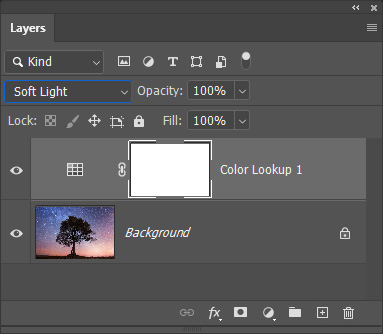
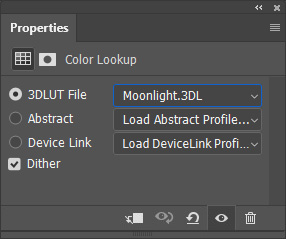
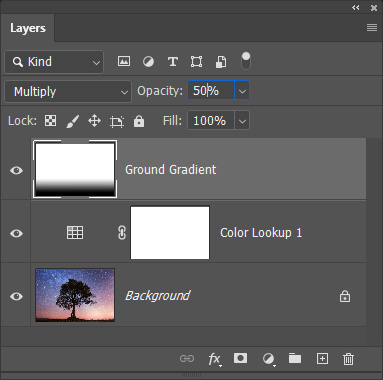
Click on the Create New Adjustment Layer icon (half-black, half-white circle) at the bottom of the Layers panel and select Color Lookup. In the Properties panel (Window>Properties), set the 3DLUT File drop-down menu to Moonlight.3DL, and then set the adjustment layer’s blending mode to Soft Light in the Layers panel. This will make those twilight colors more vibrant and the stars more visible.

Step Three:
Go to Layer>New>Layer, name this new layer “Ground Gradient,” set the blending Mode to Multiply, and click OK. Grab the Gradient tool (G); click on the gradient preview thumbnail in the Options Bar to open the Gradient Editor; select the Black, White preset in the Basics set; and click OK to close the Gradient Editor. Select the Linear Gradient icon in the Options Bar, and drag the gradient up from the ground to the top of the tree trunk. Then, reduce the layer’s Opacity to 50%.
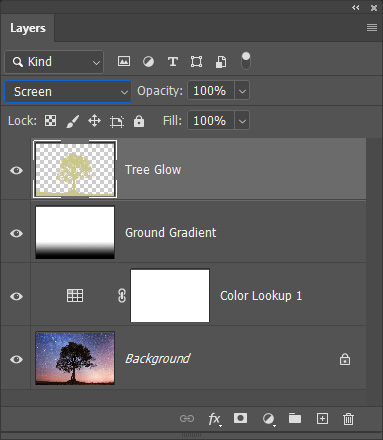
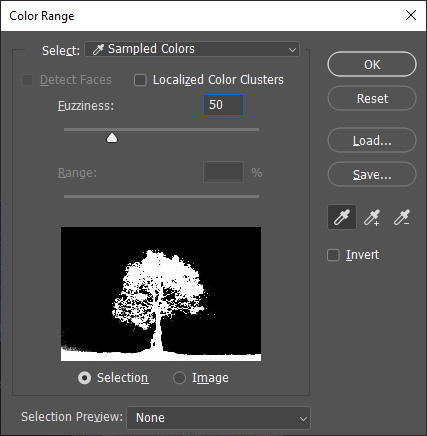
Step Four:
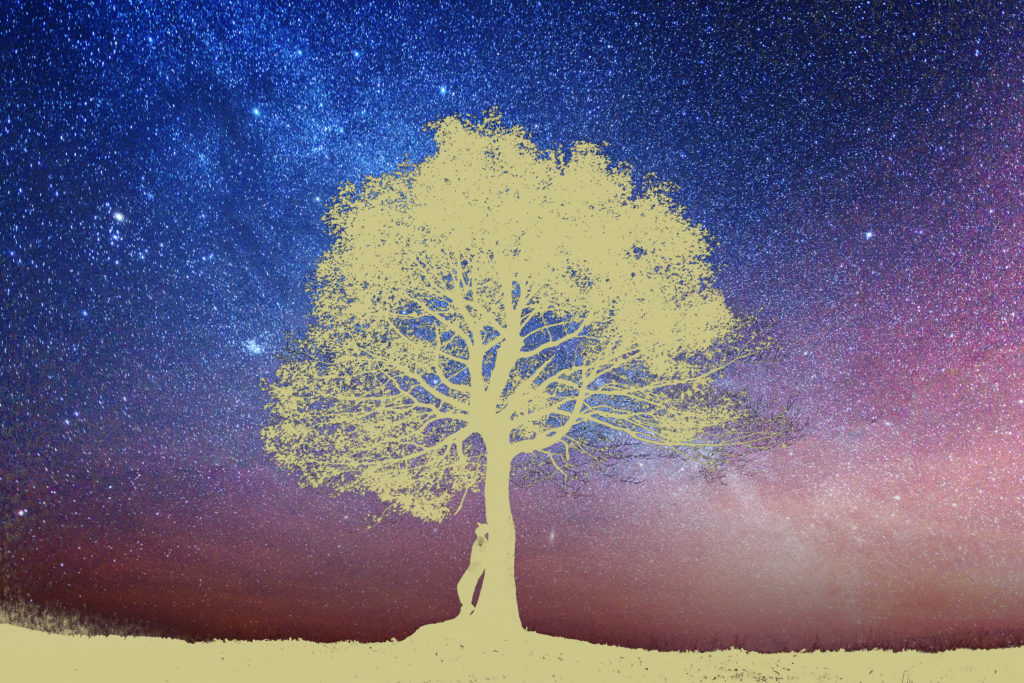
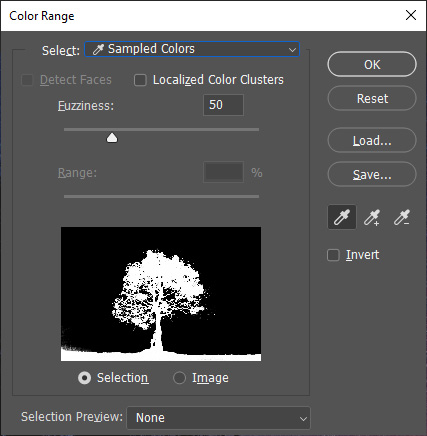
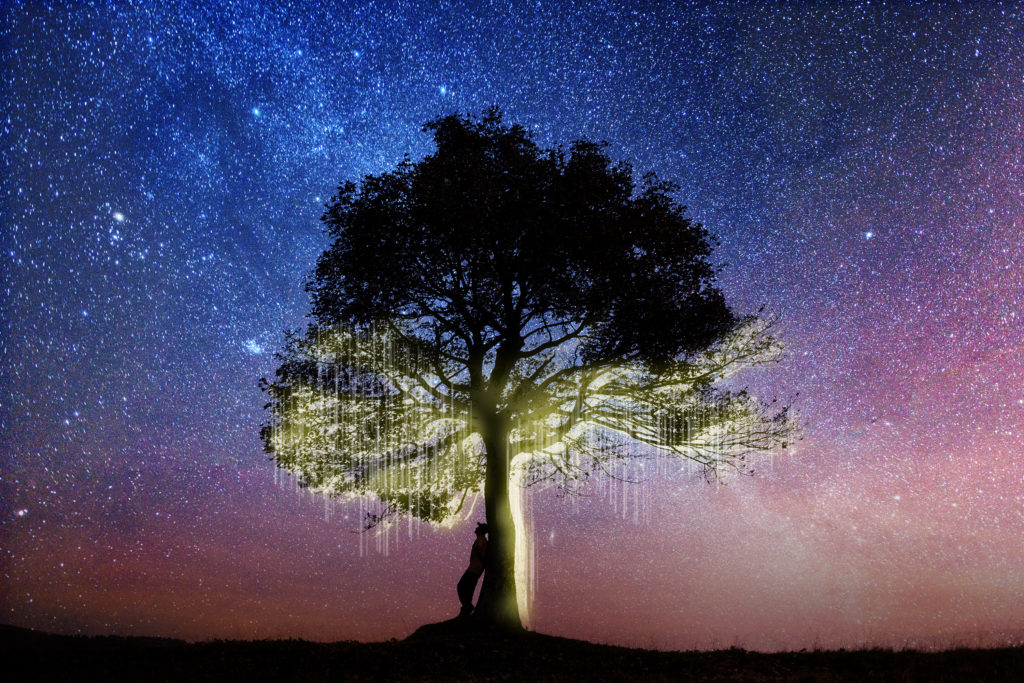
Create another new layer, name it “Tree Glow,” and set its blending mode to Screen. Go to Select>Color Range, and click on the tree in the document to select the dark tree shape. You should see the tree in white on a black background in the preview area of the Color Range dialog. Adjust the Fuzziness slider to select more of the tree.
After clicking OK to create the selection, click on the Foreground color swatch near the bottom of the Toolbar, select a pale yellow (#cbc68a) in the Color Picker, and click OK. Then hold down the Option key and press Delete (PC: Alt-Backspace) to fill the selection with the Foreground color. Press Command-D (PC: Ctrl-D) to cancel the selection.
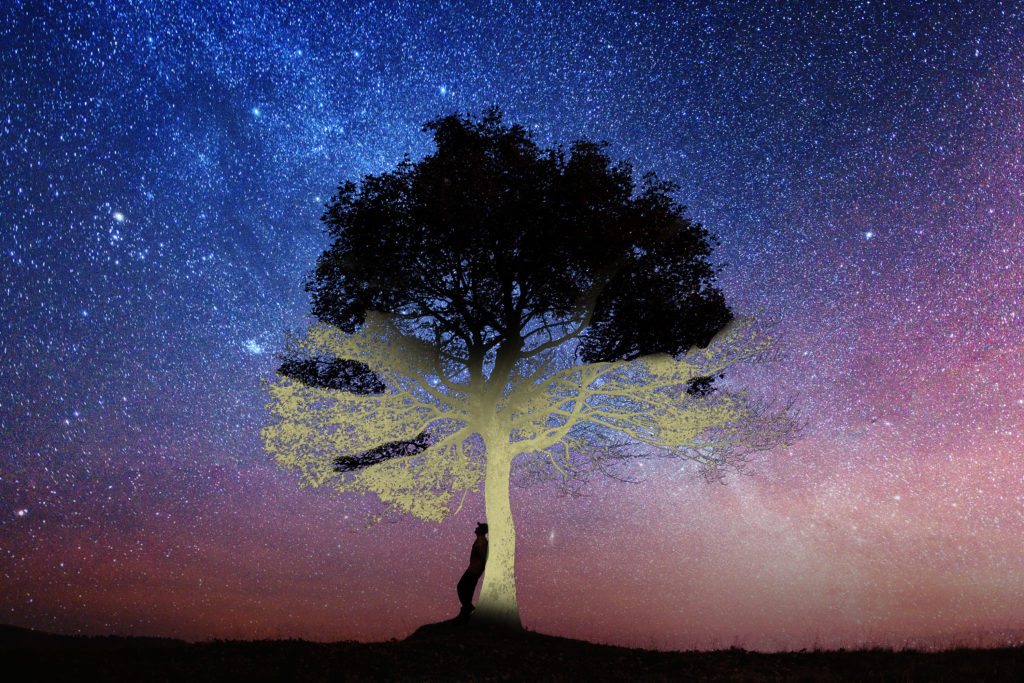
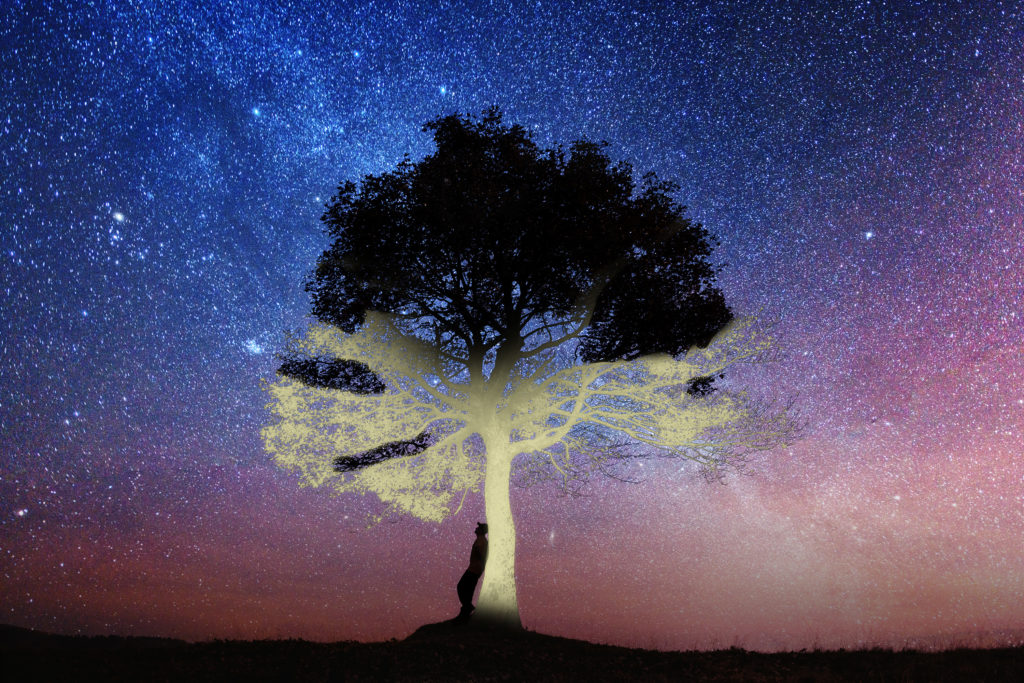
Step Five:
Grab the Eraser tool (E), and in the Options Bar, set the Mode to Brush, and select a large Soft Round brush tip. Erase the yellow on the ground area, the top half of the tree branches, and the person leaning against the tree. Usually, a destructive tool like the Eraser is avoided as best practice, but in this case, it would be a simple matter to repeat the steps to get these pixels back, so no worries! Erase with confidence.
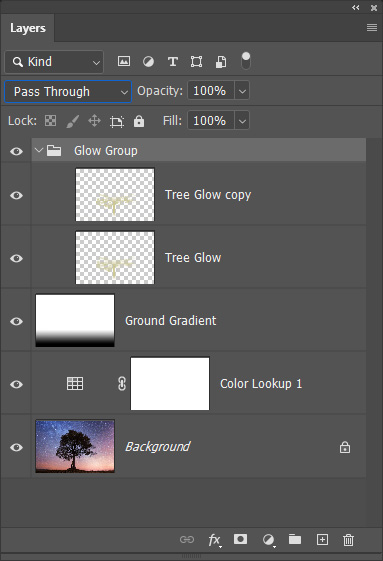
Step Six:
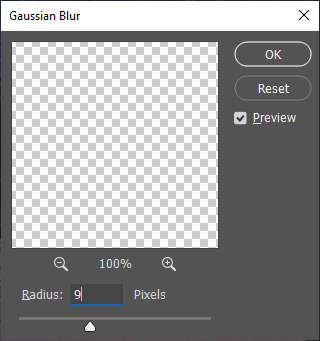
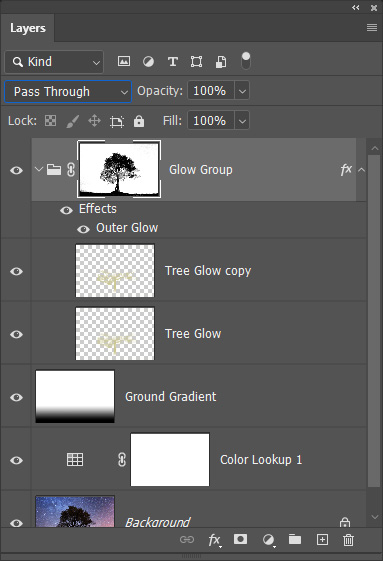
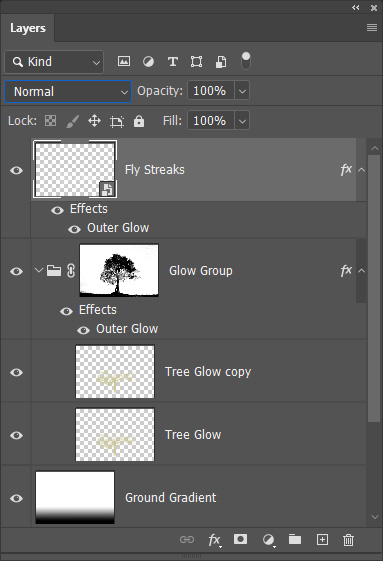
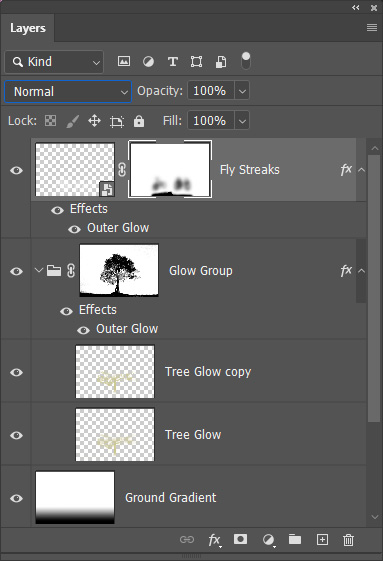
Press Command-J (PC: Ctrl-J) to duplicate the Tree Glow layer. On the original Tree Glow layer, go to Filter>Blur>Gaussian Blur, use a Radius of 9 pixels to add a soft blur to the yellow glow, and click OK. Reduce the layer Opacity to 50% to soften the effect even further. Hold the Shift key, click on the Tree Glow copy layer to select both glow layers in the Layers panel, and press Command-G (PC: Ctrl-G) to group them. Double-click the name of the group in the Layers panel, and rename it “Glow Group.”
Step Seven:
Using the Move tool (V), click-and-drag in the image to move the Glow Group slightly down and to the right of the actual tree shape. Momentarily hide the group by clicking its Eye icon in the Layers panel, then use the same Select>Color Range operation as before to select the tree shape.
Reveal the Glow Group again, hold down the Option (PC: Alt) key, and click the Add Layer Mask icon (circle in a square) at the bottom of the Layers panel to use the selection as an inverted mask on the group. If desired, touch up a bit of the mask by using the Brush tool (B) set to a soft round brush, with the Foreground color set to black (press X), and a low Opacity in the Options Bar just so it looks a little more organic, and not quite so mechanical in the application.

Step Eight:
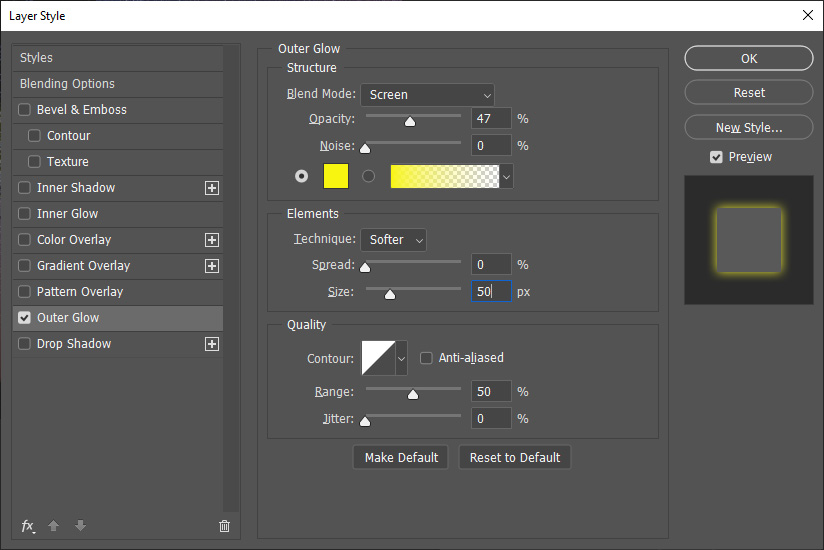
Now add a layer style by clicking the fxicon at the bottom of the Layers panel and selecting Outer Glow. Set the Blend Mode to Screen, Opacity to 47%, Technique to Softer, Spread to 0%, and Size to 50 px. Click the color swatch, select a bright yellow (#f8f50f), and click OK to close the Color Picker. In the Quality section, set the Range to 50%, and click OK.

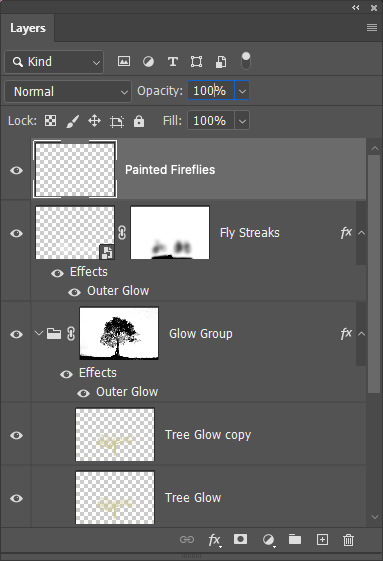
Step Nine:
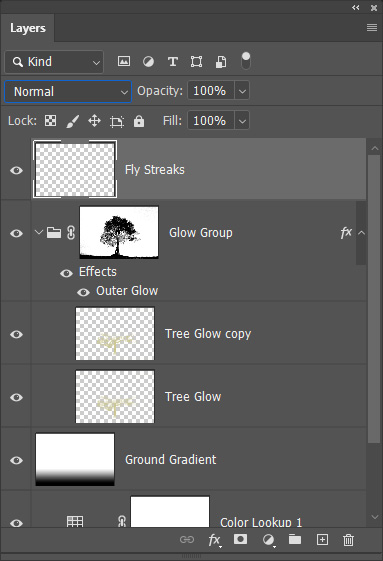
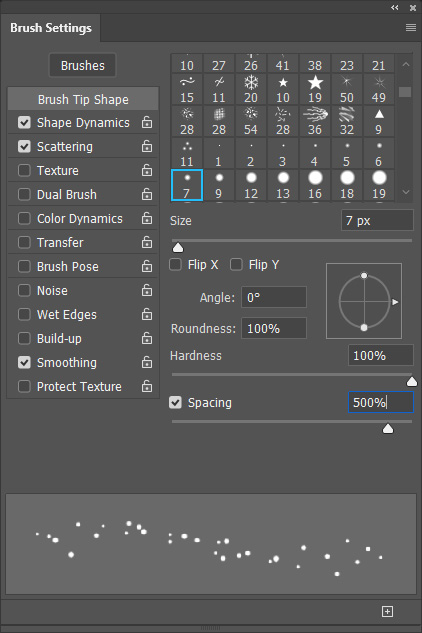
Create another new layer at the top of the layer stack and name this one “Fly Streaks” (be careful the new layer doesn’t accidentally get included in the Glow Group). Grab the Brush tool and open the Brush Settings panel (Window>Brush Settings). Start with the basic Hard Round Brush, and change the Size to 7 px and the Spacing to 500%. Enable Shape Dynamics on the left, and set the Size Jitter to 50%. Enable Scattering, set the Scatter to 1000%, check the option for Both Axes, and set the Count to 2. Finally, turn on the Smoothing option on the left.
With this fun new firefly brush, press D then X to set the paint color to white, make sure the Opacity is at 100% in the Options Bar, and paint strokes along the right side of the tree trunk and along the bottom tree branches.
Step Ten:
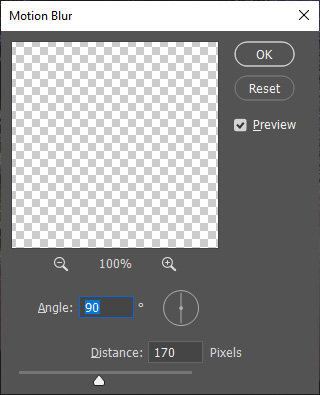
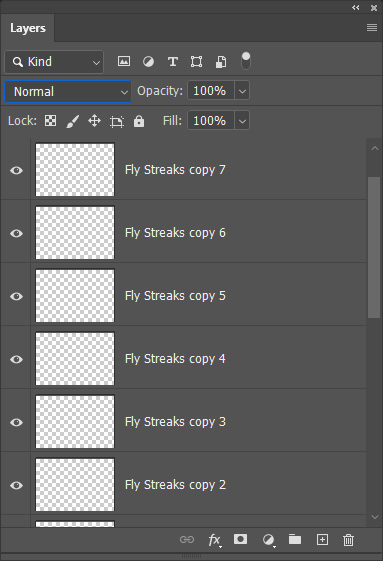
Go to Filter>Blur>Motion Blur, and set the Angle to 90° and the Distance to 170 Pixels. After clicking OK to apply the Motion Blur, duplicate the layer eight or nine times to really make the streaks bright and visible. Shift-select all the streak layers in the Layers panel and go to Layer>Smart Objects>Convert to Smart Object. Rename the layer to just “Fly Streaks” again. Use the Move tool to drag the streaks down so they don’t appear above the glow area.

Step Eleven:
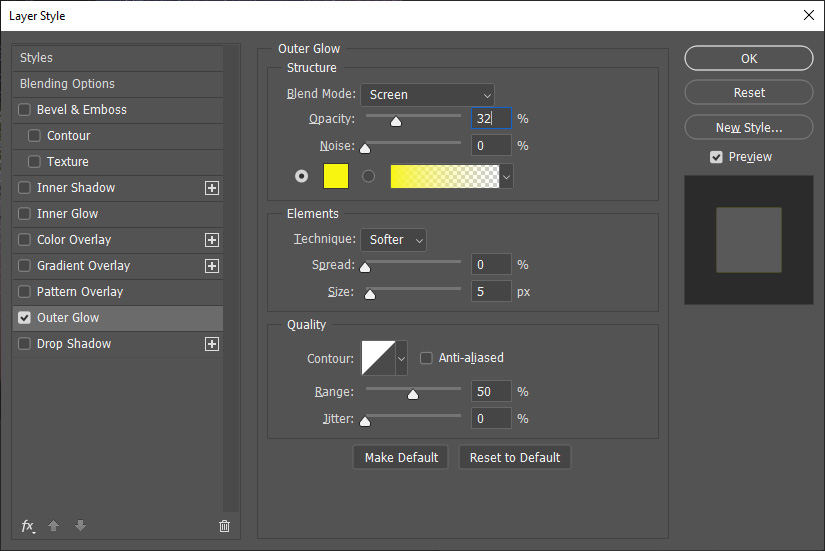
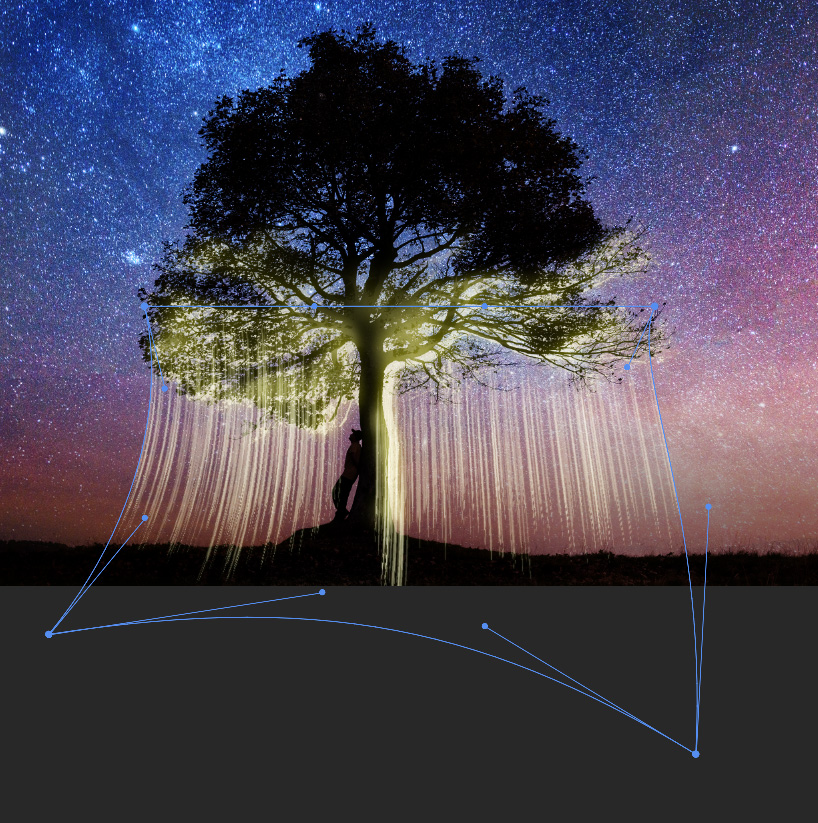
While holding the Option (PC: Alt) key, click-and-drag the Outer Glow layer style from the Glow Group to the Fly Streaks layer to copy the layer style. Double-click the words “Outer Glow” on the Fly Streaks layer to open the Layer Style dialog, and reduce the Size to 5 px and the glow Opacity to 32%. Click OK, and then go to Edit>Transform>Warp. Stretch out the streaks and shape them to have a slight outward curve as the streaks extend toward the ground as shown here. Press Enter to commit the transformation.
Step Twelve:
Click the Add Layer Mask icon (circle in a square) at the bottom of the Layers panel to add a mask to the Fly Streaks smart object. Use a large Soft Round brush with black paint to paint out the streaks that extend too far into the ground. Also, consider reducing the brush Opacity in the Options Bar and creating some variation in the streak visibility as yet another way to make the effect look more organic.
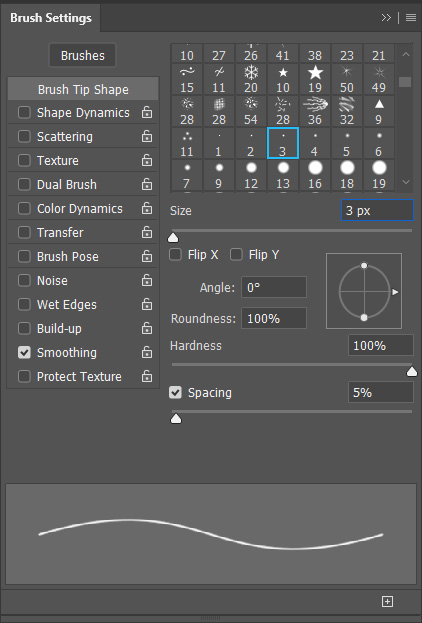
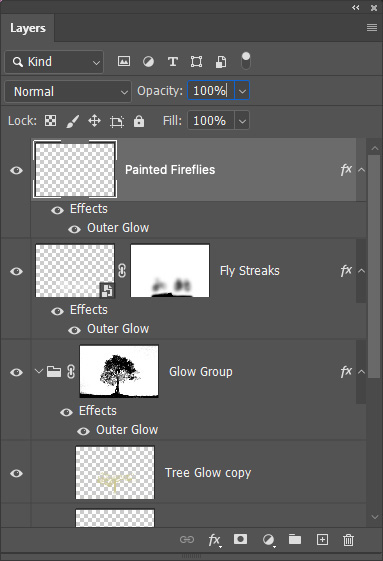
Step Thirteen:
Add another new layer called “Painted Fireflies.” Start again with the basic Hard Round Brush, and set the size to 3 pixels. Make sure Smoothing is turned on in the Brush Settings panel, and then in the Options Bar, set the Smoothing to a full 100%. Carefully paint in some smooth streaks that go diagonal to the main streaks and “bounce” on the ground.

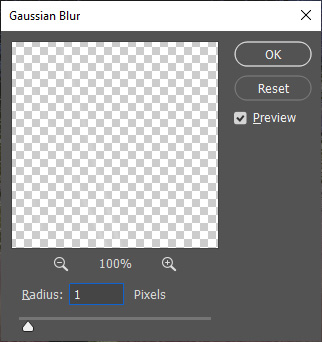
Step Fourteen:
The painted lines come in a bit sharp, but that can be easily resolved with a quick application of Gaussian Blur, using just a 1-pixel Radius. Then copy the same Outer Glow layer style from the Fly Streaks layer to the Painted Fireflies layer so they all match up nicely. If needed, a few touches of the Eraser with a large, soft round tip at a low Opacity will create more natural-looking lines.

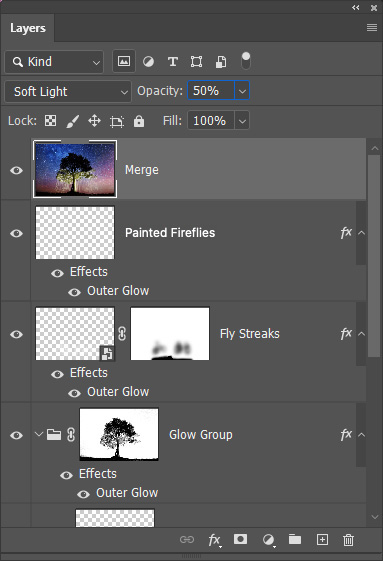
Step Fifteen:
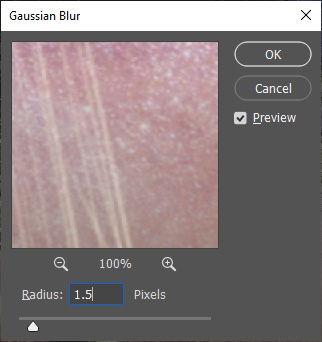
As a final effect to help mimic the softness of a long exposure, create a merged layer at the top of the layer stack by holding down the Option (PC: Alt) key and going to Layer>Merge Visible. Change the merged layer’s blending mode to Soft Light, reduce the Opacity to 50%, and add a Gaussian Blur of 1.5 pixels.
The fun of finding new ways to use old tools in Photoshop can be just as enjoyable as finding a bioluminescent insect! In all seriousness, the best takeaway from a project like this is that Photoshop’s tools have a lot more to offer than just the standard way of using them. Enjoy the exploration and discovery process as you experiment with new brushes and unique filter applications.


