Shooting photos at night can be challenging when you have a pitch-black sky and you have to crank up the ISO like crazy, but I’ll show you my workflow to deal with noise and dark areas. First of all, composition is key when you want to take a photo at night. Since part of your photo will be completely black, you need to find a good subject and be willing let some elements disappear into the darkness.
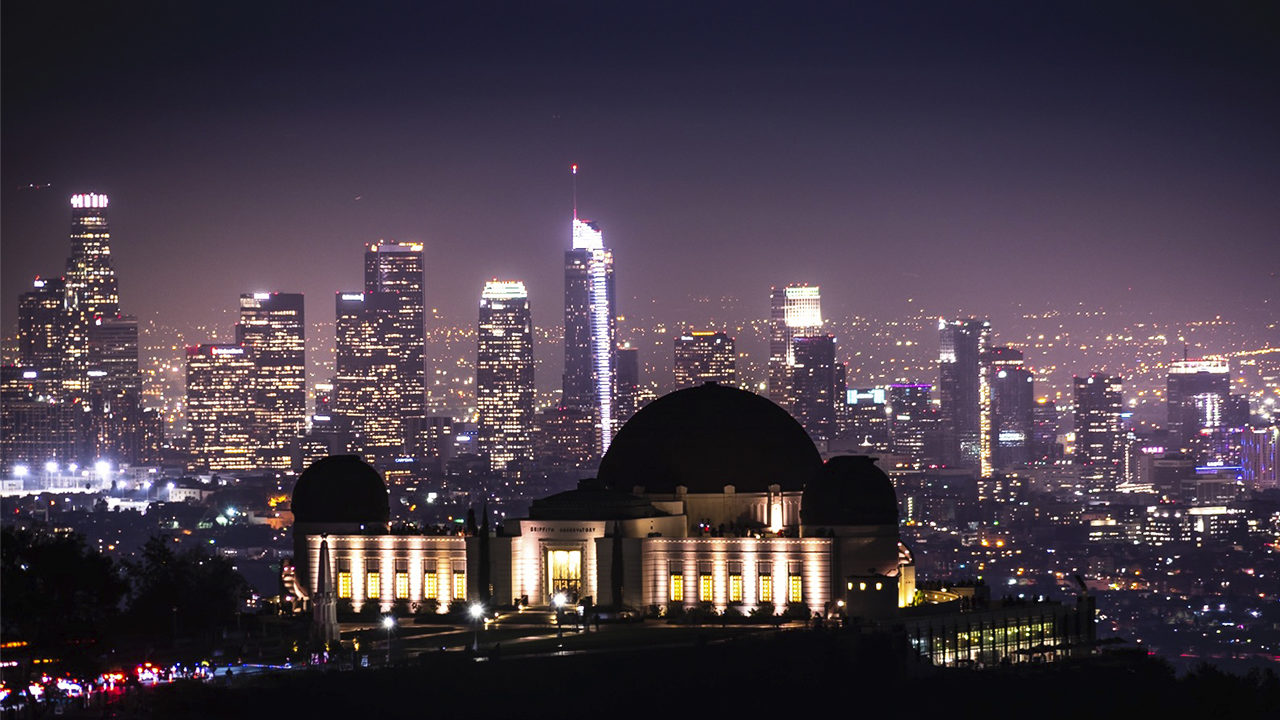
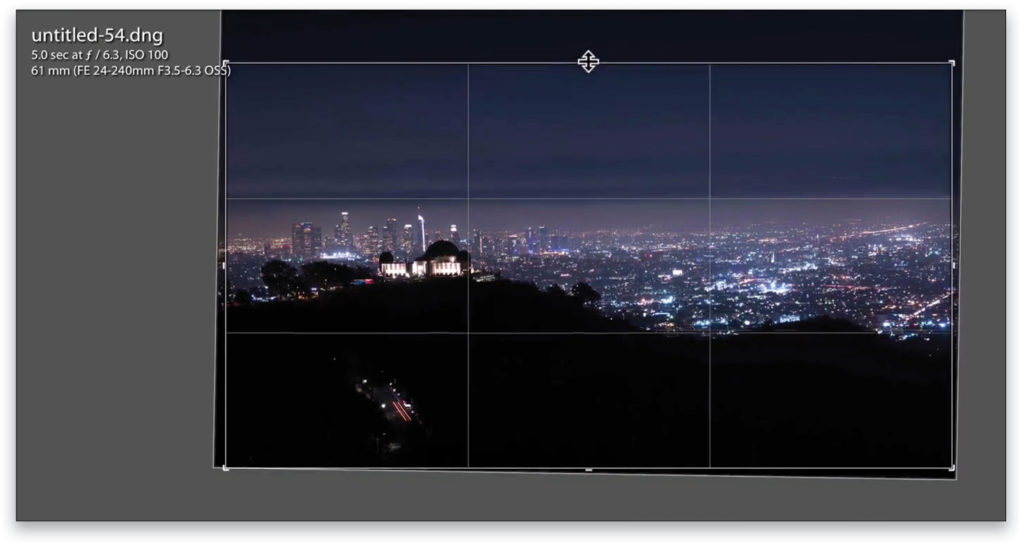
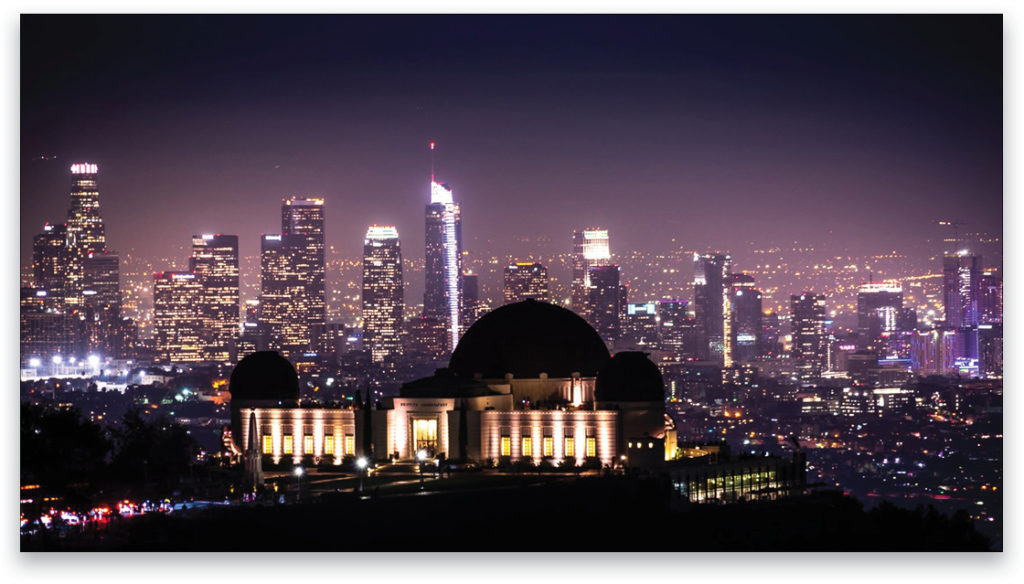
For example, in this photo I wanted to show The Terminator view of the Griffith Observatory in Los Angeles. You can see the Observatory, downtown LA in the background, and some of the sky, but the rest is pretty much pitch black. If you have foreground, middle ground, and background elements, you’ll have a more dynamic shot even if some parts of the photo are totally dark.
Once you’ve found your composition, you can try different compositions with a wider lens, or zoom in close to your subject. Don’t hesitate to try different things while you’re on the spot. For these photos, I used a 24–400mm lens and, as you can see, I took a wider shot plus a closer one. The first image above was shot at 61mm.

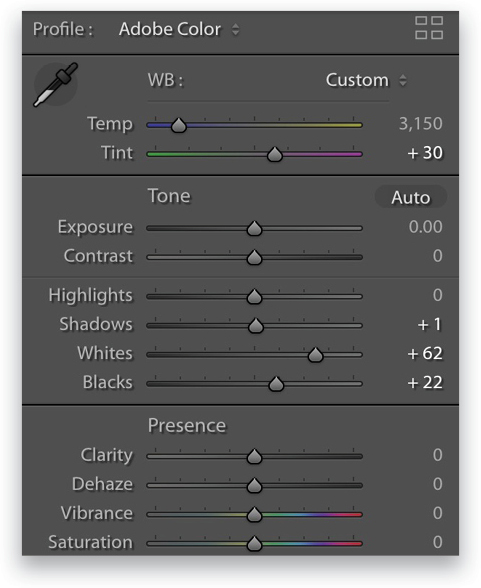
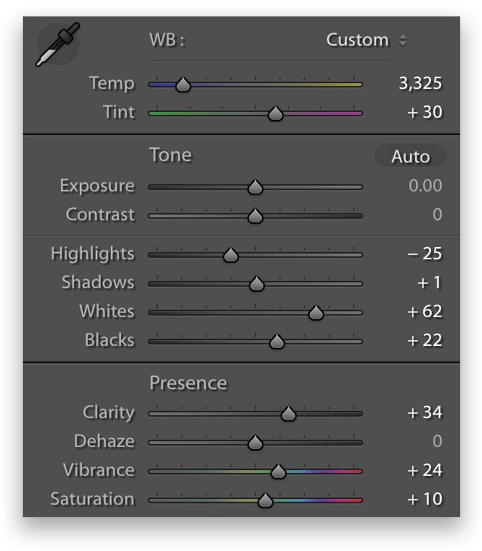
Step One: For developing in the Basic panel, you can start by opening up the Shadows, but not too much! On this image, +1 is actually enough without getting too much noise. Then you can boost the Whites to +62. Don’t be afraid to turn up the lights because they’re a key aspect in this type of image. Plus, many of the light sources are white anyway, so you don’t have to worry about blowing them out. Also, set the Blacks to +22 to reveal more of the sky without adding too much noise. Here we’ll also set the Tint to +30 to add some magenta just because I love it, but you don’t have to.
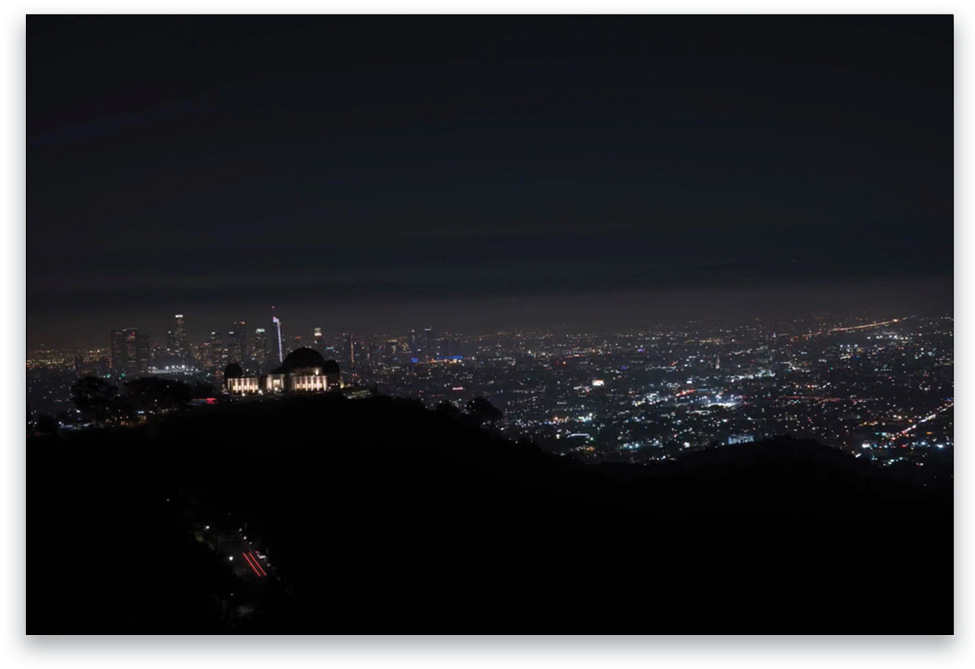
Step Two: To fine-tune your composition, you can use the Crop Overlay tool (R) to make it more panorama-like, as well as to crop out some of the pitch-black areas of your photo (below). You can also use the Angle slider in the Crop panel to straighten your photo and make the horizon level; otherwise, it will be distracting to the viewer. Press Enter to commit the crop.
Step Three: Let’s continue in the Basic panel to see how we can enhance the photo even more. Lowering the Highlights to –25 helps. To make your photo pop, you can add a lot of Clarity (+34), boost the Vibrance to +24, and add some Saturation (+10). You can play with the white balance, as well. I think this photo is too blue, so let’s warm it up by moving the Temp slider to the right (3,325).
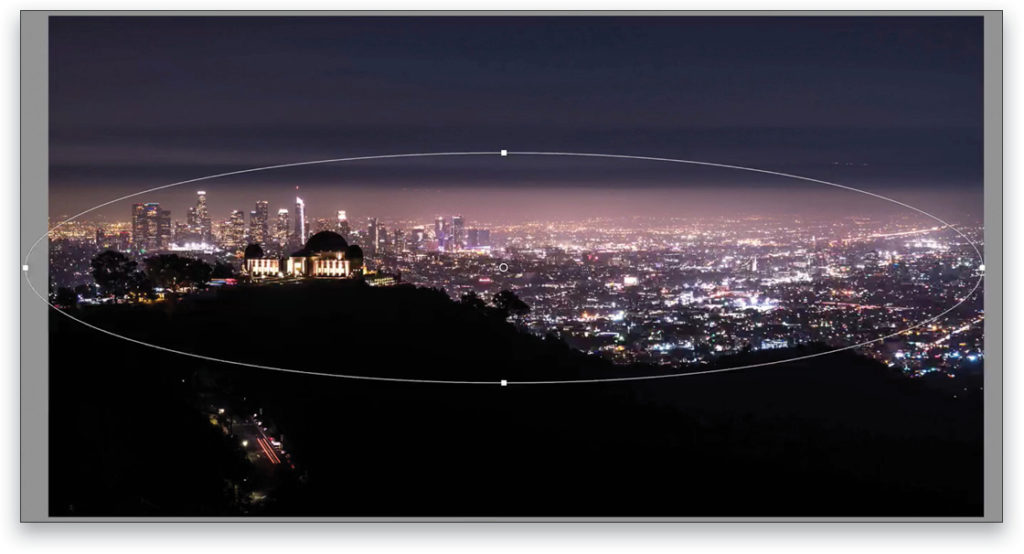
Step Four: To make your photo even more interesting, use the Radial Filter tool (Shift-M) and draw a big radial over your subject. Invert it, boost the Exposure to 0.37, and warm up the lights of the city by sliding the Temp to 14, the Tint to 13, and Clarity to 36.
Step Five: The overall photo is nicer but that black sky bothers me, so
I want to try these same settings on the close-up photo of the Observatory where there’s less sky. To easily copy-and-paste settings from the photo on which your currently working to another photo, make the other image active in the Filmstrip, and go to Settings>Paste Settings from Previous. Now you can tweak your photo with the elements that were copied over, such as the Radial Filter. In this example, I activated the Radial Filter (Shift-M), Right-clicked inside the oval, chose Duplicate, and moved the copy over the city behind the Observatory.
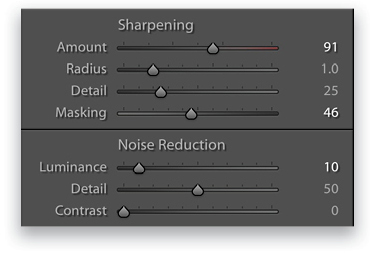
Step Six: Now you can play around with the sharpening in the Detail panel. My formula is to make sure the Amount of sharpening (91) and the Luminance Noise Reduction (10) total around 100. The Masking depends on the individual photo; here we set it to 46.
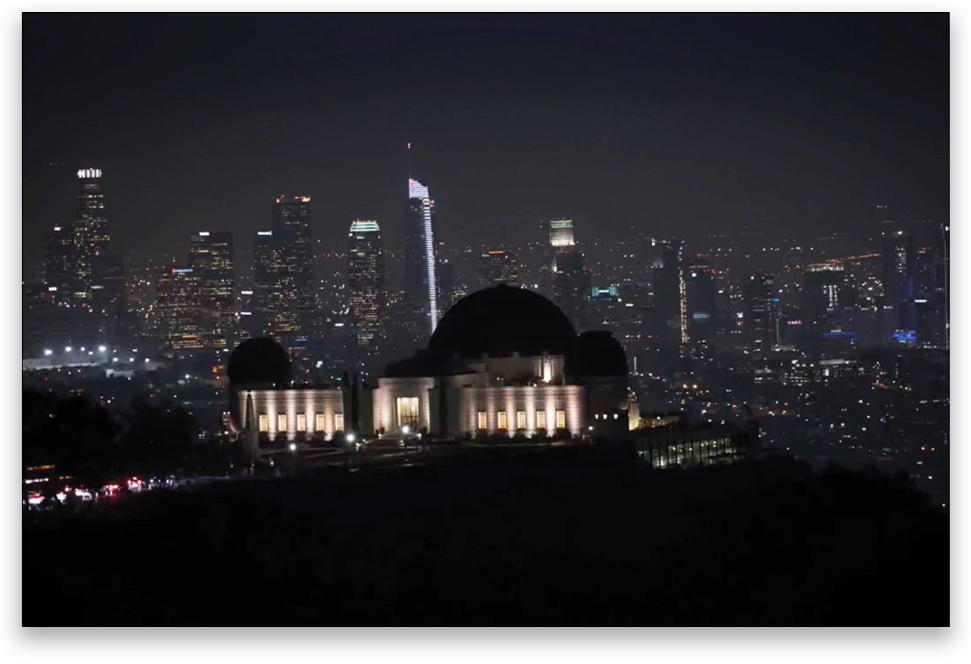
Tthe final result is shown below:
This is just a basic edit. It’s very helpful to work with the composition in-camera to avoid a lot of noise in the image. Obviously, to really become an expert in night photography, you need to have a steady tripod, a shutter remote to avoid any camera movement, and a camera that has a great sensor that doesn’t create a lot of noise. But you can still work with what you have and the tools I showed you in this article. I hope that you’ll get out there and shoot at night because you can create some amazing ambiances and moods.
This article originally published in Lightroom Magazine, Issue 45.


