Photography is all about problem solving. Your job as a photographer is to create beautiful images under any circumstance. Sometimes the light will be great, your subject will be easy to work with, and you have lots of time to get what you need; other times, everything seems like it’s working against you. Shooting as often as possible is the best way to learn how to solve problems and work quickly. Here are my top 10 tips to help you work faster and get great images no matter the environment.
Learn to Use Off-Camera Flash
With great quality cameras being more and more affordable, photographers are popping up everywhere. One of the most common things I see is “professional” photographers using only natural light. It (natural light) can be very flattering, and I use it all the time. Mixing in some off-camera flash, whether it’s a strobe used on location or speedlights, can really help your work stand out. Off-camera flash can be very intimidating, but if you know how light works, it’s really not that hard to do.
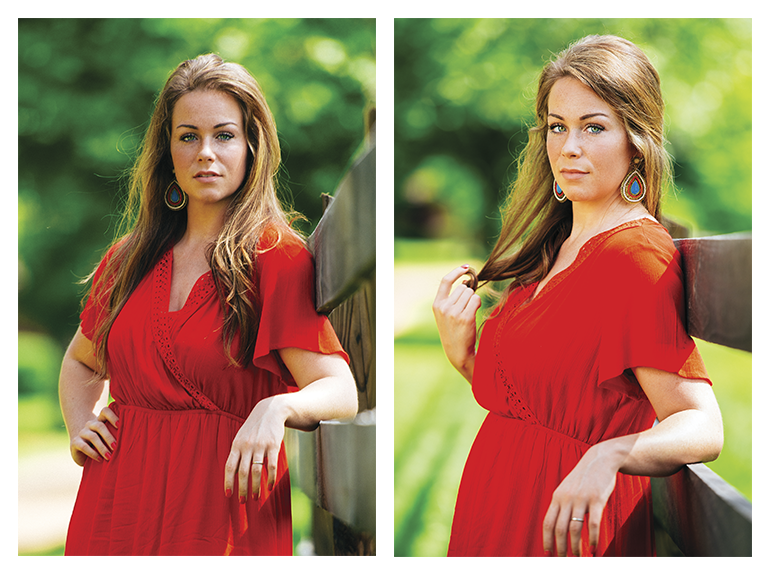
In this image, it’s early in the morning and the sun is pretty bright. I wanted to use that fence for the shot, but as you can see, the sun is creeping in on the right and creating some unflattering shadows on her face. By adding a strobe (camera left) at a low power setting, I was able to eliminate those nasty shadows and make a much more flattering shot of the subject’s face. Is the first shot bad? No, but it’s certainly improved with off-camera flash.
Create Different Looks with Natural Light and Off-Camera Flash
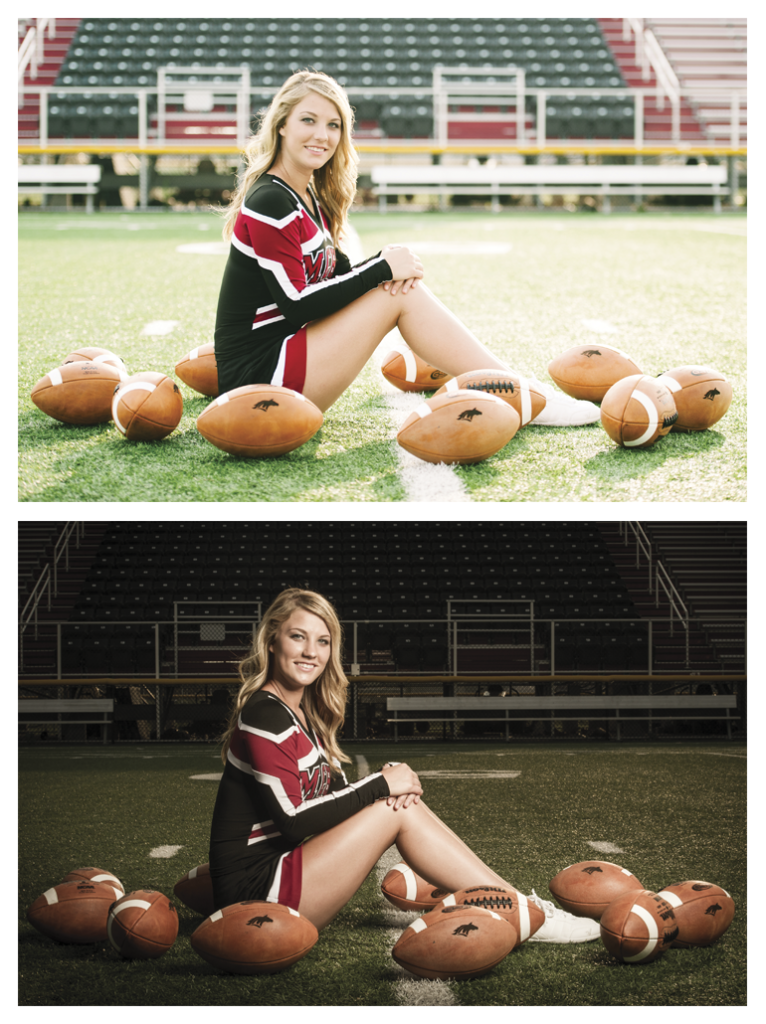
Taking a shot with natural light and then taking the same shot with strobes can create a totally different look. This gives your client more options while potentially reducing the session time and making you more efficient. Because most of my subjects aren’t professional models, they can get tired if a shoot drags on for too long (their parents, too), and that’s the last thing you want. Keep the energy high!
Use Zoom Lenses to Maximize Portrait Sessions
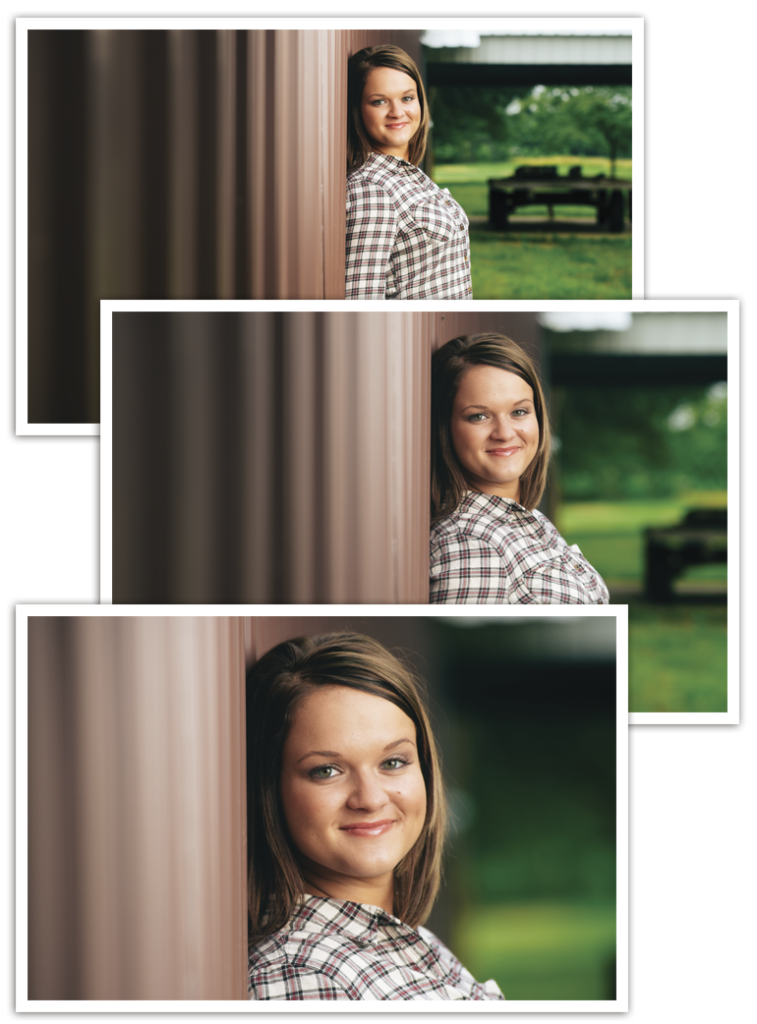
When photographing a portrait session, my 70–200mm is on my camera 90% of the time. Why? I shoot wide, then zoom in three quarters, then zoom in tight. Also, shooting vertical and horizontal adds even more variety. This can give you six different shots with one pose. Moving around to different locations takes up time; so don’t waste a good spot by getting only one image out of it. Using this technique saves you time, helps you move quickly, and maximizes your shooting time.
Use One Camera Body with a Long Lens and Another with a Wide Lens
I always have two cameras with me: One with a 70–200mm lens and the other with a 14–24mm lens. That way, I can switch between them with the same setup and get one compressed shot and one that’s wide and more dramatic. This doesn’t work for every setup, but it can be very effective when shooting sports or when taking environmental portraits. It takes time to change lenses and you don’t want your subject to lose focus because you’re fumbling around with your camera changing lenses. Because changing your lens outside can get your sensor dirty, another added benefit is that you won’t have to waste editing time having to clean up sensor spots. Sending your camera off to get it cleaned is important, but there’s no need to waste money on doing it more often than you need to. Keeping an extra body with you for different lenses can help eliminate that and save you time.
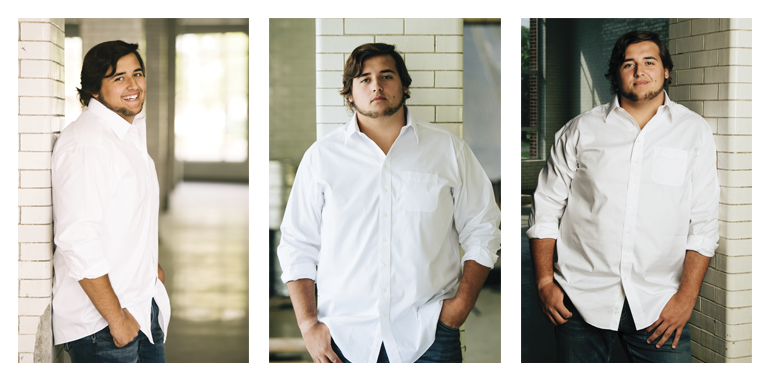
Move Around Your Subject for Each Shot
One technique I often use is taking a shot from one side of a subject, and then moving to the front, then moving to the other side. You never know which angle might work best, but trying all three helps cover all your bases. Having your subject look in different directions while doing this gives you more variety as well. Sometimes the original angle you pick for a shot isn’t the best one, but you won’t ever know unless you move around. It can also help save time by shooting several angles in one spot. In this case, all three angles worked, which is the best-case scenario—three shots instead of just one.
Talk to Your Clients About Themselves and What They’re Interested In
One of the most important things when taking portraits is to help your subject be as relaxed as possible. Make the session conversational and relaxed by picking up on things they’re interested in. Most average people don’t like getting their photo taken, so taking their mind off that huge lens in front of their face can help them forget about it. For example, a lot of my clients are athletes, so I try to figure out what college or professional sports they follow, and who their favorite team or players are. Once I get them talking, they seem to relax. At that point, it’s kind of like you’re just hanging out; you just happen to be taking some photos along the way. Tip: Don’t talk about yourself unless they ask. Remember, this is about them, not you.
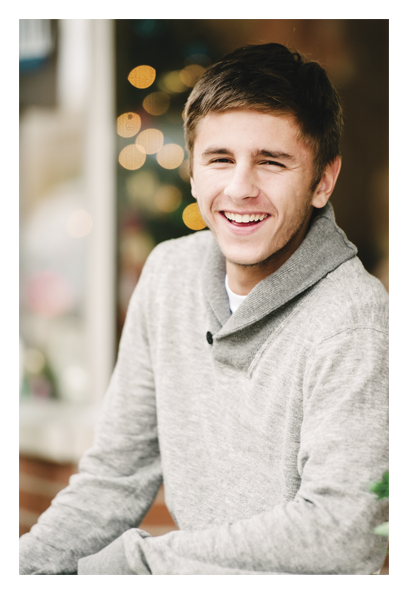
The Moment Right After a Client Laughs Can Produce Some of the Best Expressions
I’ll admit that I’m not the funniest person in the world, but I try to stay relaxed, and casually joke around with my assistant and clients throughout a shoot. When a funny moment happens and the subject laughs, be ready! The moment right after they laugh is usually one you want to make sure you don’t miss. I’ve found that a lot of clients don’t necessarily like photos of themselves laughing (although I always make sure to capture those too, because some folks love them), but they tend to relax right after that big laugh. That’s where you can get the money shot.
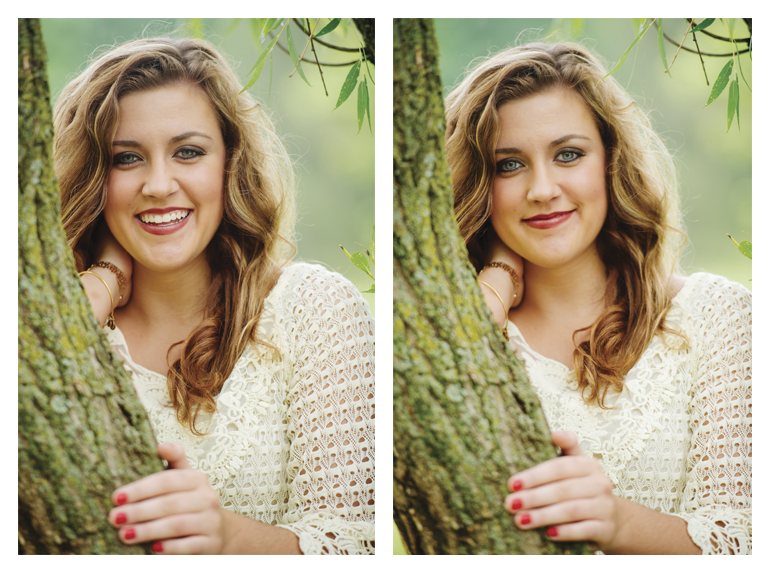
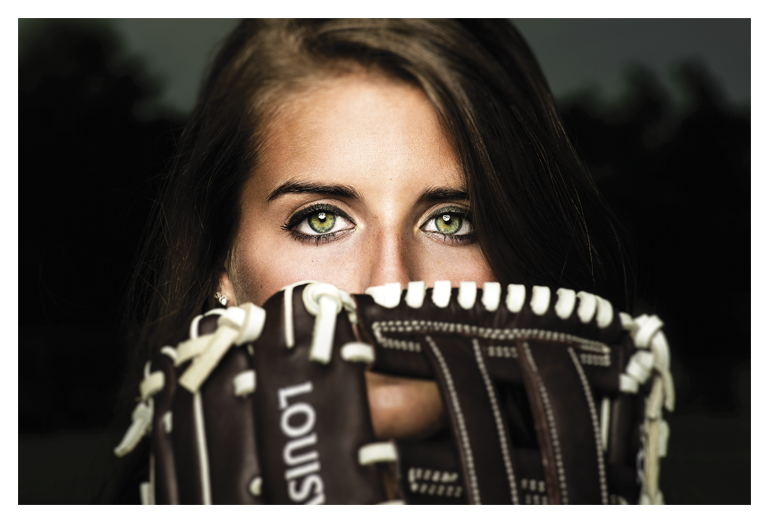
Turn Bad Backgrounds into Good Ones By Blurring Them
Compressing an image as much as possible with a long lens can eliminate clutter and distracting elements in a background. As I said before, I use my 70–200mm lens the majority of the time when taking portraits. The more you zoom in and the closer you get to your subject, the more bokeh you get. This photo is a great example. If I had taken this shot at f/8 zoomed out to 70mm, all the tree leaves in the background would be in focus. While that might not look bad, the image was drastically improved by shooting at a low aperture at 200mm. You can see how the background melts away and becomes much more pleasing. It also helps create depth, and focuses the view on the subject rather than the background. Who doesn’t like soft blurry backgrounds, right? Even if you’re in a bad location, this technique can help you get great images. Some of my clients’ favorite images end up being simple shots like this.
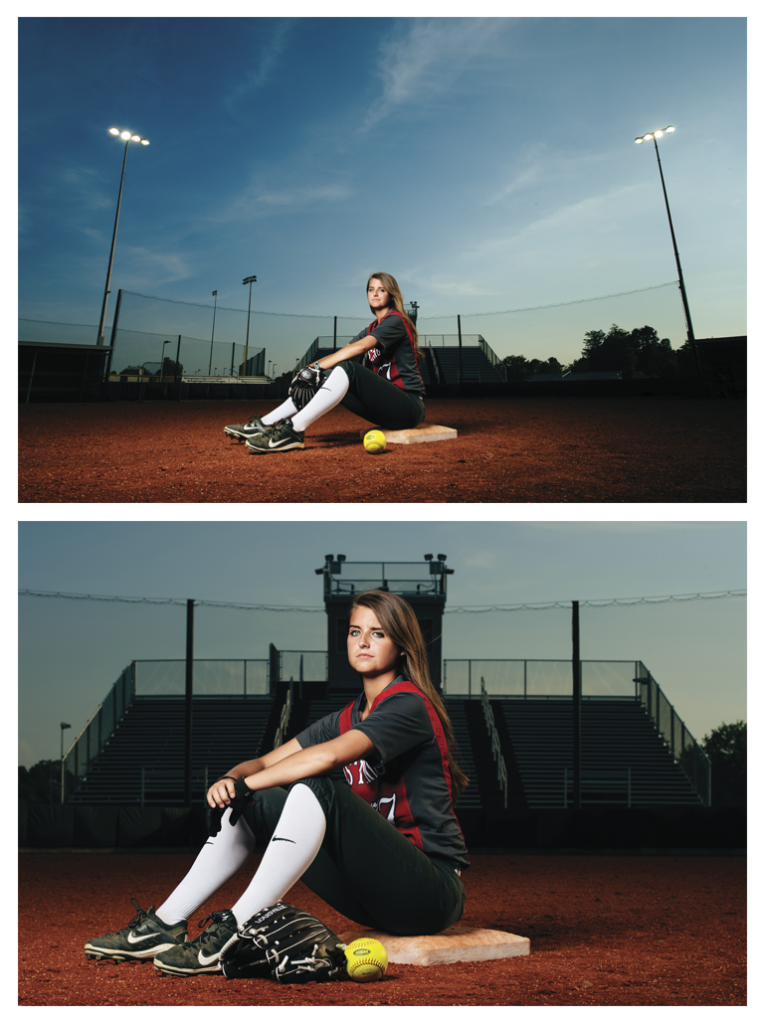
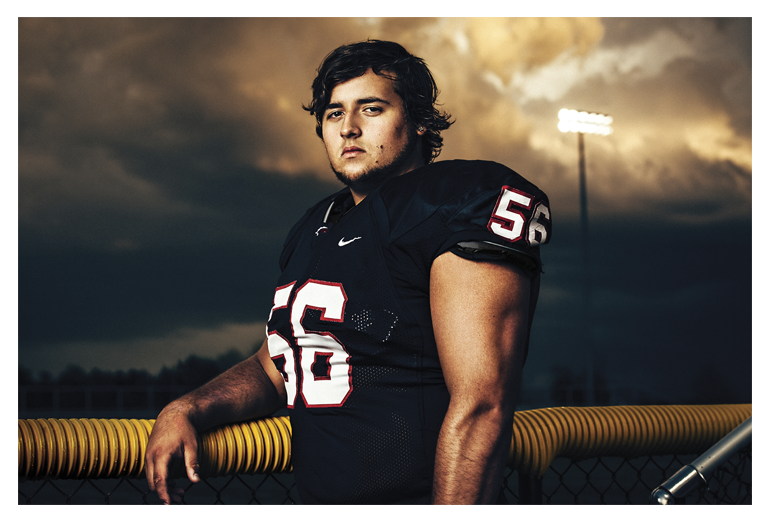
Underexposing the Sky Can Create Really Cool, Unique, and Dramatic Images
Underexposed skies can really impress your clients. I don’t know how many times I’ve heard clients say, “Wow, how did you do that? The sky didn’t look like that when we were there.” This goes back to my first tip about learning how to use off-camera flash. Remember, cameras can’t see what our eyes can see; balancing the background and subject with flash is a great tool. It will also produce something that not everyone knows how to do, which can really help your work stand out from the crowd. Personally, my taste is more toward the dramatic side, so I like to underexpose the sky by at least one stop, and sometimes two. The best way to go about this is to take a shot of the background where you’re going to place your subject using only your camera (no light). Use the in-camera meter to go one or two stops below the optimal exposure. Then, add in your subject and the off-camera flash. Adjust the flash as needed to properly light your subject, and you’re all set.
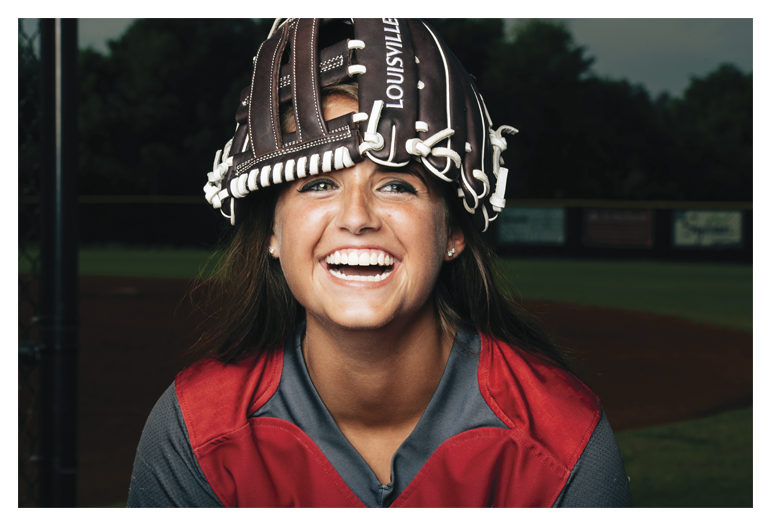
Always Be Ready for When That Great Moment Unexpectedly Happens
The first image was actually what we were going for in this particular setup. (The second shot wasn’t planned at all.) It would have been very easy for me to put my camera down and move on after I got the shot we needed; but a few moments after we got “the shot,” my subject put her glove on her head in reaction to something funny her mom said. It ended up being their favorite image from the entire shoot, and I would have missed it if I hadn’t been ready. I always keep my camera on my hip with a BlackRapid strap (www.blackrapid.com) and I never turn it off. That way if something unexpected happens, all I have to do is raise it up and shoot away.
All Images © Matt Hernandez.
This article originally appeared in Photoshop User magazine, October 2015.


