Wave painting is something I enjoy with great long-exposure images. In this article, I want to share with you a few tips on shooting long exposures and how to do wave painting in Lightroom so your photos from the beach look spectacular but still natural.
The Photo Process
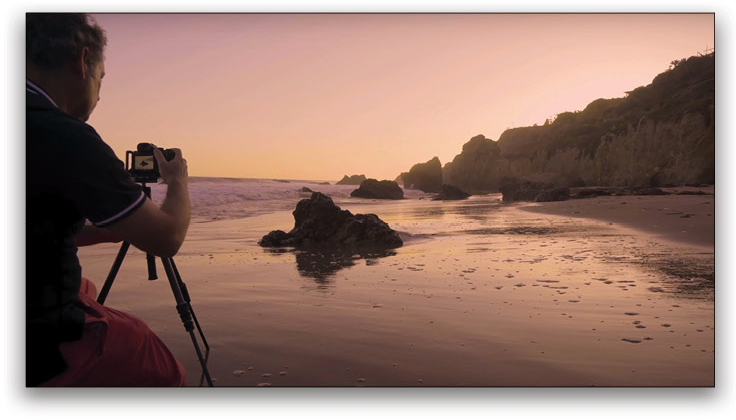
1. Use a Good Tripod and Self-Timer
The key here is to use a sturdy tripod along with a remote shutter release or the self-timer on your camera. Pressing the shutter button directly will shake the camera, making your long exposures blurry. For a nice long exposure of the waves, set the shutter speed from 1–3 seconds.
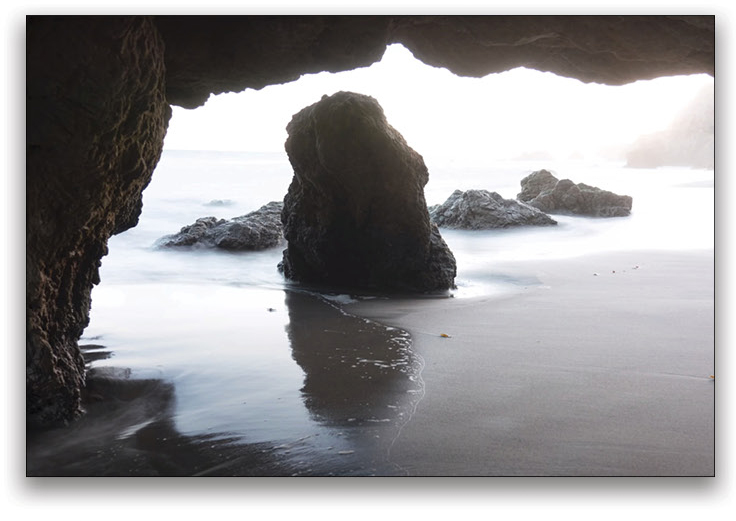
2. Find a Good Foreground, Middle Ground, and Background
Composition is important in photography but even more so for wave painting. You’ll want to find a good foreground element to enhance the movement of the water.
3. Shoot HDR as Needed
Depending on the contrast of the light in the scene, you may decide it’s worth shooting HDR. If you’re going to shoot HDR, make sure to capture –2.0 and +2.0 exposures to get a lot of data in the highlights and shadows. I advise HDR in situations of extreme dynamic range.
4. You Don’t Need an ND Filter
Because you’re going for an exposure between 1–3 seconds, you don’t need a neutral density (ND) filter. Also, you’ll want to shoot at sunset when the light is much nicer and doesn’t force you to use an ND filter.
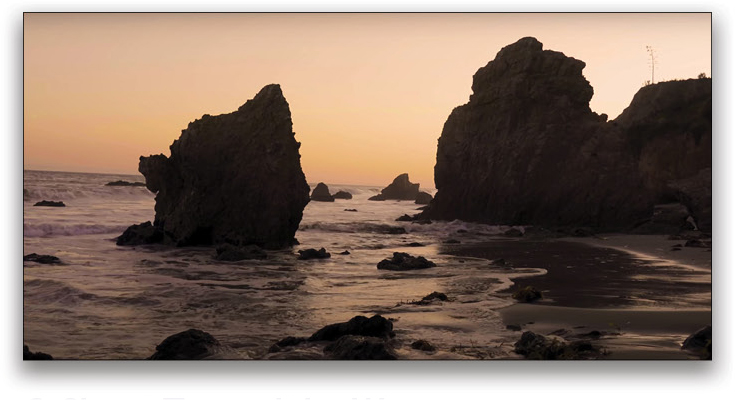
5. Shoot Toward the Good Light
As mentioned earlier, you want to shoot at sunset when the light is the nicest. The best light is usually on the west side, but you might be surprised, so look around for the optimum light and great clouds to really get the perfect shot.
6. Shoot Toward the Waves
It’s not always easy to shoot toward the waves because you also need to keep a good composition; but it’s very important for wave painting. It will create beautiful leading lines and give you great motion within the water.
7. Shutter Speed
As noted earlier, shooting between 1–3 seconds is crucial. In my experience, 1 second works best for me, but
you need to experiment for yourself. You won’t be able to do wave painting if you’re doing a 10–20-second
long exposure. Keep your ISO at the lowest possible (around 100), and your aperture between 4–10. Focus
on your foreground element and play with the exposure between 1–3 seconds, and you’re good to go!

8. Shoot in Manual
The great advantage of shooting in manual is that all of your photos from the same shoot will have the same settings, which will make it easier to synchronize your retouch across multiple images (see #12 below).
The Post Process
9. Start with Lightroom Presets to Retouch Your Photos
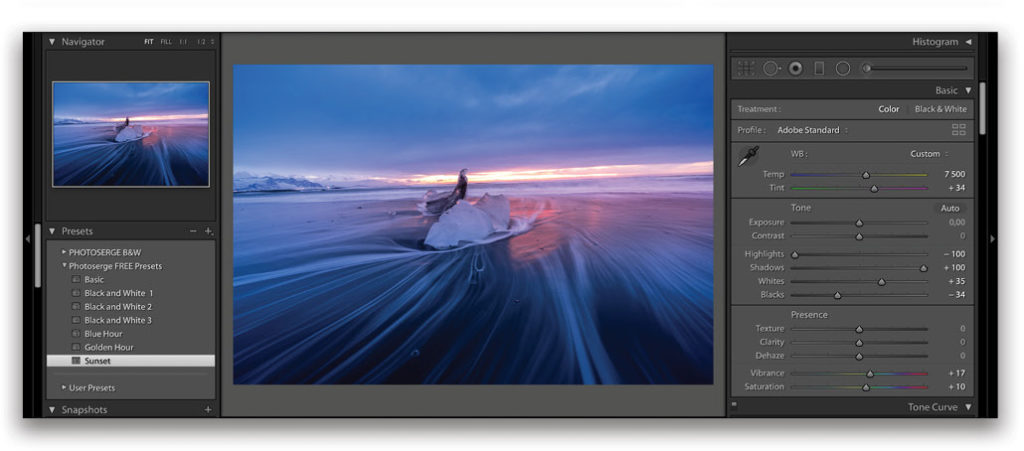
I highly advise that you use Lightroom presets, as it will make your retouch smoother and faster! You can find presets on the web (including some free ones that I offer), or you can even create your own. Here we used one of my custom presets that I call “Sunset” and, with one click, you can see that there’s already a nice look.
10. Tweak the Preset for Each Photo
A preset is always just a starting point, so now you can tweak the settings and adapt it to your photo. Here are the basic settings used for this photo: Blacks at –28, Whites at +20, Contrast at +46, and Tint at +24 to make it a little less magenta (see bottom image).

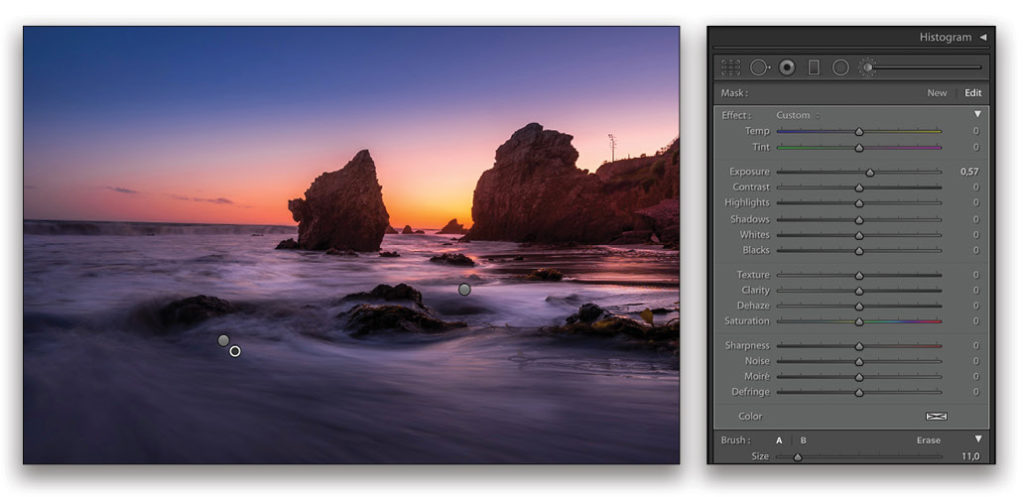
11. Wave painting
For the wave painting, grab the Adjustment Brush (K), boost the Exposure to around 0.5, and set both the Flow and Density in the Brush section near the bottom of
the panel to around 70. Now lightly brush over one of the waves. You’ll want to create a new brush for each wave, and pile up layers of brushstrokes to give you more control over the results. To create a new brush, simply click the word “New” at the top left of the Adjustment Brush panel.

Tip: Select Auto in the Show Edit Pins drop-down menu below the image on the left so the pins aren’t visible when your mouse isn’t over the photo. This way you can better appreciate the results of your brushstrokes.
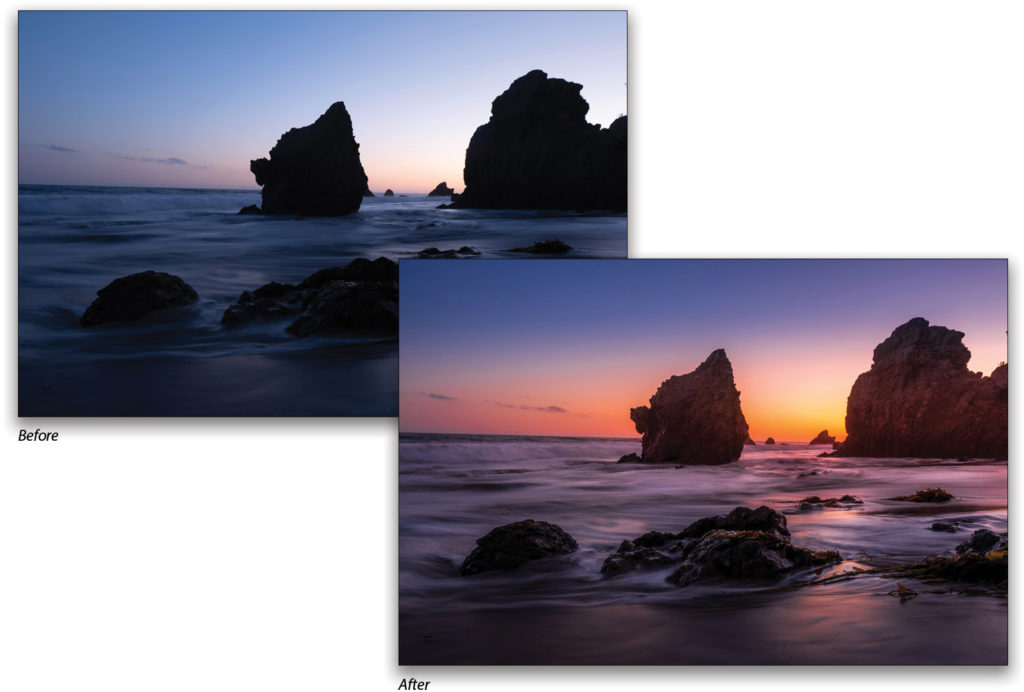
Here are the before and after photos:
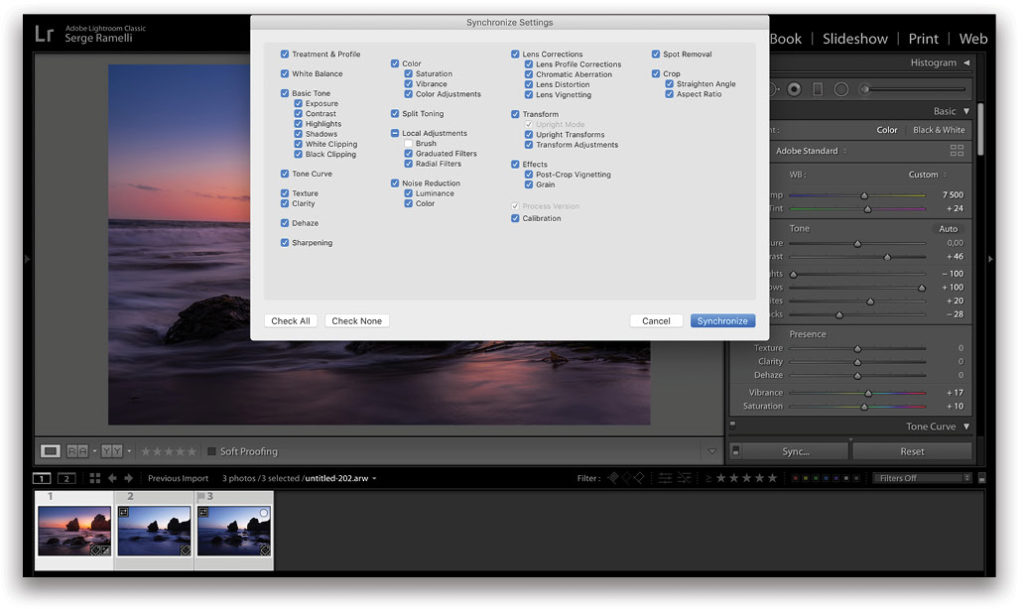
12. Because You Shot in Manual
You can easily synchronize your first retouch with the rest of the images from that shoot because you shot in manual (see #8 above) and all your photos have the same settings. With the image you just edited still the active image, Command-click (PC: Ctrl-click), or Shift-click, the images you want to synchronize in the Filmstrip. Click the Sync button below the right-side panels to open the Synchronize Settings dialog, choose the settings you want to sync, and click Synchronize. You’ll just have to do the wave painting again with the Adjustment Brush because the waves will be different, but this will definitely gain you time!
Example #2
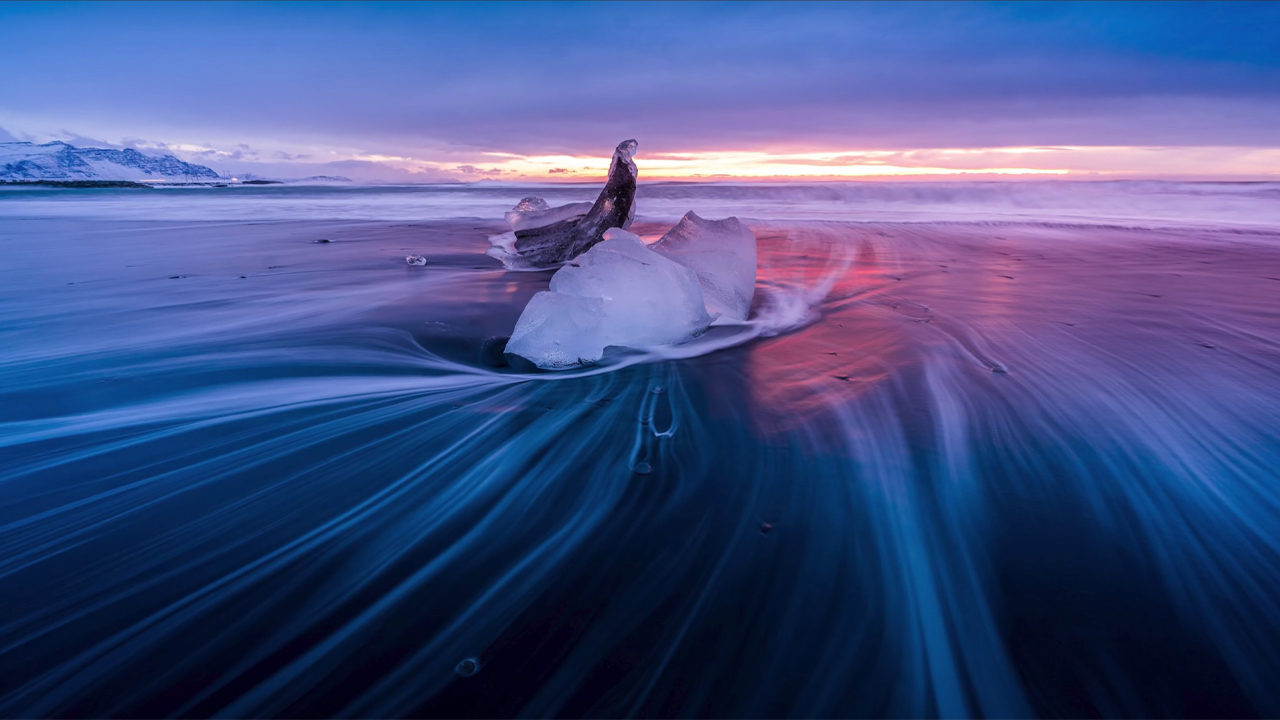
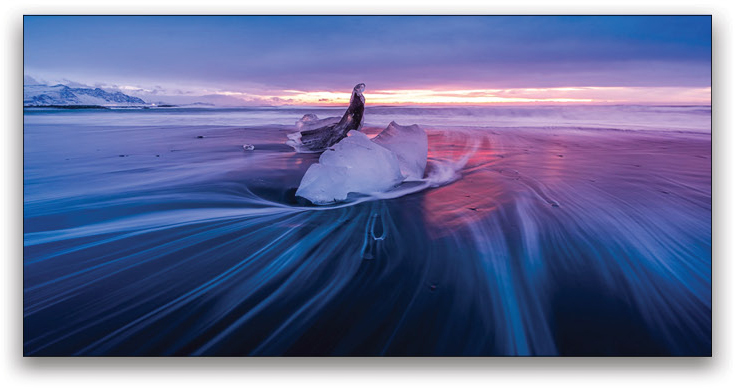
Let’s take a look at another example of a photo taken in Iceland.
Step One: As you can see, this image was taken toward the wave! So, as with the previous retouch, I’m going to start with my Sunset preset.
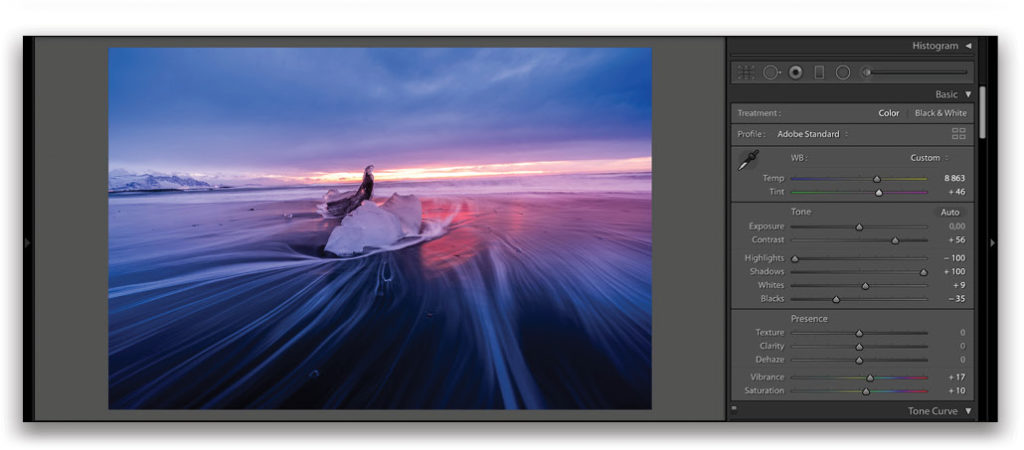
Step Two: Now let’s edit the basic retouch by setting the Blacks to –35, Whites to +9, Contrast to +56, Temp to 8863, and Tint to +46.
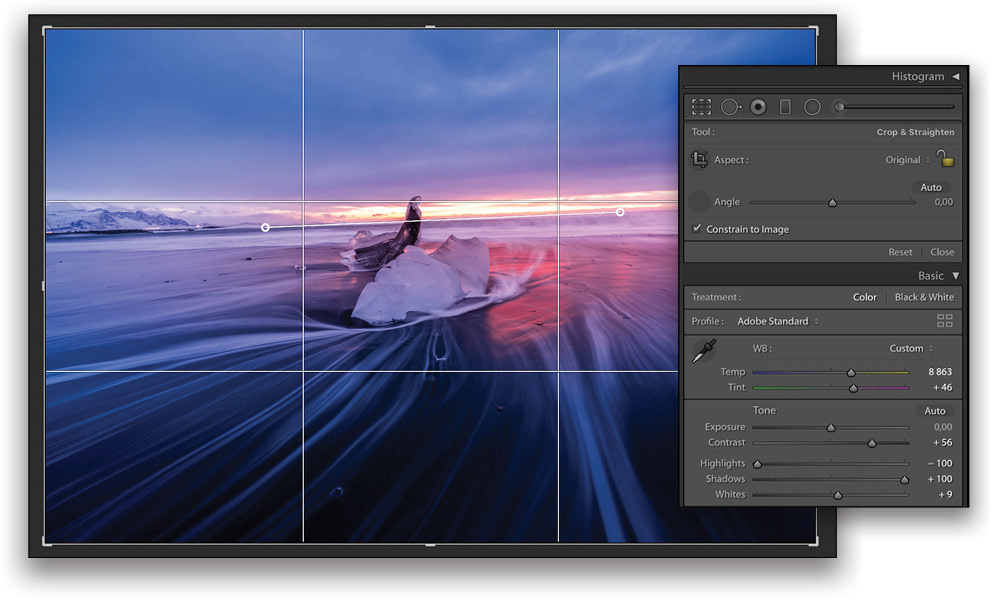
Step Three: Always make sure that your horizon is straight in your images. Go to the Crop Overlay tool (R), grab the Straighten tool to the left of the Angle slider in the Crop panel, and click-and-drag along the horizon. Lightroom will automatically rotate the image. In the Aspect drop-down menu, you can also select 16×9 to make your photo more dynamic. Press Enter to commit the crop.
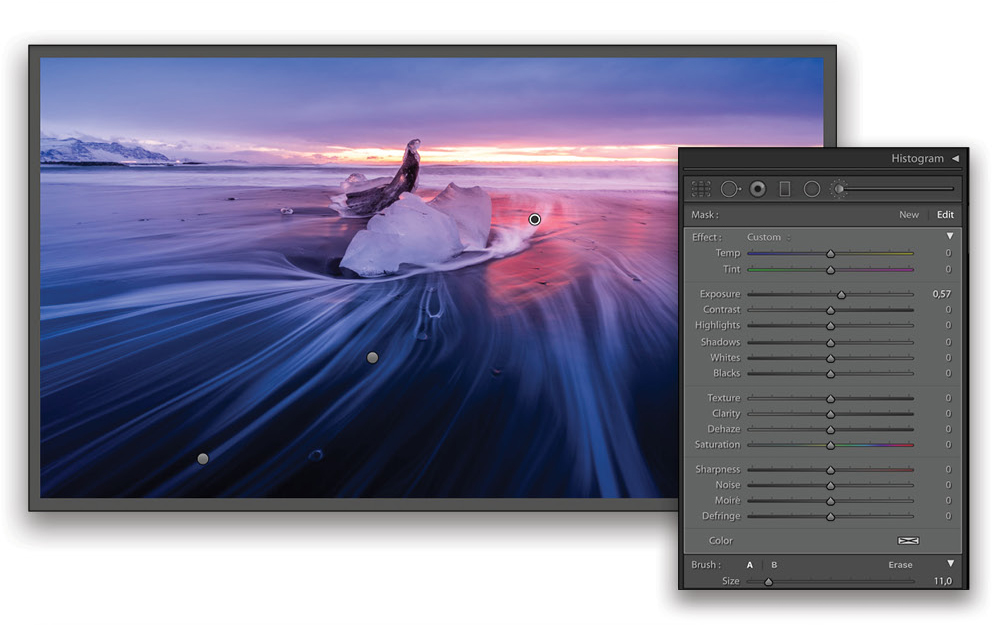
Step Four: Let’s do the wave painting with the same Adjustment Brush (Exposure around 5.0). You can brush over the white parts of the waves to enhance them. The best way to see if you overdid it is to come back later and, if the strokes of light are obvious, then you know you went too far!
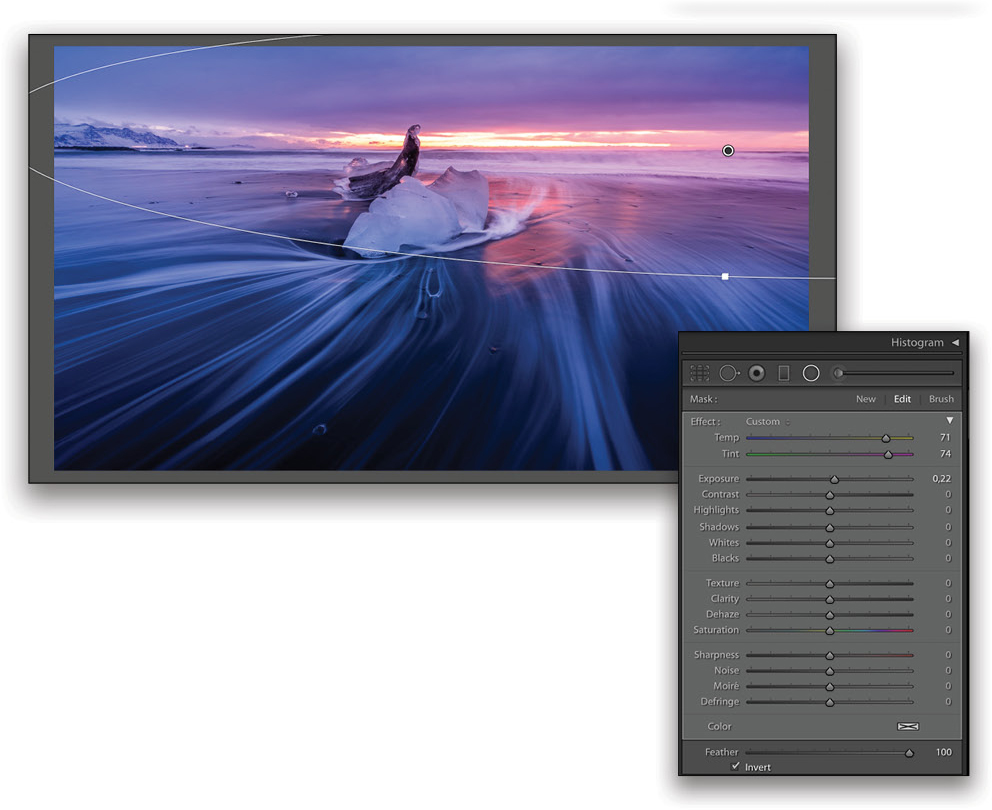
Step Five: Use the Graduated (M) and Radial Filters (Shift-M) to enhance the sun and close up the photo. Many presets (including my Sunset preset), have Graduated or Radial Filters as part of the preset; you just need to adapt them to your photos. Here, I dragged the Graduated Filter’s pin closer to the bottom of the photo and adjusted its setting to “close up” the bottom of the photo. I then moved the Radial Filter’s pin to the right and adjusted it to enhance the sun where it would be if it were still above the horizon.
There you go! I hope you enjoyed these tips and that you’ll have fun shooting long exposures at the beach and wave painting. I think it makes a big difference and adds aesthetics to the photo. Enjoy!
This article originally published in Issue 64 of Lightroom Magazine.


