
It’s that time of year again folks, the holidays! To be honest, it’s my favorite time of year. I just love how everything sparkles, people are friendlier, and here in DC we get a few beautiful snowfalls. What’s not to love?
It can also be an extremely busy time for professional photographers. Families want images for holiday cards, companies are having holiday parties and need photography coverage, and the list goes on. If you’re a professional photographer, this is great news for you! But if you’re looking for time to sneak in a holiday-themed personal shoot, your lack of free time may become a problem.
Personally, my lack of free time comes from a completely different reason, our new five-week-old. Even though I’m obsessed with my new little “shark-ette,” it does mean I have a lot less time to devote to work right now. So whatever the reason may be that you’re strapped for time, this article will show you how to repurpose an image you’ve already taken and turn it into something new and holiday-themed for your clients to enjoy.
Let me briefly touch on color: It’s definitely something people underestimate. Almost the entire meaning or message of an image can be changed by merely changing the colors within. So hopefully, the super-fast skill you learn here will re-open a world of possibilities for other images you’ve already completed, just by tweaking their colors!
Holiday Colors
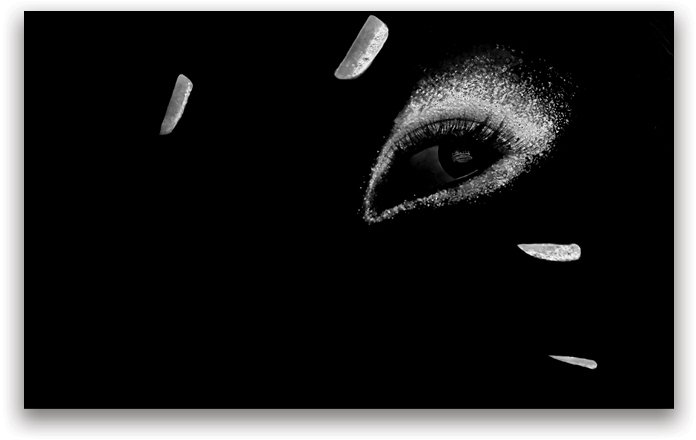
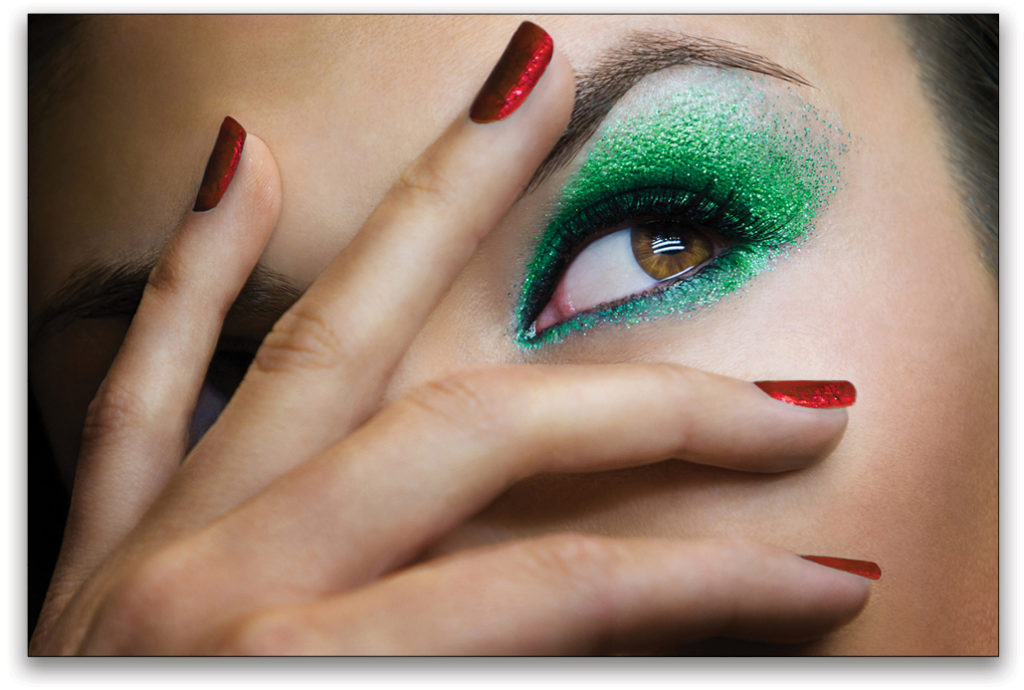
Here’s my original image, although this image is already perfectly colored for Hanukkah, I’d like to change the colors of the fingernails and the eye shadow to have a Christmas theme. And as a little holiday gift to you all, I’ve included a watermarked version of this image for you to practice this skill!
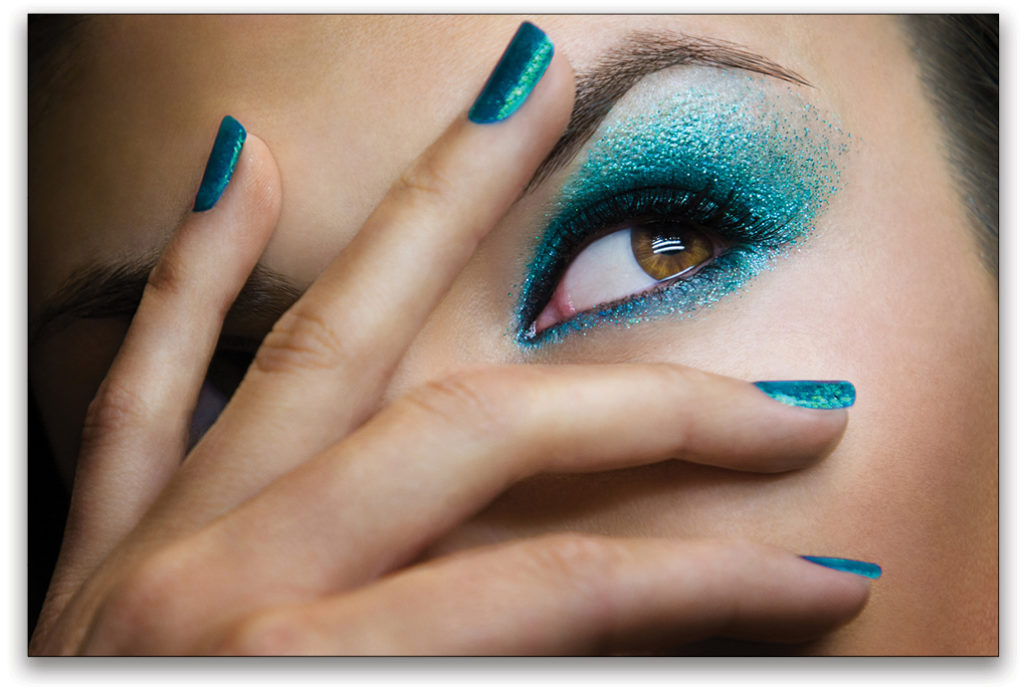
Before
[KelbyOne members may download the file used in this tutorial here. All files are for personal use only.]
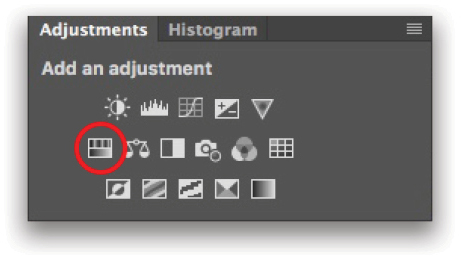
Step One: Let’s focus on the eye shadow first. We’re going to use Hue/Saturation adjustment layers to change the colors in the image, so click the Hue/Saturation adjustment layer icon in the Adjustments panel (Window>Adjustments).
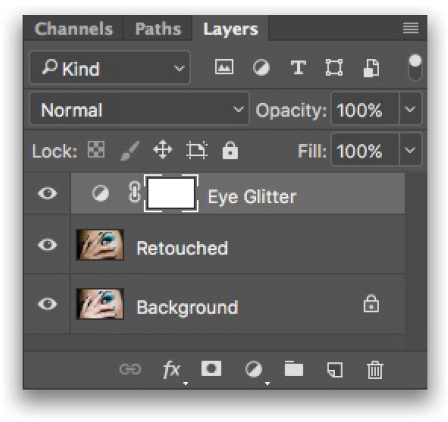
Step Two: Let’s rename our layer ”Eye Glitter.” To do this, double-click on the name of the Hue/Saturation layer in the Layers panel and type the new name.
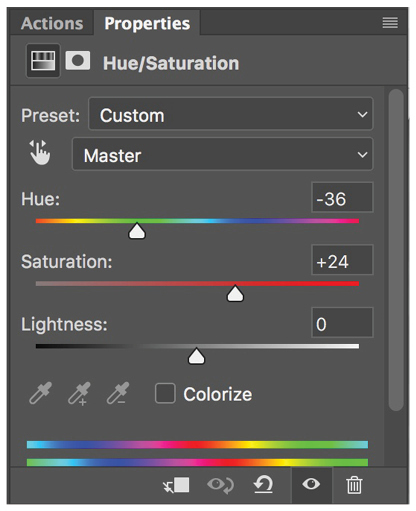
Step Three: Now it’s time to actually change the colors! In the Properties panel (Window>Properties), drag the Hue slider until the eye shadow is the color you want. For this image, I dragged the slider to –36. I also increased the Saturation to +24.
Step Four: But now the color shift is visible on the whole image. We need to edit the mask of this layer so the color change only shows through on the eye shadow. With the layer mask thumbnail of the Eye Glitter layer selected in the Layers panel, choose Color Range from the Select menu. In the Color Range dialog, choose Cyans from the Select menu, and click OK.
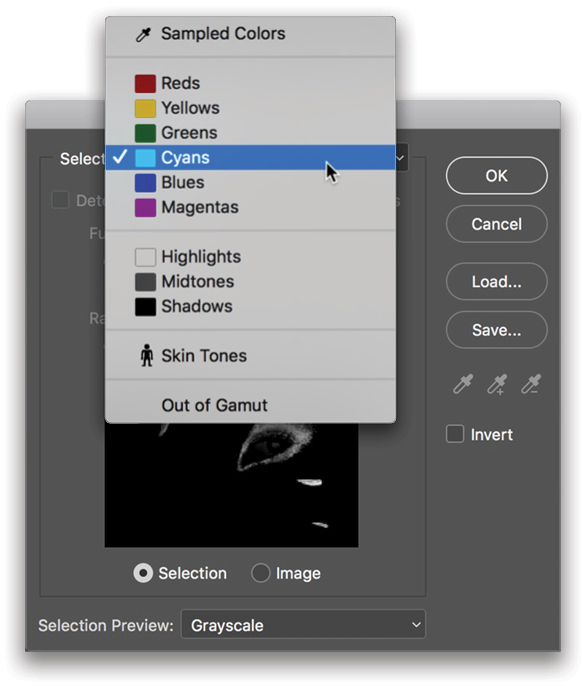
Step Five: In one easy step, an extremely intricate mask has been created for you that includes both the eye shadow and the nails. Here’s what the mask looks like. You can view the mask in your image by Option-clicking (PC: Alt-clicking) the layer mask thumbnail. Option-click (PC: Alt-click) again to return to the image.
Step Six: Using Photoshop, we’re 99% of the way there, but let’s quickly tweak the mask to expand it slightly. To do this, you’ll again need to have the Eye Glitter mask selected in the Layers panel, and then click on the Select and Mask button near the bottom of the Properties panel.
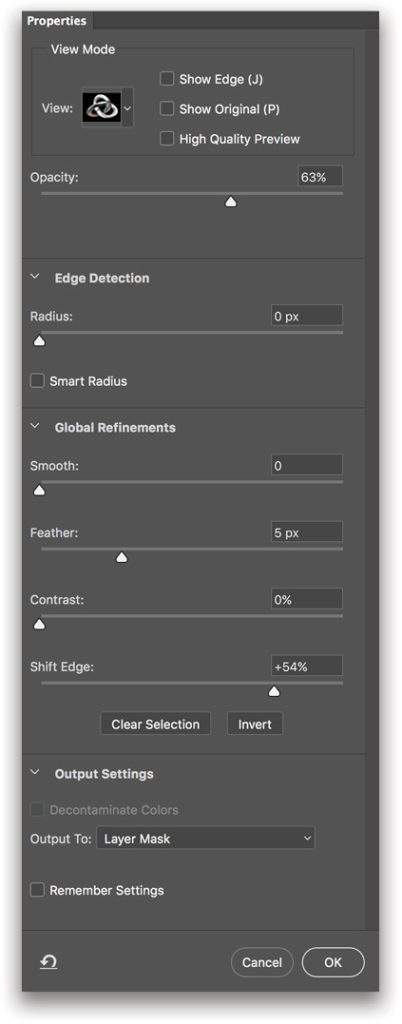
Once in the Select and Mask window, drag the Feather slider to 5 px and the Shift Edge slider to +54%. Make sure your Output Settings are set to Layer Mask at the bottom of the Properties dialog, and then click OK to return to the regular Photoshop window.
Step Seven: Some of you might be reading this and saying, “Wait, the nails are still green. This looks more like a St. Patrick’s Day image than a Christmas one!” Since Photoshop did such an awesome job of creating a perfect mask for both the eye shadow and the nails with Color Range, it makes sense to use this mask for the nails, as well. So let’s duplicate the Eye Glitter layer by clicking on the layer in the Layers panel and pressing Command-J (PC: Ctrl-J). This will be the layer we use to turn the nails red. Before moving on, we should rename the Eye Glitter Copy layer to “Nails.”
Step Eight: We now have two layers that are changing the colors of the nails and eye glitter to green. But we want the mask of the Eye Glitter layer to only have white in the area of the eye glitter, and the mask of the Nails layer to only have white over the nails. Temporarily hide the top Nails adjustment layer by clicking its Eye icon in the Layers panel, then click on the layer mask of the Eye Glitter adjustment layer to make it active.

Now let’s use our Brush tool (B) with a soft round brush to paint with black over the nails in the image (essentially erasing the effect from the nails and changing them back to their original cyan color). Hide the Eye Glitter adjustment layer, reveal the Nails layer, and click its mask so we can paint with black over the eye glitter area to hide the effect from that area. Turn the Eye Glitter layer back on. Here’s what the two masks should look like.
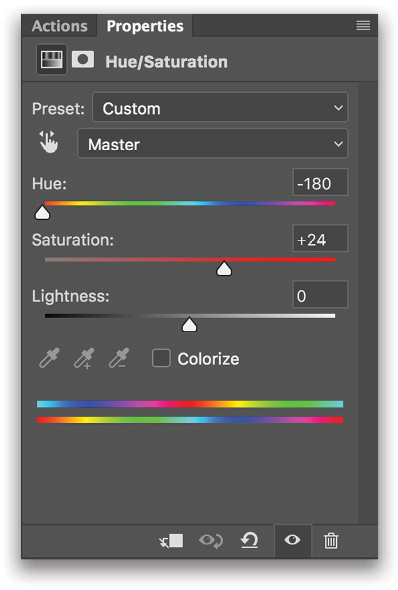
Step Nine: At this point, your nails and the eye glitter are both still green, but they’re now divided onto two different layers. Our last step is to change the color of the nails from green to red. Click on the actual layer icon (not the mask) of the Nails layer and drag the Hue slider to -180. It’s literally that simple!
Here’s the before and after of the image. In a few short minutes, I’ve created something fun and festive to send out to my clients and wish them a happy holiday season!
Even though this is somewhat of a well-known technique, my hope is that you’ll be able to use this tool in a new way to breathe new life into older images! I hope you all enjoy, and wish you Happy Holidays!


