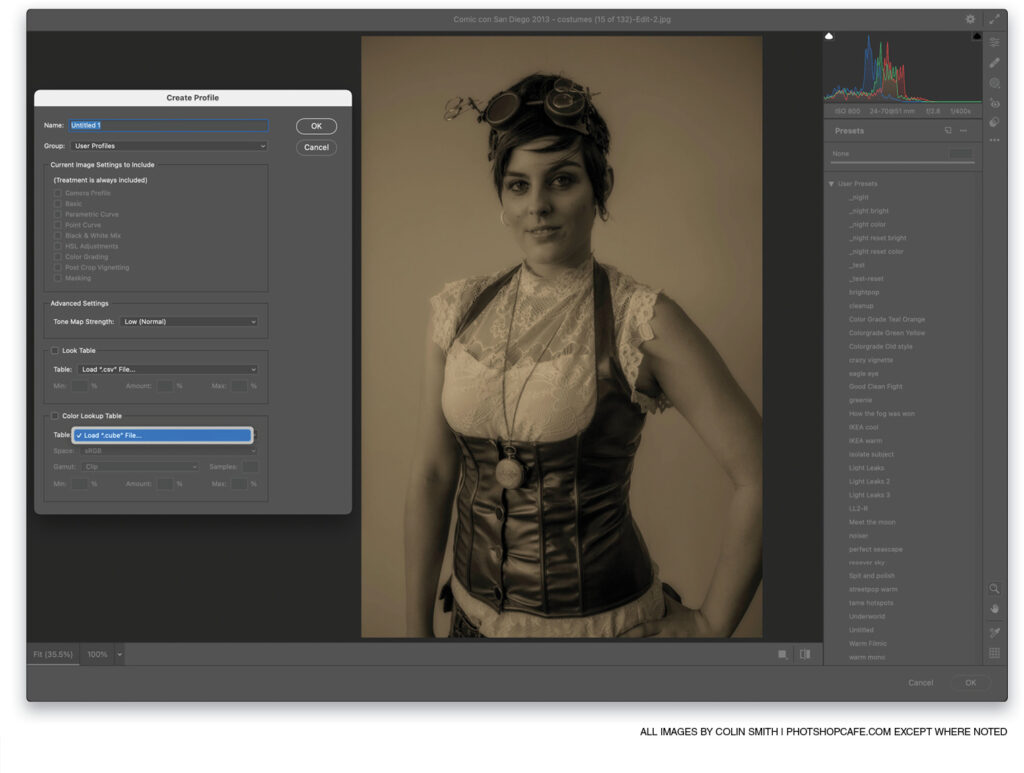
Color LUTs (lookup tables) are powerful for color grading images. Not only can you use the same LUTs in different applications, you can also use them on photos and video. LUTs can access advanced settings that a regular Camera RAW preset can’t. If only you could use LUTs in Camera Raw and Lightroom…but, you can: they’re just hidden.
Open your image in Camera Raw, and click on Presets (two overlapping circles on the right). Hold down the Option (PC: Alt) key and click on the Create Preset icon at the top right of the panel. The Option (PC: Alt) key causes the Create Profile dialog to open instead of Create Preset. At the very bottom you’ll see a section for Color Lookup Table. In the Table drop-down menu, select Load “.cube” File and your file browser will open looking for a LUT. You can now load in any LUT that’s in the .cube format.
Give your profile a name at the top of the Create Profile dialog and choose the Group in which you wish to save it. Click OK. All you need to do now is apply the profile in the Profile Browser in Edit and you’re actually applying the LUT.

This tip originally published in Colin Smith’s “Photoshop Tips” column in the April, 2023 issue of Photoshop User magazine.


