Join Lightroom expert Terry White in this excerpt from his Photoshop World 2023 class “Leverage the Power of AI in Lightroom” as he demonstrates advanced masking techniques for editing multiple people in your photos. Learn how to get optimal results when selecting and adjusting clothing and facial features. Perfect for all photographers looking to enhance their editing skills. Watch the clip from our YouTube channel here, or keep reading this post below.
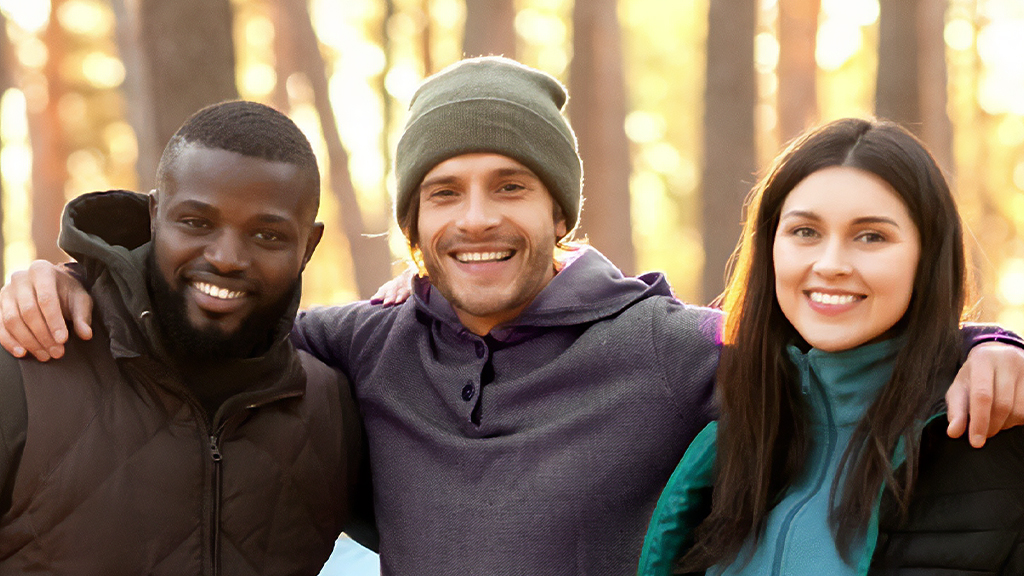
AI Masking can be based on subject or based on person. What happens when it’s more than one person, you ask? I’ve got a sample right here. So, there are three people in this shot.

When I go to click on the masking icon, it quickly detects all three people.
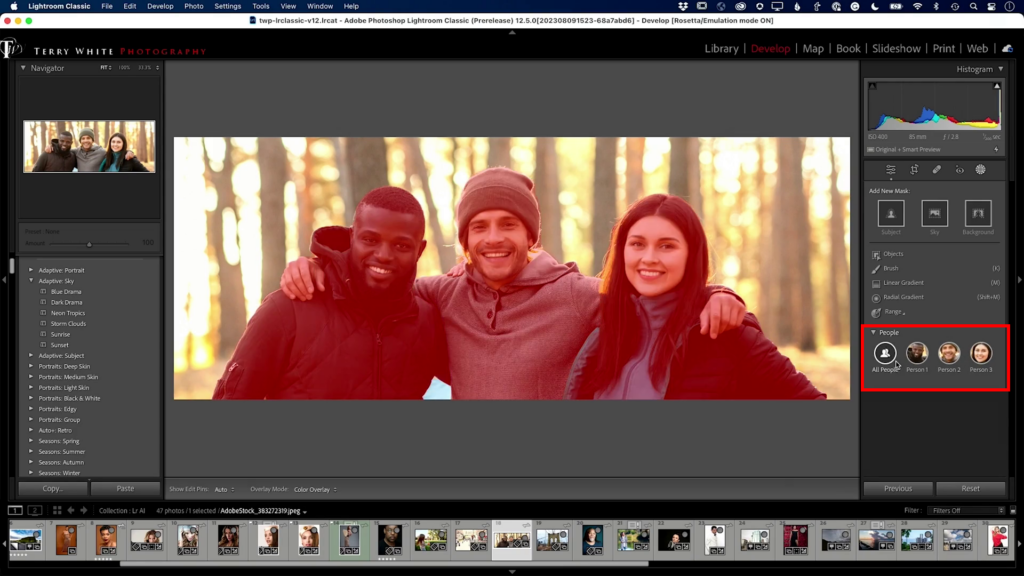
It doesn’t know which one’s which, but it detects all three. So now let’s say I want to select the guy in the middle. Just click on “Person 2” and Lightroom will reveal all the available Person Mask Options for that person.
Let’s mess with his clothes. Tick on the box for Clothes from these options.
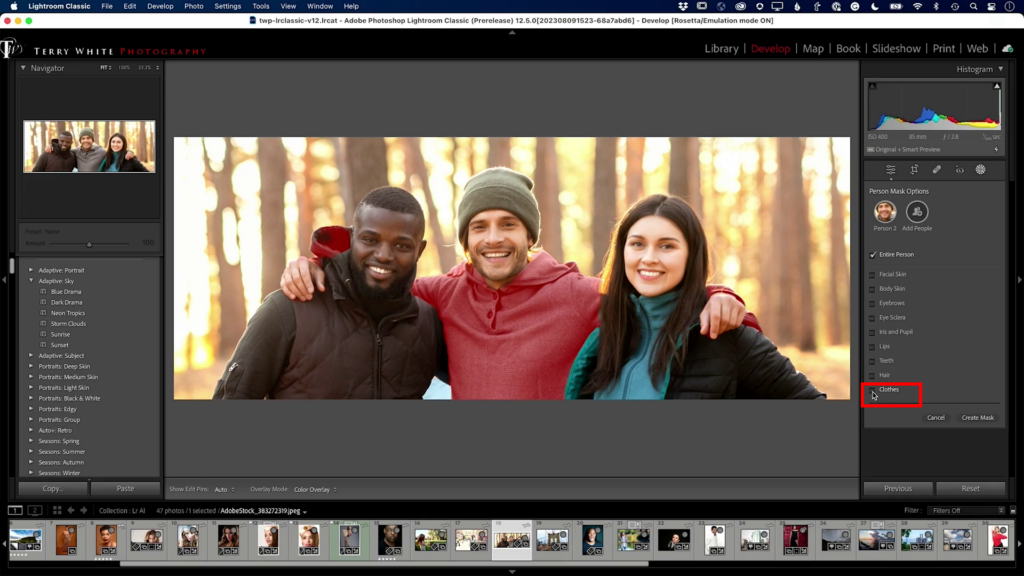
It does a good job. So let’s go create a mask for just the clothes by clicking on Create Mask. We can adjust just the clothes, lightening or darkening them, using any Lightroom adjustments we want. Now in this case, the first guy’s hood is not part of this outfit. So what would I do if I don’t want his hood selected? Let’s name this mask “Person 2 clothes.”
Go to that mask. I would hit Subtract > Brush, and just say, “no, no, no, leave that other guy’s hood alone” by painting over that area with the brush. And so now when I make adjustments, it’s not affecting the first guy’s hoodie at all.
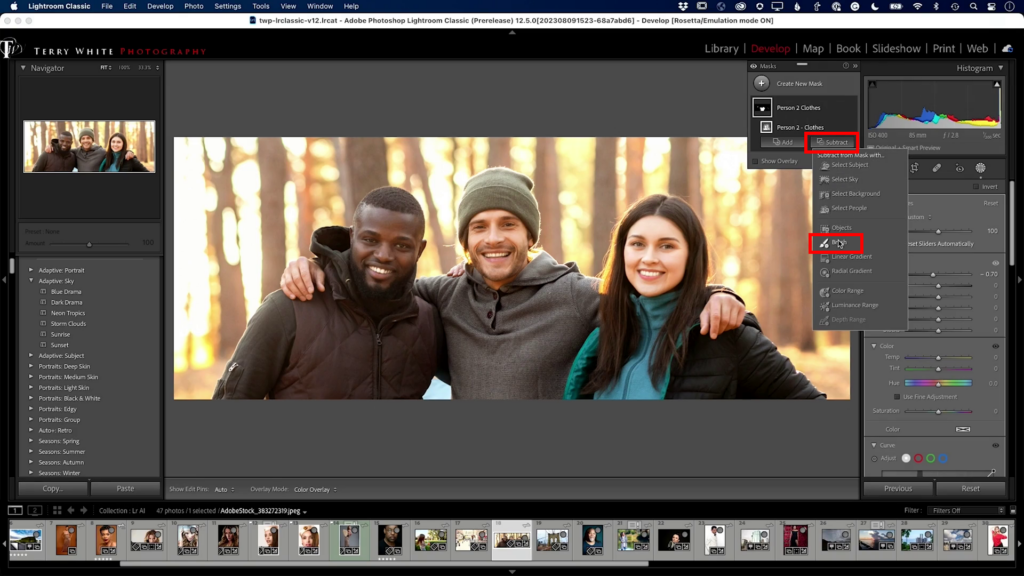
So same thing on the right. The mask is including the back of the woman’s hoodie. Use that same brush to subtract her hood from the mask.
If you want, you can even change the color of his outfit. I’ve shifted it to look more purple. I see now that Person 3’s hand is on the center guy’s shoulder. Let’s not make her hand purple. Brush on the mask there, too.

You’d want to zoom in to do a better job, but this shows a quick subtraction of her hand.
Those are the kinds of things you want to look for and correct, especially when people are touching like this. You want to make sure that the AI doesn’t go a little too far.
That’s what Lightroom’s AI masking does for multiple people.
If you go Create New Mask and choose “Select People“, it will show you all three subjects again, and then you can select whatever part of each person you want.
If I go to “Person 1”, he’s got enough facial hair that it’s identified in the Person Mask Options. So, if I select tick on facial hair, click Create Mask, I can then go in and make any changes to his facial hair that I want.
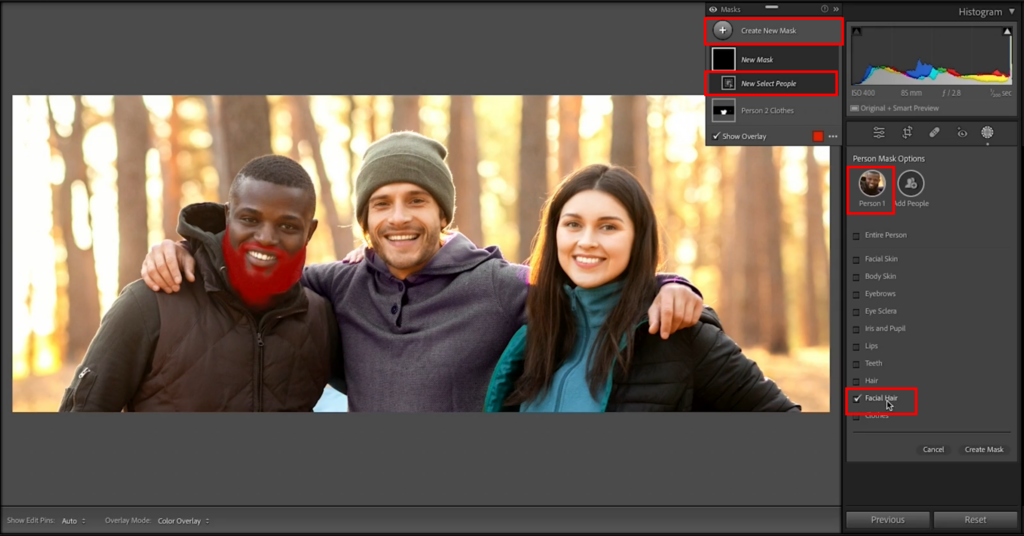
So, we could give him a dark grizzly bear beard, or whatever you call it, I don’t know, I’m not a beard guy. Or lighten it up a bit, or make any other changes to it you want.
I’ve found that I’m more successful when I try and lighten or darken facial hair not with Exposure, but with Curves instead. When I click the Curves, it just gives me better results when I’m making adjustments to the facial hair.
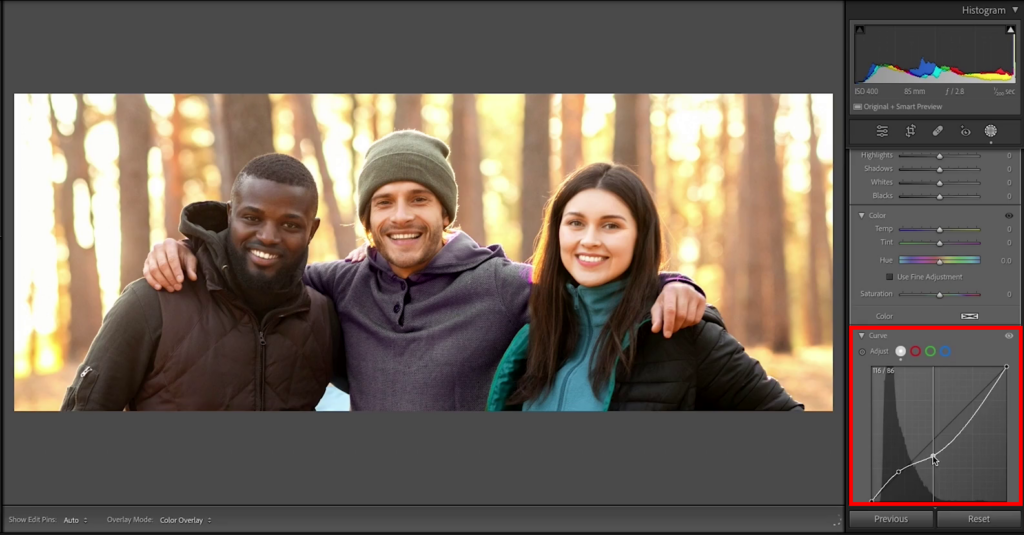
And I’m not really a Curves guy, but this is one of those times where Curves is the better way to go. when you’re affecting facial hair. I’ve just found that to be the case.
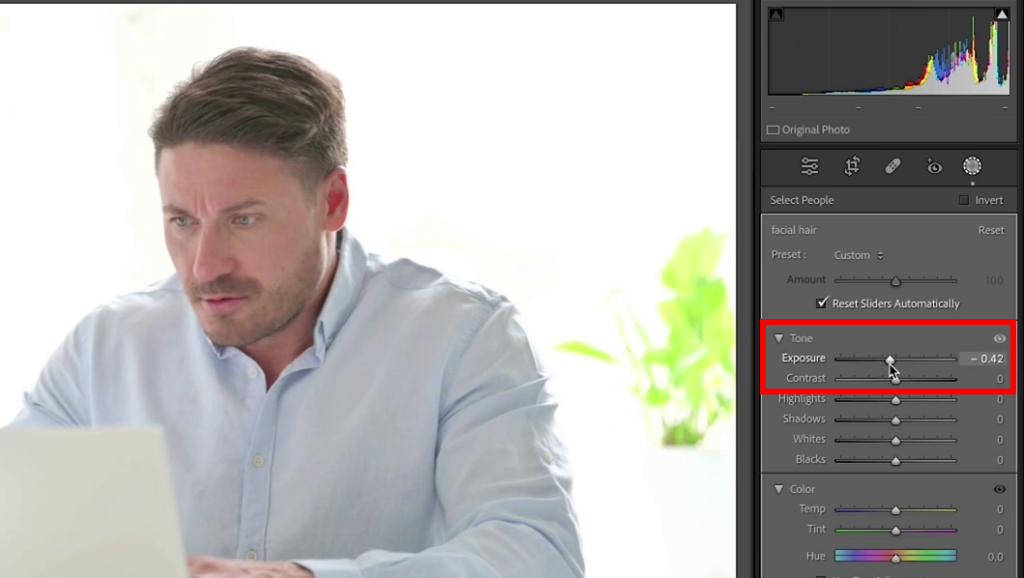
I’ll show you one more example where we can adjust the facial hair. So, the person mask selects his facial hair. Look at that nice red mask right on the facial hair. So easy! Create the mask by clicking on Create Mask. Rename that mask “facial hair.”

Again, you could use Exposure. If you just want to adjust a little bit, Exposure is fine.
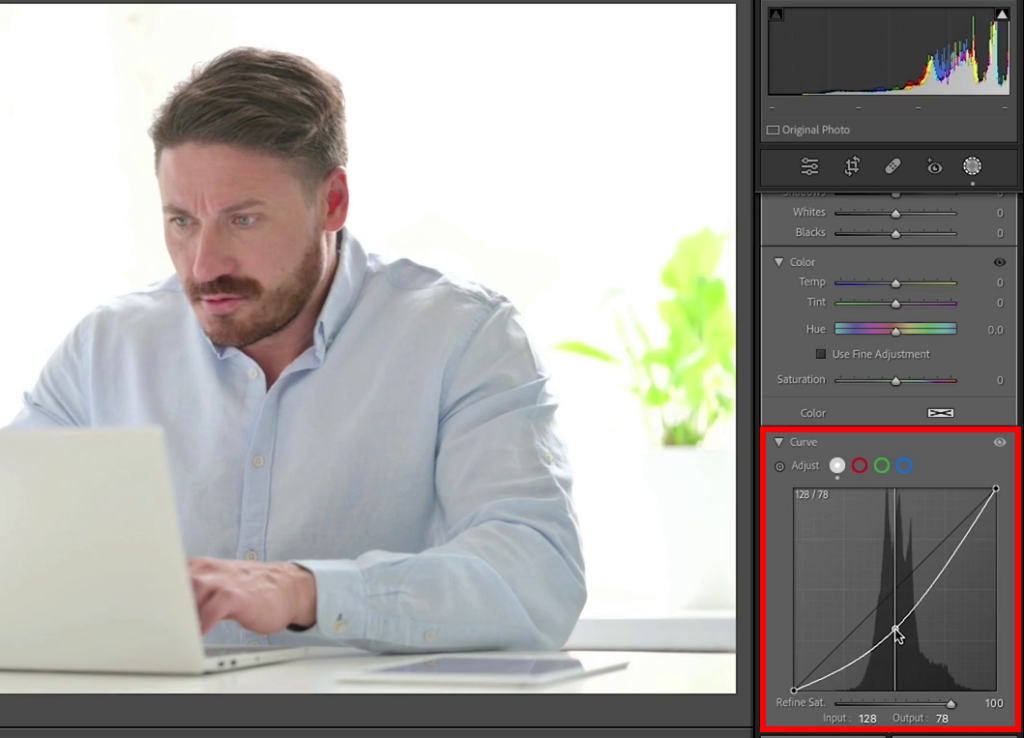
If you really want to be detailed about it, use Curves. Look at just how much control you get with a curve.
Cheers everybody, thanks for watching. I hope you enjoyed this tutorial from one of my classes from last year’s Photoshop World. The schedule for Photoshop World 2024 is coming soon, so keep an eye on the site. Looking forward to it!
Join us at Photoshop World 2024 and immerse yourself in an event packed with innovative sessions and inspiring content. Experience top-quality sessions that will push your limits, provide fresh insights, and elevate your photography and design skills.


