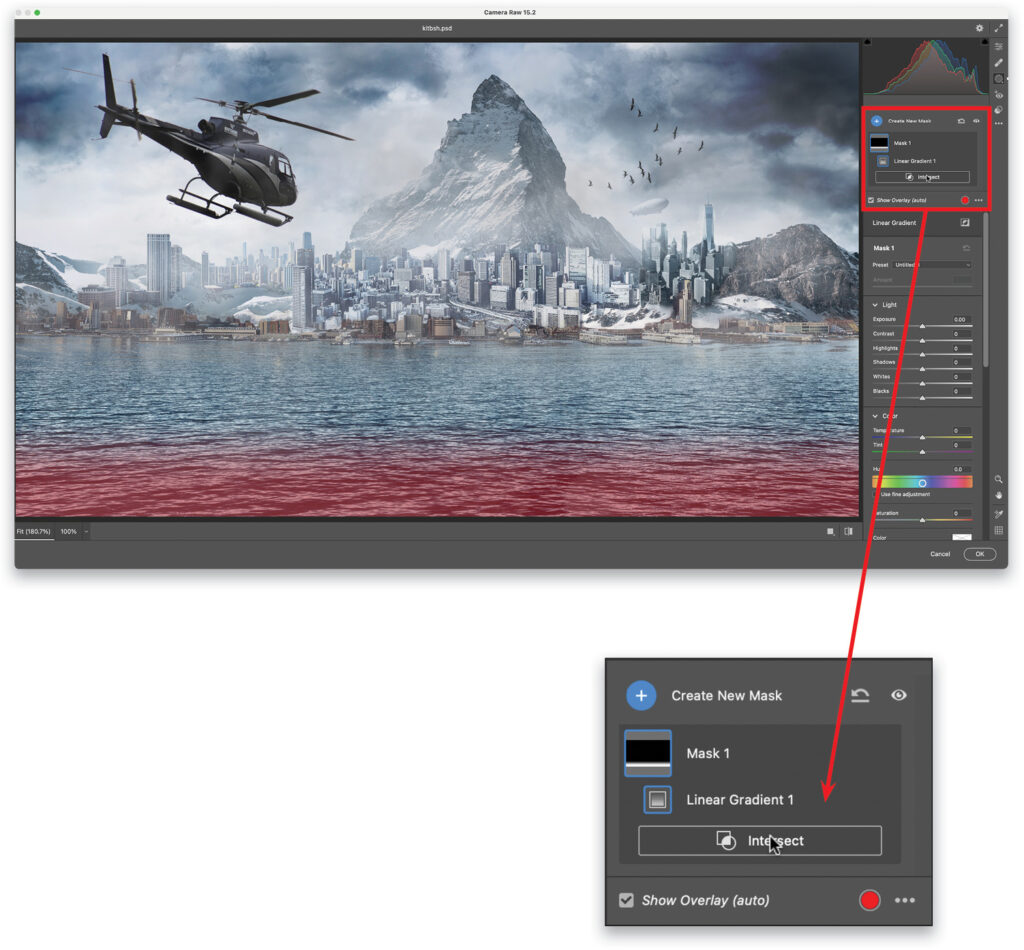
Have you tried the newer masking tools in Camera Raw yet? They’re really great for selecting practically anything. When the selections aren’t quite perfect, you can use the Add or Subtract buttons and select a masking tool to fine-tune the adjustments. There is another, more hidden and misunderstood tool, and that’s Intersect, which works like a frisket with an airbrush. “Oh, that clears it up,” said almost no one. For most people who don’t know what a frisket is, it’s a stencil that protects the image from being painted anywhere outside the cutout area, so the painted shape is made by a mask. In Photoshop terms, start with a mask, any mask. Now use another tool such as the Brush tool within the mask and only the areas where the brush overlaps the mask will show. This overlap is really powerful and can be used in creative ways.
Here’s the tip on accessing Intersect in Camera Raw: When you’ve created a mask, you’ll see two buttons in the Masks panel named Add and Subtract. If you hold down the Shift key, the two buttons will change into a larger button that says Intersect. Click and choose your desired tool and you’re off to the races. The new mask will only be visible where the two masks overlap.

This tip originally published in Colin Smith’s “Photoshop Tips” column in the April, 2023 issue of Photoshop User magazine.


