Since this issue’s central theme is weddings, I thought we would explore a few photo effects that are quick and easy and can benefit both designers and photographers.
Dramatic Lighting
Most photographers will tell you that the most important thing is lighting, and they’re right! Lighting alone can make or break the image and getting it right on site is crucial, but sometimes you may look at a shot and wish you had done one or two things differently. Well, here’s a cool trick that uses some simple layer tricks to get a really dramatic lighting effect:
STEP ONE:
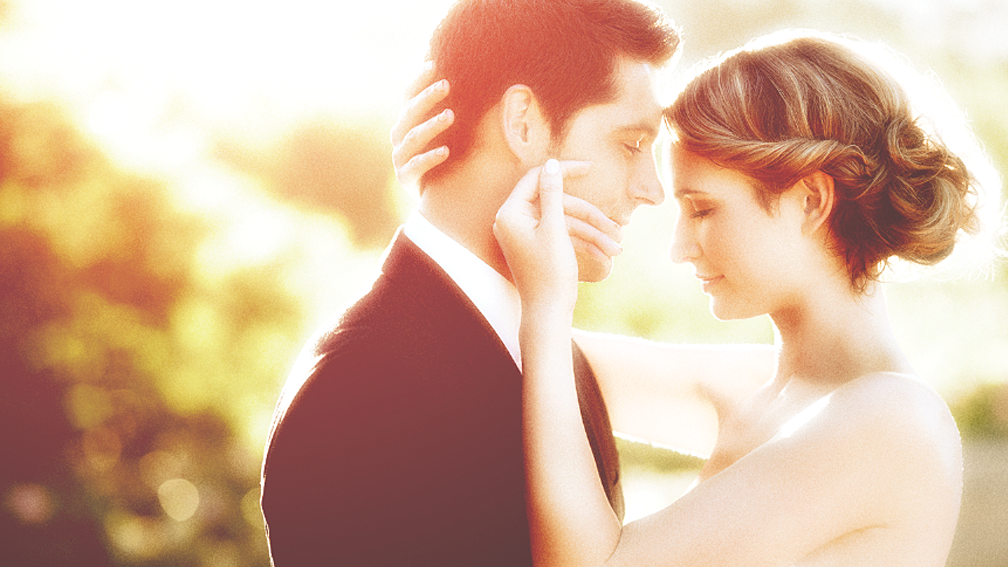
Here, we have a nice wedding shot taken at the beach. A nice composition, however, the lighting seems flat. Whatever can we do to make this image more dramatic? Let’s find out.
[KelbyOne members may download the files used in this tutorial here. All files are for personal use only.]
STEP TWO:
Click on the Create a New Layer icon at the bottom of the Layers panel to create a new blank layer, and then press Shift-Delete (PC: Shift-Backspace) to open the Fill dialog. Choose Black from the Use drop-down menu and click OK. Then, change the layer blend mode to Soft Light. This will immediately darken the image and boost the contrast a little.

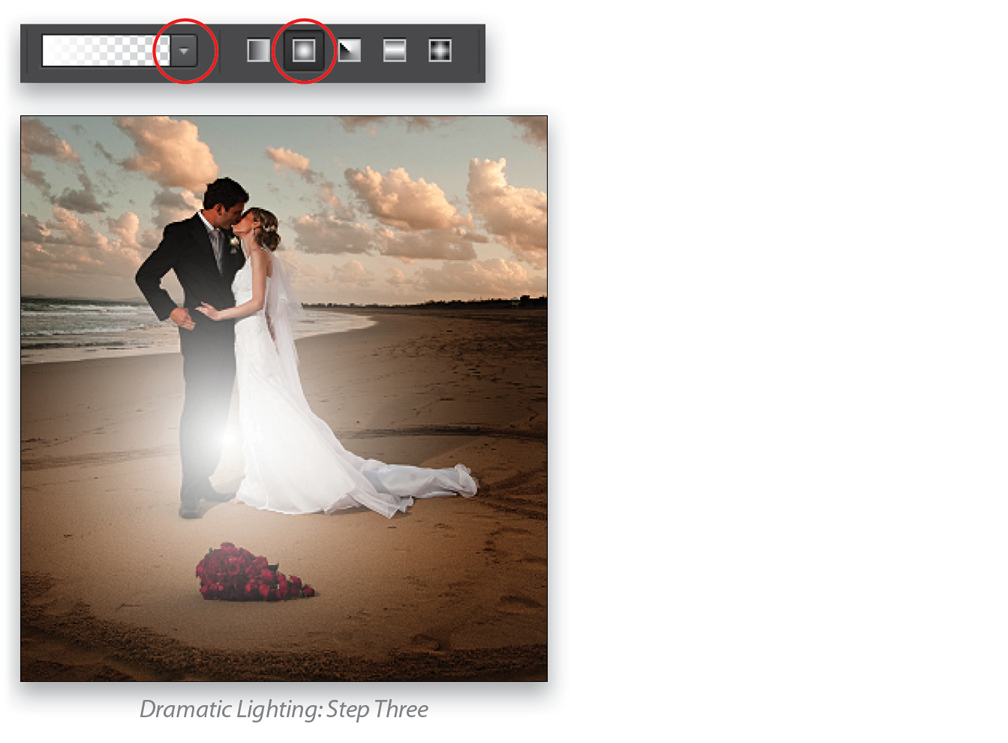
STEP THREE:
Now, create another new blank layer and then go to the Toolbox and choose the Gradient tool (G). Press D then X to set the default colors and make white the Foreground color. Up in the Options Bar, choose the Foreground to Transparent gradient from the Gradient Picker, and then click on the Radial Gradient icon. On the blank layer, draw a small gradient out from the center. Be sure, though, not to go all the way to the edges of the document.
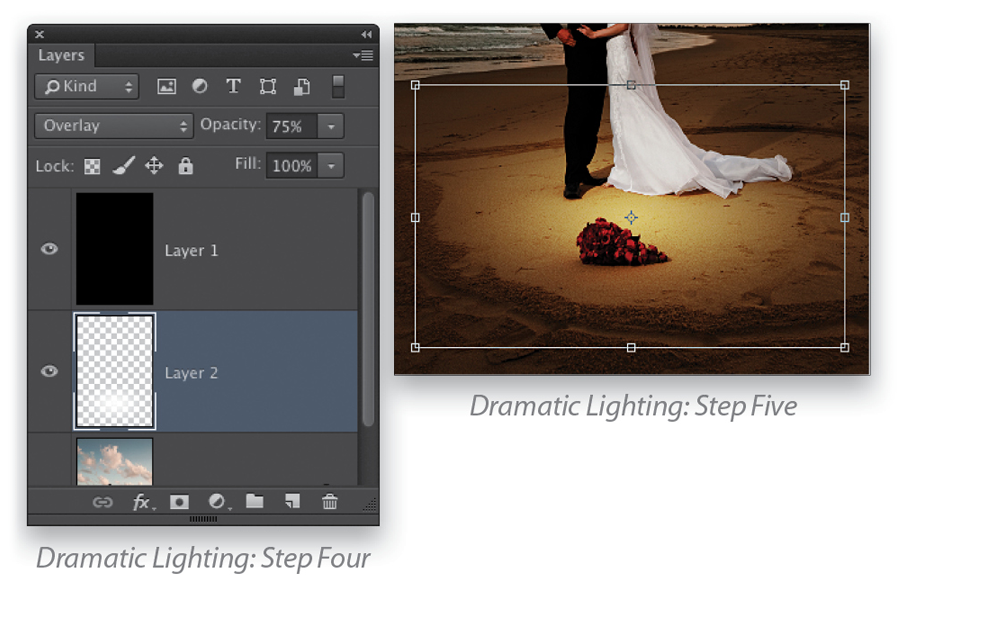
STEP FOUR:
Go to the Layers panel and change the blend mode to Overlay, and then drop the layer Opacity down to about 75%. Also, drag the gradient layer below the black-filled layer in the Layers panel.
STEP FIVE:
Press Command-T (PC: Ctrl-T) to invoke Free Transform. Grab the top-middle handle and drag down to squash the gradient horizontally, then click-and-drag inside the bounding box to position it over the sand area around their feet. Press Enter to lock in the transformation.
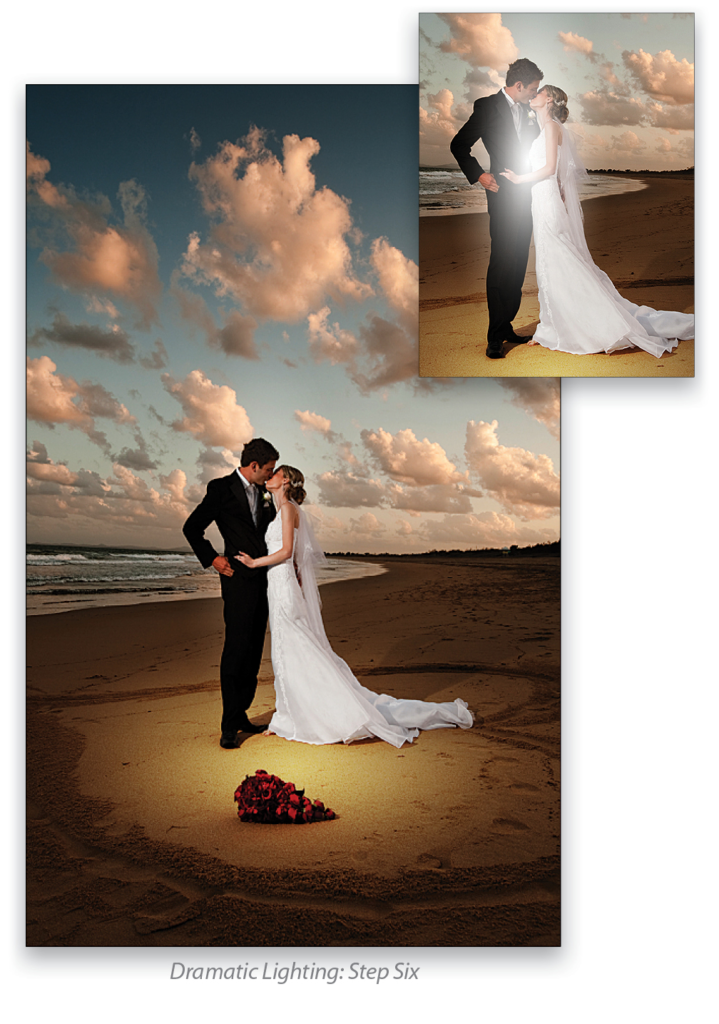
STEP SIX:
Create another blank layer and, using the same Gradient tool options, draw a gradient in the center again. Put the new gradient in Free Transform, but this time squash it vertically. Then, position it directly over the subjects and press Enter. Change the blend mode to Soft Light, which will give the photo a different mood altogether.
Experiment with this effect on other photos, tweaking the various settings as you go, as all images will be different. Enjoy!
Foreground Elements
Often, photographers will frame their shots with foreground elements to give a sense of depth to a shot. Here’s a cool trick to fake that depth of field and give the shot a private, intimate feel.
STEP ONE:
Start by opening the photo where you want to create depth of field. Then, open an image of flowers (you can download this one I found on Fotolia.com). Any image of flowers will work; you just need to be able to extract them, so the simpler the background the better.
STEP TWO:
Open the Channels panel (Window>Channels), press-and-hold the Command (PC: Ctrl) key, and click on the RGB channel thumbnail. This will load the brightness of the image as a selection.
STEP THREE:
Go to Select> Inverse to flip the selection around, or press Command-Shift-I (PC: Ctrl-Shift-I).
STEP FOUR:
Press Command-J (PC: Ctrl-J) three or four times to extract the selected elements to a new layer. Each duplicate layer builds up the density a little more.
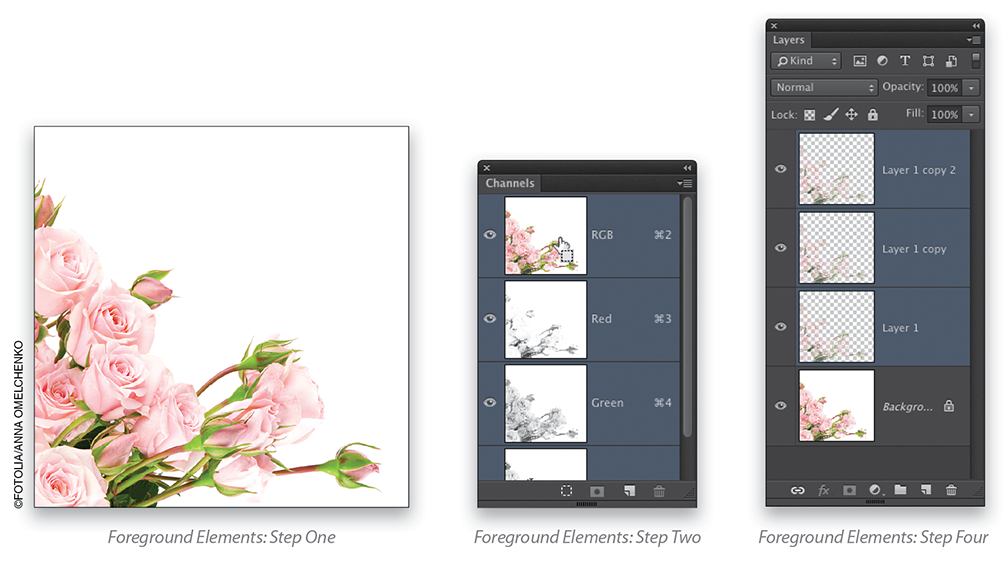
STEP FIVE:
With the top layer active in the Layers panel, Shift-click the first duplicated layer (Layer 1) to select all the layers, except for the Background layer, and then merge them together by pressing Command-E (PC: Ctrl-E).
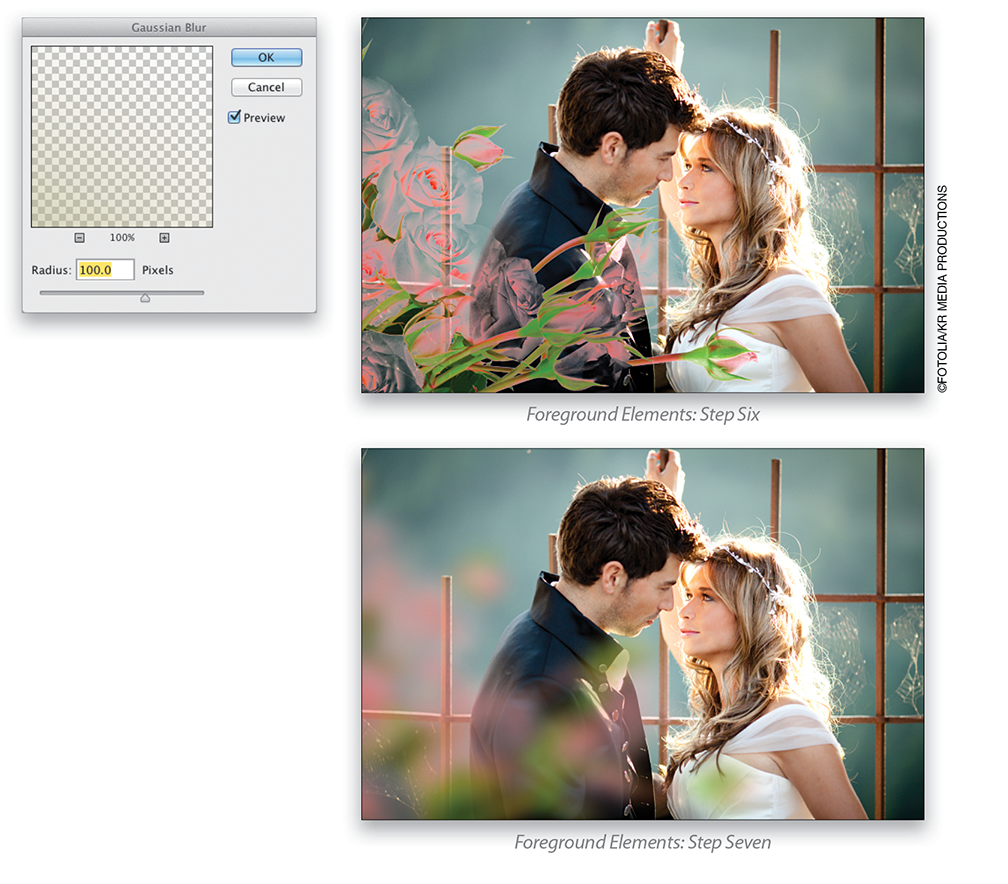
STEP SIX:
Now, using the Move tool (V), click-and-drag this layer into your image (here, we’re using a wedding shot). Use the Move tool to position it where it will work best depending on your image. Here, it works in the lower-left corner. If you need to resize the flowers, press Command-T (PC:
Ctrl-T) for Free Transform, press-and-hold the Shift key, and drag a corner point. Press Enter to commit the transformation. Once in place, go to Filter>Blur>Gaussian Blur. Set the Radius to around 100 pixels for a high-res image and click OK. (Note: If you’re using the download files, try a Gaussian Blur of around 15 pixels.)
STEP SEVEN:
Voilà! We now have a subtle foreground element to enhance the intimacy of the scene. Since this element is on its own layer, you can drag it to other images for an instant foreground effect.
Instagram Effect
One effect that has become very popular is the classic Instagram look. It’s funny how photo technology has gotten so much better, yet we’re looking for ways to get that retro look. Here are some more cool layer tricks to achieve that look quickly.
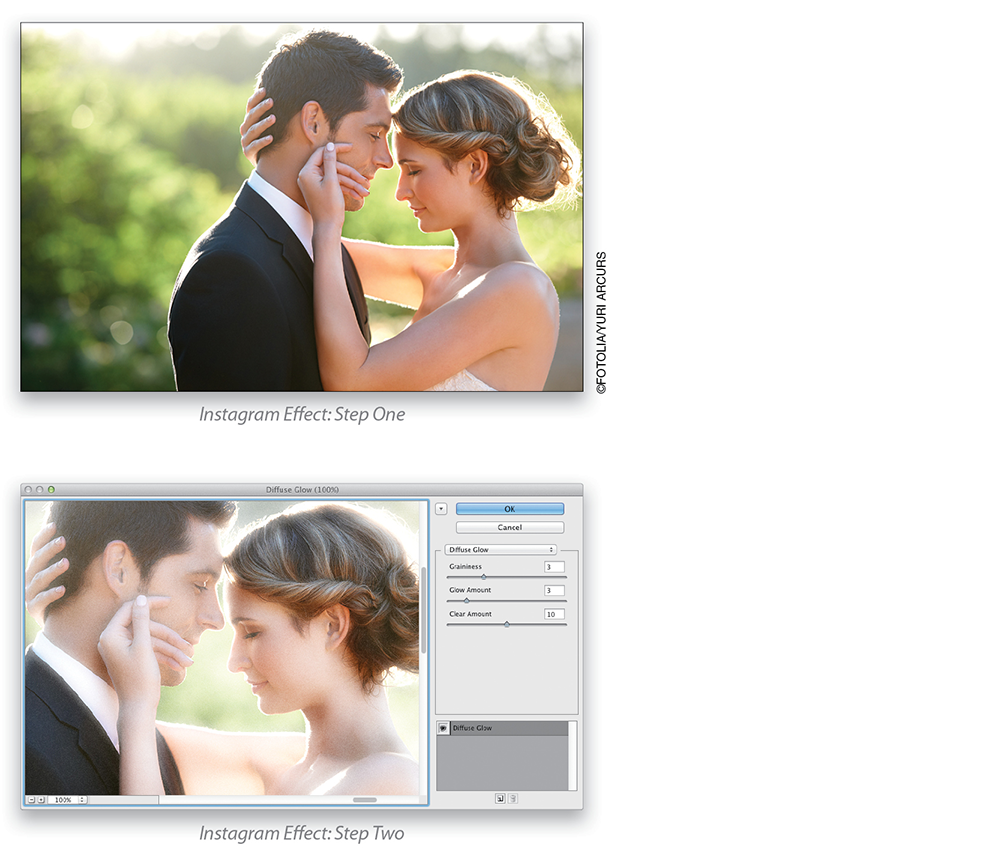
STEP ONE:
Start by opening a photo. It helps if it’s a daylight shot like this one here, but I’ve tried this technique on many different kinds of images and the results come out pretty good.
STEP TWO:
Press D to set your Foreground and Background colors to their defaults of black and white, then go to Filter>Distort>Diffuse Glow. (Note: If you don’t see this filter, go to Photoshop [PC: Edit]>Preferences>Plug-Ins and turn on the Show All Filter Gallery Groups and Names checkbox, or just choose Filter>Filter Gallery and then choose Diffuse Glow under Distort.) On the right, set the Graininess to around 3, Glow Amount to 3, and the Clear Amount to 10. Again, play around with these settings if you’re using different images. Click OK. You can see this gives the photo a soft glow effect with some grain.
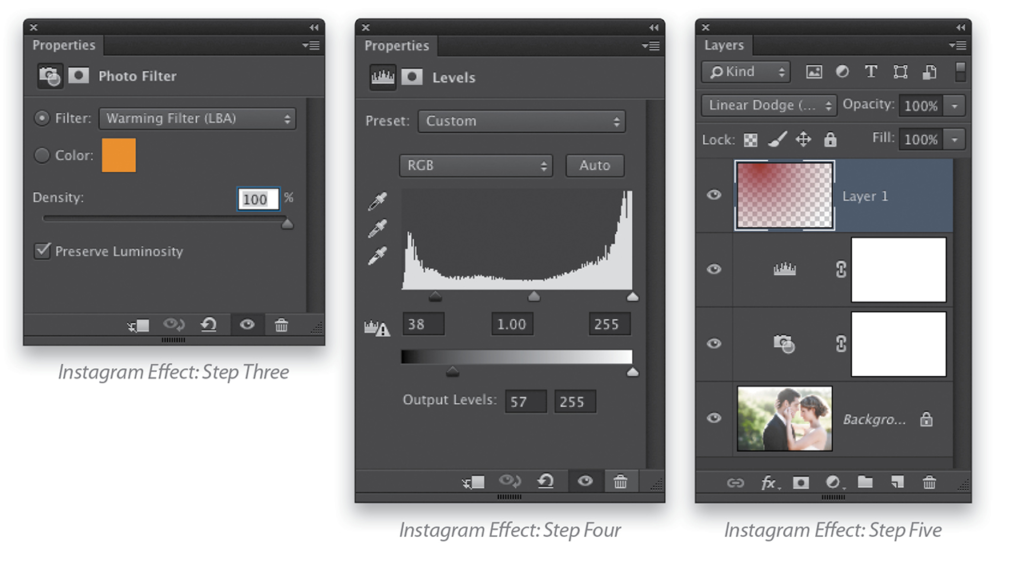
STEP THREE:
Now, in the Layers panel, click on the Create New Adjustment Layer icon (half-white, half-black circle) and choose Photo Filter. Choose Warming Filter (LBA) from the Filter drop-down menu in the Properties panel and set the Density to 100%. Set the layer blend mode in the Layers panel to Soft Light.
STEP FOUR:
Click on the Create New Adjustment Layer icon again and choose Levels this time. In the Properties panel, there’s a gradient bar under the histogram. This adjusts the Output Levels, so grab the black slider on the left and drag to the right to around 57. Then, grab the shadow slider beneath the histogram and drag to the right a little, as well. This will flatten the contrast just a bit.
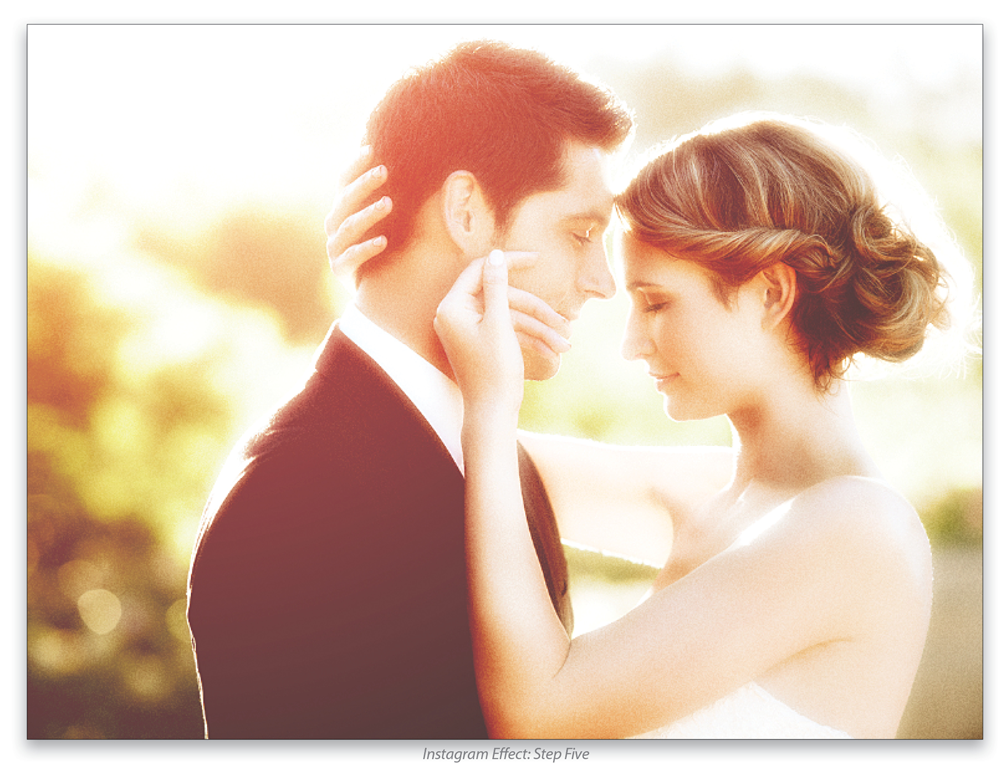
STEP FIVE:
Now, click on the Create a New Layer icon at the bottom of the Layers panel to create a new blank layer at the top of the layer stack. Select the Gradient tool (G) from the Toolbox and then, in the Options Bar, select the Foreground to Transparent gradient in the Gradient Picker, as well as the Radial Gradient style. Click on the Foreground color swatch at the bottom of the Toolbox and set it to a burgundy red (R:161, G:19, B:23). Click OK to close the Color Picker.
Starting at the edge of the image where the light seems to be coming from (in this case, it’s the upper-left side), drag the gradient out over most of image, as you see here. Then, change the layer blend mode to Linear Dodge (Add) in the Layers panel.
There you have it. Instant Instagram! This is another one of those effects that you’ll want to try on every image—just don’t go nuts and make all your images look the same. Good luck and enjoy!
This article originally published in the March, 2013 issue of Photoshop User magazine.


