This issue, I’m going to reveal some tips and tricks that I wish I knew when I first started retouching images in Lightroom. These are key elements that I use every day now, and they can be used by everyone from brand-new photographers to advanced photographers, because they’re super easy and
super effective!
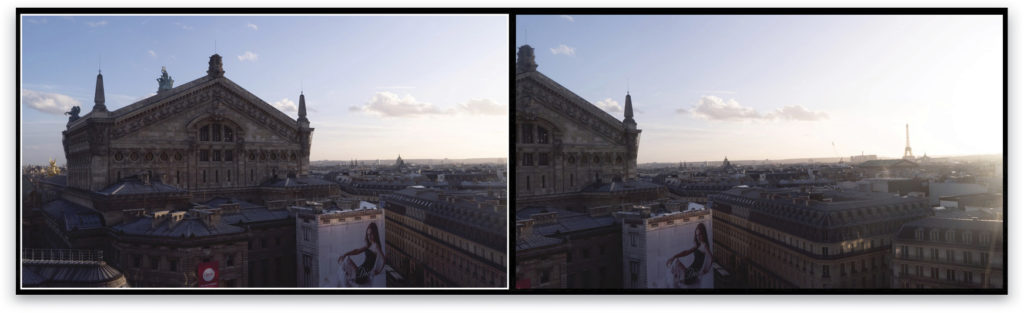
Tip #1: Shoot in Landscape Mode for Your Panorama
I used to shoot in portrait mode to create my panoramas, so I ended up with four or five photos to merge together, but it’s much easier if you shoot your panoramas in landscape mode like the images shown here.
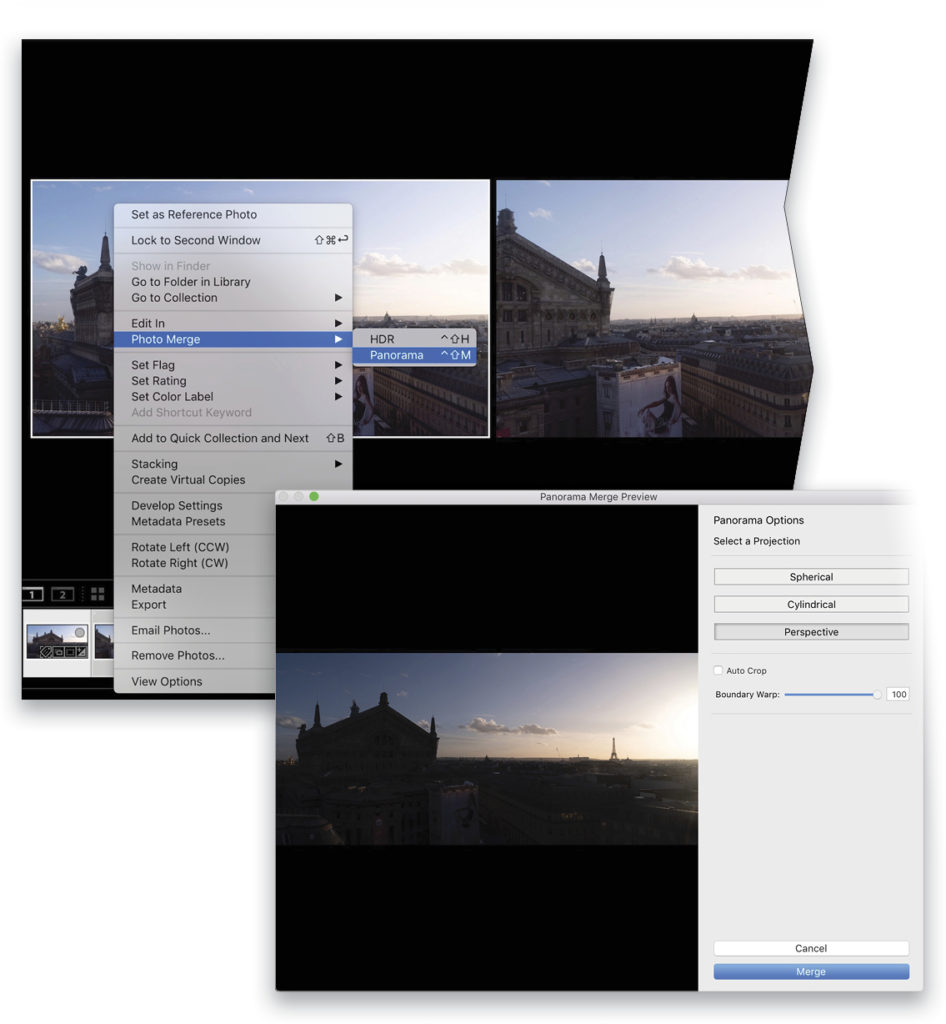
Tip #2: Use the Perspective and Boundary Warp Option
After you import your images into Lightroom, select all the photos for your panorama, Right-click on one of your selected photos, and choose Photo Merge>Panorama. In the Photo Merge Preview dialog, use the Perspective option for Projection, and then drag the Boundary Warp slider to make sure that your horizontal line is straight and not too distorted.
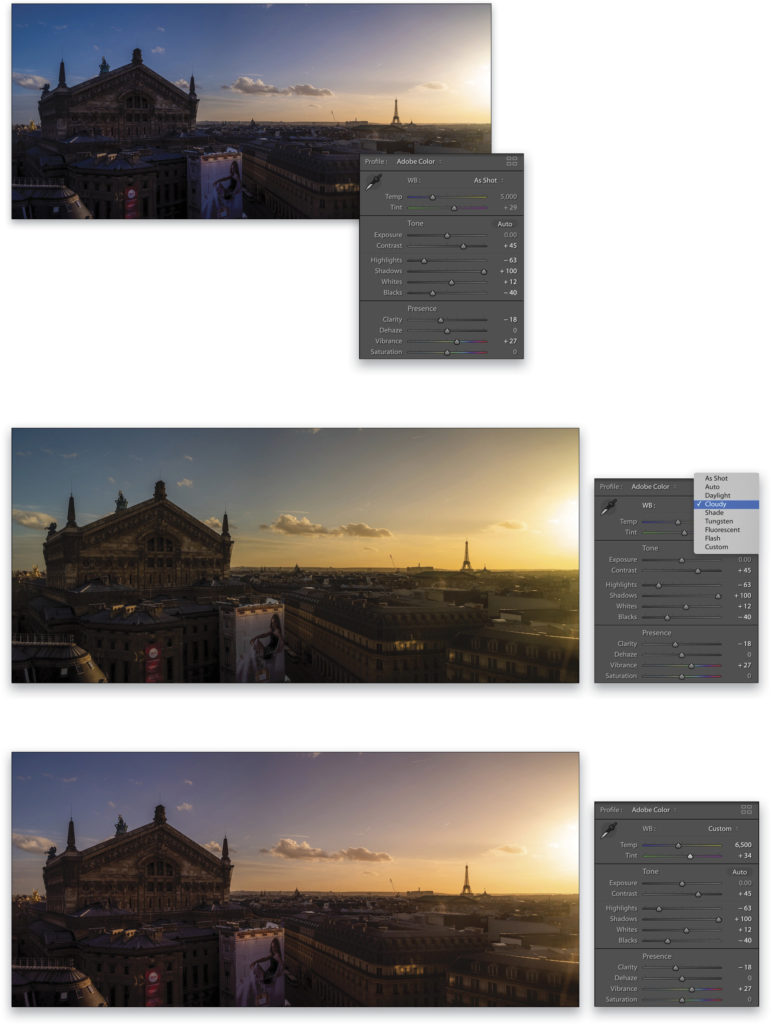
Tip #3: Shoot RAW for Better Colors with White Balance
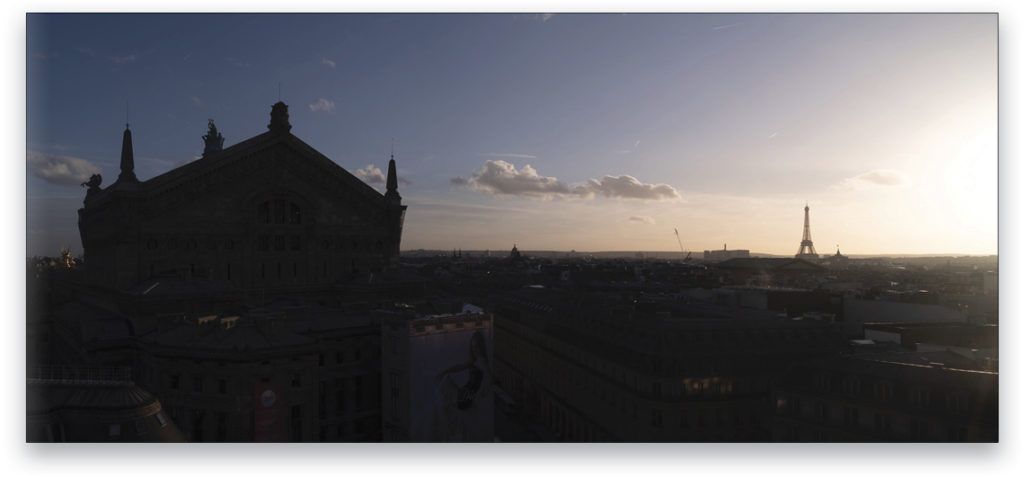
In this tip, I’ll show you why it’s so vital to shoot RAW, and one of the main reasons is for colors. Here’s the RAW file with which we’re starting:
For this example, I opened up the Shadows to +100 and brought down the Highlights to –63. (Note: If you have the sun in your frame, don’t bring the Highlights all the way down, because it’ll create a weird halo around the sun.) Then, I set the Blacks (–40) and the Whites (+12), boosted the Contrast to +45 and the Vibrance to +27, and lowered the Clarity to –18. Lowering the Clarity on landscapes gives a nice natural result.
You can see how the colors are important when you choose the white balance. For this image, I picked the Cloudy white balance, which gives the image a greenish color. To kill the green, you can add some magenta with the Tint slider (I went from +29 to +34).
Because this photo is a bit dark, I boosted the Exposure to 0.15; however, I’ll show you the best way to make a photo more interesting and dynamic in the next tip.
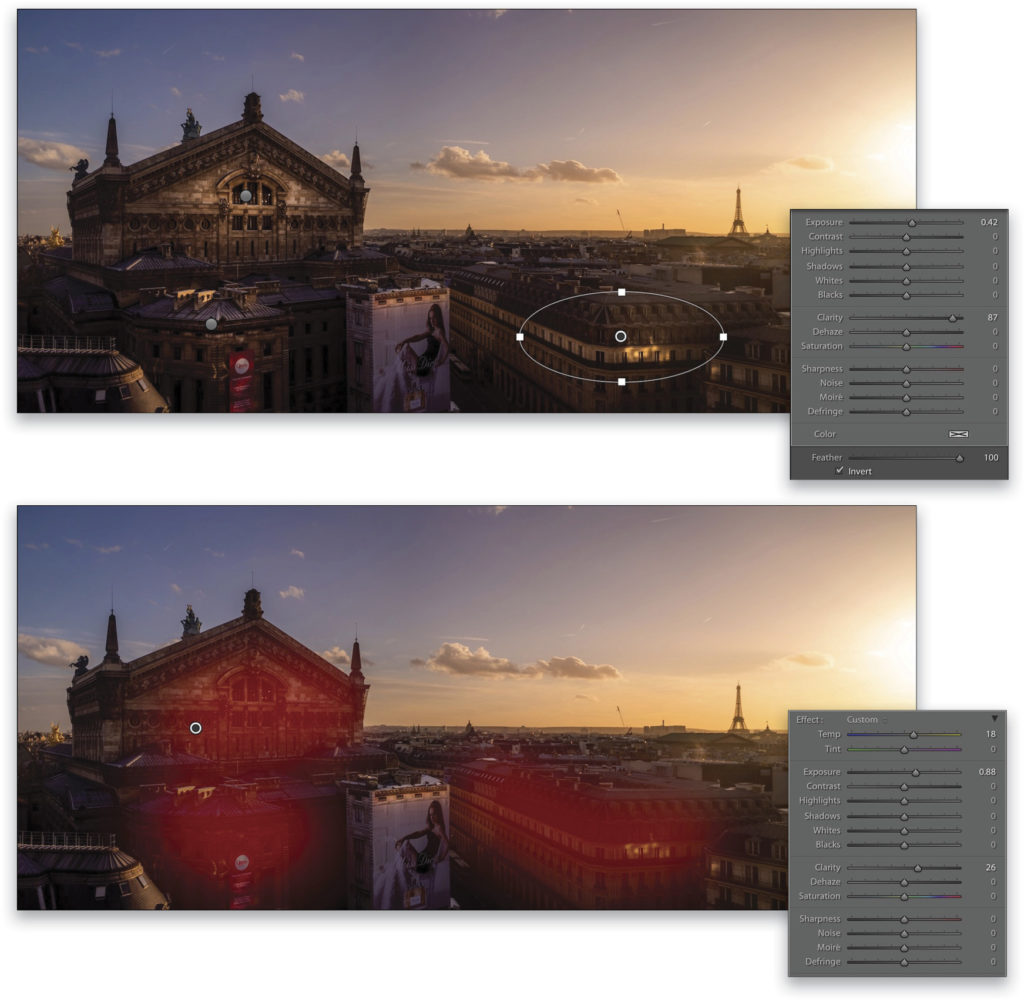
Tip #4: Add Lights and Colors with the Radial Filter or Adjustment Brush
When you partially light an image or an object, it becomes more interesting. A couple of ways of doing this in Lightroom is to use either the Radial Filter or the Adjustment Brush.
Press Shift-M to select the Radial Filter, find a part of the photo that’s evenly lit, draw a Radial Filter around that area, and select the Invert option so that the changes happen inside the oval. Set Feather to 100, and then boost the Exposure (0.42) and Clarity (87). Right-click anywhere inside the Radial Filter and choose Duplicate. Drag the duplicate to another area to do some dodging and burning. Repeat as necessary, as shown in the top image.
For the Adjustment Brush (K), set the Flow and Density to around 80. Just as with the Radial Filter, boost the Exposure (0.88) and Clarity (26), and then just brush over the areas of your photo that you want to brighten. (The red overlay in second image above shows you where I brushed.)
The Radial Filter is easier to use, because when you make a duplicate and move it to a different area of the photo, the changes are contained in one area; but when you duplicate the Adjustment Brush, all of the brushstrokes associated with that pin will move with the duplicate, which is less convenient. You can decide which method works best for you!
Tip #5: Use the Calibration Panel for Even Better Colors
If you want to tailor-make the colors of your photos even more, use the Calibration panel. For example, I’m not crazy about the sunset in this photo, so I went to the Calibration panel and changed the Hue (+31) and the Saturation (+22) for Red Primary, and then added a little magenta by dragging the Tint of the Shadows to +5, which made a big difference (top image).
You can also use the Radial Filter to give your photo a more beautiful sunset. Here’s how: Draw a large Radial Filter, Invert it, Feather it to 100, and boost the Tint to 95 and Temp to 20. You can also boost the Saturation (+7), depending of the effect you want to create (second image above).

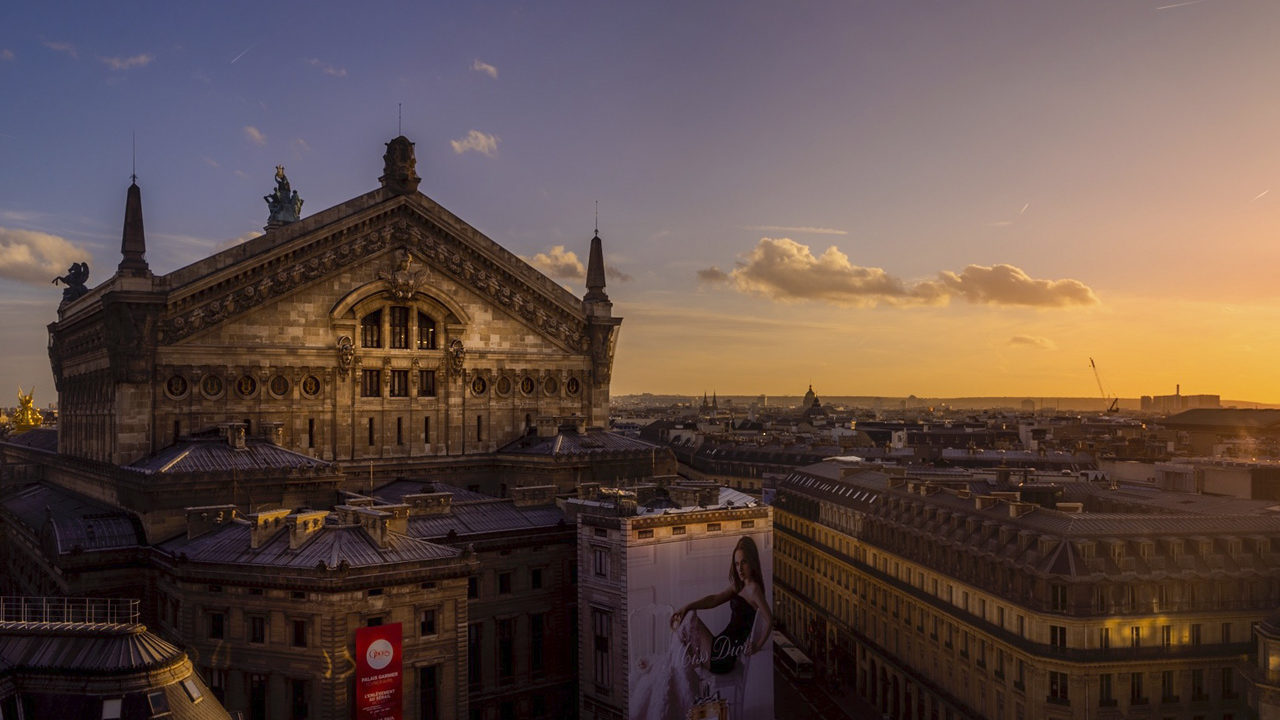
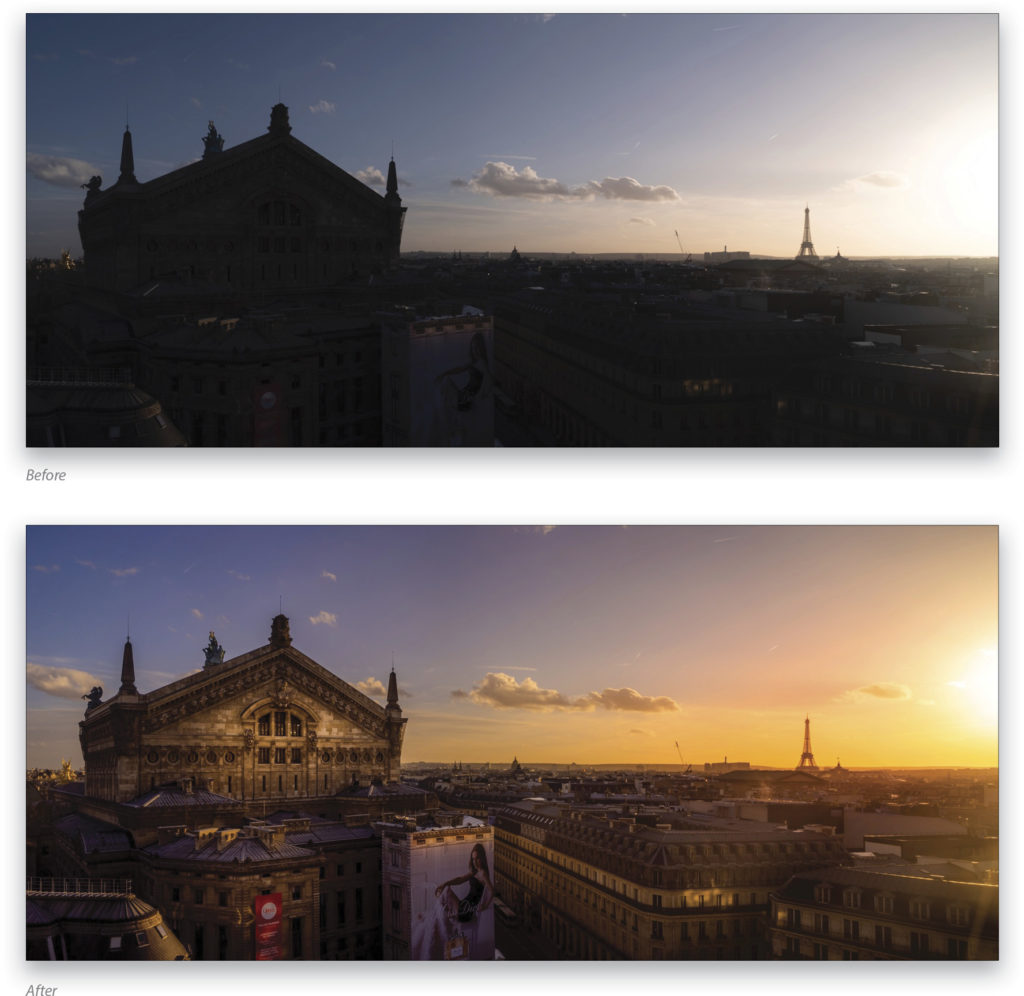
Using these tips, look at the before and after images below to see how we’ve improved this photo.
This is the magic of Lightroom! I hope you find these tips useful and that you have lots of fun making your photos pop and look amazing! Have fun shooting!
This article previously published in Issue 42 of Lightroom Magazine.


