When it comes to street photography, respecting your subject is the most important thing to keep in mind. If you respect the subject, you’ll have a better chance of getting the type of pictures you envision. What’s more, you’ll have a better chance of not getting into a confrontation with a subject who may not want his or her picture taken.
With the thought of “respect” in mind, I thought I’d share some of my Canon EOS R photographs from my January 2019 10-day trip to India. Before we get going, here are three thoughts on street photography.
- Each photographer will tell a different story of the street, depending on what he or she is trying to say with the pictures. For example, most of the streets of India are super crowded, filled with trash, and dotted with cow poop. What’s more, the poverty will sadden you. The scene would be quite the opposite if you were street shooting in Venice, Italy, for example. I’m a positive person and shoot for myself. In India, I wanted to show the positive side of this fascinating country.
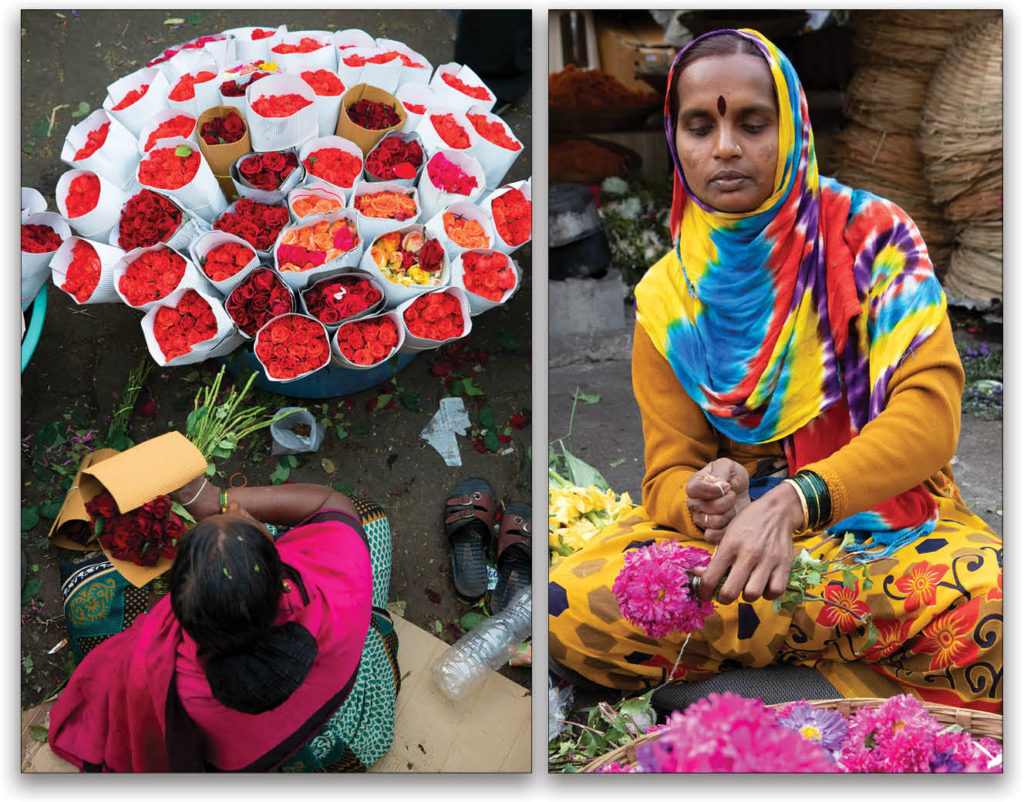
- A question I get asked all the time is, “Do you pay people, and how much do you pay when you take a photograph?” Of course, the answer is: It depends. I paid the man with the flowers on his head 100 rupees, which is about $1.40. He’s a street performer/character, like the ones we see here in Mallory Square in Key West, Florida. He’s there to be photographed. I also asked (through my guide who asked her boss) if I could photograph the woman with the large stone on her head. I paid her 500 rupees. These were the only payments I made for the people pictures in this article. For some of the other people pictures, I just smiled and asked if I could take a photo, or shot in a way in which it wasn’t obvious that I was taking a picture.
- Comfortable shoes are a must!
Okay, let’s get to some India street photography photos and tips.
R=Respect
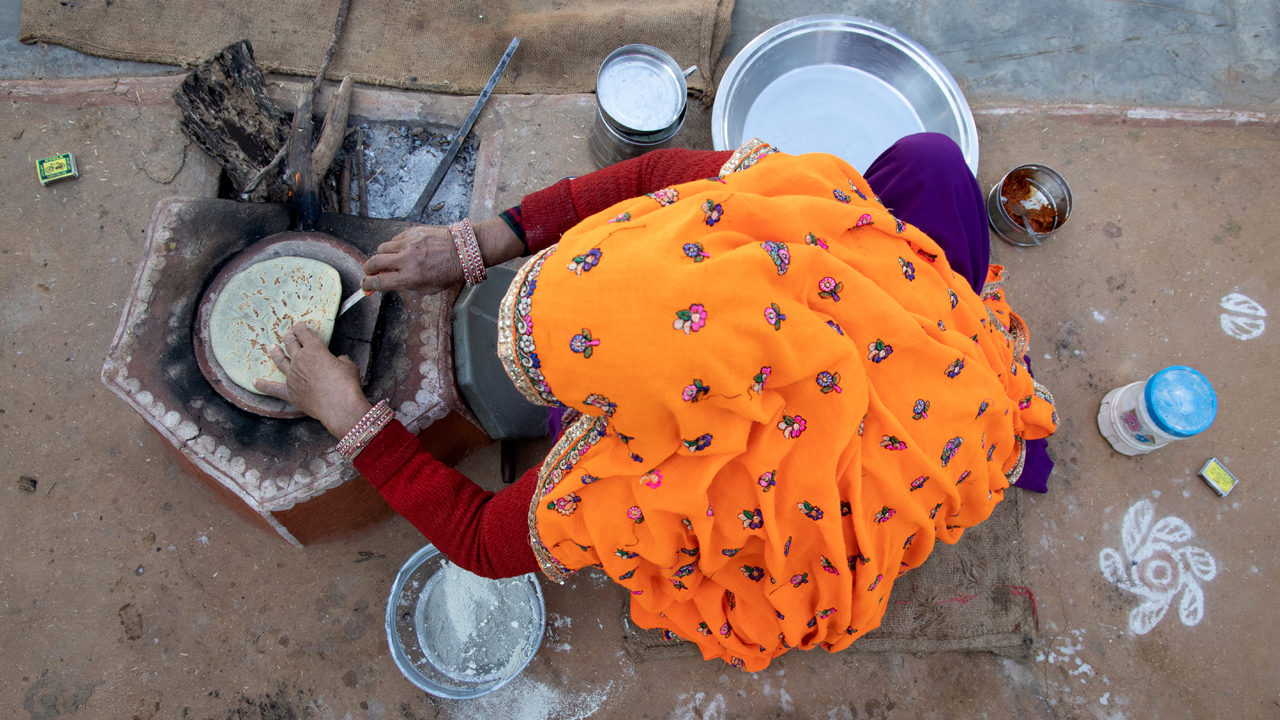
When I took the opening photograph for this article, I was showing respect for the subject who, according to my guide, didn’t want her face (although beautiful and striking) to be photographed. I asked if I could take a photo from behind or above and she said okay. So even though the photograph doesn’t show the woman’s face, it still tells the story (a goal with all of our pictures) of the woman making bread on the street.
Photographing a subject from above, or as I say, “Use your camera like a spaceship,” has another advantage: You just may end up with a more creative image that cuts the clutter of the surrounding area. That said, getting down low (again “Use your camera like a spaceship”) and shooting eye-to-eye helps the viewer of the photograph identify more with the subject (see images below).
E=Equipment
Ah, the big question: “What lens or lenses should I take?” My advice would be to take either a 24–105mm or 16–35mm lens; or better yet, both. Also important: The faster (wider aperture) the lens, the better, because street photography often involves low light, which often means using high ISO settings. Faster lenses let you shoot at faster shutter speeds than slower lenses, which helps in handheld photography, which is what street photography is all about.
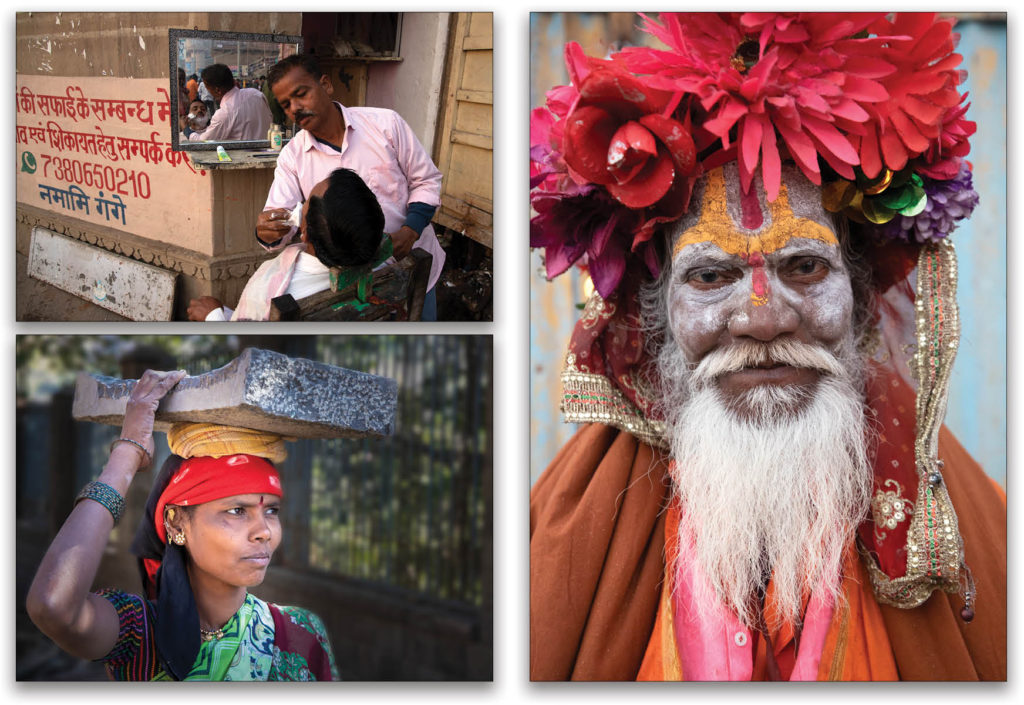
I photographed this street barber (top left) with my 24–105mm IS lens set at 24mm. I set my focus (using focus lock) slightly behind the barber to get the entire scene in focus and set my aperture at f/6.
This street shot (above), also taken with my 24–105mm IS lens, is one of my favorite people pictures from the trip because it tells a story of a strong and proud woman. According to my guide, the stone slab she’s carrying on her head weights about 30 or 40 pounds. Can you imagine you or I doing that? But look closely at how eloquently the woman is dressed, and notice her earrings, scarf, necklace, and dress. Keep in mind that this woman does this all day.
This next image (top right) might be my first street portrait—or portrait for that matter—taken with a 16–35mm lens set at 35mm. Traditionally, we should use longer lenses for portraits, starting with 50mm, due to the distortion of faces when using wider lenses. Because I had to shoot fast, however, and didn’t have time to change lenses, I set my lens to 35mm and took the shot. The key to not getting distortion was to back off a bit and crop my picture.
Here are two quick tips for street portraiture:
- Take several pictures to capture the mood and feeling you want your photograph to illustrate.
- Use Lightroom or Photoshop to enhance your images.
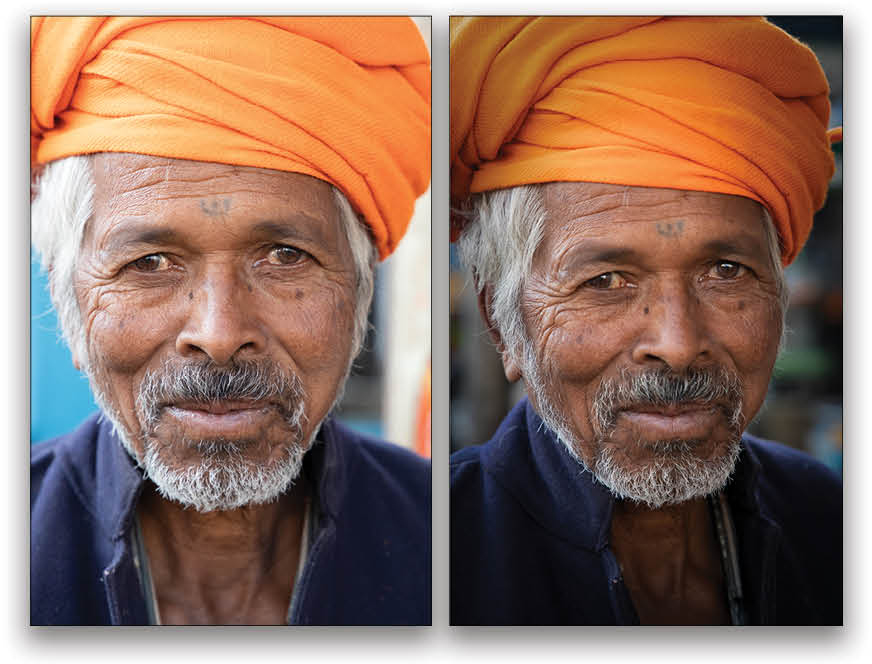
For this photograph (below), I darkened the image (to create a more dramatic mood) and then added a vignette to draw more attention to the subject’s face. As you can tell from the man’s expression, he enjoyed our time together, mostly because he felt that I respected him and smiled throughout the photo session.
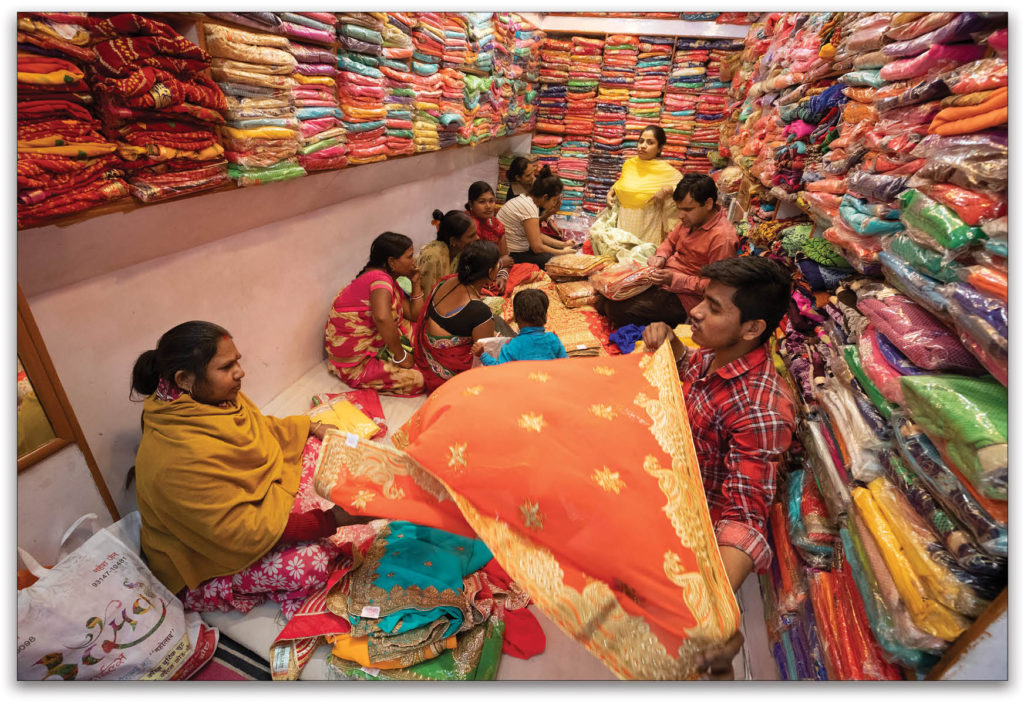
Earlier, I mentioned that we often need to set a high ISO, which increases noise in our images. As my dad used to say, “If a picture is so boring that you notice the noise, it’s a boring picture.” While walking down a narrow street, I looked into this fabric shop and knew I had to capture the colors. To get a sharp handheld shot, I had to set my ISO to 3200.
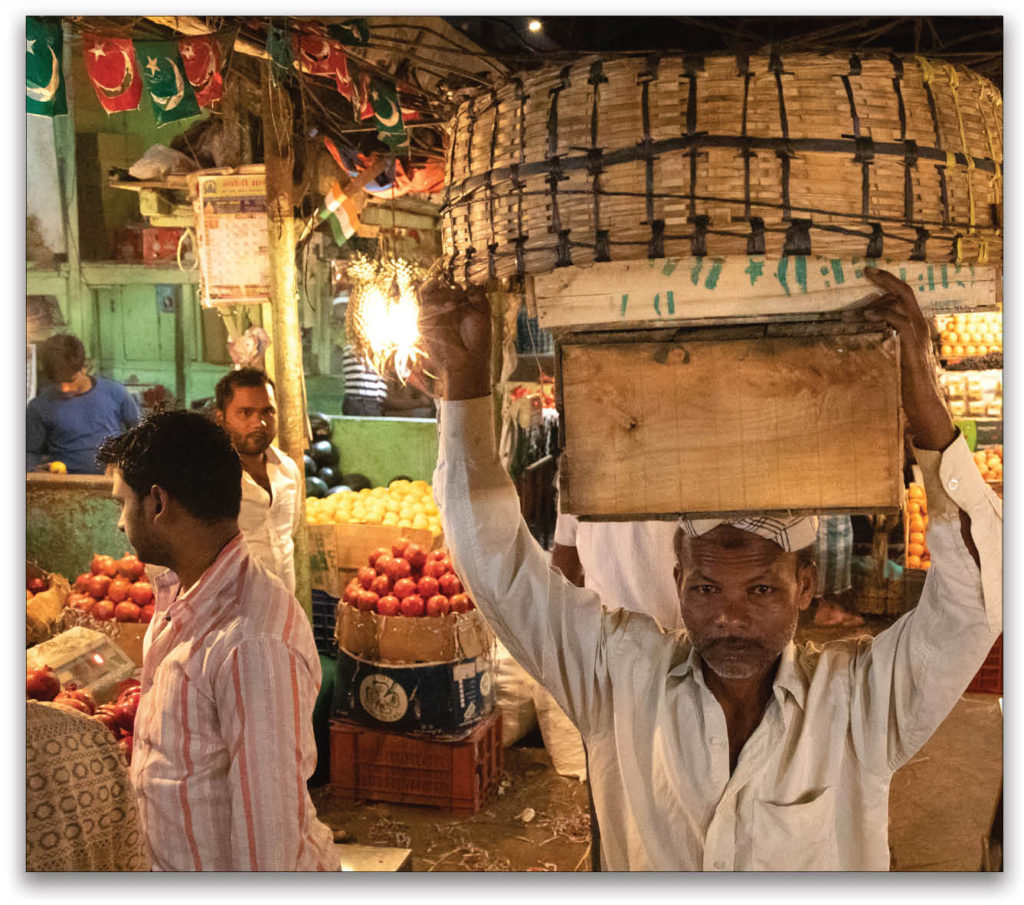
On an early morning (pitch dark) street walk in a vegetable market, I had to set my camera to ISO 16,000 (sixteen thousand) to get a sharp shot of this man who was walking fast and carrying two boxes and a basket on his head. Yes, I had some noise in both images, but that was an easy fix in Lightroom and Photoshop.
S=Situational Awareness
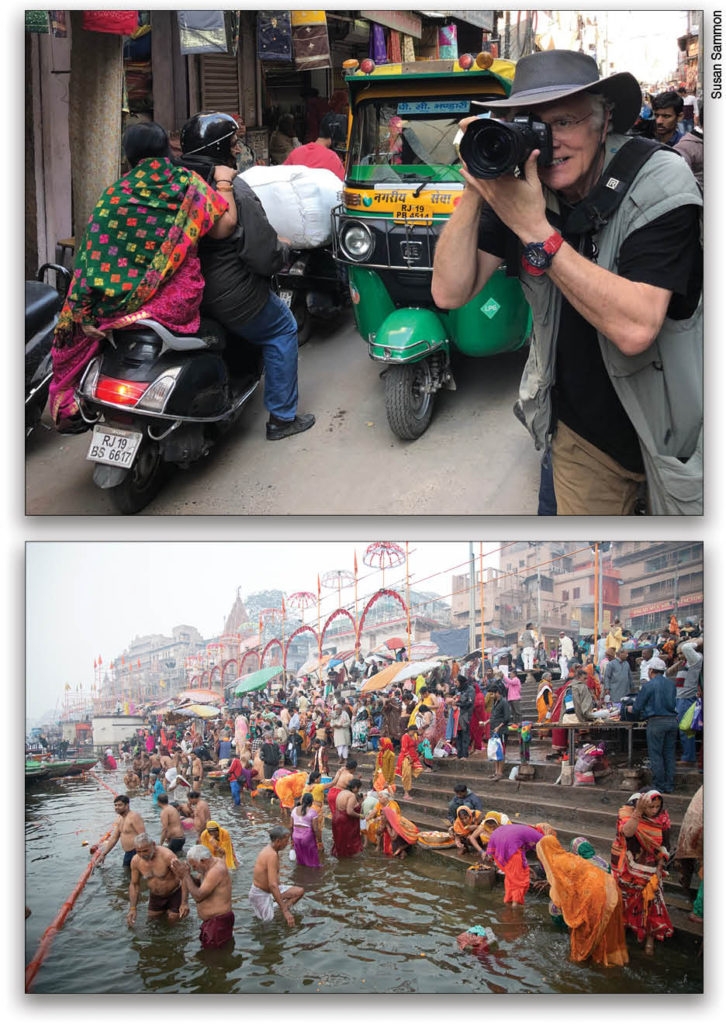
Yes, that’s me street shooting in India. As you can see, the street is packed with vehicles and people. You’ll also notice that I’m wearing a photo vest in which I pack my second lens, extra batteries, and memory cards.
When you’re street shooting, you must have “situational awareness,” that is, you need to be aware of everything that’s going on around you—for your safety and for the sake of looking for interesting pictures. And speaking of looking, you can see that I’m shooting with both eyes open. That’s an important technique so you can see before you take a shot what might come into the frame to help or ruin your photograph.
Thank you Susan Sammon for the fun shot and great memory.
P=Purpose
Shooting with a purpose, which is the same as setting a goal, is important in street photography. One of my main goals in Varanasi was to tell the story of the Hindus who come to Ganges River every morning to bathe in the holy water of the river.
If I had to choose between a wide-angle shot and a telephoto shot to tell the story, I’d go for the wide-angle shot because, in this example, it shows hundreds of people on the Ghats (steps) leading down to the water and in the water. This is shot with a 24–105mm lens with ISO at 3200.
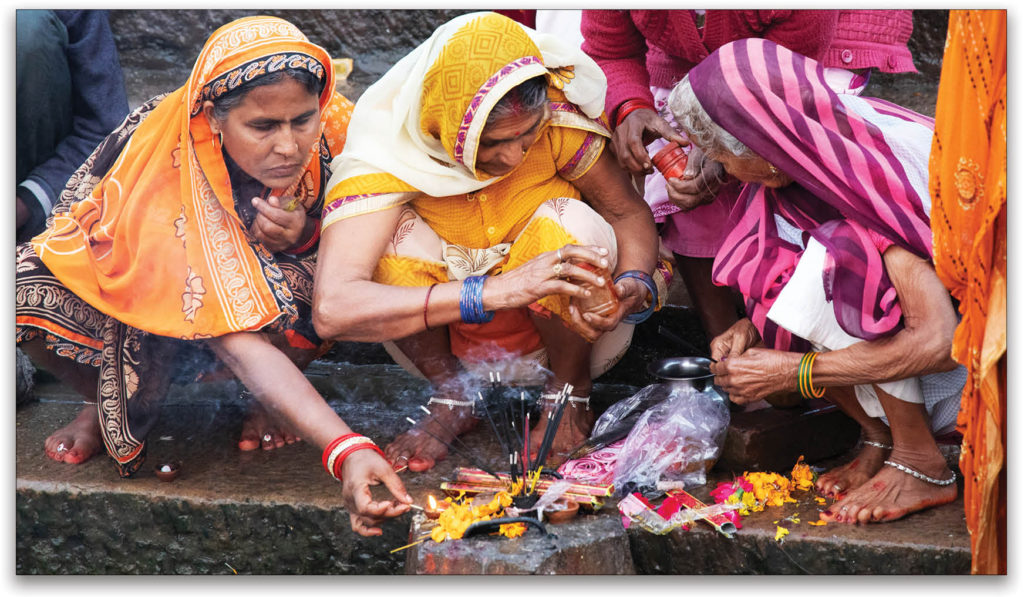
But here I could take many shots, so another goal was to “cut the clutter.” Looking carefully at the crowd, I spotted these three women lighting candles (bottom of previous page). I only had my 24–105mm IS lens, so in the original, these women only filled about 25% of the frame. Cropping helped me get the shot I wanted. This, too, is at an ISO of 3200. Both photographs were taken before sunrise.
E=Envision
We need to envision the end result before we take a picture. Doing that helps us choose the right camera settings and gives us an idea of what we can do in Lightroom and Photoshop.
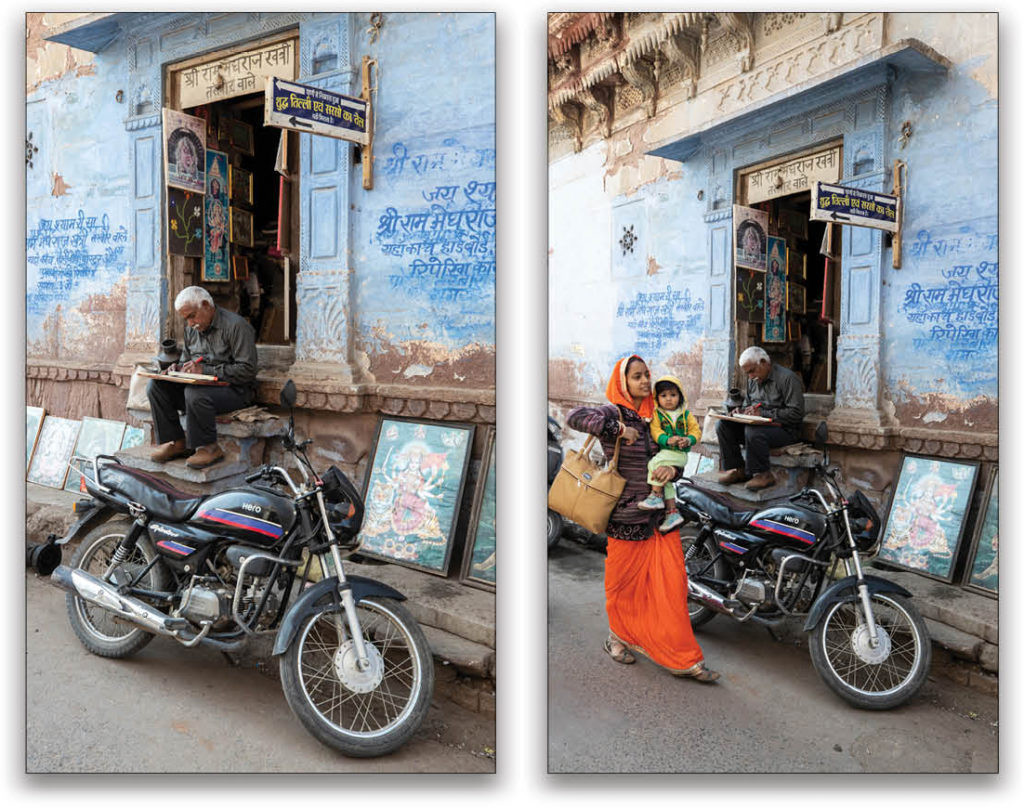
When I first saw this man painting, I thought an image of him and his shop with a motorcycle in the foreground was a cool idea, so I took a shot. But then I tried to envision another shot—a shot of someone walking into the frame. Zooming out and patiently waiting, I got the shot. I go back and forth, however, as to which image I like best (usually the one without the women and child), because each photo tells a different story. So my advice is to take a variety of pictures to ensure you get the shot you love.
C=Creativity
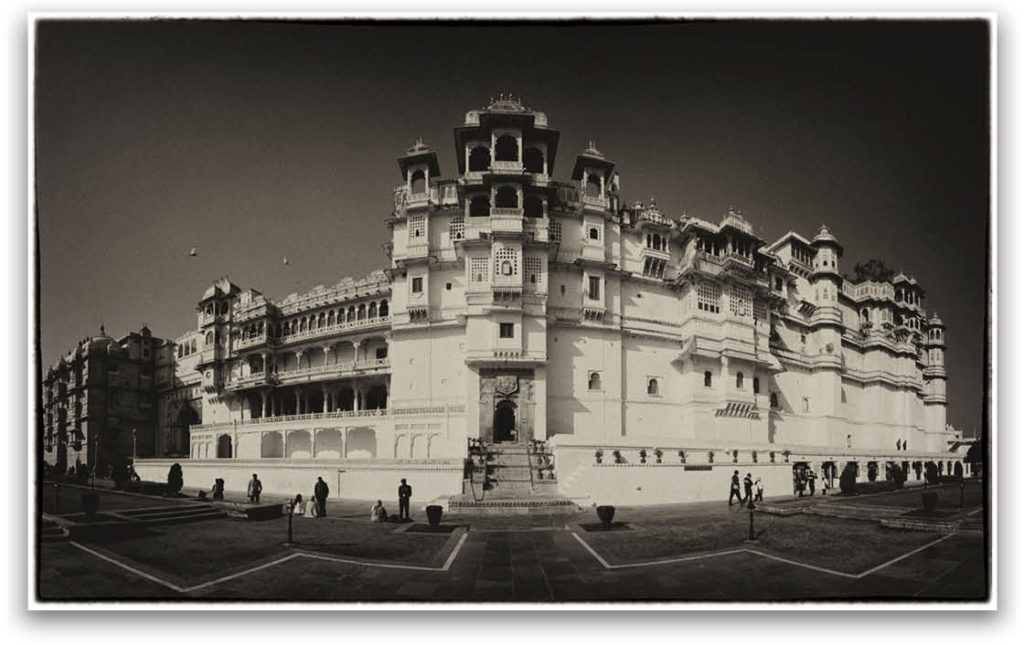
Straight street shots are fine, but add some Lightroom, Photoshop, and plug-in effects and you may end up with a more creative image. To enhance this panorama of a palace, I added the Aged Photo effect in Nik Silver Efex Pro, and then added a border in Nik Color Efex Pro.
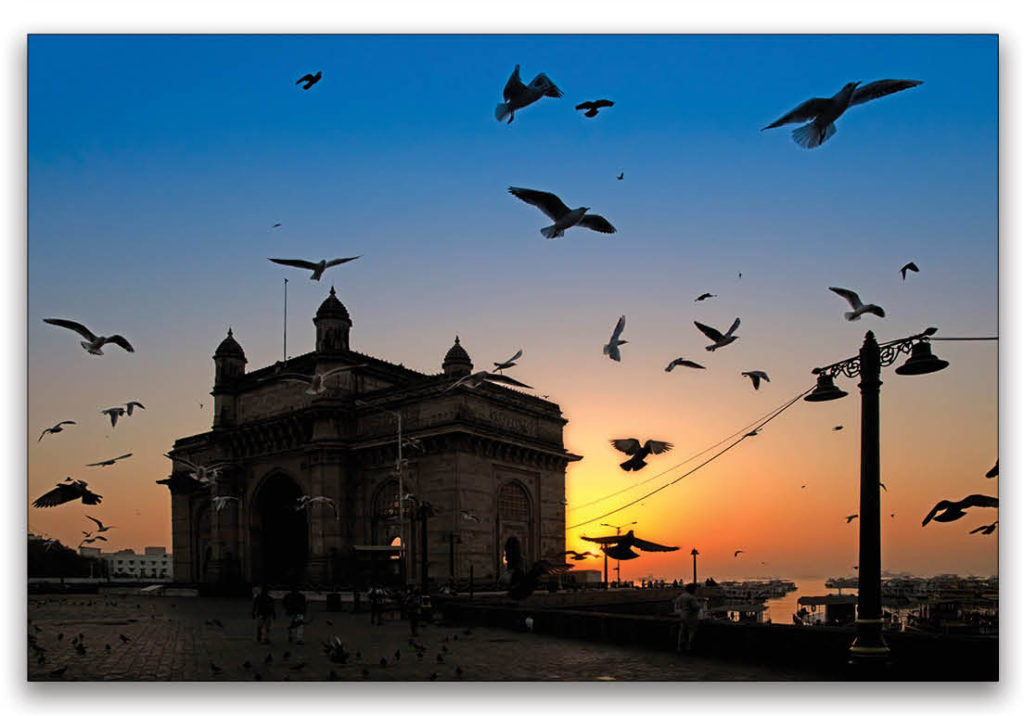
My original sunrise shot at the Gateway of India arch in Mumbai was nice enough, but to enhance (soften) the image, I used the Duplex Filter in Nik Color Efex Pro. Playing with plug-ins can help you awaken the artist within. But as always, overdoing it can do just the opposite.
T=Timing
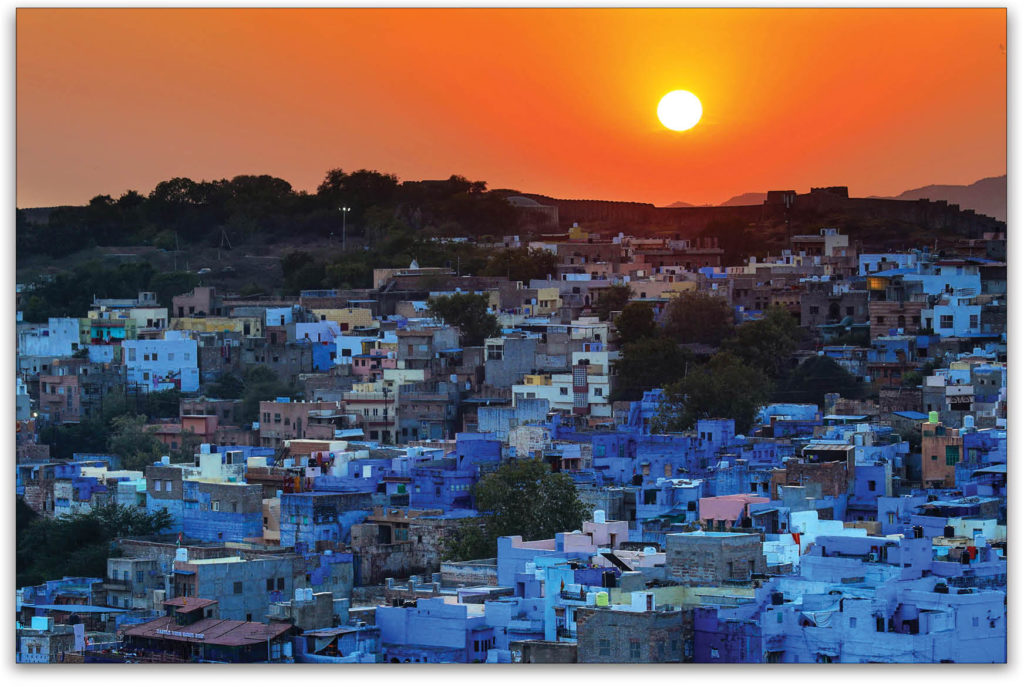
In photography, as in life, timing is everything. To get this sunset shot of the Blue City, our guide put us on a mountaintop in exactly the right position at exactly the right time. So a very important tip here is to find a great local guide, which you can usually do at your hotel.
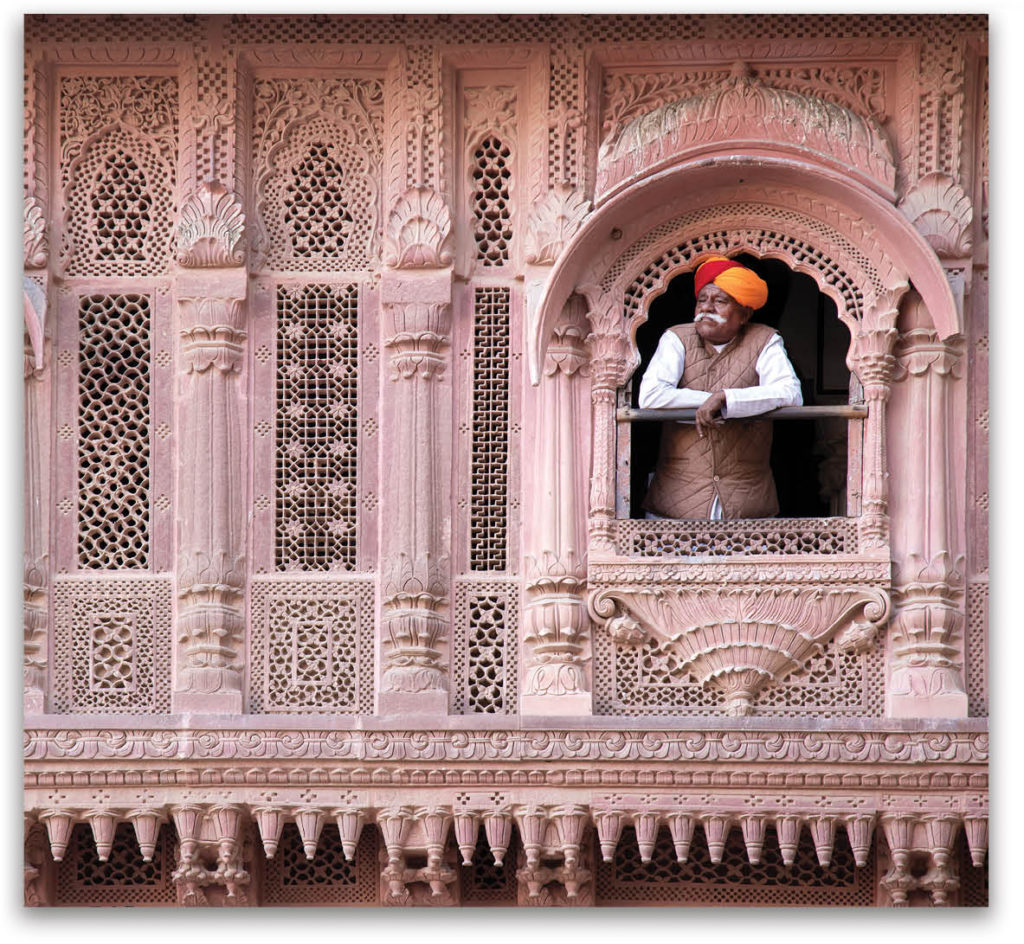
Well, that’s my R.E.S.P.E.C.T. advice for street photography. Before I go, however, I have one more tip: Always look up (and always look back). While walking around, I looked up and spotted this man in a widow. Composing using the rule of thirds, I quickly took a shot before he went back inside.
In closing, if you’re wondering how I got around from spot to spot in each city, here’s a short video that shows the answer. Have fun, be creative, and be careful on your street photography adventures.
This article originally published in Issue 49 of Lightroom Magazine.


