There are many ways to create and use presets in all parts of your Lightroom workflow, but no presets are as useful or prolific as Develop presets. In fact, at different points in time, I’ve had way more than I ever needed or used. It was after one of those preset binges that I decided enough is enough, and it was time to take back control over this aspect of my Lightroom workflow. I want to pass along to you some tips, tricks, and ideas to help you become the master of your preset domain. If you’re new to presets, or new to Lightroom in general, then perhaps you’ll get started on a much better foot than I did.
Develop presets, which I’ll simply refer to as presets from here on out, are simply a type of text file that can store a combination of Develop module adjustments so that you can reapply those adjustments in a single click, any time you want. This is incredibly handy, and a huge timesaver. Presets can serve as a new starting point, or the entirety of your adjustments. Presets are so handy that you can access them from the Quick Develop panel in the Library module for easy batch applications, or even from the Import dialog so that all imported photos enter Lightroom with those settings applied right out of the gate.
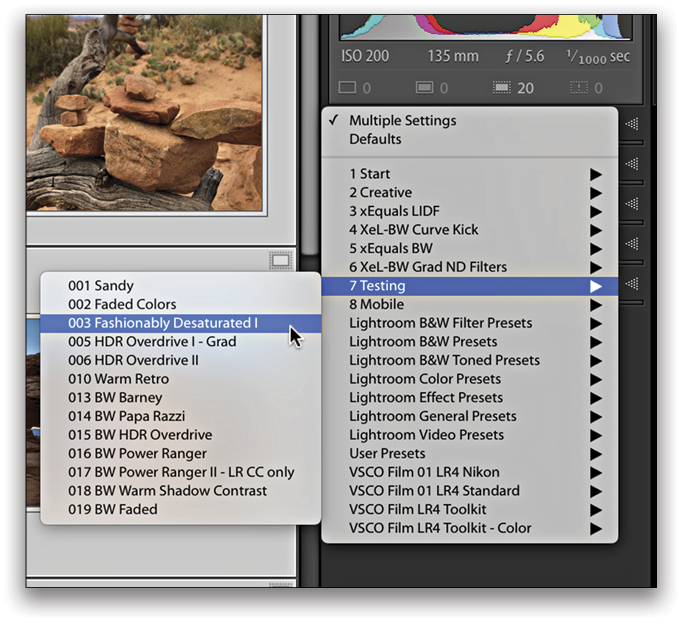
The most common place they’re used, however, is within the Develop module, where they’re found in the Presets panel.
Presets Panel
Lightroom comes with seven sets (folders) of presets that you can use at your convenience. These serve to introduce new users to the concept of presets, and to show what’s possible. I don’t use many of them personally, but your mileage may vary. You can’t delete the pre-installed presets (at least not easily). My recommendation is to explore each set, see what can be done with each, and if you find any you like, make custom versions for yourself.
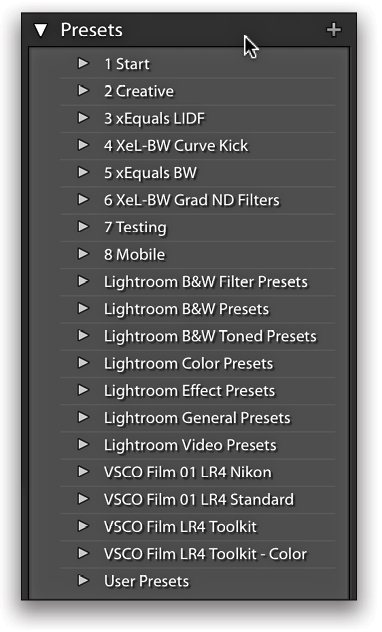
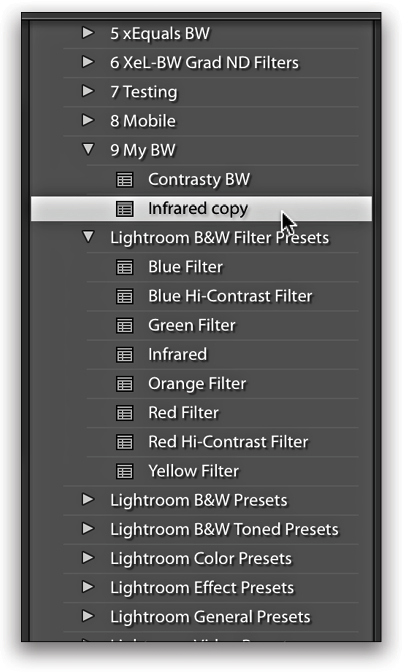
Before we get into how to do that, let’s step back and point out a few things worth knowing about the Presets panel. First, like other panels in Lightroom, it sorts alphanumerically. I use this fact to my advantage to work around the permanence of the preinstalled Lightroom preset folders by naming all my custom presets folders with a leading number. This not only ensures my custom presets remain at the top of the list, but also means that I don’t waste time scanning up and down the folder looking for a specific preset.
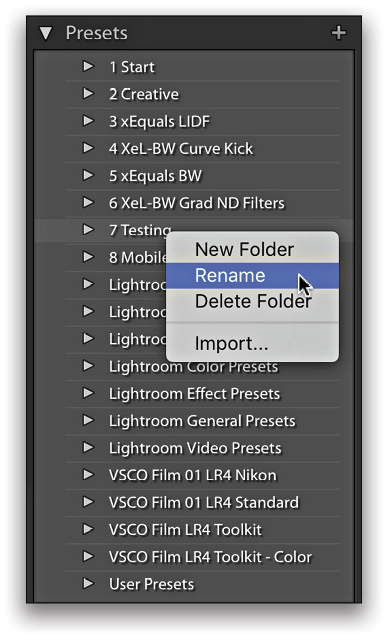
You can rename any of your custom preset folders simply by Right-clicking the preset folder, and choosing Rename from the contextual menu. While we’re looking at that contextual menu, note there are also options for creating a new folder, deleting the folder, and Import. This contextual menu is one of the keys to taking control of your presets.
If you’ve yet to create any custom folders, start by Right-clicking any of the preinstalled folders to access the contextual menu with New Folder as an option. When it comes to how you order your preset folders, that’s entirely up to you, but my suggestion would be to follow Lightroom’s top-down approach, and keep the preset folders you use first near the top, and then number them in order of decreased use. Note: You can’t nest preset folders within preset folders.
Creating and Organizing Presets
You can also create preset folders while you’re in the process of creating a new custom preset. Here’s how:
Step One: Apply all the adjustments you want in your preset to a photo.
Step Two: Click the plus sign at the top right of the Presets panel to open the New Develop Preset dialog.
Step Three: Give the preset a meaningful name.
Step Four: Click the Folder drop-down menu and choose New Folder. Give the preset folder a meaningful name.
Step Five: Check only the boxes for the settings you want to include in this preset, and click Create.
Your preset folder will appear in the Presets panel, and your new preset will be placed inside. As you create new preset folders, you can drag-and-drop custom presets between those folders to begin organizing them to your liking (and move them out of the default User Presets folder).
If you find a preset that you like within the preinstalled set of Lightroom presets, you can drag that preset from its original folder into any custom preset folder you’ve made. Doing this creates a copy of the preinstalled preset in the target folder (because we can’t delete the preinstalled presets or remove them from those folders). This is useful though, because you can now customize that preset more to your liking. Here’s an example using the Infrared preset found in the Lightroom B&W Filter Presets folder.
Step One: Select an unprocessed photo (click Reset to be sure there are no settings applied).
Step Two: Drag the preset you want to customize to a preset folder that you created. If you click-and-drag in one motion, you’ll create a copy of the preset in the folder without applying the settings to the photo.
Step Three: Click on the copy of the preset to apply its settings to the photo.
Step Four: Expand each panel on the right side of the Develop module to see what settings have been applied.
Step Five: If you like the overall look, then you’re done, but feel free to tweak any settings to customize the look. In the case of the Infrared preset, I tweaked the settings for WB, Contrast, Highlights, Clarity, Sharpening, Masking, Grain, and Camera Profile. This is entirely a personal decision.
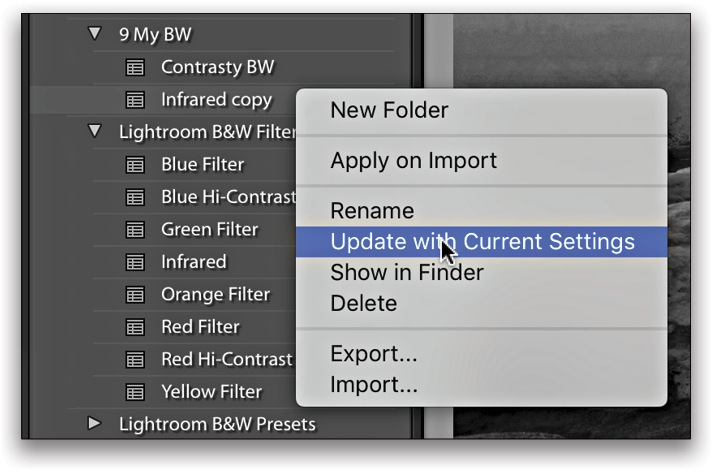
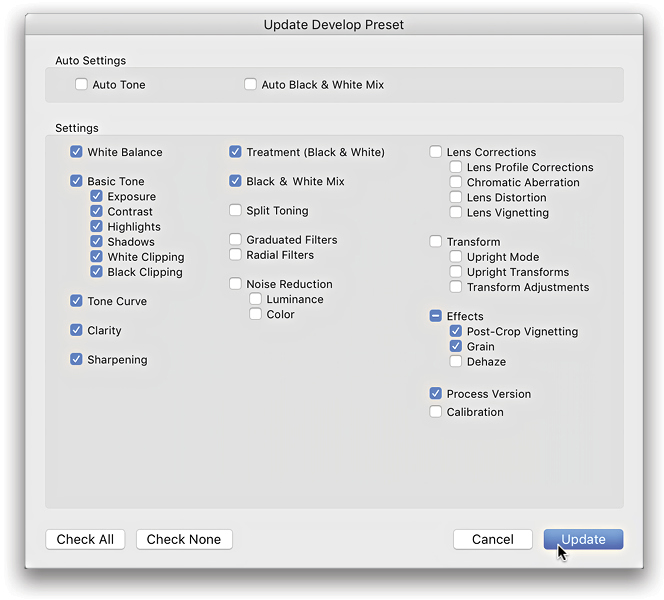
Step Six: With the settings customized, Right-click the copy of the preset and choose Update with Current Settings to open the Update Develop Presets dialog.
Step Seven: Check only the boxes you want included in the preset, and click Update. Optionally, once updated, you can rename the preset as well.
The update settings process works for any custom presets you want to evolve over time. Taking a closer look at the contextual menu options associated with a custom preset, there are also options for renaming the preset, deleting the preset, showing its location in Finder (PC: Explorer), exporting the preset, importing a new preset, and even marking that preset to be applied during import. As I said earlier, the contextual menu is key.
Working Outside of Lightroom
Now that you’ve been introduced to the organizational tools inside Lightroom, I want to point out that you can do some of this outside Lightroom too. Right-click any custom preset, and choose the Show in Finder/Explorer option. This will open a new file browser window showing the actual preset file, with its .lrtemplate file extension. If you go up the folder hierarchy, you’ll find your develop presets are stored in a folder aptly named Develop Presets.
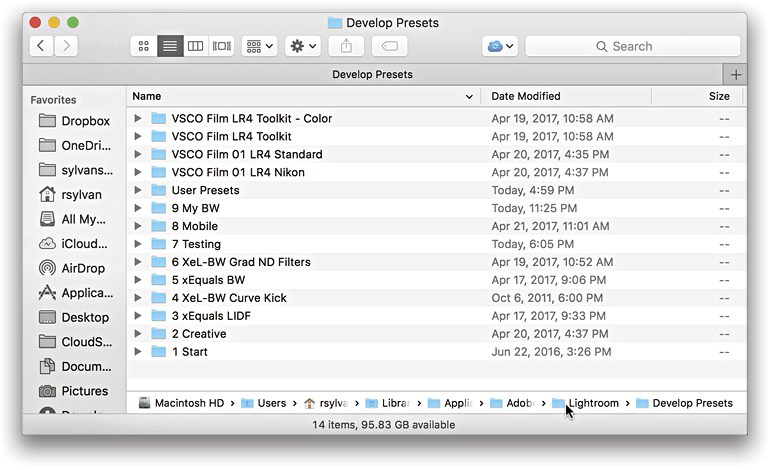
You can close Lightroom now (as you’ll need to restart Lightroom to see any changes you make outside Lightroom), and just use your file browser to create new folders, rename existing folders, delete unwanted presets, and manually reorganize your presets. Just remember that you can only have one level of folders containing your presets within the Develop Presets folder.
This is a good time to make a backup copy of your presets too. If you’ve downloaded presets from the Internet, you can drag-and-drop those into folders and they’ll be added the next time you launch Lightroom.
You should now be well on your way to a more organized Presets panel, and a more efficient use of your presets.
This article originally published in Issue 34 of Lightroom Magazine.


Really enjoyed this and found it helpful. I already started organizing my presets.