
I love playing with new tools! Photoshop CC 2018 introduced Symmetry Painting as a Technology Preview, and it’s been a total blast to play with. It allows you to use one or more paths to define a symmetry boundary—whatever you paint or draw on one side appears on the other side, as if the path were a mirror. Once you try it, my guess is you’ll get lost playing and creating, just like I did.
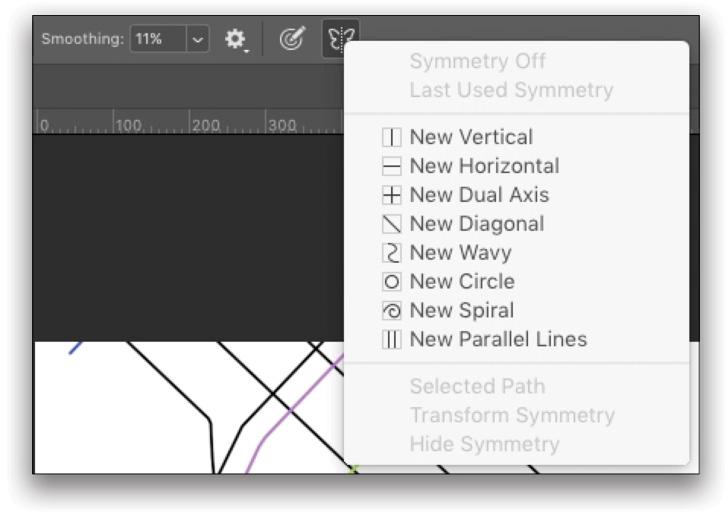
Because this feature is a technology preview, you must be using the latest version of Photoshop CC 2018, and you’ll have to enable it in the Preferences: Photoshop CC (PC: Edit)>Preferences>Technology Previews. Check the box labeled “Enable Paint Symmetry.” Fortunately, it won’t require you to relaunch the application, so click OK to close the dialog, and then press B to load the Brush tool. With a new document open and a blank layer to paint on, check out the Butterfly icon in the Options Bar. This is a drop-down menu with several options. [Note: As of October, 2018 this feature is no longer a Technology Preview and you may be able to skip enabling it if your application is up to date.]
Most of these should be pretty clear; the symmetry modes create a path that acts like a mirror along the length of the path. Many painting and 3D applications have something similar. What’s unique to Photoshop is being able to use curved paths, including paths you define yourself. With a curved path, you can achieve some very unusual distortions, something you can’t easily do with standard copy/paste/transform techniques.
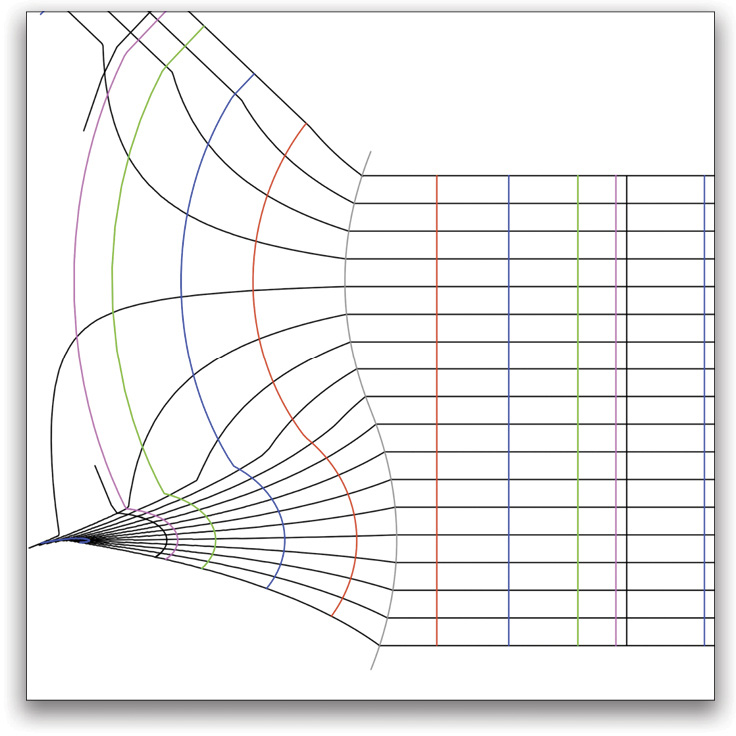
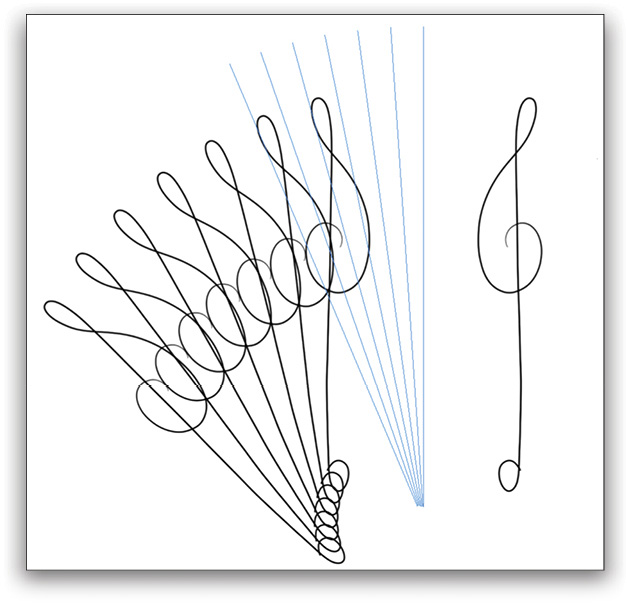
In this example image, I created straight, vertical strokes on the right, and the results are on the left side of the symmetry path. You can see the mapped points (called the “translation”) from right to left, showing the distortion caused by finding the minimum distance across the curved path. There are a couple of interesting things about how Symmetry Painting works. First, while it can distort the paint stroke you make, it doesn’t scale or distort the brush tip. This means you’ll paint with the same size brush no matter what, which limits the ability to use a curved path to paint with a kind of perspective—you’ll have to stick with Warp and Transform controls for that effect.
Note: Remember that painting in Photoshop really means laying down a series of marks, which you can see if you increase the Spacing slider in the Brush Settings panel (Window>Brush Settings). Each mark has its own unique position. Symmetry Painting works by reflecting the position of each mark on the opposite side of the path, and not just by copying pixels.
Second, the paths are not straight. See the kinks in what seem like they should be smooth curves on the left? That has to do with the way Photoshop finds the minimum perpendicular distance from the painted point through the path. If math isn’t your strong suit, just keep in mind that the more extreme the curve, or the further away you are, means you may not intuitively predict the location or shape of a given stroke’s symmetric reflection. Working closer to the path yields more easily predicted results.
Now Let’s Get Painting
After you activate the tech preview and choose the Brush tool (B), you can choose any of the modes from the butterfly drop-down. When you do, a path is placed in the center of your canvas, with transform controls already activated. You can move, rotate, and scale the path as you like, then press Enter to commit the change.
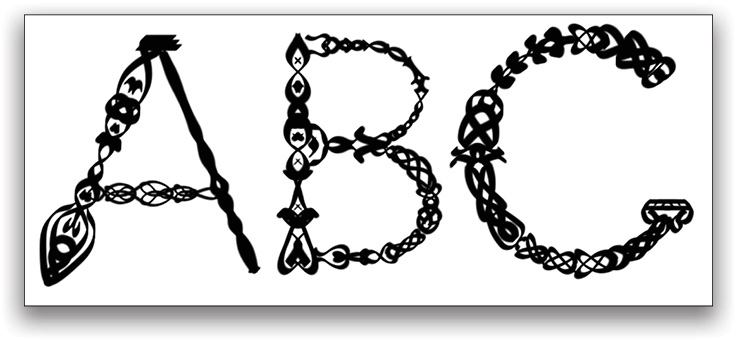
Since this is an actual path, you can manipulate it either with the Transform controls or by using the Path tools. I like to use the Path Selection and Direct Selection tools (A) to tweak points as I work. What’s really cool about this is you can use a simple path on a single layer and build up smaller designs rather quickly. In this lettering example, I typed the characters in a basic font on one layer, then lowered the Opacity and used Paint Symmetry on a higher layer. For the A, I placed a single, straight path along one edge and painted, then moved the path to the next edge, and so on. For the B, I added a point to the path using the Pen tool (P) and made it a curve. The C was created with a transformed Circle path, then a short straight path for the bottom serif.
The Hidden Modes
There are two “hidden” modes in Symmetry Painting: Mandala and Radial. Radial creates copies evenly distributed and rotated around a circle, like numbers on a clock face. Mandala does something similar, but also adds another reflection that’s rotated. This image shows the results of making exactly one mark in the same spot, first using Radial, and then using Mandala (the brush mark is highlighted in blue for illustration; symmetry marks use the same color with which you paint).
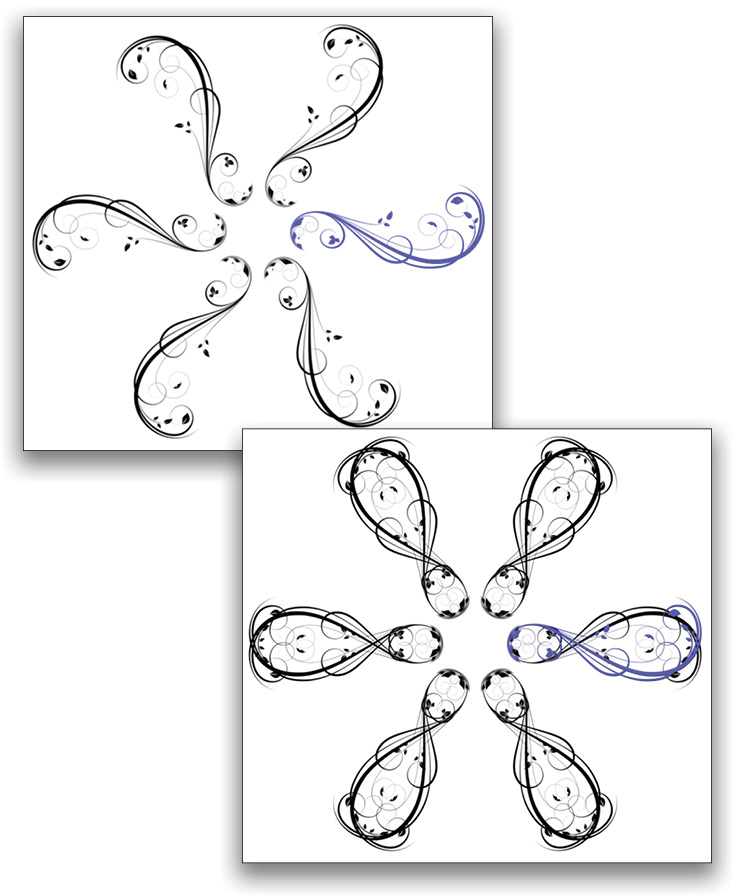
To enable these hidden modes, start by choosing New Dual Axis from the Options Bar, and press Enter to commit the path. Then open the Paths panel (Window>Paths) and find the new path. Double-click the name of the path and type in “Mandala Symmetry 6” or “Radial Symmetry 6.”
You can actually use any number from 1 to 12, which changes the number of symmetry results you get. Even better, you can do this at any time and the change will be reflected as soon as you start painting again.

Creating Multiple Paths
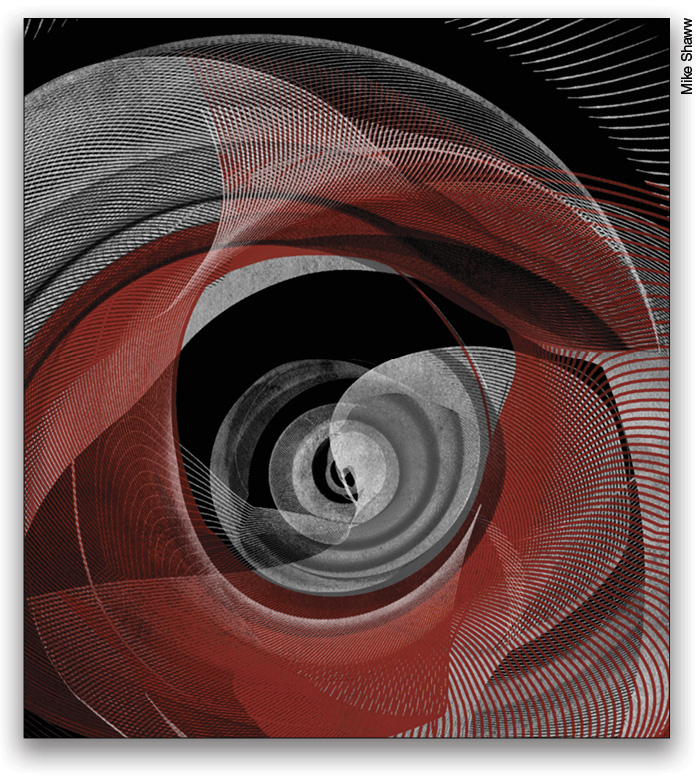
There’s another trick that I think is totally amazing, and was pointed out by Mike Shaw, Adobe Photoshop Senior Quality Engineer. You can copy/transform/paste the symmetry paths to create multiple simultaneous results. This is best done with very small brushes, around 4 px or smaller. To do this, start with something simple like a Vertical symmetry path, press Enter to commit it, then use the Path Selection tool and click the path on the canvas again. Press Command-Option-T (PC: Ctrl-Alt-T), transform the duplicated path, and press Enter. To repeat this and create a new copy, now press Shift-Option-Command-T (PC: Shift-Ctrl-Alt-T). Do this four or five times and press Enter. Now when you paint, you’ll get a result for each duplicated path!
Check out this example from Mike.
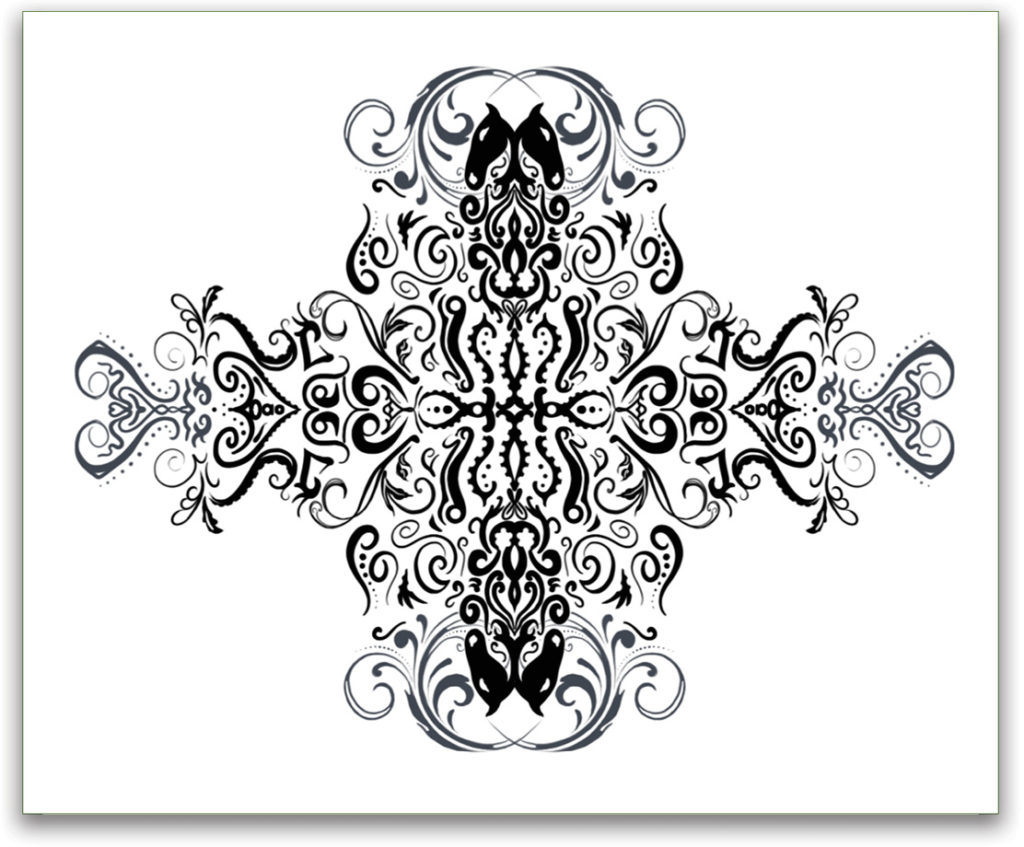
And here’s a really complicated piece from Dave Richardson,
an Adobe Community Professional in the UK.
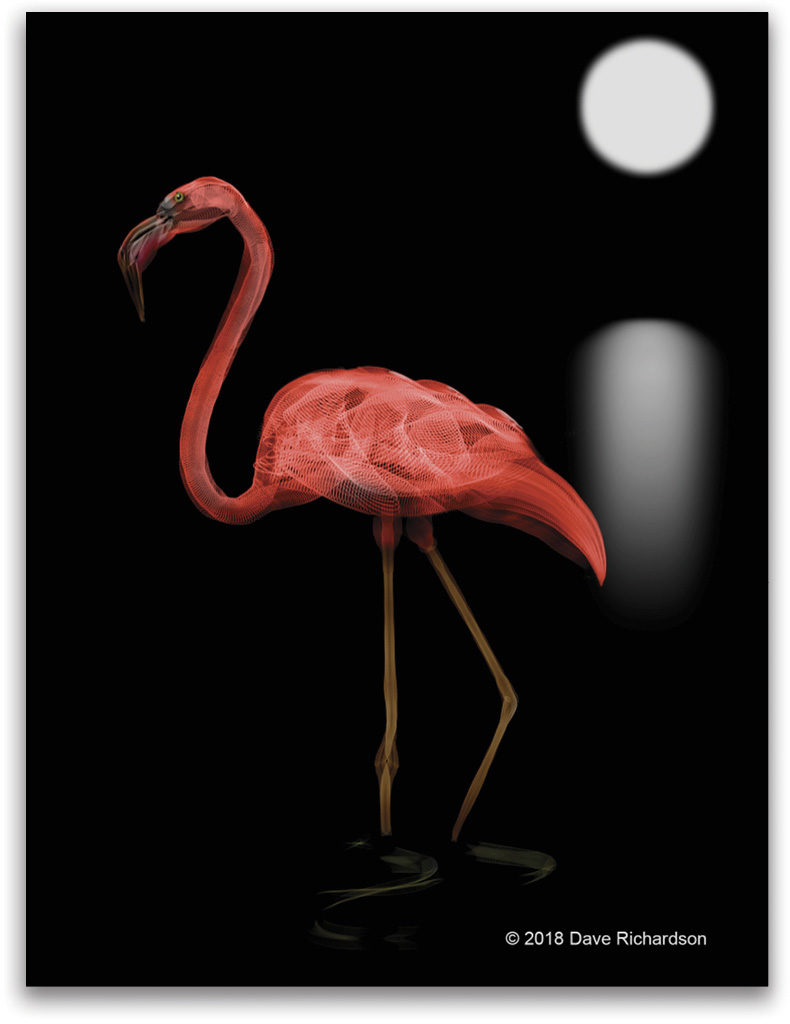
Both of these amazing images use multiple copied paths, and in Dave’s case, creating building blocks and compositing them together.
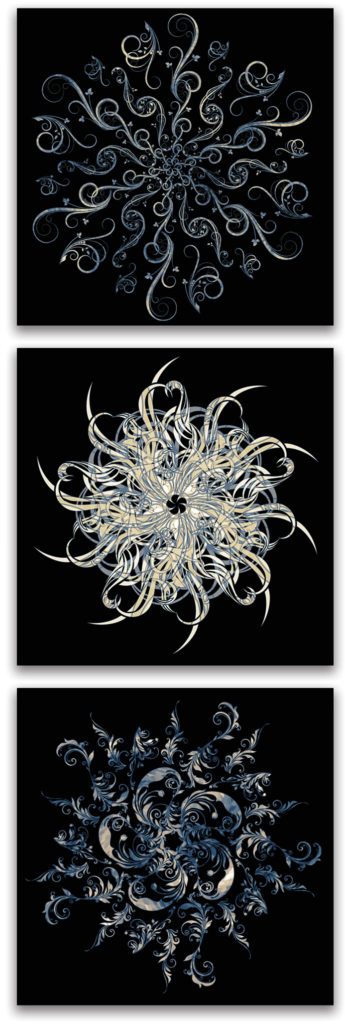
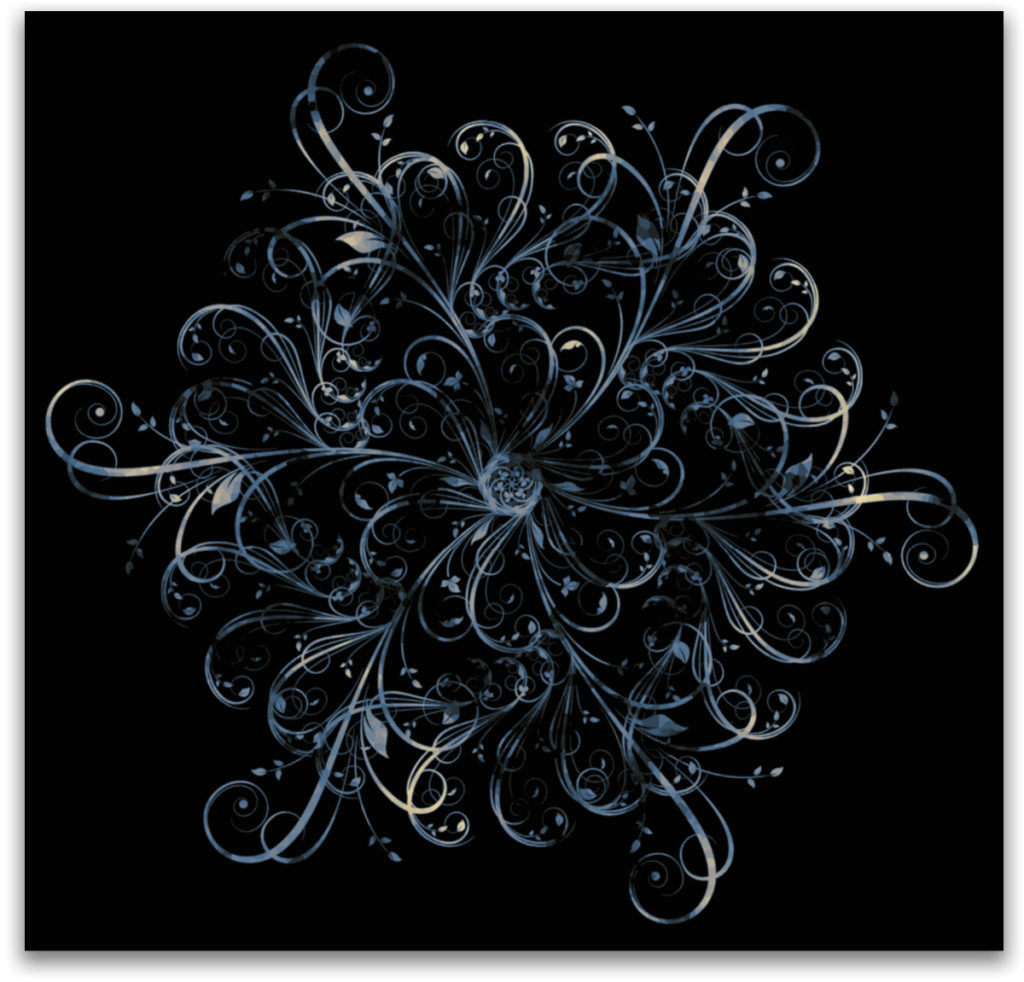
My first attempt was a lot simpler. I created some brushes from tribal and floral ornaments I downloaded from Adobe Stock, and used those as stamps with Radial and Mandala symmetries. To make clean stamps, set the Spacing option in the Brush Settings panel to 1000%. I also like to use a Wacom Intuos tablet so I can rotate the brushes easily.
To get the fill texture, I painted with white on a black layer, and placed a solid black layer beneath that. Then on the painted layer, I added a layer mask and filled it with the Clouds filter (Filter>Render>Clouds). From there, I experimented with various pixelization and distortion filters, then finished off with a Gradient Map above the painted layer, using some Photographic Toning presets. You can click here to watch a video on creating these various snowflakes.
Some Other Things to Know
Here are a few things to keep in mind when working with Symmetry Painting.
You can create and save many different symmetry paths in a given document, which allows you to continue working after closing and reopening a document, or to share a custom path to new documents.
To activate a saved path, simply select it with the Brush tool active, and then go to the Symmetry Painting drop-down and choose Selected Path.
Transform a path while you’re working by pressing-and-holding A to temporarily active the Direct Selection or Path Selection tool (depending on which tool is currently visible in your Toolbar). Move the path where you want it, release the A key, and then continue painting (see the ABC example above).
Hide the symmetry path to make things easier while you’re painting. This option is under the Symmetry Painting icon in the Options Bar.
Also in the options is the ability to toggle symmetry on and off. For a given document, this choice is persistent until you close the document, so you’ll have to turn it off when you don’t want to use it.
There are also some limitations, such as being limited to regular brushes only—no live brushes such as mixer or erodible tips. That also means no smudging, gradients, selections, or additional paths; however, you can erase using symmetry.
Also note that simple paths work best! Complex curves will break down quickly into chaos, and using too many duplicate paths with large brushes will seriously warm up your processor.
Remember that this is still a technology preview, so if and when this feature becomes standard, it may look totally different. Until then, get in there and have fun with it! Create richly illustrated photo borders, standalone designs, or small elements like buttons and fabric patterns for illustrations and compositing. And don’t forget about 3D textures! Share your creations on the KelbyOne Community forums and social media (#kelbyone, #pspg).
This article originally published in the February, 2018 issue of Photoshop User magazine.


Very professional. clean and simple design and very easy steps.
nice info thanks
Really amazing work. It is very clear and perfect.