
Hair and objects with soft edges are among the most difficult items to select, but the new Select and Mask workspace is built for that task. In this column, you’ll learn how to use it to refine a selection of a subject with curly hair in order to swap in a more colorful background.
Step One:
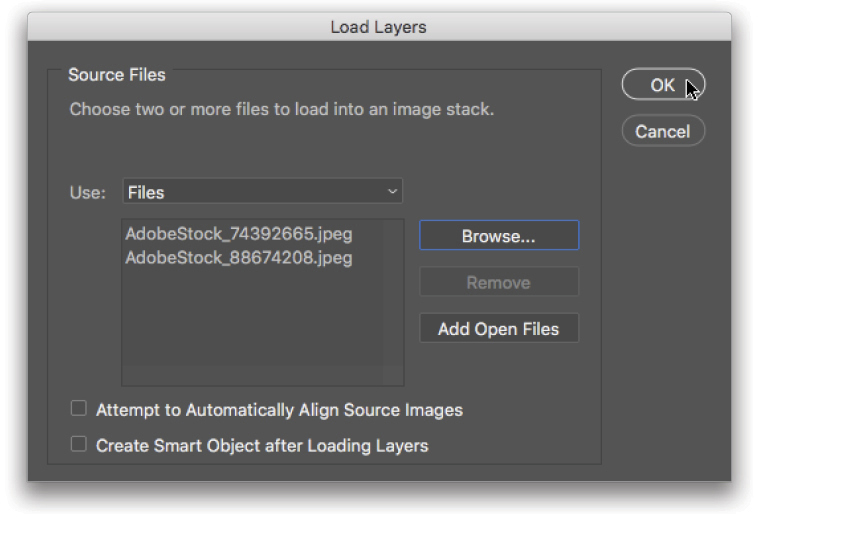
Choose File>Scripts>Load Files into Stack. In the resulting dialog, click Browse and navigate to the photos of the woman and the colorful bokeh background. (Bokeh refers to the pleasing or aesthetic quality of out-of-focus blur in the highlights of photos taken at a wide aperture, say, f/2.8 or wider.) Shift-click to highlight both files and then click Open. Click OK in the Load Layers dialog. If you use Lightroom, you can Shift-click two thumbnails in the Library module and then choose Photo>Edit In>Open as Layers in Photoshop. Either way, the images open in a single Photoshop document on separate layers.
[KelbyOne members may download the files used in this tutorial at http://kelbyone.com/magazine. All files are for personal use only.]
Step Two:
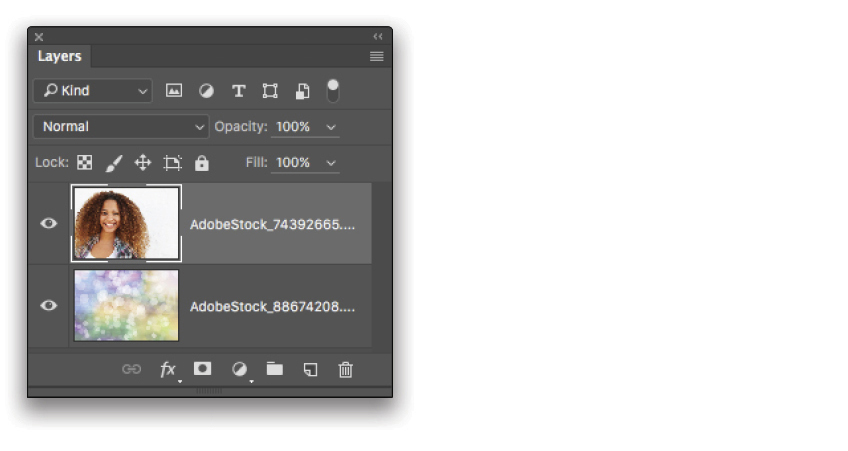
If necessary, drag the layer thumbnail of the woman to the top of the layer stack in the Layers panel.
Step Three:
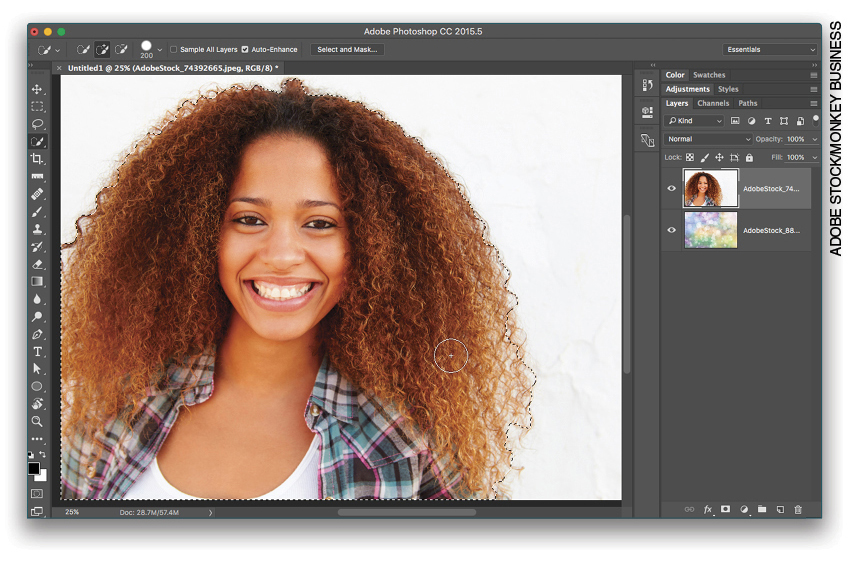
Activate the layer of the woman and press W to grab the Quick Selection tool (press Shift-W to cycle between the Quick Selection tool and the Magic Wand). In the Options Bar, turn on Auto-Enhance and then drag atop the lady to select her. The size of the area that Photoshop selects is controlled by your brush size: use a bigger brush for larger areas and a smaller brush for smaller ones (a 200-pixel brush was used here but you can use a smaller brush for the lower-res practice file). Tip: Use the Left and Right Bracket keys on your keyboard ([, ]) to quickly adjust brush size.
Step Four:
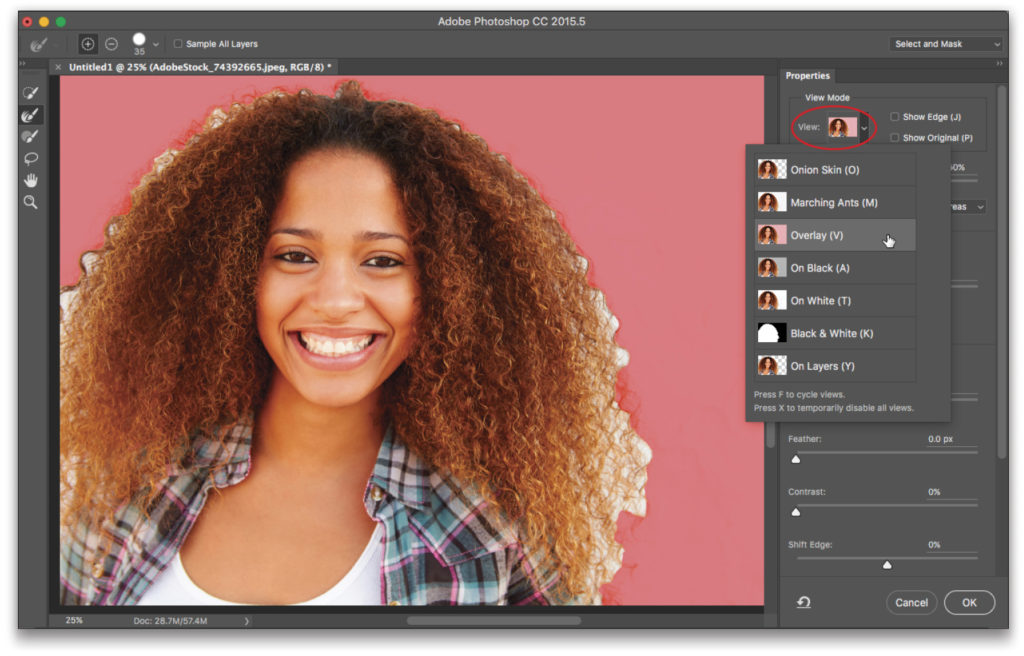
In the Options Bar, click Select and Mask. In the workspace that opens, click the View drop-down menu in the Properties panel on the right and pick the view that lets you see the edges that aren’t yet included in your selection. You can cycle through the views by tapping F on your keyboard. In this case, Overlay works well. Click outside the View menu to close it and use the Opacity slider to adjust the opacity of the red overlay so you can see strands of hair (50% was used here). If the red overlay is over your subject, change the Indicates drop-down menu just below the Opacity slider from Selected Areas to Masked Areas.
Tip: Alternatively, you can summon the Select and Mask workspace first and create the selection there. To do that, choose Select>Select and Mask and then use the Quick Selection tool at the top of the Toolbar at the left.
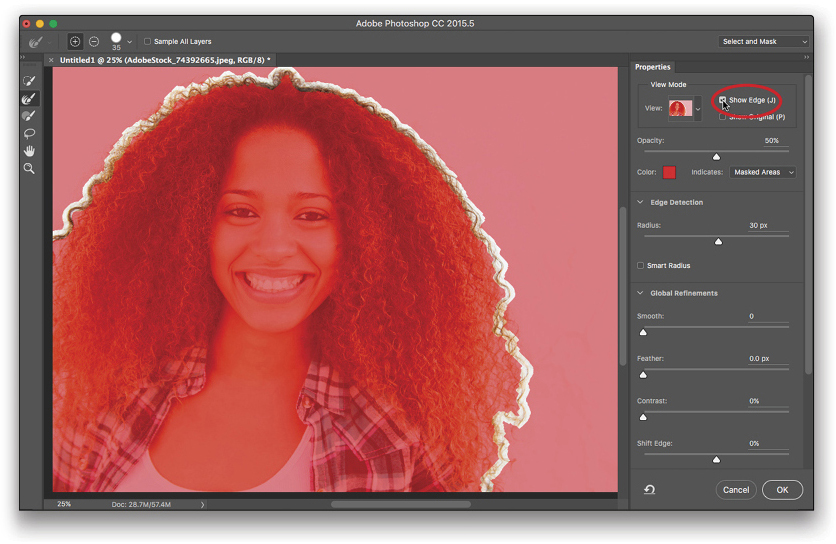
Step Five:
In the Properties panel, click the disclosure wedge to the left of Edge Detection to expand that panel and then drag the Radius slider rightward to about 30 px to widen the area Photoshop takes into consideration as it refines the selection. (Note: For the low-res practice file, set the Radius to 15 px.) To view that area, turn on Show Edge (circled here) and then turn it back off. The Smart Radius checkbox tells Photoshop to adjust the radius for both hard and soft edges. Since there are no hard edges in this photo, turn it off. Expand the Global Refinements section and set the Smooth, Feather, Contrast, and Shift Edge sliders to 0. Don’t click OK yet.
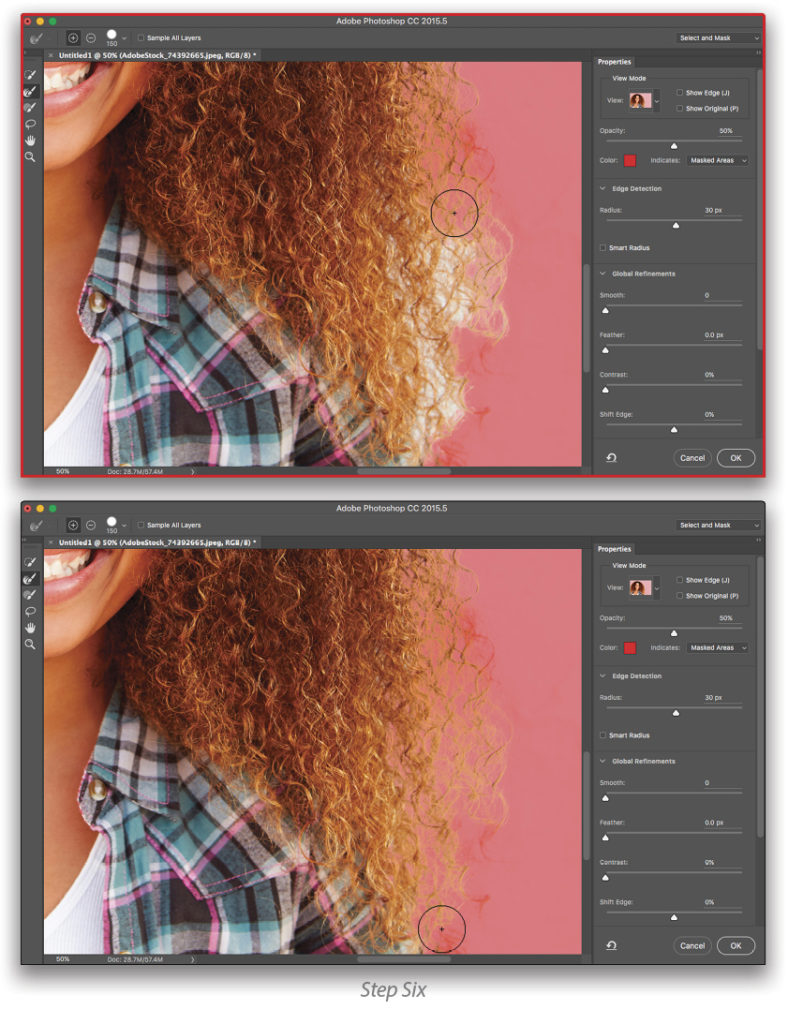
Step Six:
To include more hair in the selection, and to remove the white background where it shows through her hair, brush over those areas with the Refine Edge Brush tool (R) in the Toolbar at the left. Zoom in if you need to by pressing Command-+ (PC: Ctrl-+) and reposition the image onscreen by Spacebar-dragging. Use the Bracket keys on your keyboard to adjust brush size. On this image, you can use a fairly large brush (say, 80 pixels for the practice file), though for finer detail you may get better results using a smaller one.
Tip: If Photoshop suddenly excludes a giant swath of your subject in the selection (you see the red overlay over you subject), press Command-Z (PC: Ctrl-Z) to undo your last brushstroke and try again using a smaller brush or make shorter brushstrokes (or both). You can also press B to activate the Brush tool and then brush across those areas to include them in the selection again.
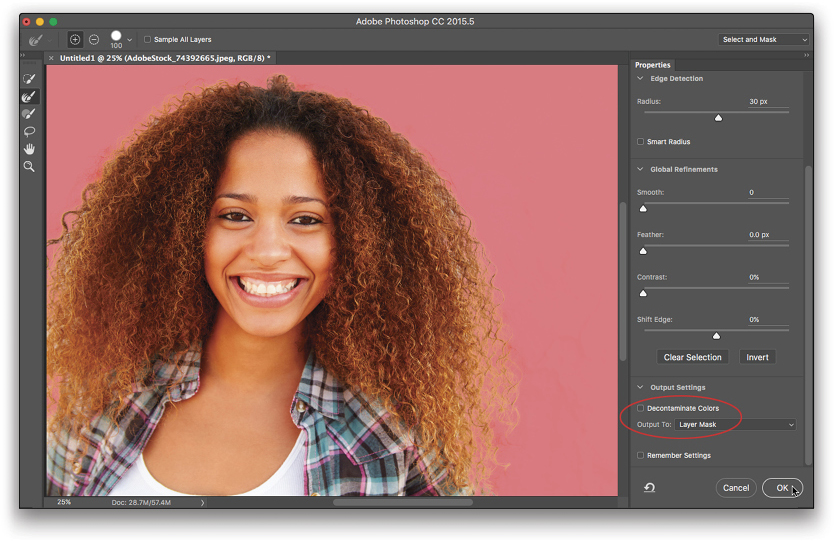
Step Seven:
When the selection looks good, scroll down the Properties panel and expand the Output Settings panel. Turn off Decontaminate Colors, which tries to remove any remaining background pixels that may be loitering in the selection; if your selection looks good you may not need it. From the Output To drop-down menu, choose Layer Mask. Click OK at the bottom right of the Properties panel and Photoshop masks the active layer with your newly refined selection, allowing you to see through to the new background layer below.
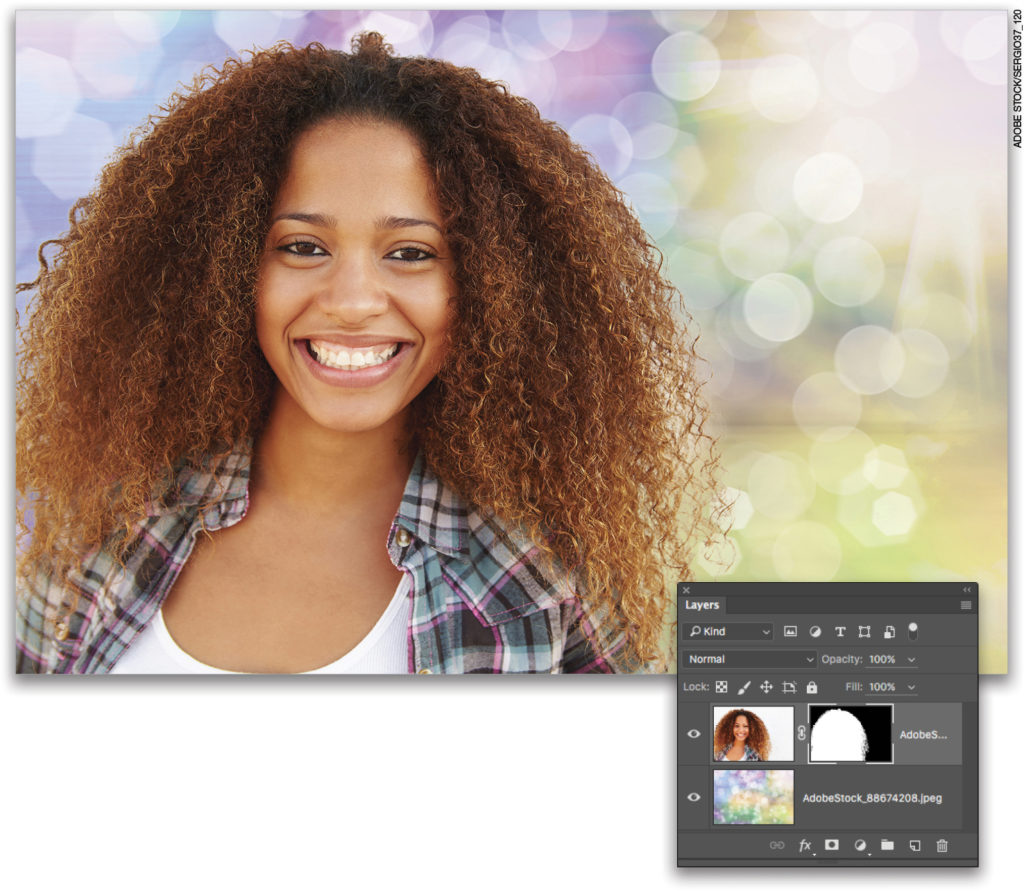
Step Eight:
Here you can see the final result. Choose File>Save As and pick Photoshop from the Format drop-down menu so your layers and mask remain intact. If you opened the files from within Lightroom, choose File>Save instead. Either way, press Command-W (PC: Ctrl-W) to close
the document.
As you can see, the Select and Mask workspace made short work of refining a selection of hair in order to swap backgrounds; however, the resulting selection could also be used to alter the selected area of the image in a specific way. In that case, in the Select and Mask workspace, pick Selection from the Output To drop-down menu instead of Layer Mask, and then add the adjustment layer of your choice. Until next time, may the creative force be with you all!
This article originally published in the October, 2016 issue of Photoshop User magazine.


Where do we get the files for this tutorial (Selecting Hair Using the Select And Mask Workspace)? The pointer leads to all past issues.
Thanks for letting us know, I have updated the post with the correct link. ~JM