Inverting Masks, Linear Masks, and More Control
Review by Erik Vlietinck
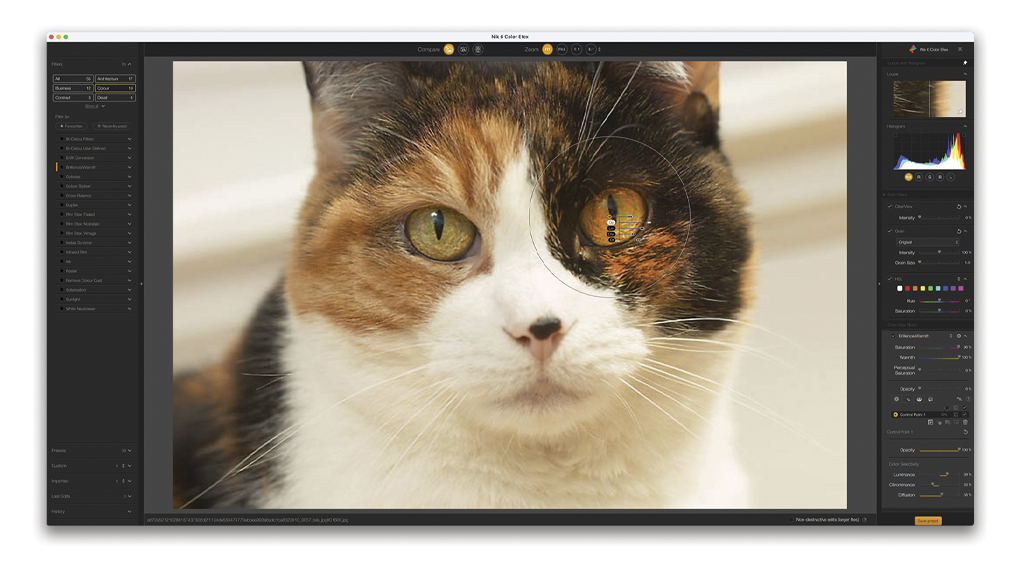
DxO’s NIK Collection 6 is yet another upgrade that brings a more modern interface and new functionality. One of the big new features is a control line for linear masks in addition to the circular control points we already had.
Version 6 lets you control some of the parameters that define the masks created by control points and lines. Diffusion lets you set the fall-off of the mask, while chrominance and luminance let you further fine-tune the mask, which helps, for example, with retaining more detail in an area that you otherwise can’t boost to a desired saturation level. An “invert” setting makes it possible to invert the mask as well.
As you probably build a large number of presets yourself with NIK Collection, version 6 felt your pain of having to wade through endless lists of presets, and now lets you search through them. It pays off big time if you’d made the effort to name existing ones sensibly. Besides naming presets, you can now also name control points throughout the entire collection.
Photoshop users, in particular, will love the fact that you can convert your edits to Photoshop’s smart object type from within the plug-in itself, which is useful if you forgot to do that before starting to work on an image. Another nice new feature is that the plug-in remembers the last 15 edits so that you can go back to a previous one without having to save your work with every change you make.
NIK Perspective has a new ReShape, Symmetry, and Guides functionality, that all work much the same way as those in DxO’s ViewPoint 4. Finally, NIK Sharpener and HDR Efex are still being worked on, but will be available sometime in the summer of this year, free of charge to those who have a license for version 6.