When I’m traveling, I often witness spectacular landscapes that don’t have a great sky or light, and it really takes all the magic out of the moment. So here’s a great way for you to always make amazing shots in Photoshop, no matter the circumstances. (Note: Before you attempt this quick technique, make sure your version of Photoshop is updated to at least 20.0.1.)
One of my favorite tips to be efficient in replacing skies is to use the Libraries panel in Photoshop. When I see a nice sky, I capture it so I can add it to my CC Libraries for future use. With this article, I’m offering you some skies that you can download to help you start your own library. You can click here to download them, or visit kelbyone.com/magazine.
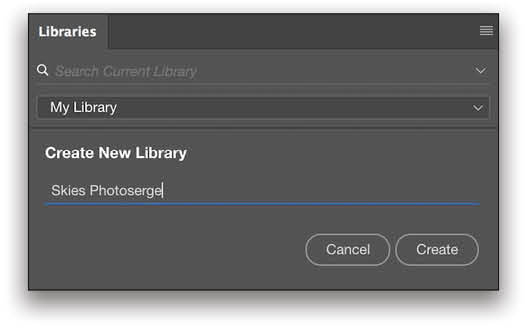
Step One: After downloading the sky images, go to your Libraries panel (Window>Libraries), click on the flyout menu at the top right, and select Create New Library. For this example, name the new library “Skies Photoserge,” and click the Create button.
Step Two: To add items to your new library, first locate the downloaded sky files and open them in Photoshop. Now, select the Move tool (V) at the top of the Toolbar, and simply drag-and-drop each sky photo into the Libraries panel. You can close all the files once they’re in the panel.
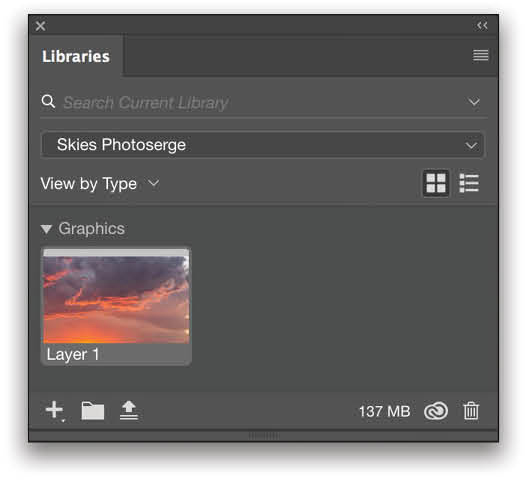
Any images that you add to the Libraries panel will upload to the Creative Cloud so you can easily access them on any computer, as well as in all your Adobe CC apps. Repeat this process to add your own sky images and grow your library.
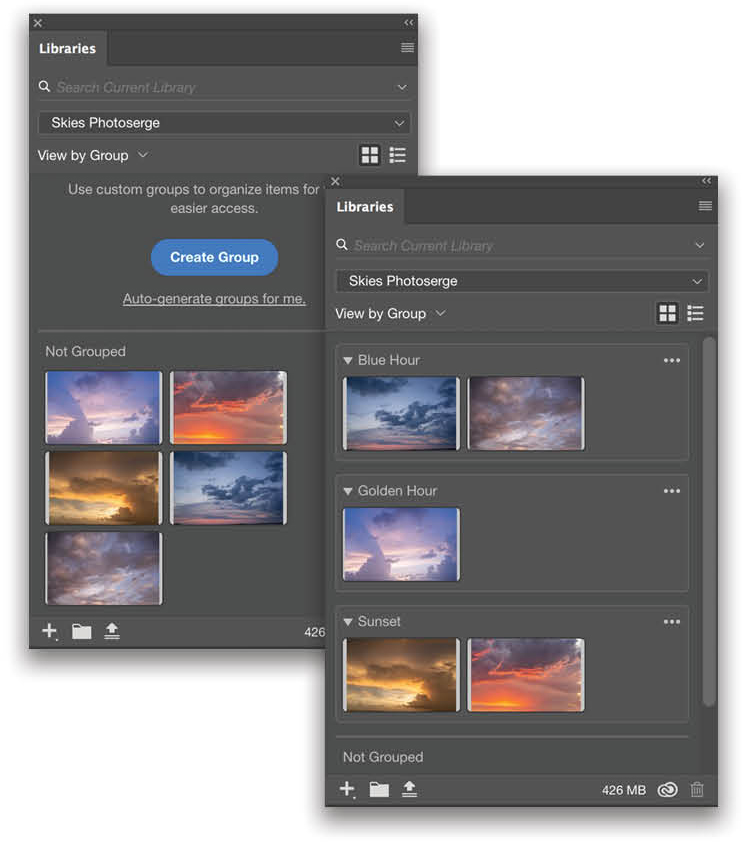
Step Three: To be even more organized, create groups in your library to separate the images by specific scenes. Just below the name of the library in the Libraries panel is a drop-down menu that currently says View by Type. Click on that drop-down menu, and choose View by Group. Click on the Create Group button that appears, and give the new group a name. Drag the appropriate images into that group. Now that your first group is created, click on the Create Group icon (folder) at the bottom left of the Libraries panel to add additional groups. You can then drag-and-drop the groups to change their order.
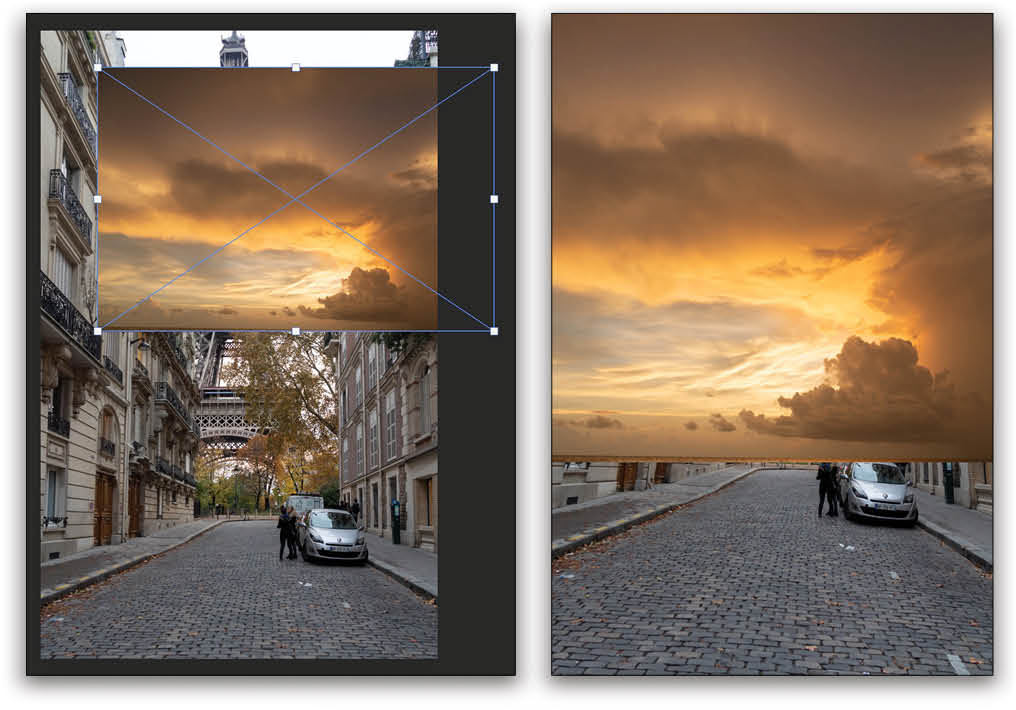
Step Four: Now let’s get into the good stuff: replacing the sky in an image. First, open a photo in which you wish to replace the sky. Decide on the new sky in your Libraries panel that you’d like to use, and just drag-and-drop it from the panel onto your photo. The new sky will automatically appear with transform handles, so resize and position it so it completely covers the original sky in the image. Press Enter to commit the changes. It will look pretty strange at this point.
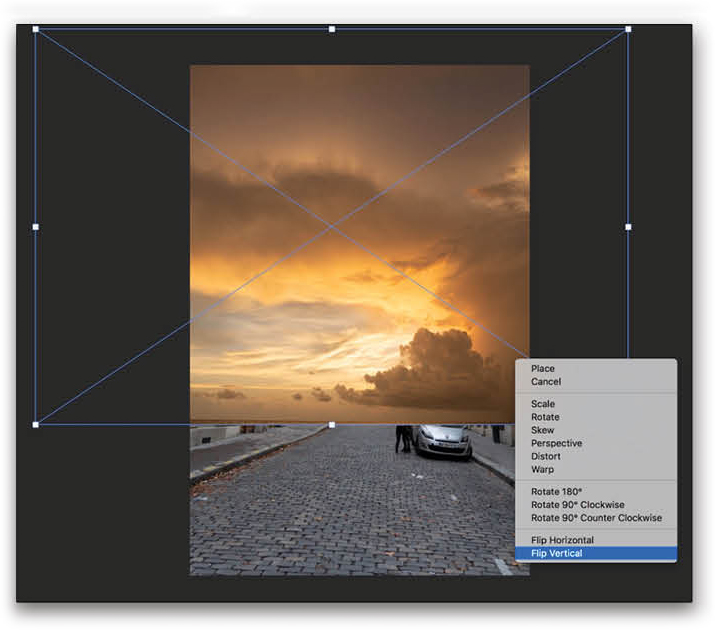
Step Five: In the Layers panel, duplicate your new sky layer by dragging-and-dropping it onto the Create a New Layer icon at the bottom of the panel. Press Command-T (PC: Ctrl-T) to bring up Free Transform, Right-click inside the bounding box, and select Flip Vertical.
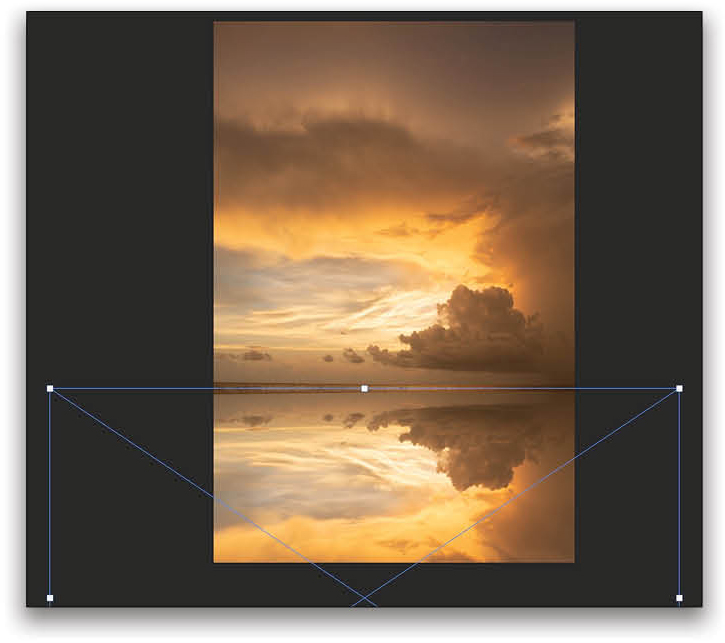
Step Six: Now, holding the Shift key, drag the flipped sky layer straight down to the bottom edge of the original new sky layer to create a reflected image. Press Enter to commit the transformation.
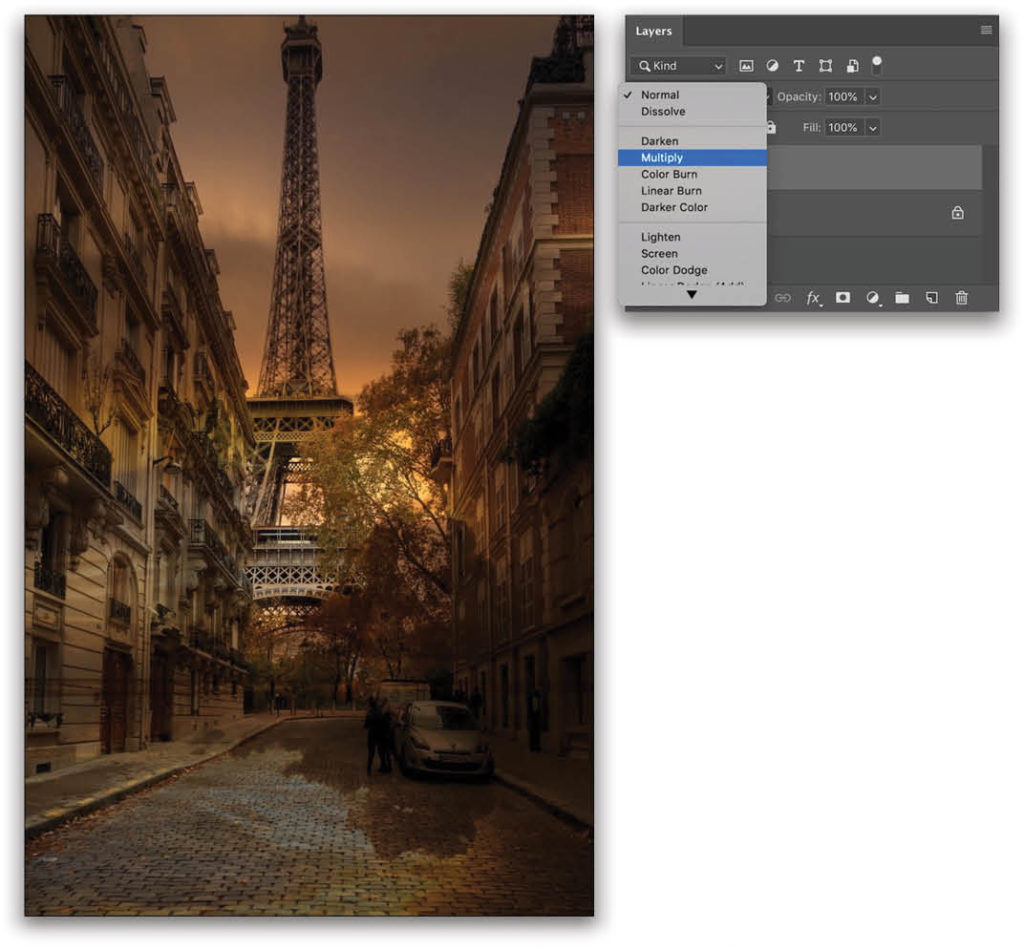
Step Seven: Shift-click the original new sky layer in the Layers panel so both sky layers are selected. Right-click on one of the selected layers, and choose Merge Layers. With the layers merged, select the Multiply blending mode near the top left of the Layers panel.
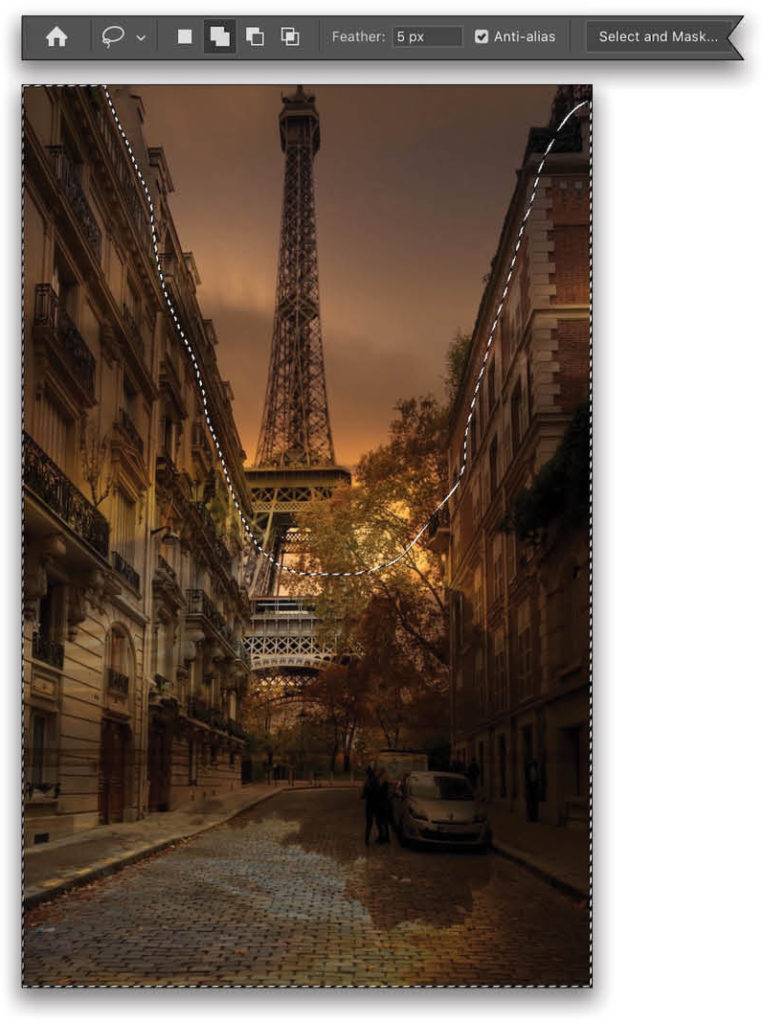
Step Eight: As you can see, the image has a weird look to it, so in this step, grab the Lasso tool (L), and set the Feather to around 5 pixels in the Options Bar. Draw a rough selection around everything in the foreground, leaving out the main sky area, as shown here.
Step Nine: Now go to Filter>Blur>Gaussian Blur. Set the Radius to around 135 pixels, and click OK. That leaves us with only the color of the sky and not its texture in the foreground elements.

Step 10: But it still needs more work to make it look realistic. Press Command-D (PC: Ctrl-D) to deselect, and click on the Add Layer Mask icon (circle in a square) at the bottom of the Layers panel. Switch to the Brush tool (B), click on the brush preview in the Options Bar to open the Brush Preset Picker, and set the Hardness to 0%. Then, set the Opacity in the Options Bar to around 20%. Press X to set your Foreground color to black, and then brush over your photo to remove some of the sky color to make it look more natural. If you erase too much of the sky color, you can press X to switch the Foreground color to white, and brush over those areas to bring it back.
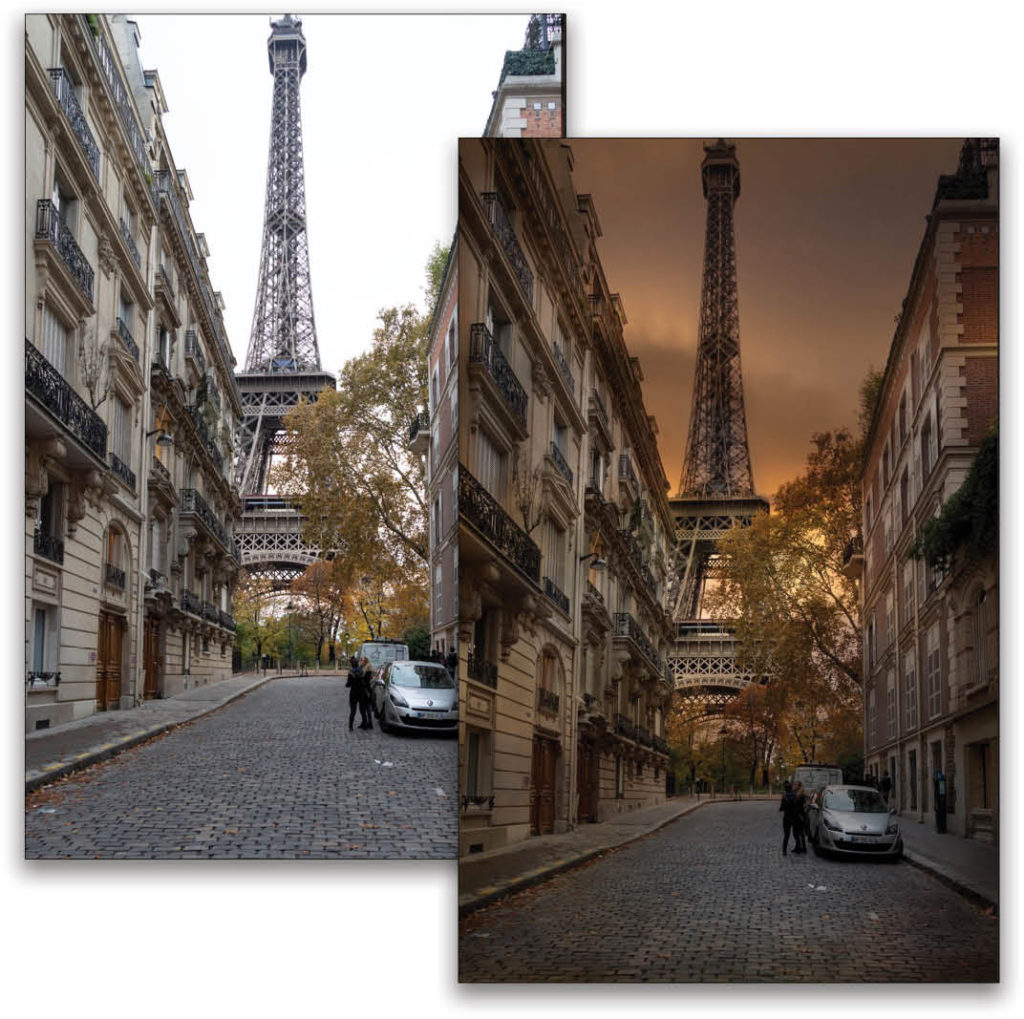
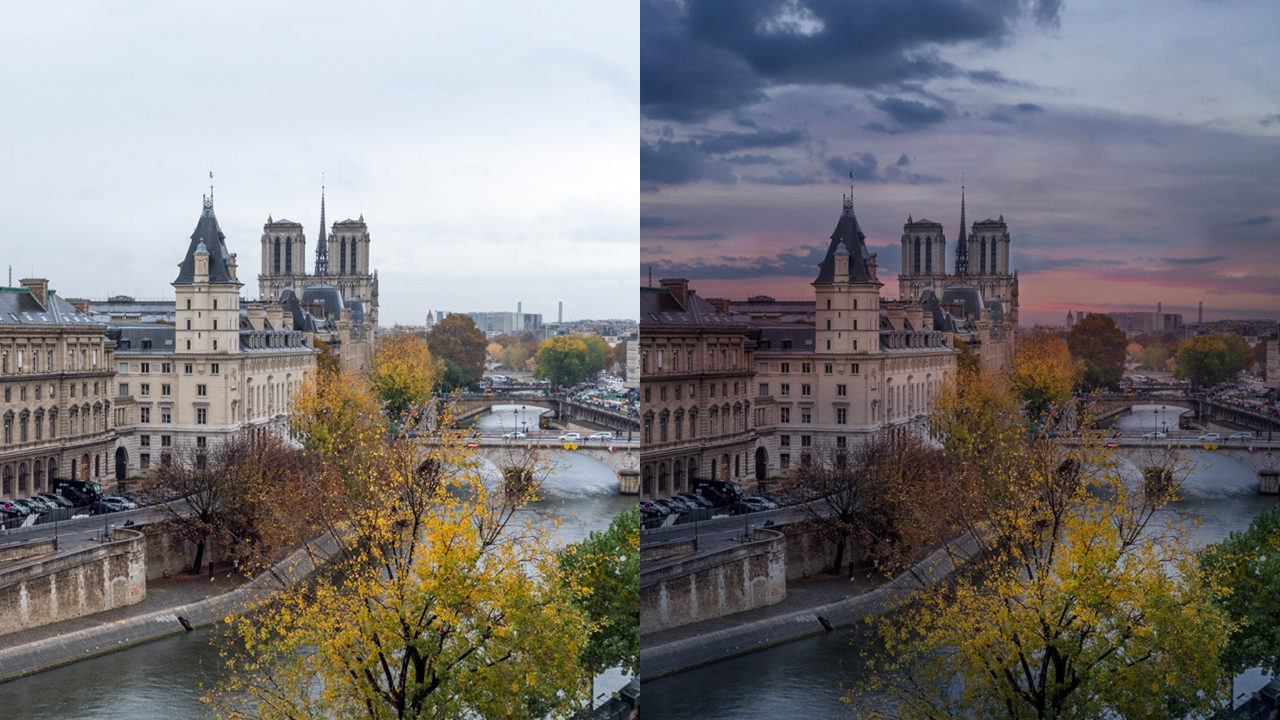
That’s all there is to it. You quickly replaced a sky! Here’s the before and after.
A Quick Overview
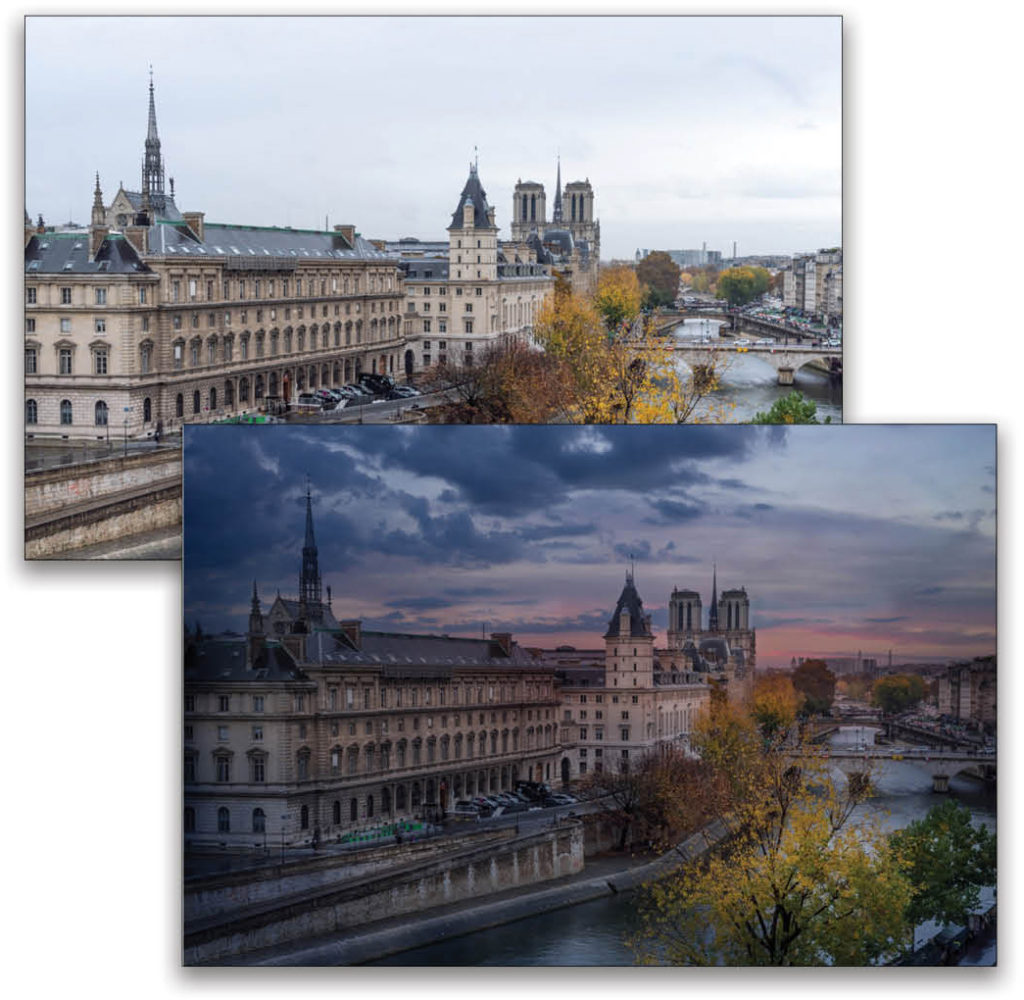
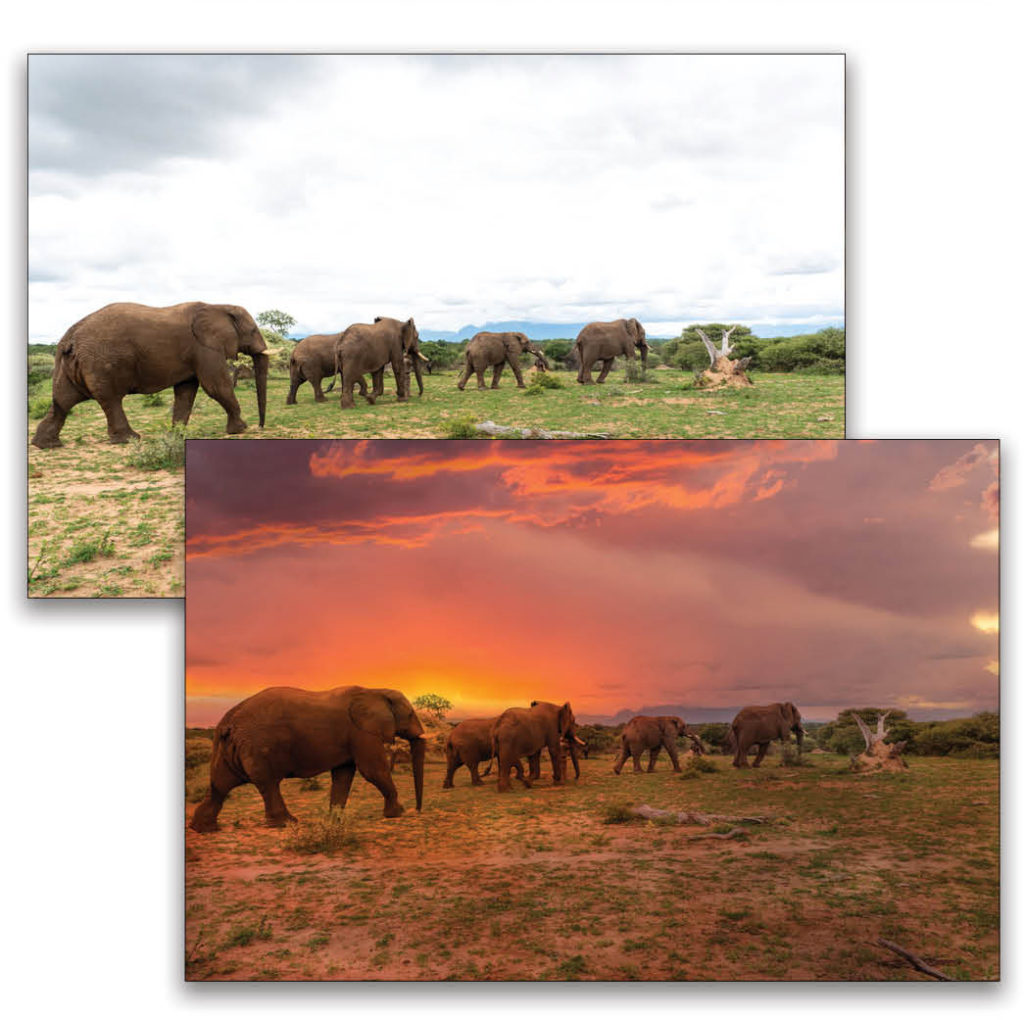
Here are a couple more before and afters using this sky replacement technique. And to iterate just how easy this technique is, here’s a quick recap of all the steps.
- Drag-and-drop your new sky from the Libraries panel onto your photo in Photoshop.
- Resize and position the sky where you want along the horizon and press Enter.
- Duplicate the new sky layer.
- Use Free Transform to flip it vertically.
- Position your flipped sky over the rest of your photo to create a reflection.
- Select both layers and merge them.
- Select the Multiply blending mode.
- Make a selection of your foreground elements with the Lasso tool.
- Apply a Gaussian Blur to remove the sky texture in the foreground elements of your photo.
- Deselect, add a mask (make sure that your Foreground color is black), and use a soft-edged brush at a low Opacity to brush out the sky color to make it look more natural.
I hope that these tips will be very useful for your own images, and that you’ll no longer have excuses for photos with bad skies!
This article originally published in the May, 2019 issue of Photoshop User magazine.


I am not sure if this is right thing to do. Altering existence sky what was in the picture makes sense.. But adding a new sky from somewhere else does not sound like photography. Now there is really no distinction who took a great picture if this picture was tampered so much to look great. Sorry did not mean to hurt anyone, was just my 2 cents and opinion.