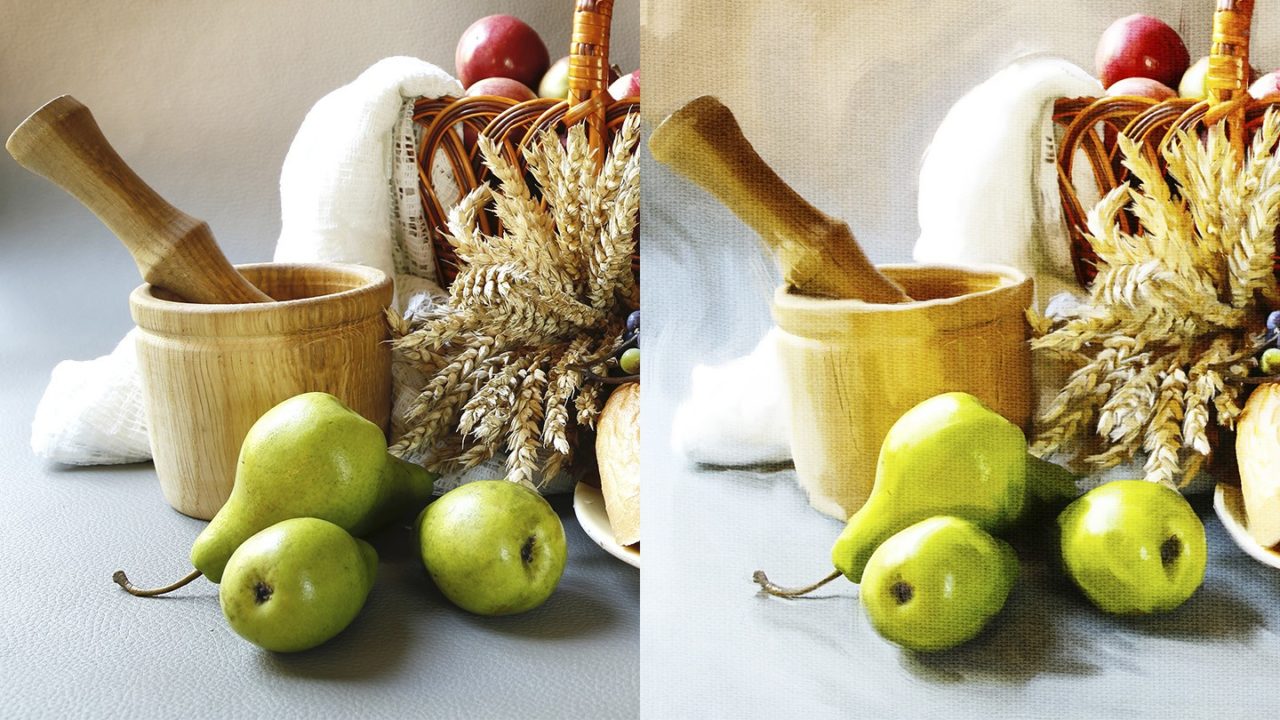
Photo painting is a method of achieving a quick and effective painted effect that’s more convincing than any filter. As a disclaimer, this approach isn’t intended to undermine or devalue the traditional painters who have spent years developing their painting skills. This is just to show an option that’s accessible to mere humans and produces good results.
There are three main elements to making this technique work like it does: Photoshop’s Mixer Brush tool, the Bristle Brush tips, and a pressure-sensitive graphics tablet. It’s possible to do this with a mouse or trackpad, in the same way it’s possible to tie your shoe with one hand. Possible, but not recommended.
Step One:
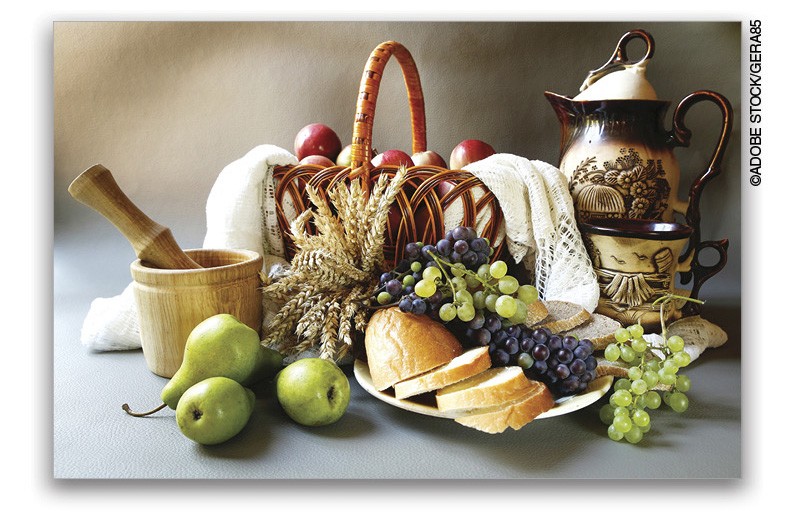
Begin with a photo that looks like it would make for a good painting. Still-life settings are a favorite subject matter for most painters, so consider using an image containing fruit, baskets, jars, cloths, etc. on a tabletop. By selecting a subject matter that’s usually associated with painting, the final effect will be even more convincing. Once you have a photo selected, open it in Photoshop.
Step Two:
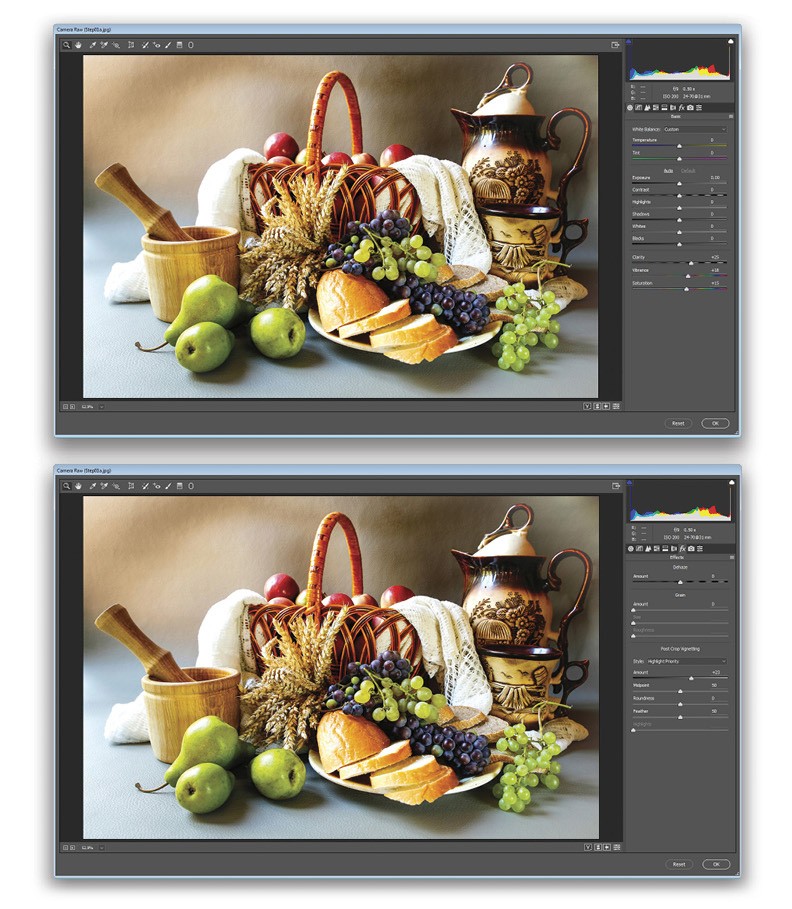
Generally speaking, paintings have more color saturation and vibrancy than photographs. Start by converting the background to a smart object by going to Layer>Smart Objects>Convert to Smart Object. Then, go to Filter>Camera Raw Filter. In the Basic tab, increase the Clarity to +25, Vibrance to +18, and Saturation to +15. Switch to the Effects (fx) tab and, in the Post Crop Vignetting section, adjust the Amount to +23. This gives the image bolder colors and a subtle brightness reminiscent of classic painting techniques. Click OK.
Step Three:
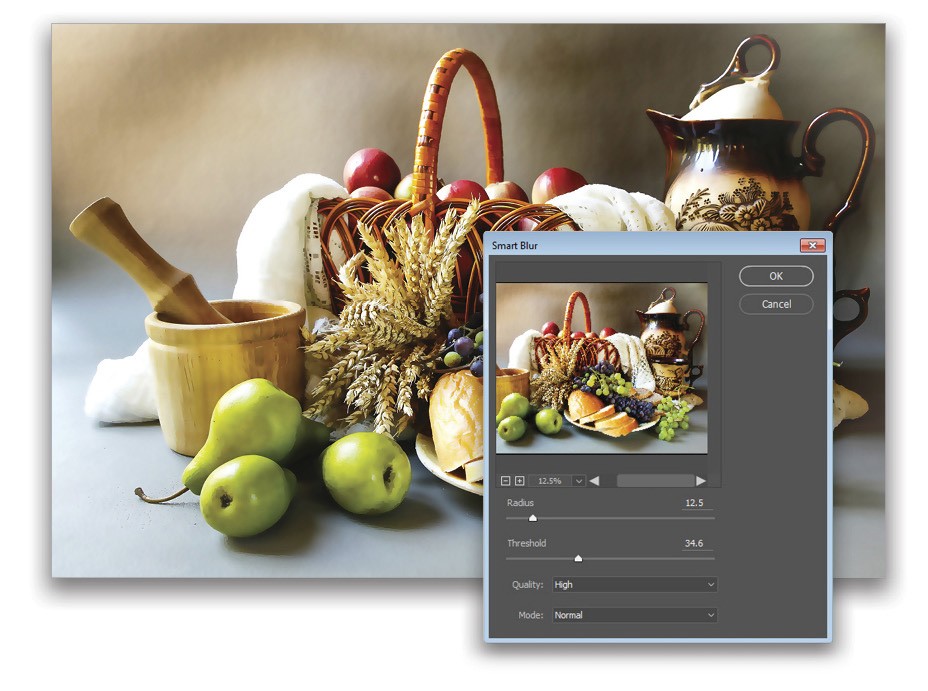
By its very nature, photography captures more detail than most paintings, so to create a convincing painted effect, those details need to be removed from the photograph. Go to Filter>Blur>Smart Blur. Set the Radius to 12.5, the Threshold to 34.6, and the Quality to High, and click OK. These settings will vary for other images and image sizes, but the goal is to blur out fine details without losing subject contours.
Step Four:
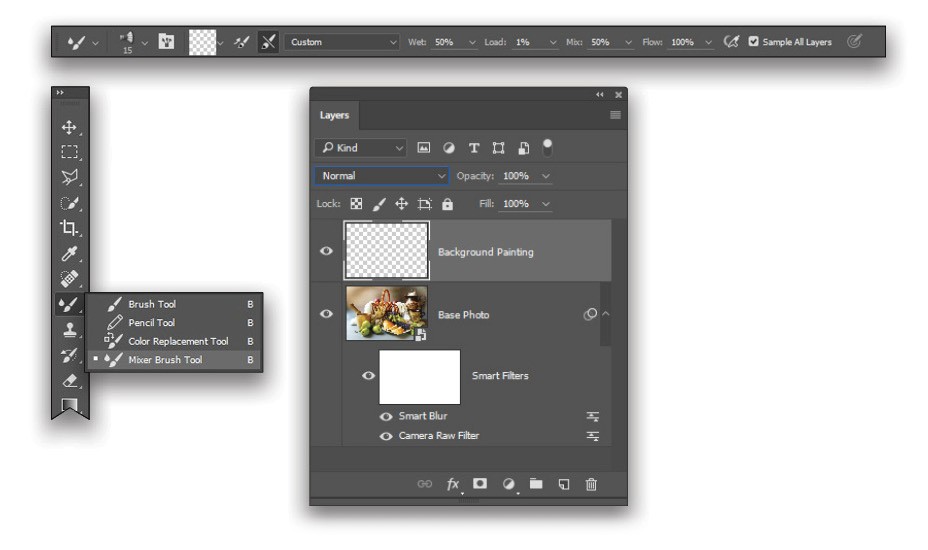
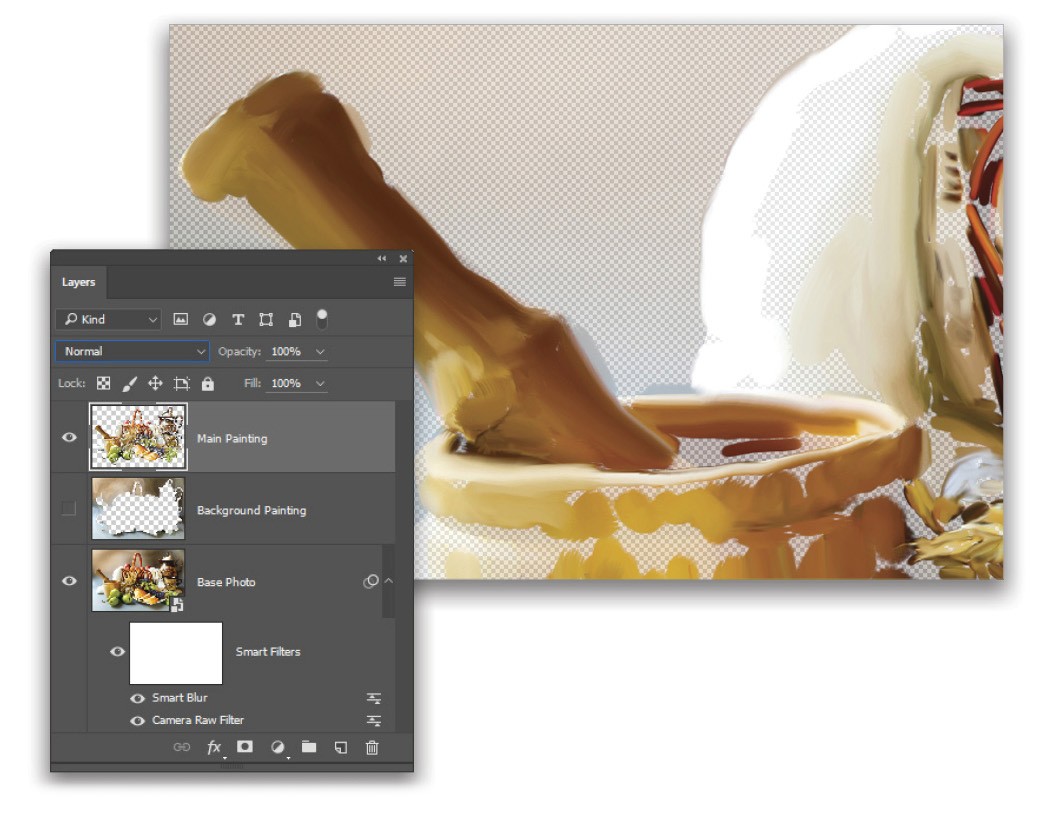
Add a new layer with Layer>New>Layer, or press Shift-Command-N (PC: Shift-Ctrl-N). Call this layer “Background Painting,” and click OK in the New Layer dialog. Double-click the name of the photo layer in the Layers panel, and rename it “Base Photo.” Now grab the Mixer Brush tool (B). If you don’t see it, that’s because it’s hiding behind the regular Brush tool. Just click-and-hold on the Brush tool until the tool menu flies out and you can select the Mixer Brush tool. In the Options Bar, engage the Clean The Brush After Each Stroke icon (brush with a line through it), set the Wet option to 50%, Load to 1%, Mix to 50%, Flow to 100%, and engage the Sample All Layers option.
Step Five:
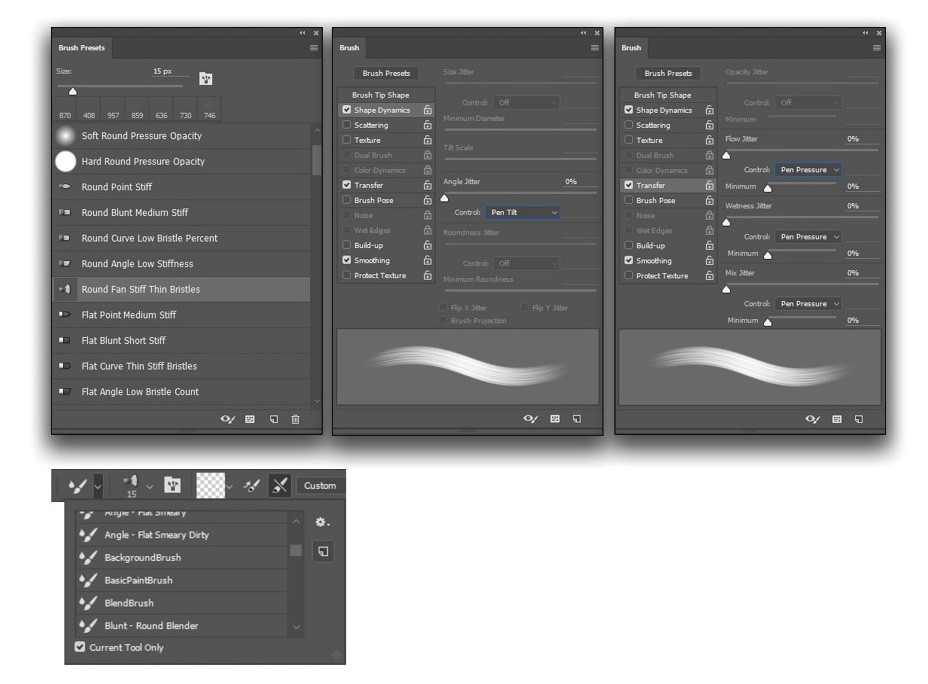
Open the Brush Presets panel by going to Window>Brush Presets. Select the Round Fan Stiff Thin Bristles brush preset. This is a bristle brush that will provide more realistic brushstrokes. Open the Brush panel (Window>Brush), engage the Shape Dynamics option, and set the Angle Jitter Control to Pen Tilt. Then engage the Transfer settings and set the Flow, Wetness, and Mix Jitter controls all to Pen Pressure. Once these settings are made, consider saving them as a tool preset. To do that, look for the pull-down menu for the Tool Preset Picker on the far left of the Options Bar. Open that and use the gear icon to add a New Tool Preset named “Background Brush.”
Step Six:
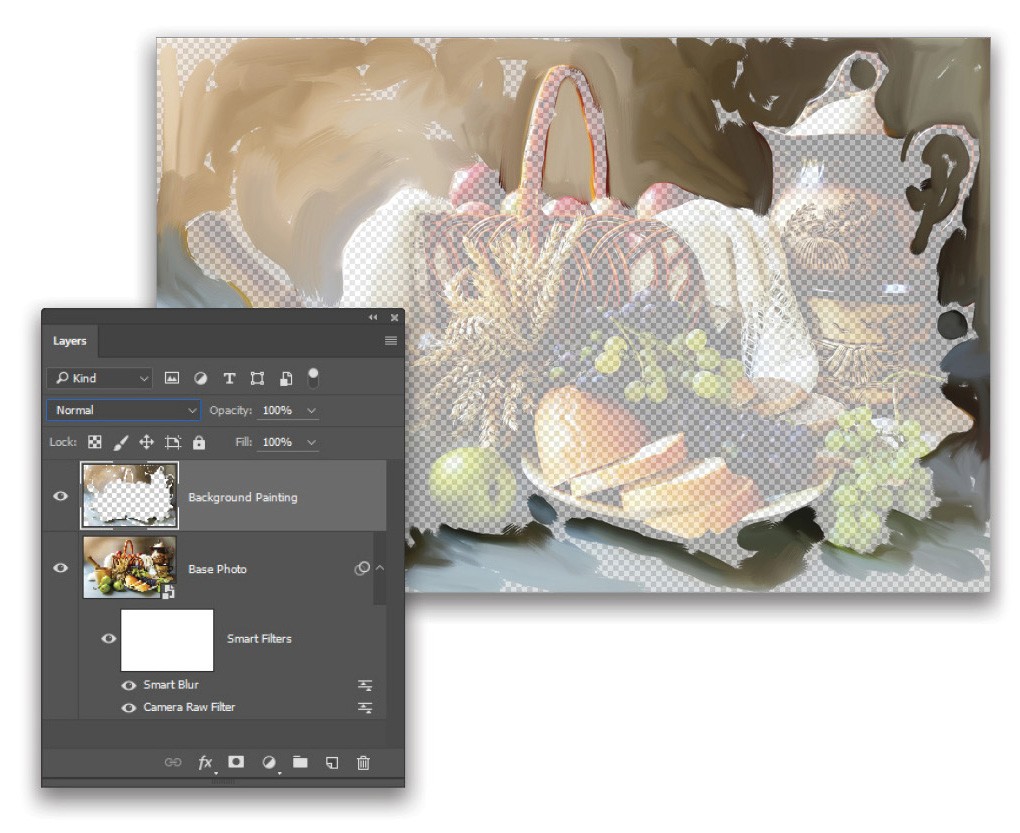
Here’s where the magic of this technique really comes through. Reduce the Opacity of the Base Photo layer to 50% so it’s still visible but just barely. The Mixer Brush tool will sample the pixel colors as if they were still at full opacity (just as long as the Sample All Layers option is checked). Click on the Background Painting layer in the Layers panel to make it active. Use the Mixer Brush to paint in the background wall and the tablecloth. Don’t worry about painting over contour lines of the subjects, those will be brought back later.
Step Seven:
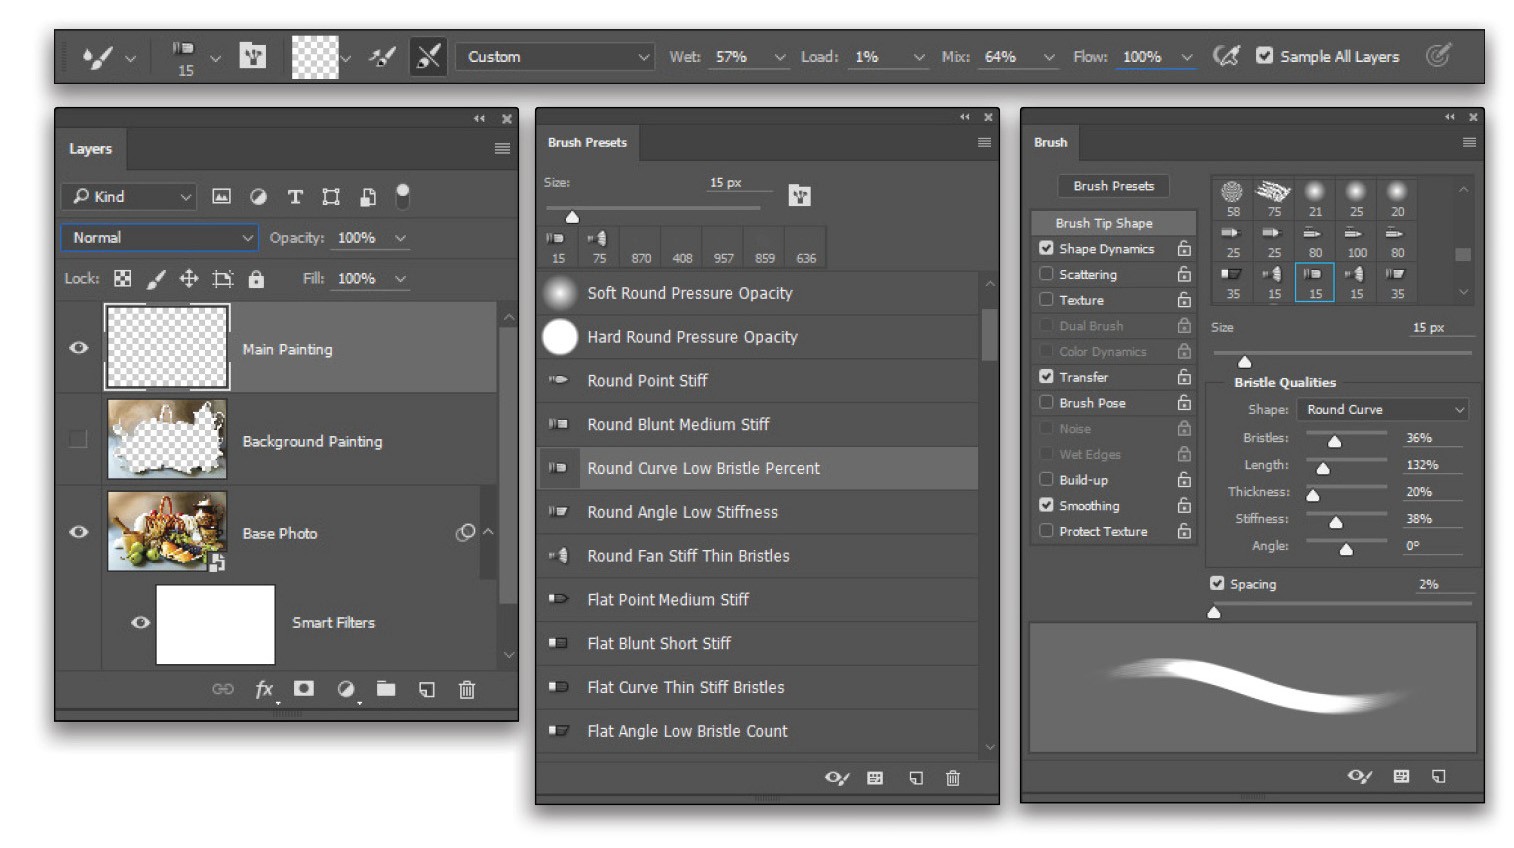
Hide the Background Painting layer by toggling off the Eye icon next to its layer thumbnail. Add another new layer called “Main Painting.” Look in the Brush Presets for the Round Curve Low Bristle Percent brush tip. In the Brush panel, highlight the Brush Tip Shape option at the top left and look for the Bristle Qualities settings area. Set the Bristles to 36%, Length to 132%, Thickness to 20%, and Stiffness to 38%. Engage the same Shape Dynamics and Transfer settings as with the previous brush. In the Options Bar, set Wet to 57%, Load to 1%, and Mix to 64%. Create a tool preset for this brush called “Basic Brush.”
Step Eight:
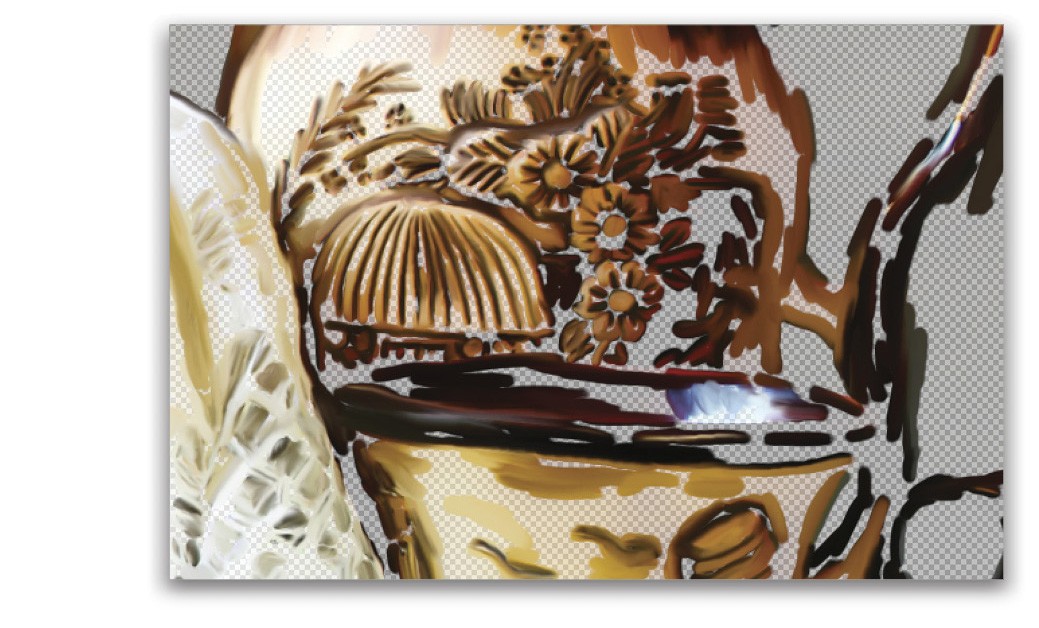
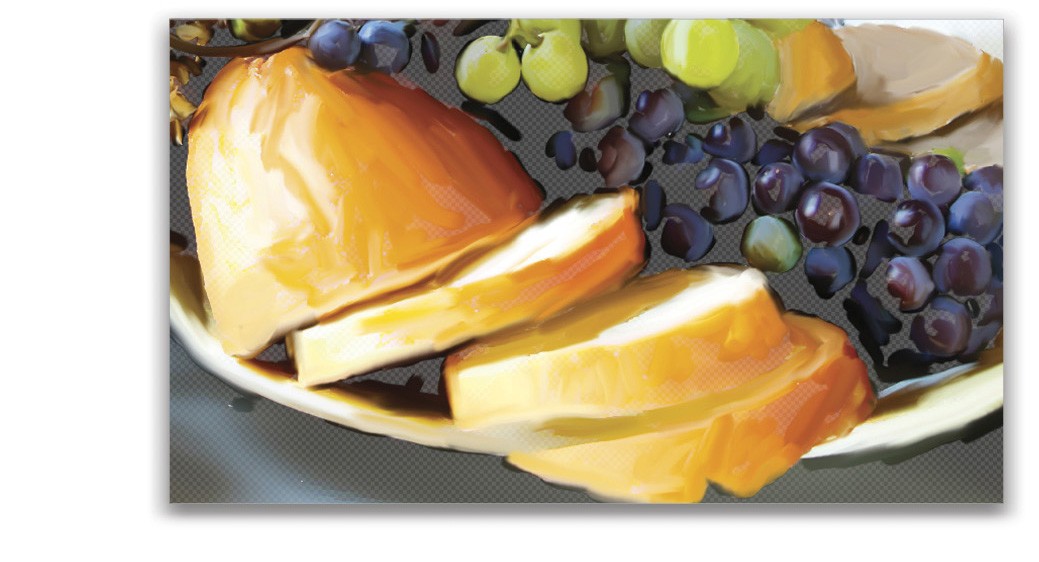
Use this Basic Brush to trace along the outside contours of each element in the scene. Once the outlines are established, work on filling in the shapes. Follow along the natural grain and lines of each element. Let the subject dictate the type of paint stroke. Use long strokes for the wood grain of the bowl, but short straight strokes for the grain heads, and round circular strokes for the grapes. (See next step for tips on painting smaller details.)
Step Nine:
When working with areas that require finer details, such as the print on the vase, it’s important to make decisions over what should be painted, and what should be obscured. The brush tip can be scaled down by tapping the keyboard Left Bracket key ( [ ) to trace along some of the smaller details. But keep in mind that this stage is just to capture the main colors and lines; there will be a detail pass to capture the smaller bits.
Step 10:
One of the greatest benefits of this technique is the flexibility it provides. If at any point you feel your brush strokes are incorrect, then they can be easily erased with the Eraser tool (E). Consider using the Mixer Brush to first “push” a large portion of paint into an area, then use smaller strokes to “pull” it back into a more controlled position.
Step 11:
Hide the Main Painting layer and add a new layer for “Details.” Open the Brush Preset panel again and select the Round Point Stiff brush preset. In the Brush panel, set the Shape Dynamics and Transfer settings again to Pen Pressure to take advantage of the capabilities of the pressure-sensitive tablet. In the Brush Tip Shape section, set the brush Size to 4px. In the Options Bar, change the brush setting from Custom to Wet, Light Mix; and set the Flow to 71%. Add this to the tool presets as “Detail Brush.”

Step 12:
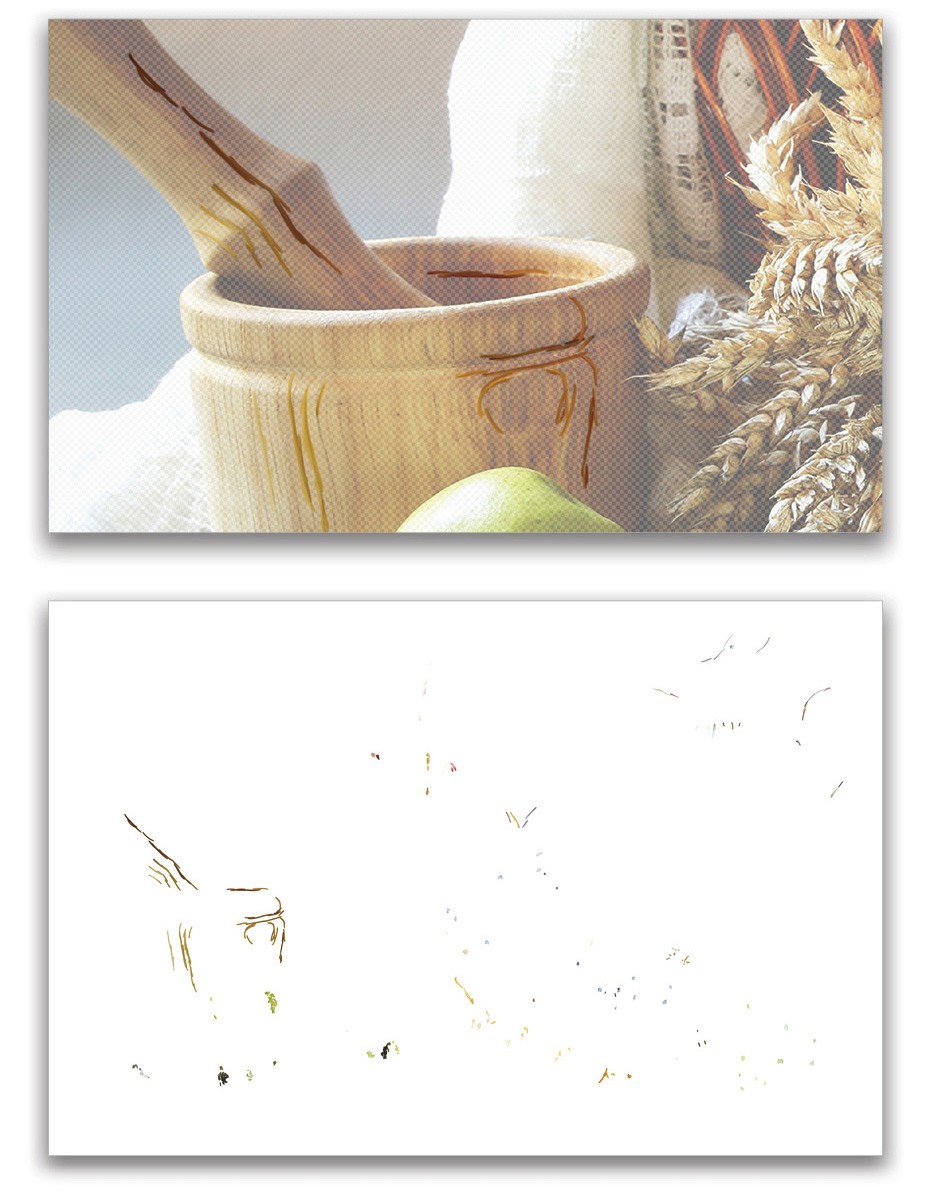
Now we’ll spend some time working on the finer details of the image. Bring the Base Photo Opacity up to 80% and hide the smart filter effects by using the Eye icon next to the Smart Filters mask beneath the Base Photo layer. Make sure the Details layer is the active layer and begin to trace out some of the finer details of the original photo. Focus on things like the long wood grain in the bowl and spoon, the texture on the crust of the bread, the fibers of the wicker basket, and especially the bright highlights on the grapes.
Step 13:
Toggle all the painted layers to be visible again, restore the Base Photo to full 100% Opacity, and reveal the smart filter effects that were hidden in the previous step. Select a canvas texture to use (you’ll find the one we used here in the download files) and layer it into the project using File>Place Embedded. Photoshop brings the texture in as a smart object with a bounding box around it so you can resize and position it. Scale it to cover the entire canvas are and hit Enter to commit the transformation. Make sure this texture layer is at the top of the layer stack in the Layers panel and set its blend mode to Soft Light.
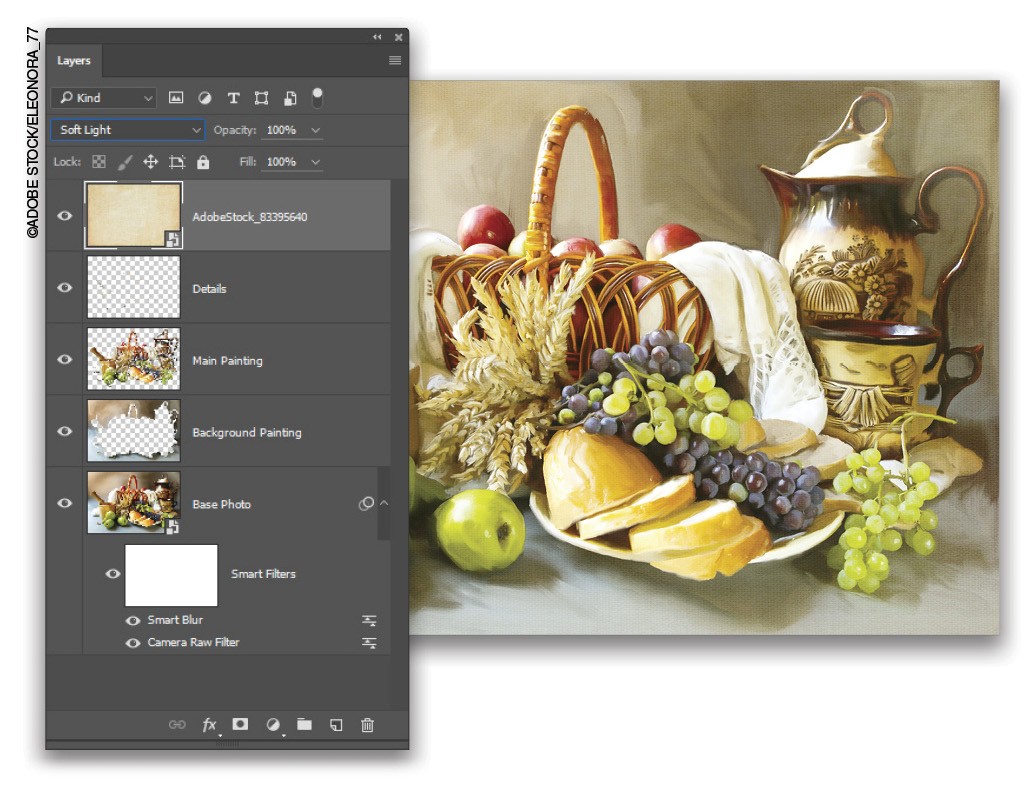
Step 14:
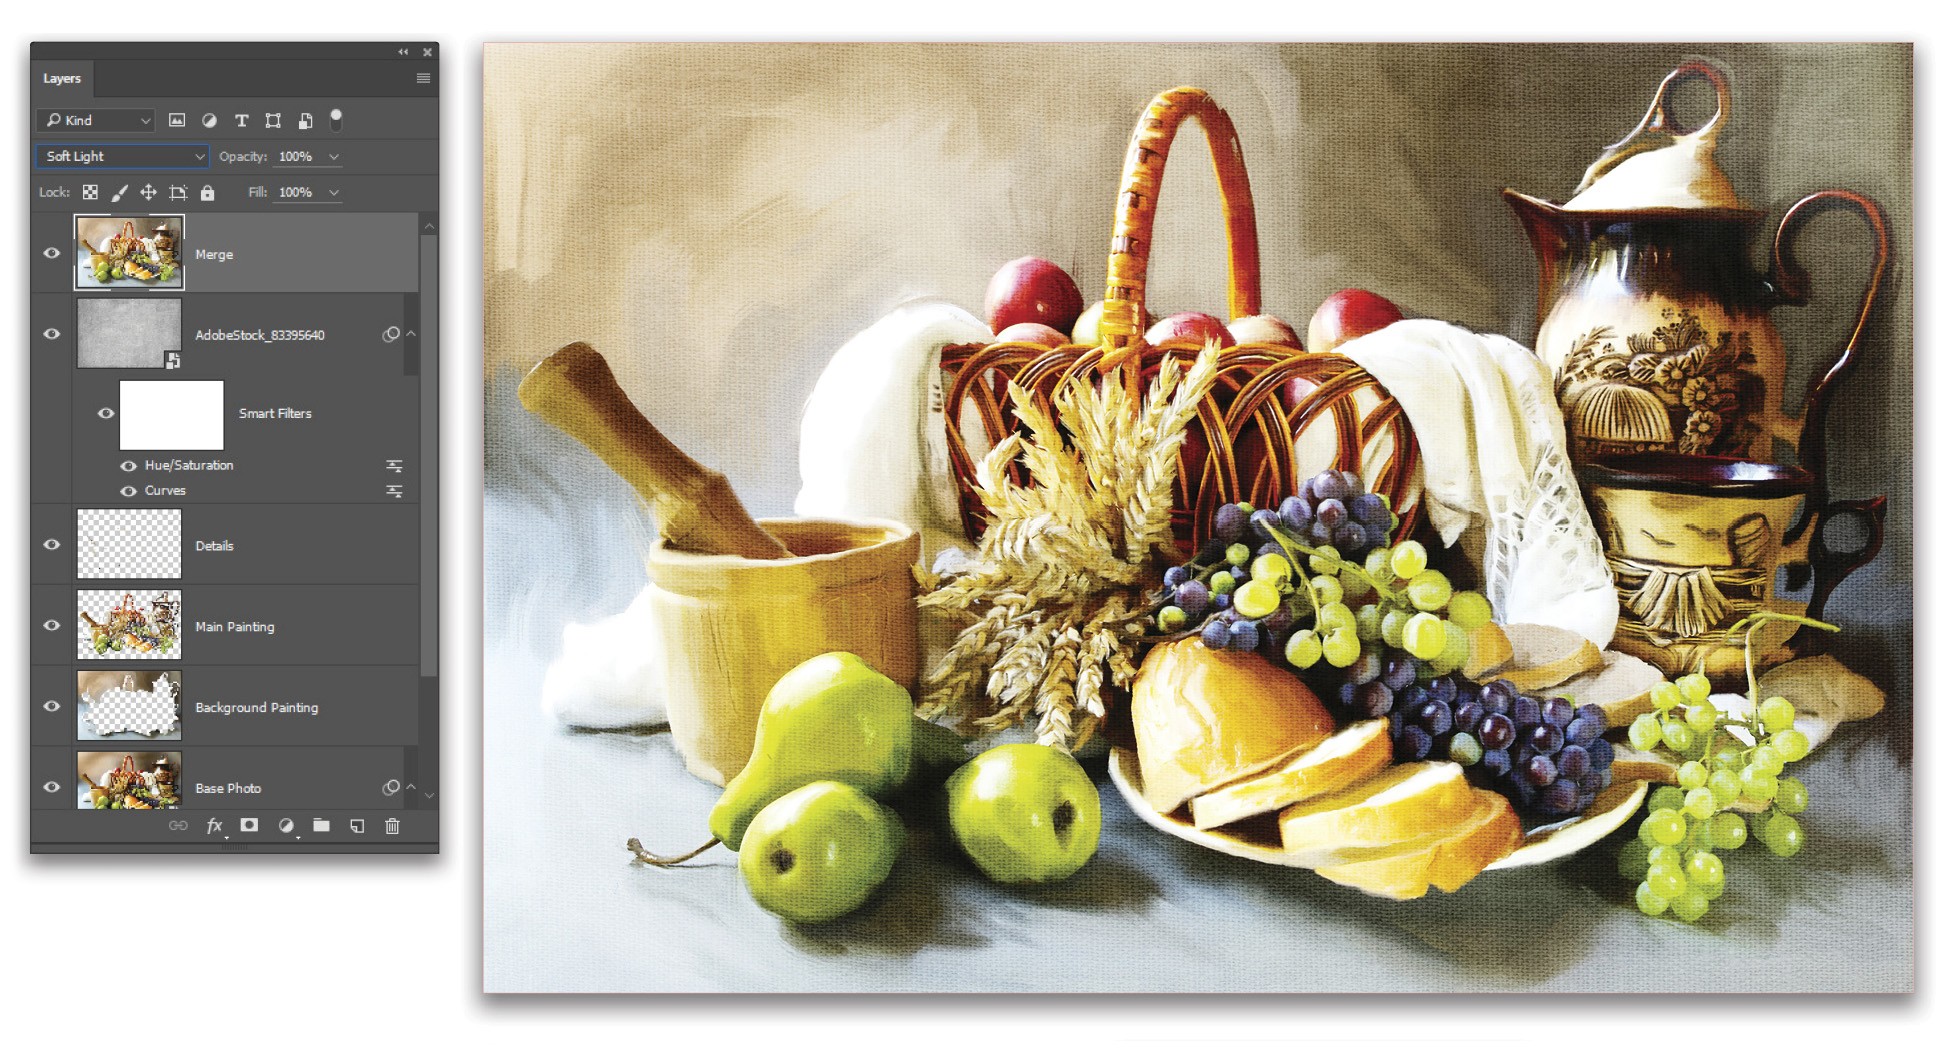
Go to Image>Adjustments>Curves, or press Command-M (PC: Ctrl-M), and adjust the top and bottom curve points to be closer to the histogram. This intensifies the contrast of the canvas texture. Add a center point to the curve and drag it down slightly to subtly darken the texture too. Click OK, then go to Image>Adjustments>Hue/Saturation and reduce the Saturation value to a full –100. This will remove the brownish tint that the canvas texture brought in. Click OK.

Step 15:
For the final effect, create a merged layer at the top of the layer stack by holding down the Option (PC: Alt) key and going to Layer>Merge Visible. Set the layer blend mode to Soft Light to add even more contrast and color vibrancy.
Photo painting is a fun and rewarding way to transform any photo into a convincing painting. The great thing about this technique is that it’s done by hand, so it’s more personal and rewarding than using a simple filter, but it’s not difficult, and doesn’t require the skill of painting from scratch.
This article originally published in the November, 2016 issue of Photoshop User magazine.


