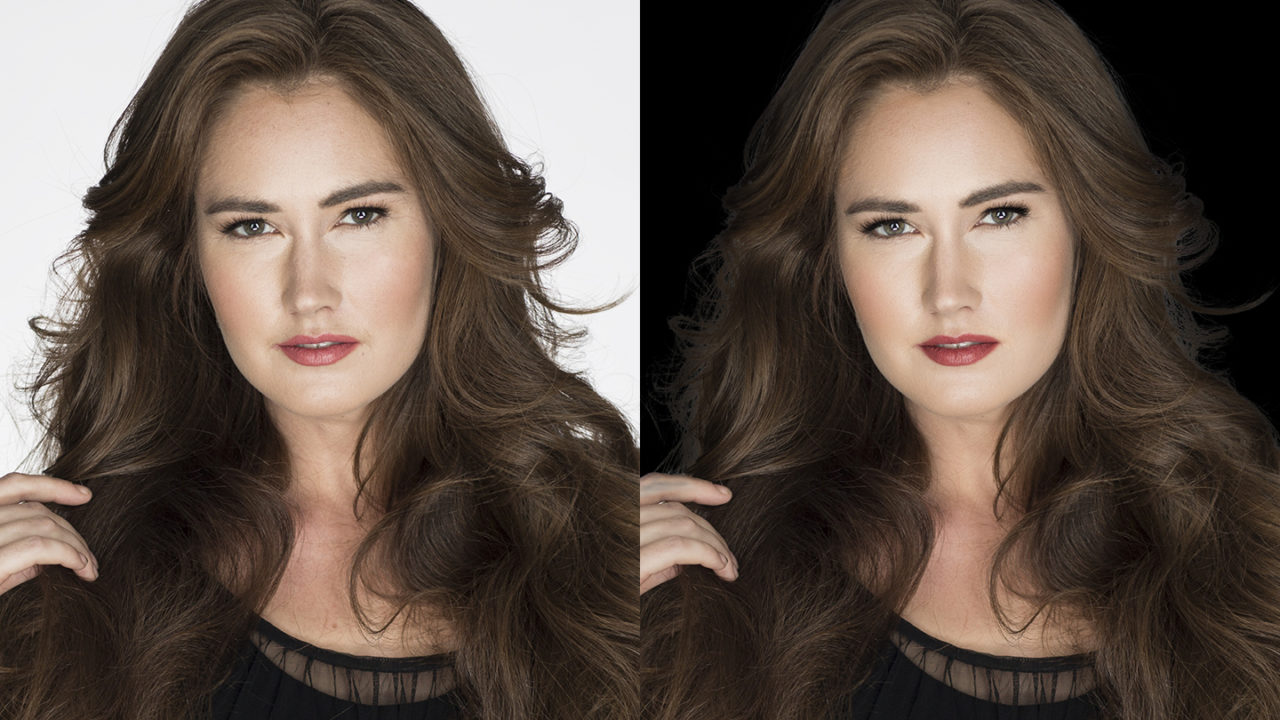
If you’re anything like me, and a client asks you to change the background color of their image from white to black, your first urge is probably to have an internal temper tantrum and secretly throw your face up to the sky and scream, “Why!” It used to be almost impossible to cleanly cut out hair and edges around your subject without having that muddy white lens flare glaring back at you from your image. It’s okay, you can step back from that ledge, my friend, I’m here today to share an amazing little trick I learned from Photoshop guru and KelbyOne educator Glyn Dewis that will help you tremendously with this type of task.
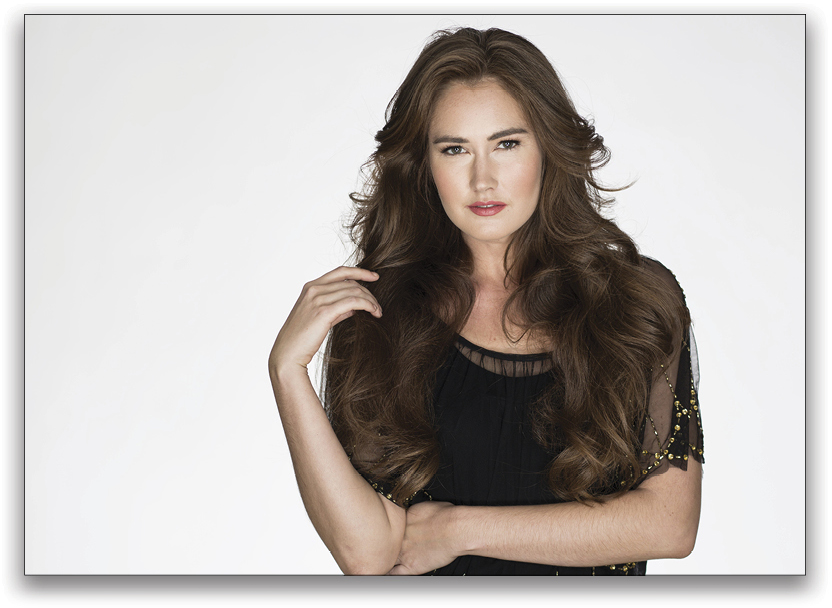
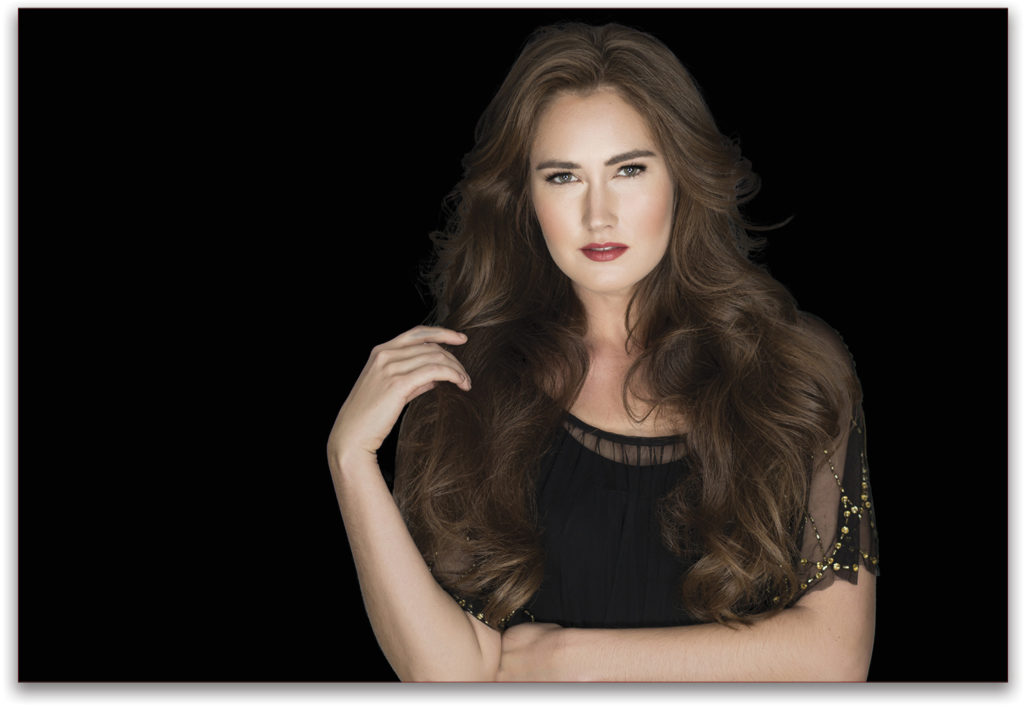
Here we have an image of a model on a white background. Even though you can’t actually see the white tones seeping into the edges of the model, believe me when I say—it’s there. Just wait; it will be completely obvious as we move forward in this process.
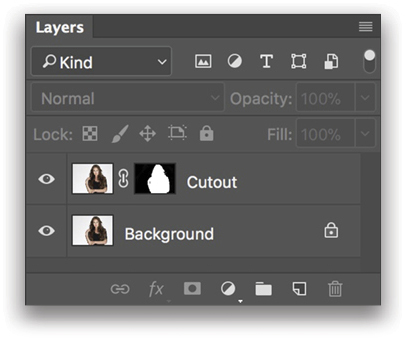
Step One: Let’s start by duplicating our Background layer by pressing Command-J (PC: Ctrl-J). Double-click the name of your new layer and name it “Cutout.”
Step Two: Now, we need to isolate the model from the white background. Whenever I’m trying to select something, I like to use the selection tool of least resistance, and for this task, since the background is completely white, let’s use the Color Range command (Select>Color Range). Once in the Color Range dialog, choose Highlights from the Select drop-down menu. This will select everything that’s completely white in the image, and thus, anything that isn’t white (e.g., my model) won’t be selected.
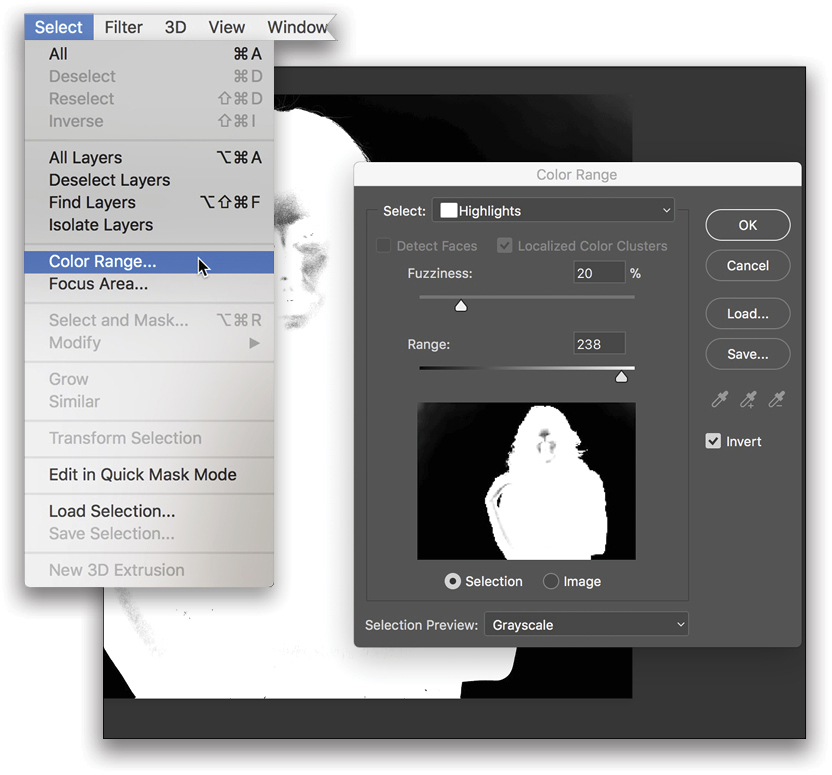
Make sure the Selection Preview drop-down menu at the bottom of the Color Range dialog is set to Grayscale. To make your life even easier,
Photoshop has added an Invert checkbox to the Color Range dialog, which will immediately invert your selection so you don’t have to do it manually. So check the Invert box, which will make the background black and the model white, then modify the Range slider until most of the background is black and most of the model is white (I settled on a Range of 238). Click OK.
Step Three: You should see marching ants around your model. Next, simply click the Add Layer Mask icon (circle in a square) at the bottom of your Layers panel. Photoshop will use your selection to create the mask. We need to clean up the mask, so click on its thumbnail in the Layers panel while holding Option (PC: Alt) to bring up a full-size preview of the mask in the document. Use the Brush tool (B) to paint with white over any areas on the model that aren’t completely white, such as her forehead and cheeks, and any other areas that might look like they don’t belong in the cutout. Option-click (PC: Alt-click) the mask thumbnail again to return to the image.
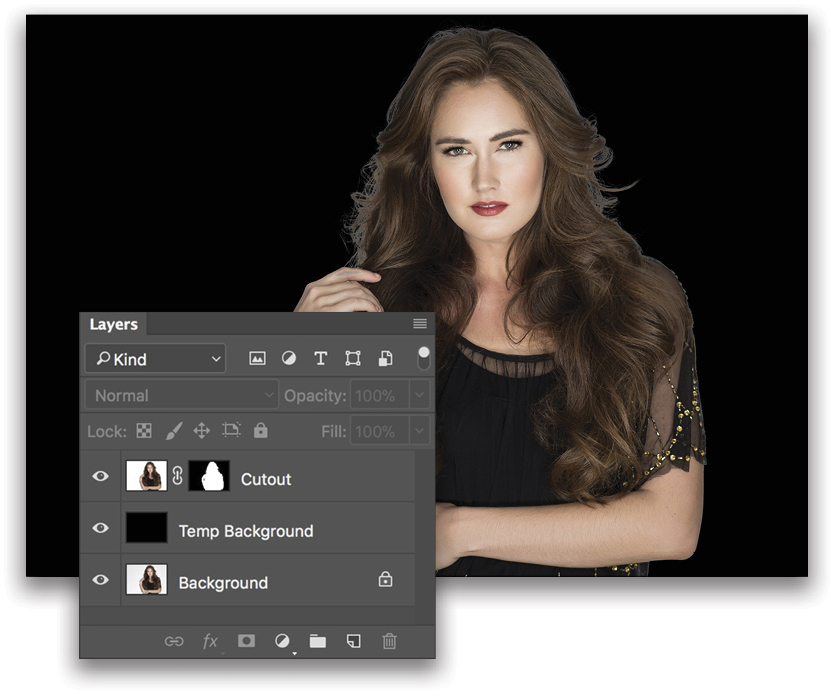
Step Four: Next, let’s add the black background. Click the Create a New Layer icon at the bottom of the Layers panel, and name the layer “Temp Background.” Then click-and-drag that layer in between the Cutout layer and the Background layer. To fill this layer with black, let’s use one of my favorite keyboard shortcuts: Shift-Delete (PC: Shift-Backspace), which brings up the Fill dialog. Select Black in the Contents drop-down menu and click OK to fill the layer with black.
Step Five: Now can you see those dreaded white pixels? Of course you can! They’re hideous! Let’s get rid of them! Right-click on the Cutout mask icon and choose Select and Mask. In the View drop-down menu at the top of the Properties panel, choose to view your layer On Black (A), and make sure the Opacity is all the way up to 100%.
Moving down to the Edge Detection section, click the Smart Radius checkbox and then slowly drag the Radius slider to the right. The more you increase the Radius value, the more white you’ll remove. I landed at about a Radius of 28 pixels. Next, click on the Refine Edge Brush tool (R) in the mini-Toolbar at the top left and paint along the rim of her hair to remove even more white. Use the Bracket keys on your keyboard to quickly change the size of the brush as needed.
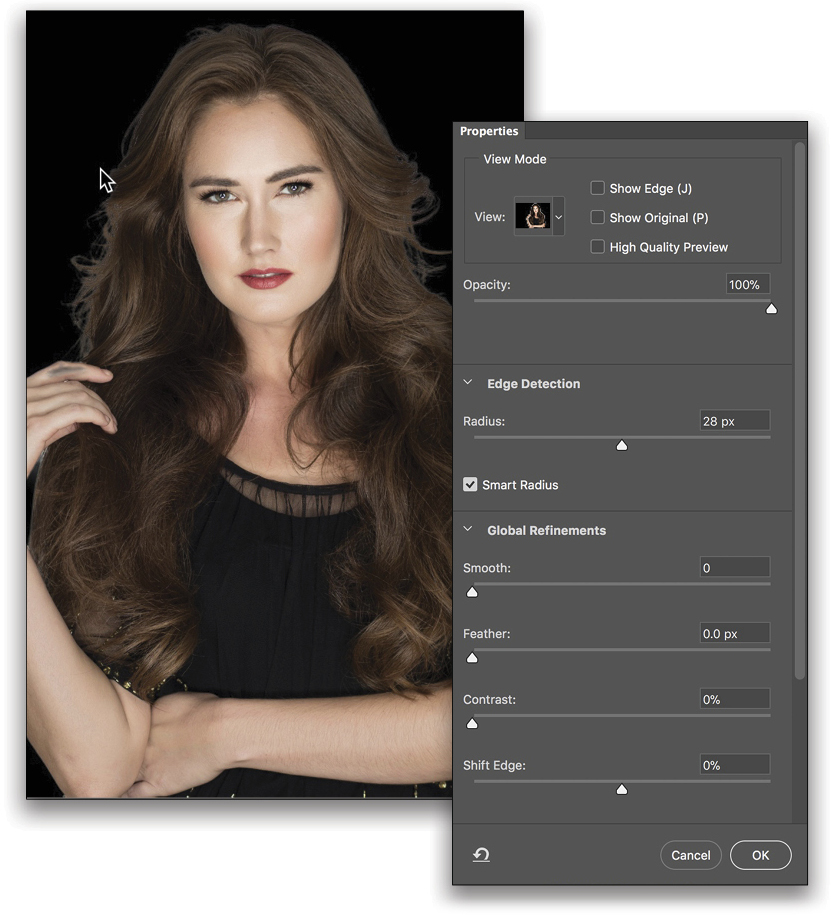
Step Six: Lastly, make sure the Output To drop-down menu (at the bottom right side) is set to Layer Mask, and click OK.
Step Seven: Now, we’re starting to get somewhere! But we have a few more steps, and here’s where the magic happens! Some of you Photoshop pros out there may be asking, “Why not use the Decontaminate Colors command in the Output Settings section at the bottom of the Select and Mask workspace? This will get rid of the white bleeding onto the hair.” While this may work for some of you, it may not always work for what you need; for example, Decontaminate Colors only works if your output is set to a pixel-based new layer. If you’re looking to create a layer mask or a selection, you’re unable to use this awesome added bonus.
Step Eight: Here’s where the layer styles come into action: we’re going to add Inner Shadows to both sides of her hair! Just like the Outer Glow layer style that’s used frequently on text, the Inner Shadow will allow you to modify the pixels right around the edge of your selection. And since we’ll be adding two Inner Shadows (one for the right side and another for the left side), we’ll be able to modify them independently from one another (another benefit that isn’t possible when you use the Decontaminate Colors method).
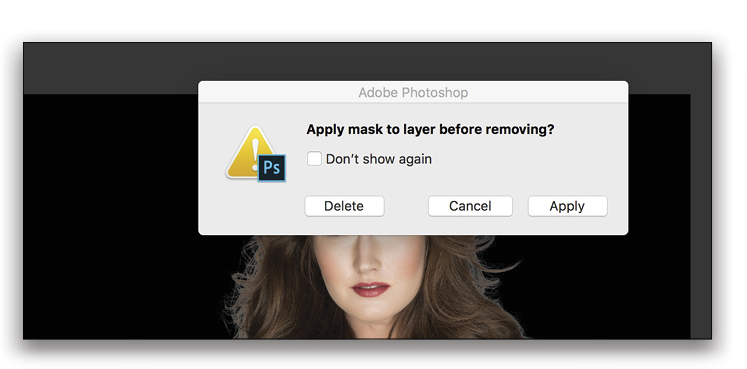
Step Nine: Drag-and-drop the Cutout layer mask onto the Delete Layer icon (trashcan) at the bottom of the Layers panel. A warning dialog will pop up asking, “Apply mask to layer before removing?” We want Photoshop to do this, so choose Apply.
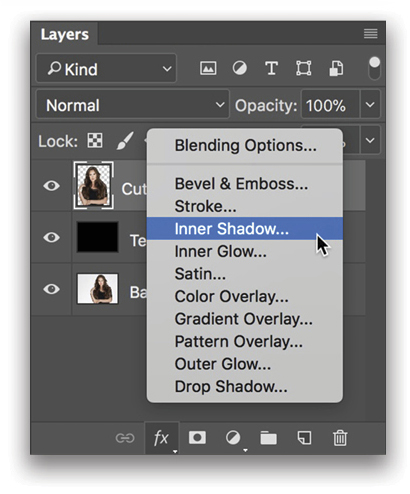
Step 10: Now our original, white background pixels have been removed along with the mask on this layer. With the Cutout layer still active, click the Add a Layer Style icon (fx) at the bottom of your Layers panel, and choose Inner Shadow from the flyout list.
Step 11: The Layer Style dialog will appear, and on the left-hand side, Inner Shadow will be checked. As I mentioned earlier, we have the capability of modifying each side independently. Let’s start with the left side. In the screen shot below, you can see that we’ll be adding the Inner Shadow to the left side because the Angle of the light is set to 144°. This means the shadow will show up on the upper left-hand side of the layer.
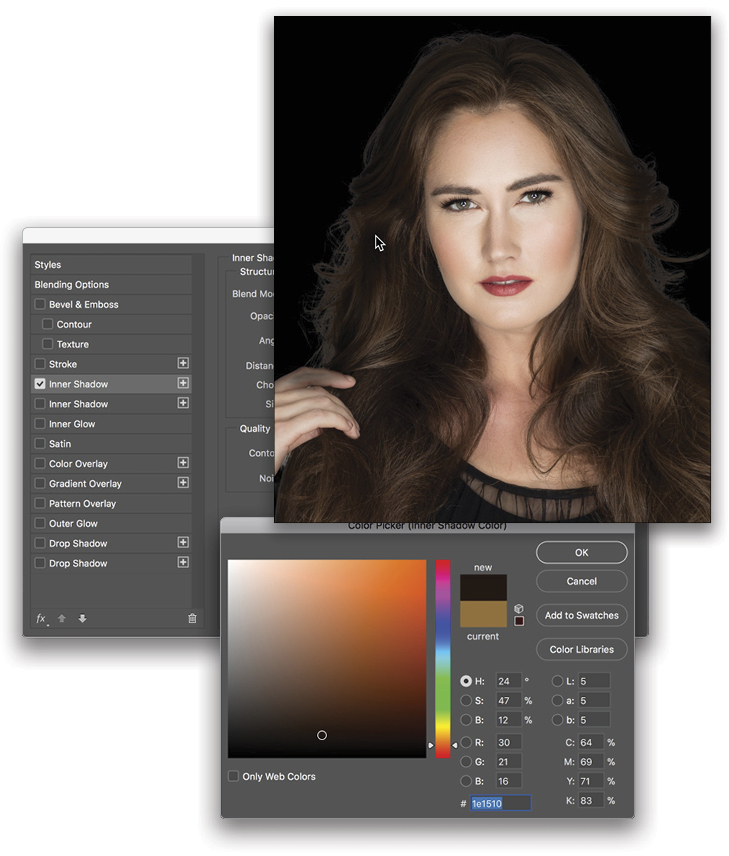
Make sure your blend mode is set to Multiply, and then click on the color swatch to the right of the Blend Mode drop-down menu to choose your color. When the Color Picker appears, click to sample a dark tone of the subject’s hair. Click OK to close the Color Picker.
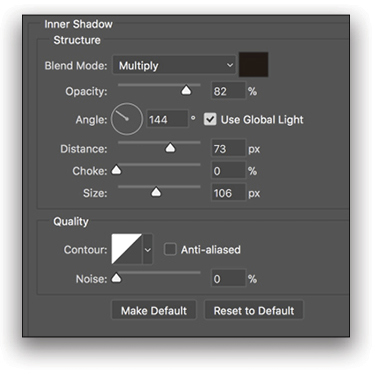
Step 12: Our next step is to modify the Opacity, Distance, Choke, and Size to correctly lay over the pixels that have the white contamination. Reset all three of your sliders to zero to start (except for Opacity, which I usually keep at around 80%). Distance affects how far away from your edge the shadow will go, Choke is something I usually leave alone, and Size is actually more like the “feather” amount of the shadow. Here are my settings for the left side of her hair. I went slightly overboard because I’m planning to gradually mask in this effect more in some areas and less in others. Click OK.
Step 13: Now that we’ve clicked OK, you’ll see a few changes to your Cutout layer in the Layers panel. Right-click on the words “Inner Shadow” that now appear below the Cutout layer, and select Create Layer to tell Photoshop to create a pixel-based layer from the Inner Shadow layer style. We’re getting really close to the end!
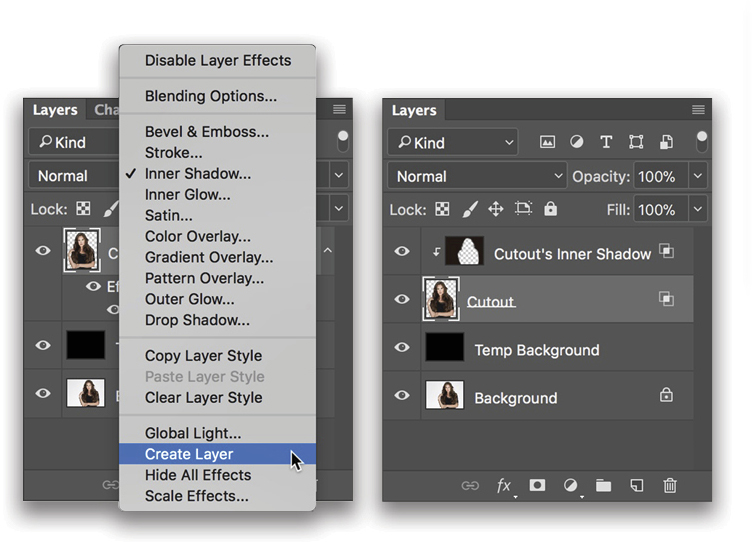
Step 14: Let’s add a black mask to the layer named “Cutout’s Inner Shadow” by holding down the Option (PC: Alt) key while clicking the Add Layer Mask icon. This will hide the effect of the Inner Shadow. Our last step for the left side is to paint back in the darkening around the edges with the Brush tool set to white. Use a low Opacity (something between 25% and 30%) in the Options Bar in order to paint in just enough of the effect to get rid of the white. Here’s what the left side looks like finished! Can you see a difference between the left and right sides?
Step 15: To do the same thing to the right side, you’ll start from Step 10 where you click the Add a Layer Style icon at the bottom of your Layers panel, and follow the steps again through Step 14. The only change you’ll make is to the Angle of the effect. You’ll change it from pointing down from the left (144°) to pointing down from the right (39°). The other difference, of course, is that you’ll paint on the right side of her hair in Step 14.
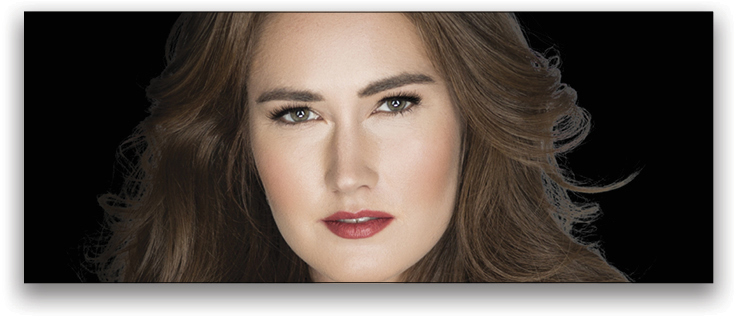
Here’s the final shot on the new, slick black background. It looks awesome, almost as if it was photographed that way!
This article originally published in the May, 2018 issue of Photoshop User magazine.


