A panorama is a great way to make any photo more cinematic and more impressive. It just has that look—a window open to the outdoors. So, in this article, I want to share with you my best tips to make your landscape photos more spectacular by making an incredible panorama!

The first thing is to shoot with the idea of making a panorama. For Lightroom to stitch it together properly, you’ll need to take a few shots of the same subject from right to left or up and down, with around 30% overlap in each frame. Here are four RAW files that I shot in Los Angeles.
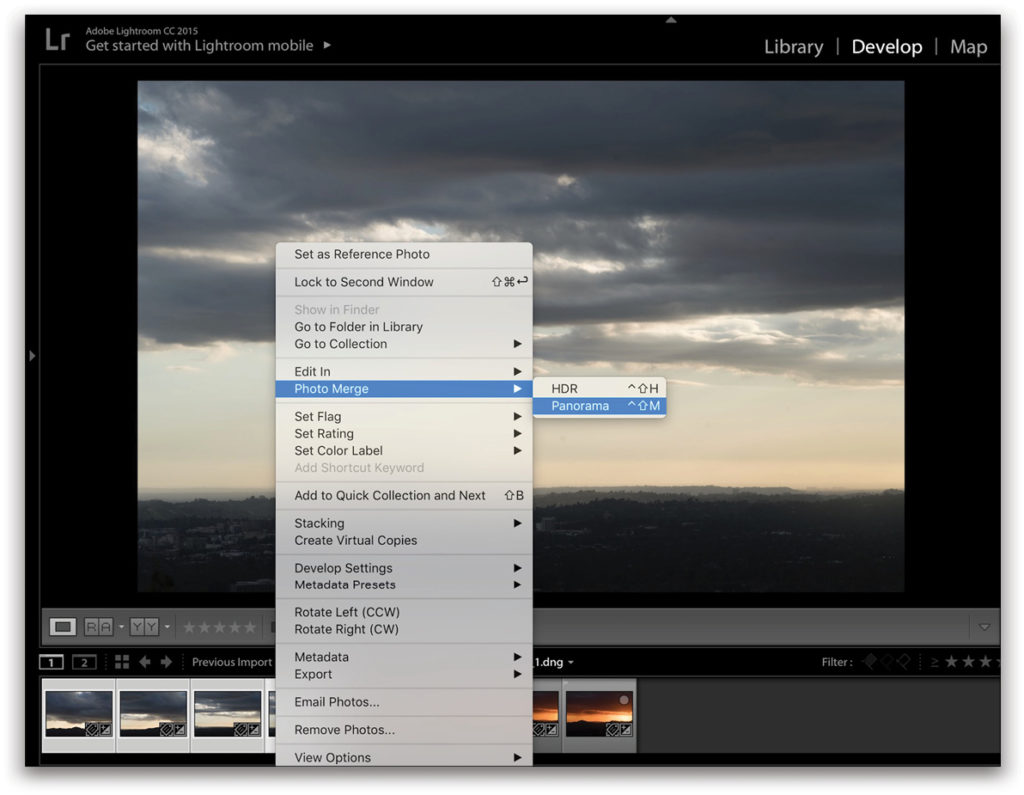
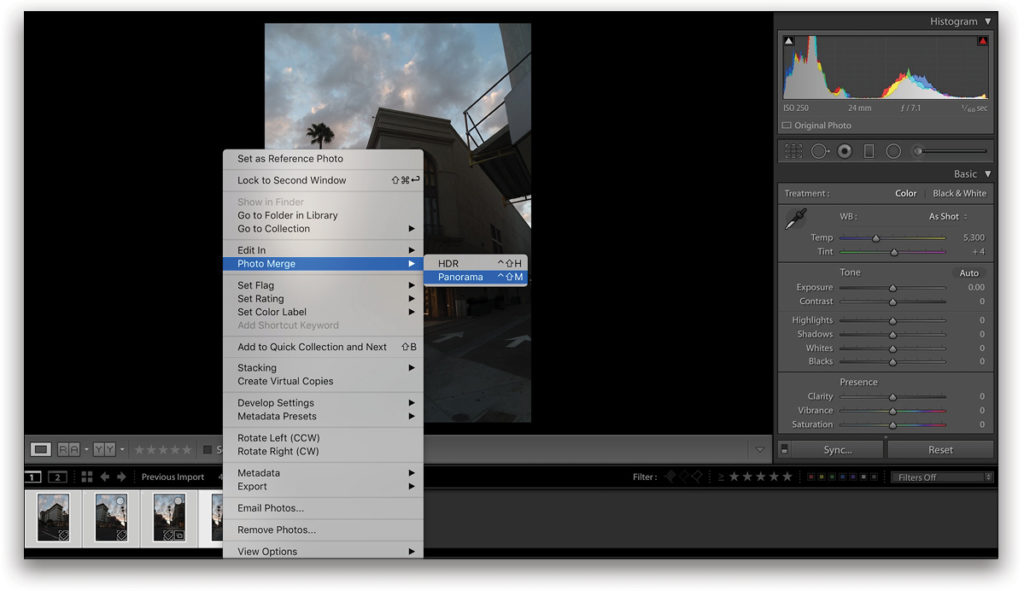
Step One: Click on the first photo, then Shift-click on the last photo to select all of them. Right-click on one of the photos and choose Photo Merge>Panorama.
Back in the day, when you wanted to stitch your photos together to create a panorama, you had to retouch each photo one by one and then stitch them together. That wasn’t very convenient because if your white balance wasn’t right, or if the exposure was very different, they wouldn’t be retouched in a harmonious way. And it was hard to go back, because you’d created a RAW file with a different retouch. Anyway, it wasn’t fun! But now, what’s amazing with Lightroom Photo Merge is that it lets you create one super-RAW file by stitching all of your RAW files together, and then retouching that big RAW file!
Step Two: Once the Panorama Merge Preview opens, Lightroom proposes three “projections.” So, what are projections? Simply put, a projection is the way that the photos will be stitched together. By default, Lightroom will propose you stitch your photos using the Cylindrical projection and, in this case, it works pretty well.
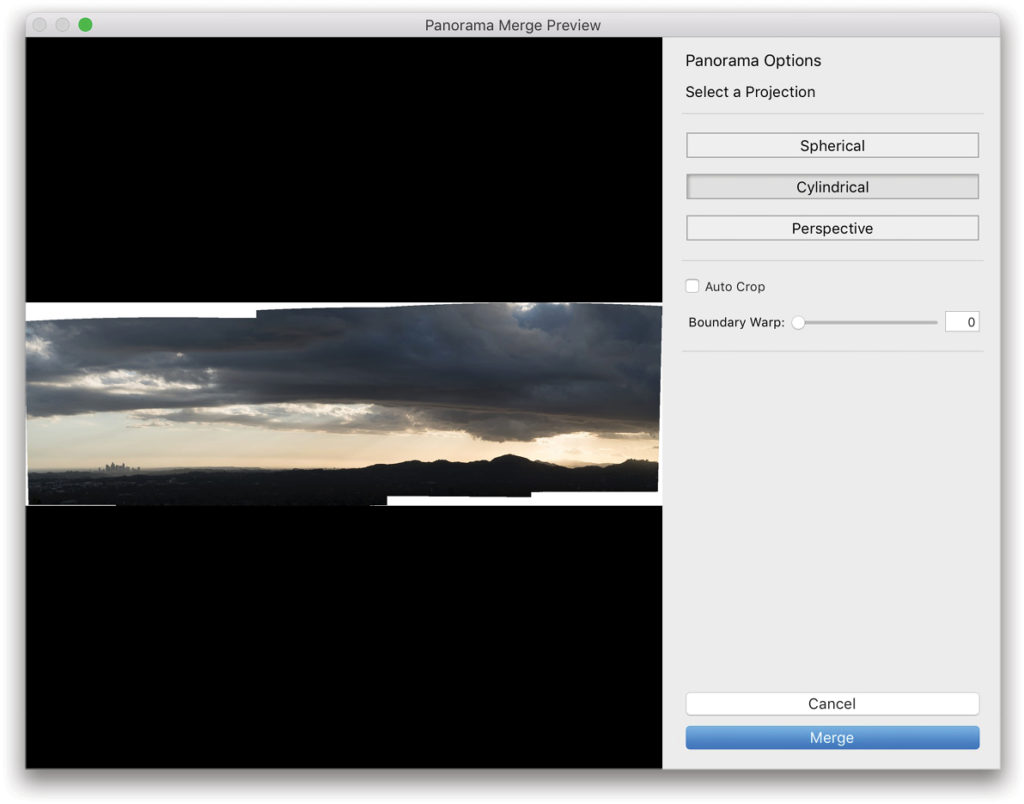
You can also choose a Spherical projection, which is similar to Cylindrical, but it’s a little tighter, and has less height.
The last choice is Perspective, which works well if you’ve shot some buildings or architectural objects.
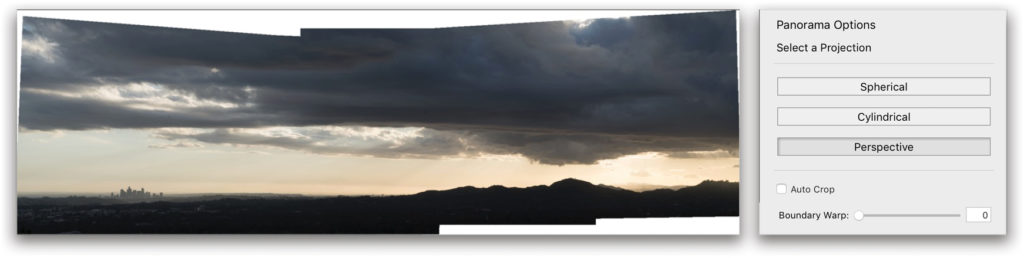
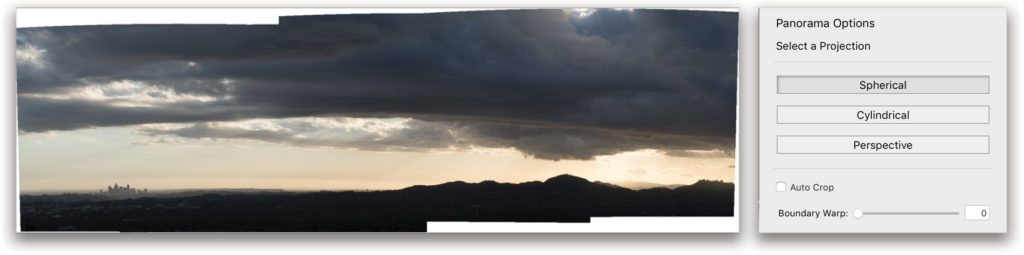
Step Three: For this example, I prefer to use Cylindrical and, as you can see from the last step, there’s extra white space around the photo. To remedy that, use the Boundary Warp slider: Just slide it to the right and it will fill all the white space around your photo, making it disappear.
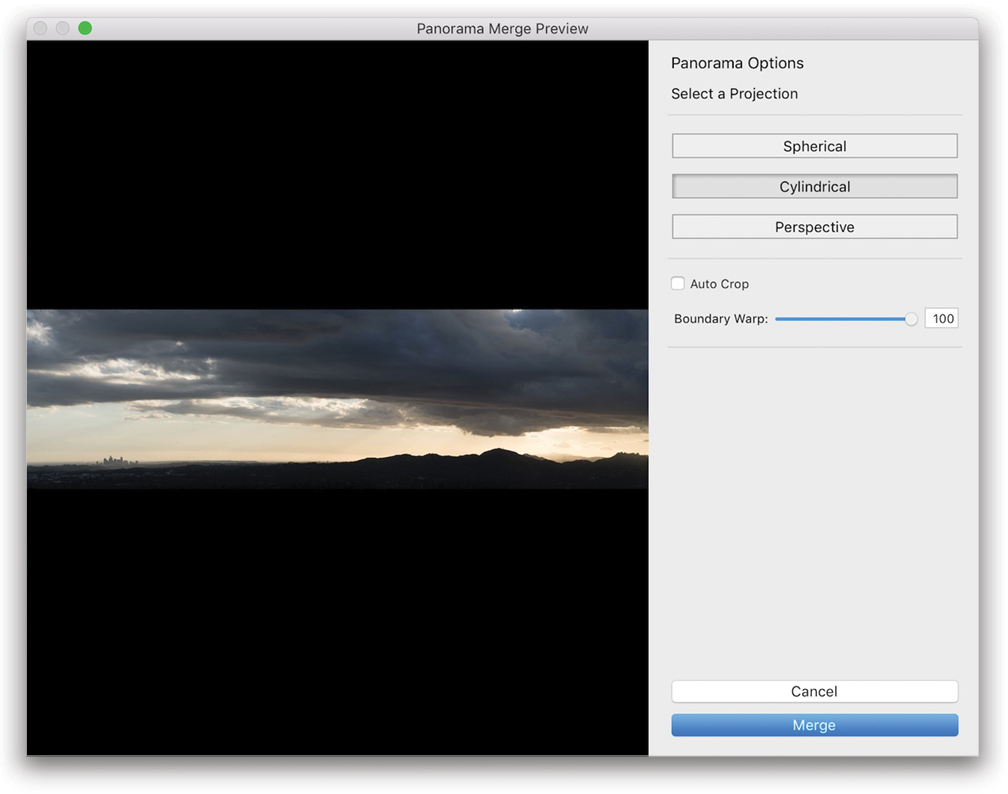
You could also use Auto Crop, but it will just remove the white space by cropping it off, while boundary warp will create the missing pixels. Now, just click Merge and you’ll see your panorama.
Step Four: Click on the panorama and press D to go to the Develop module (if you’re not already there). To retouch this photo, I’ll offer you some natural presets that you can download by clicking here or visiting kelbyone.com/magazine. To install the presets in Lightroom, go to the Develop module, click on the + (plus sign) at the right end of the Presets panel header and choose Import Presets. Navigate to where you saved the presets, click on the first one, Shift-click on the last one to select all of them, and then click Import. You should now see them in the Presets panel.
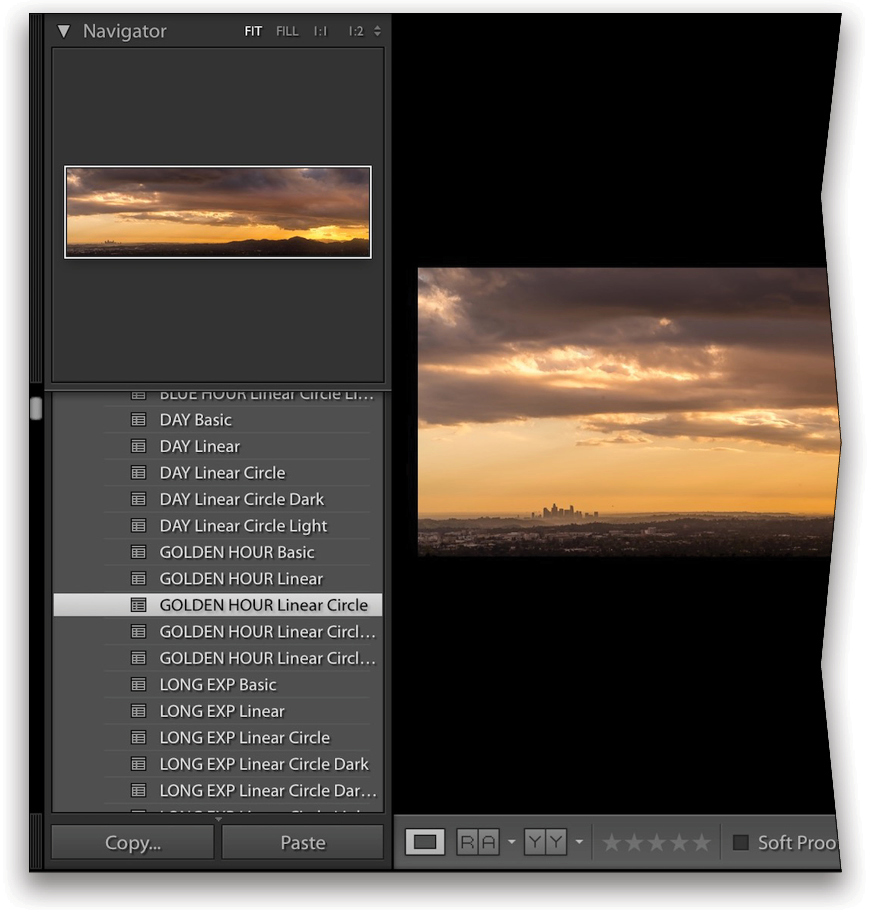
I love presets! I’ve made fine-art coffee table books using presets. They really help set the mood and create uniformity in your work. It can also bring you places you didn’t expect. For this example, you can use the Golden Hour linear circle preset, which will retouch most of your photo instantly. You can now fine-tune it the way you want.
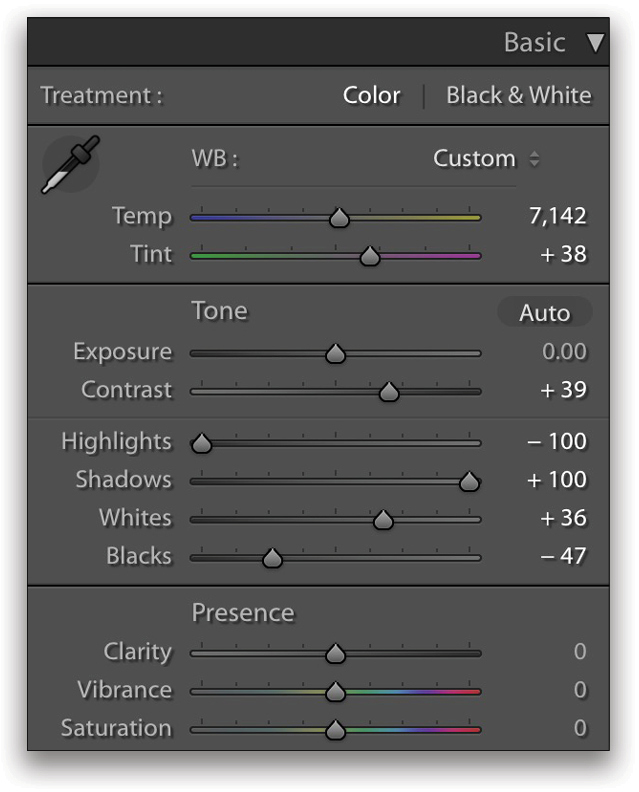
Step Five: To tailor it, you can lower the Blacks to –47 (you want to have at least 2% of your photo completely black); boost your Whites to +36 (you want to have a nice white, but not too crazy, so parts of your photo aren’t burned). Then, add some contrast (+39) to make your photo pop, and move your Tint slider to the right (+38) to get more magenta.
Step Six: In each preset, there’s a Radial Filter, so press Shift-M to get the Radial Filter tool. Click on the filter’s pin (to select it) and drag it down, placing it on the sun to emphasize the brightest part of the photo.
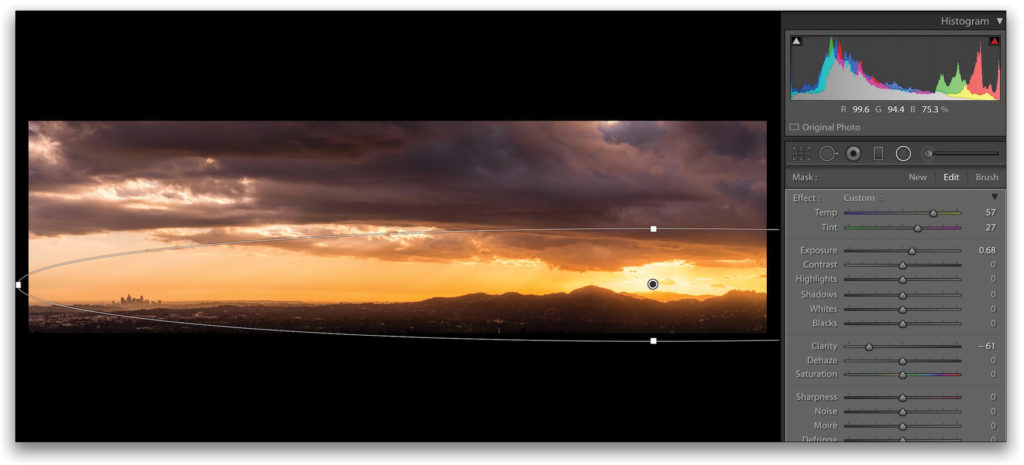
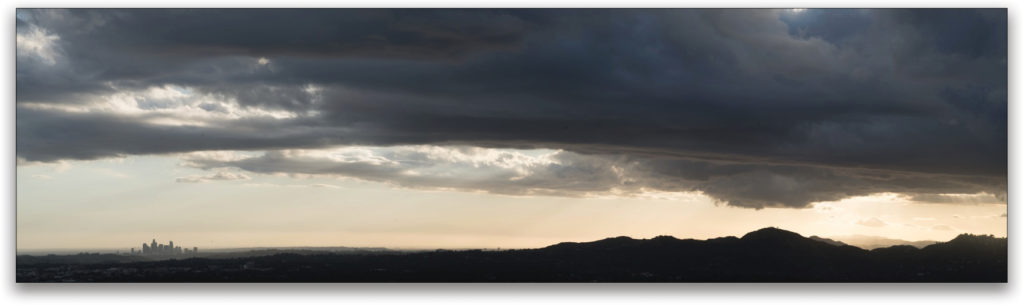
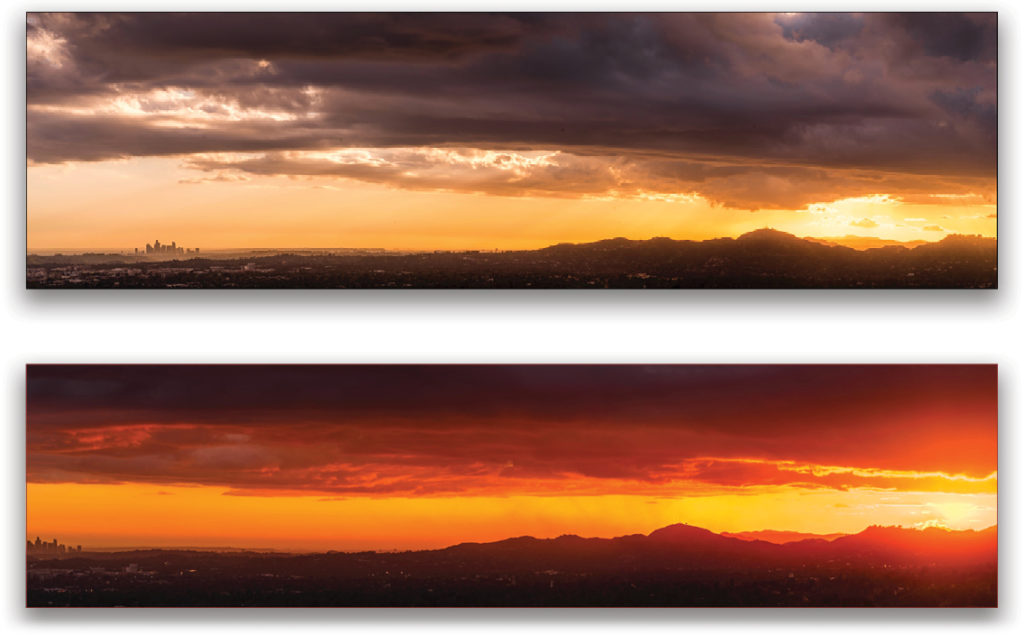
Step Seven: I love the final panorama! There’s a nice view of downtown, the sky’s pretty spectacular and, because it’s a panorama, it gives you the feeling of a lot of space.
Here’s another panorama taken on the same day, but using the Sunset Linear Circle preset.
Architectural Panoramas
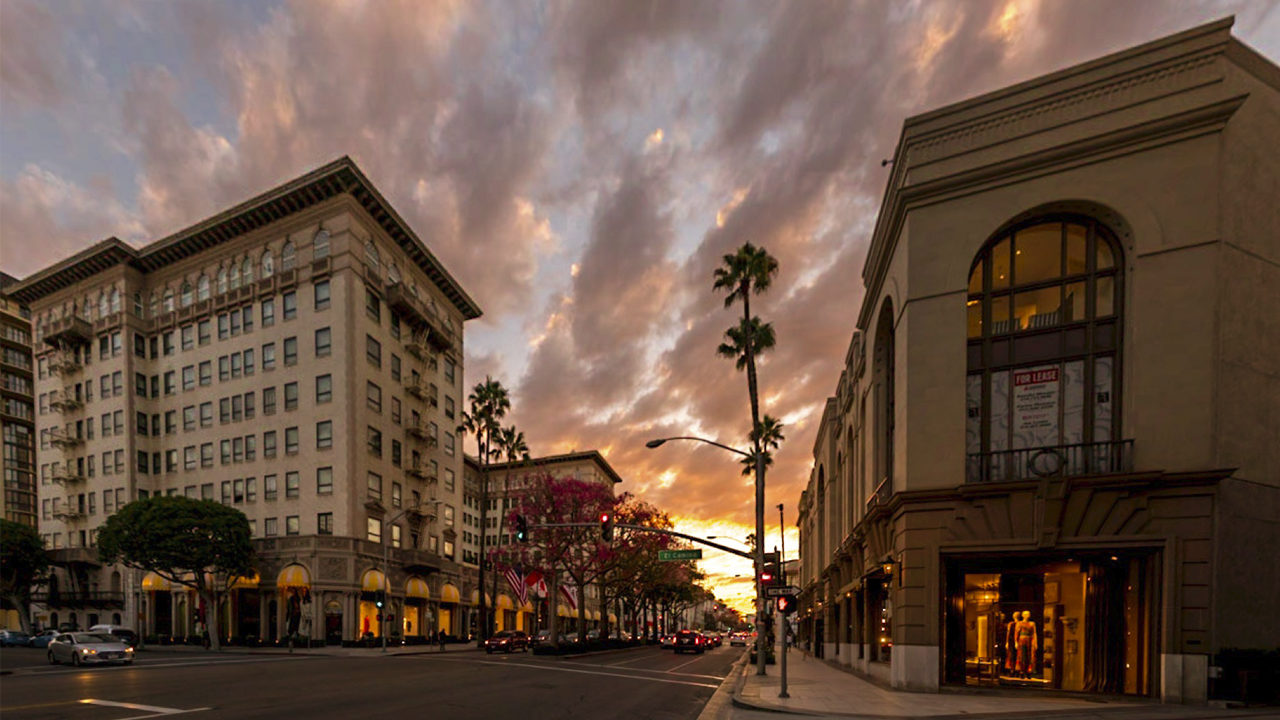
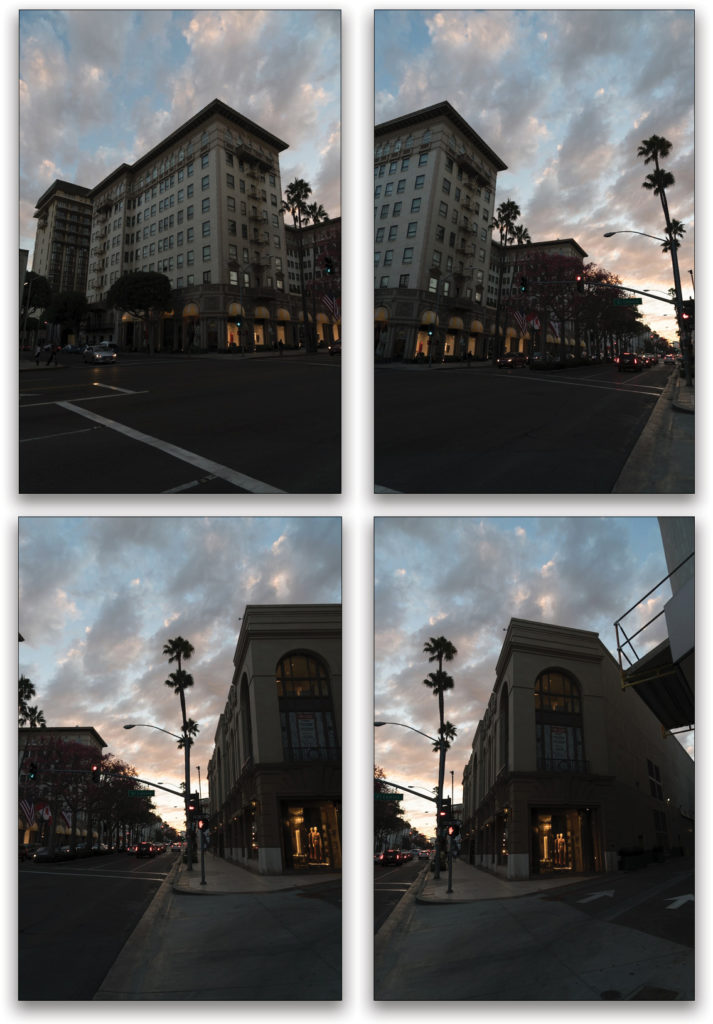
I took these four photos on Rodeo Drive for a panorama. I shot them in portrait mode to get the height of the building and include the sky.
Step One: Just as we did for the first panorama, import and select all your photos, Right-click on one of them, and then select Photo Merge>Panorama.
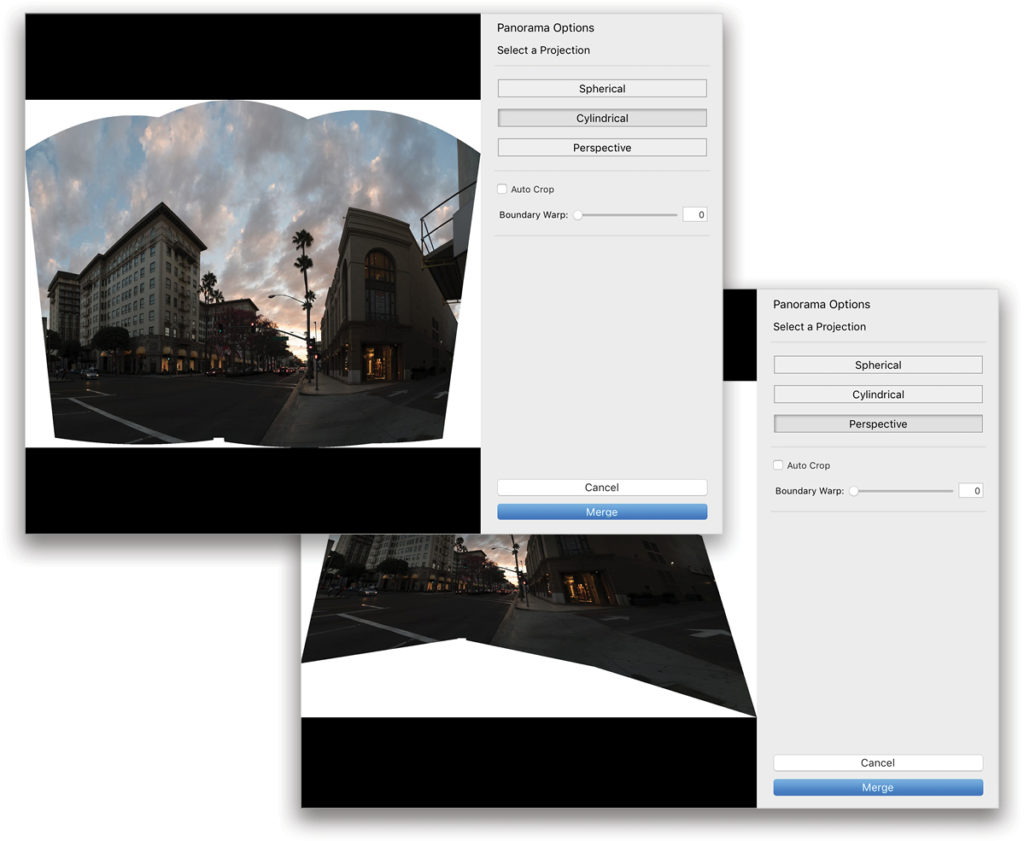
Step Two: As mentioned earlier, the best projection for architecture is Perspective. If you click Cylindrical, you’ll notice that all the buildings are kind of bloated and crooked. At first, Perspective is a little weird, but you’ll see the difference, so click Perspective, and then click Merge.
Step Three: Click on the panorama and press D to go to the Develop module. Now, let’s retouch the photo with the Golden Hour linear circle preset.
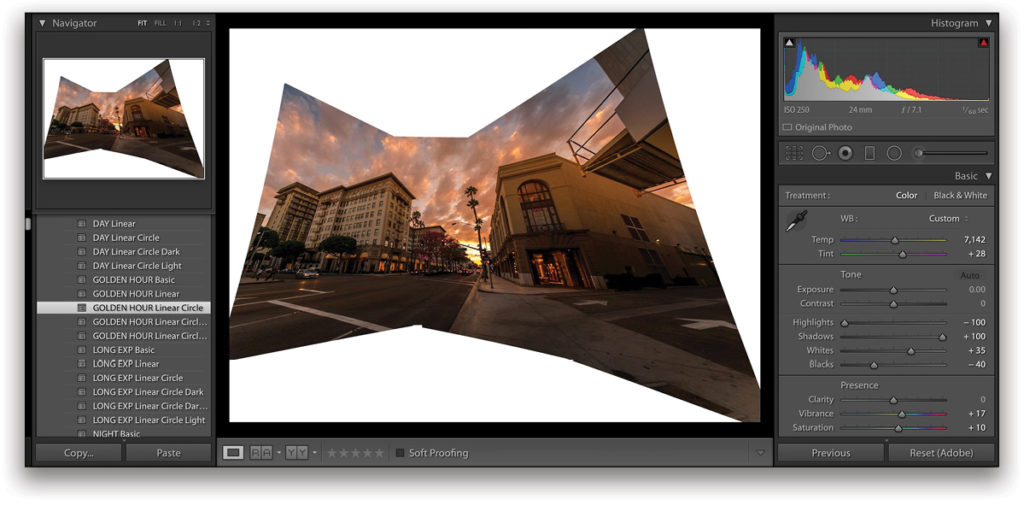
Step Four: Tweak the photo the way you want by moving the Blacks slider (I settled for –47) and the Whites slider (+35).

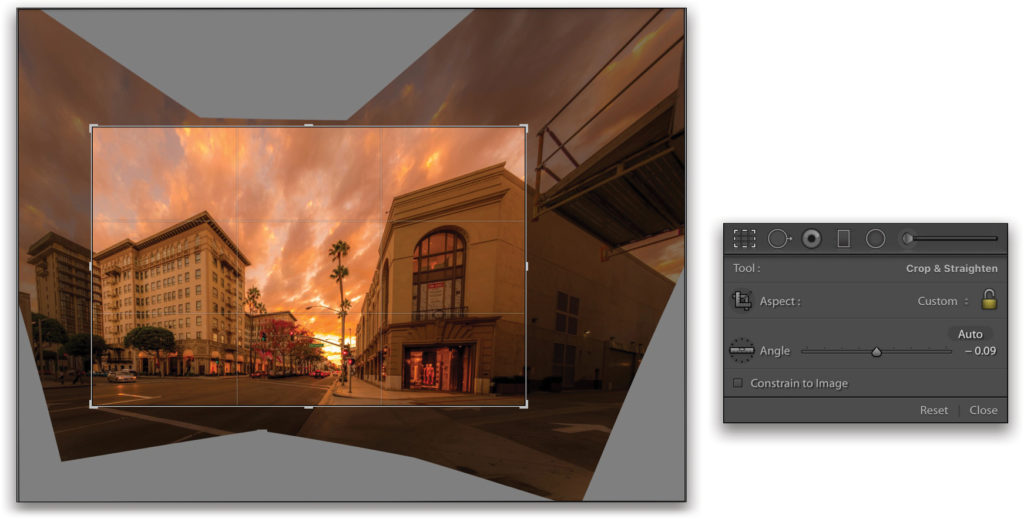
Step Five: Now, let’s go to the Transform panel to make this image perfectly straight. First, click on the Guided button, which automatically activates the Guided Upright tool. Then, create a line along the corner of the building on the right that should be vertical. Add a second line along the corner of the building on the left to make your photo straight. You’ll see an immediate difference.
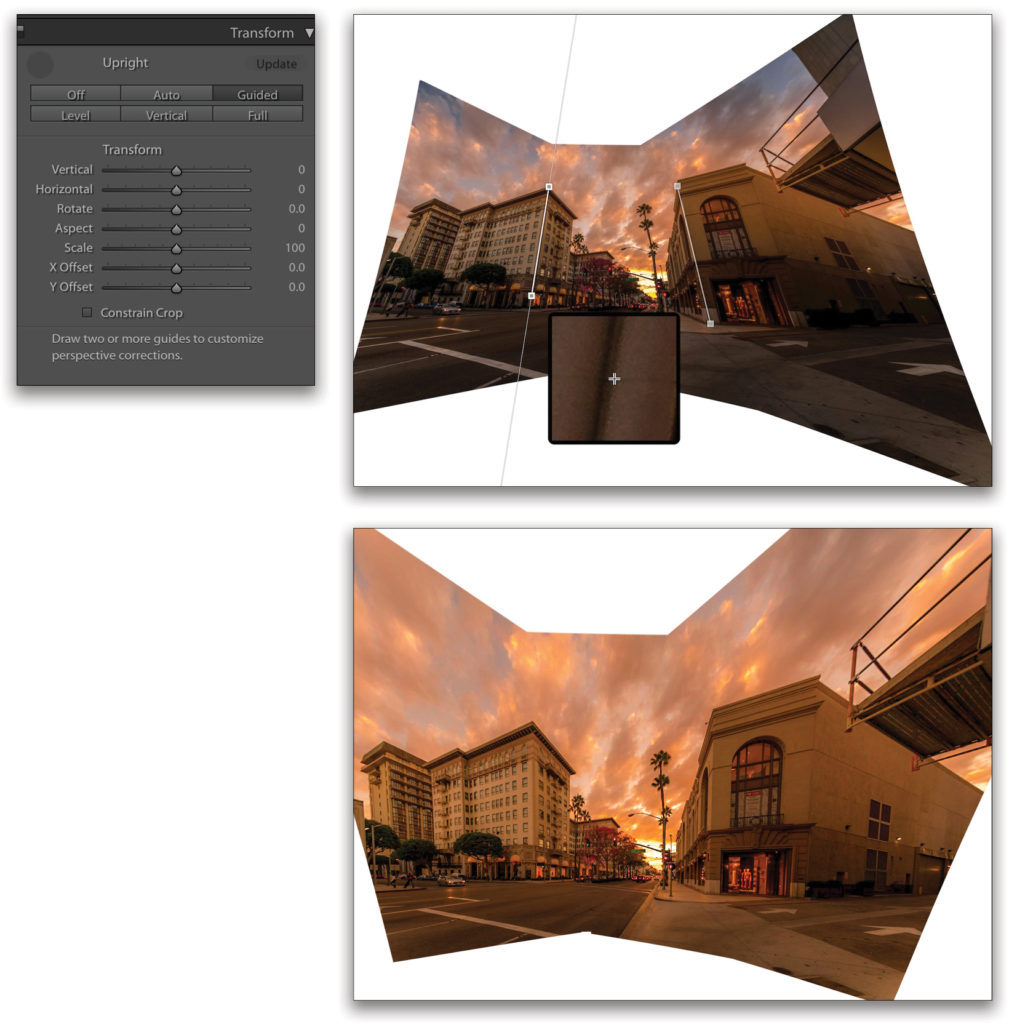
Step Six: Pretty cool! Your lines are straight and there are no distortions. It will be even more noticeable once you crop the image. Press R to get the Crop Overlay tool, and you can crop out a lot and still have a big file.
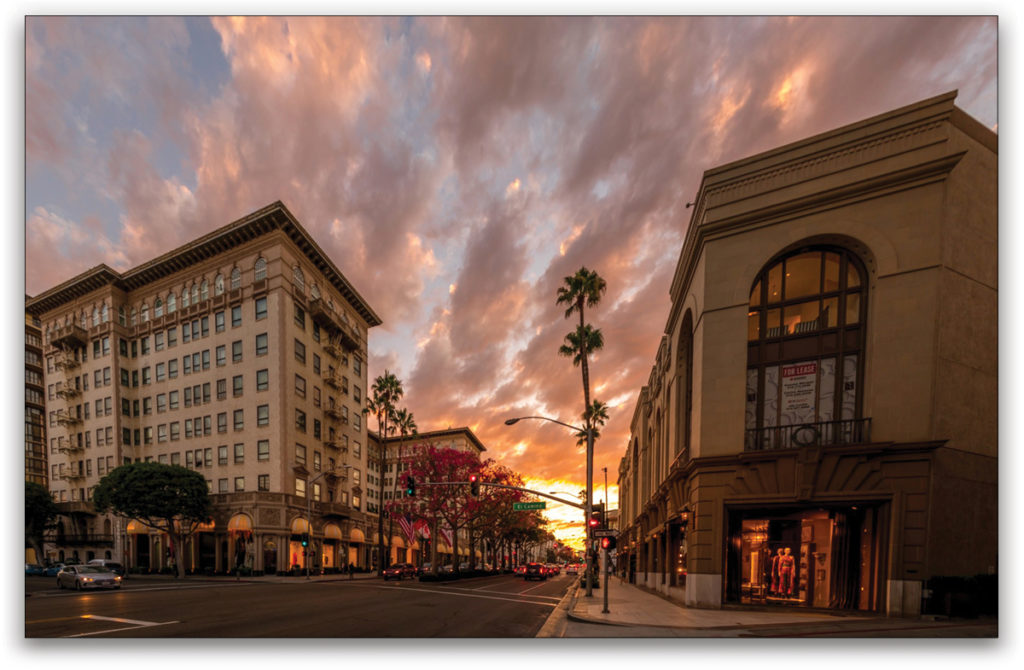
Step Seven: Because we’re working with my presets, you can click on the Radial Filter tool and find your Radial Filter, and adjust it to make each photo unique. Here’s my basic retouched photo.
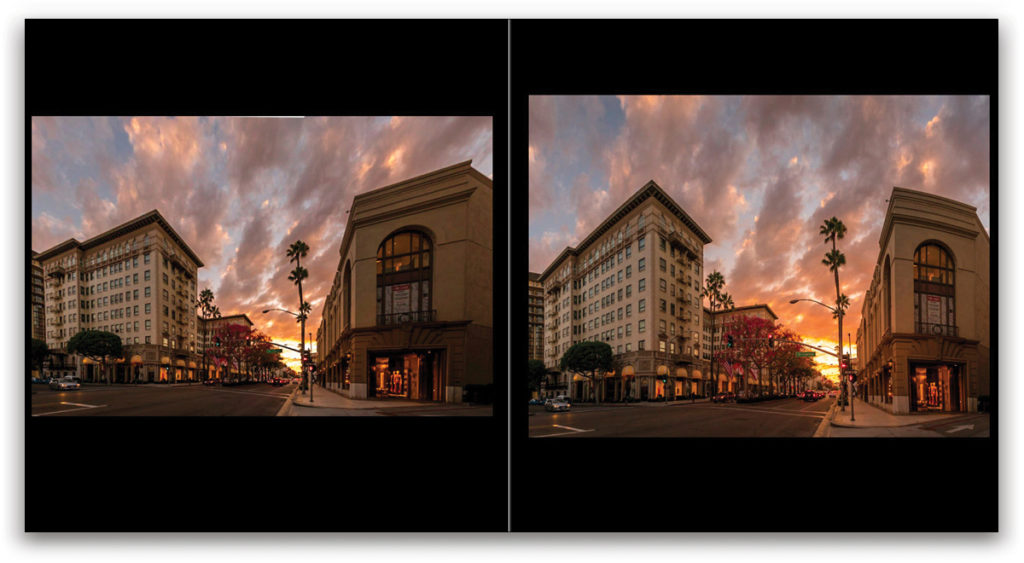
Step Eight: As I said earlier, there are different types of projections you can use, so I did these exact same steps using the Cylindrical projection to show you the difference. Don’t you think the Perspective projection gives a more natural result?
This article originally published in Issue 52 of Lightroom Magazine.


Where is the photo taken