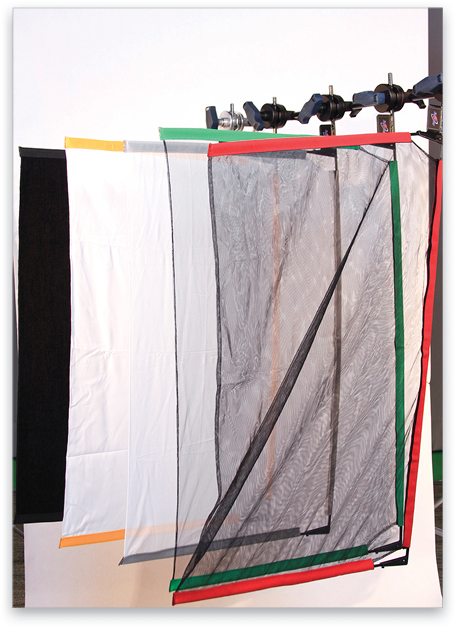
When you think about it, lighting is all about control. By this I mean being able to control exactly where you want light and where you don’t. Grids are one of the top tools in my arsenal for light shaping and control. Grids are placed in front of other modifiers such as softboxes, reflectors, and beauty dishes to further modify the beam of light being created.
Grids control the spread of light, creating a narrower beam from the strobe-and-modifier combo being used. They’re typically available in honeycomb patterns ranging from 10º, 20º, 30º, and 40º, and are just as at home in the studio as they are on location. Grid degree ratings are simply an expression of how wide or narrow the beam of light will be: the lower the number, the narrower or smaller the pattern of light. While they all perform essentially the same task, grids come in several varieties, each meant for a different purpose and application.
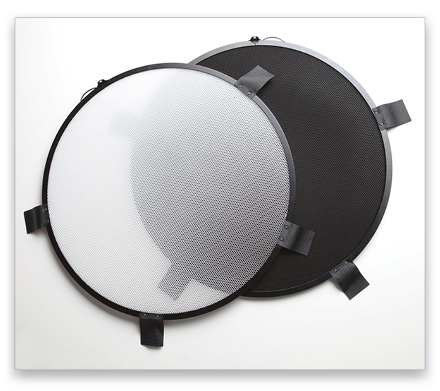
Soft Egg Crate Grids
Soft egg crate grids (like those from Lighttools reviewed in this issue) are used to control the width of the beam of light created when using softboxes, stripbanks, and octabanks. As their name implies, they’re soft, constructed out of black fabric, and collapsible. With soft egg crate grids, the larger the dimensions, the more sagging at the center can become a potential issue. For this reason, I favor solutions that incorporate an internal frame to provide rigidity, such as the Lighttools ez[POP] system.

Courtesy of Lighttools
Grid Spots
The second category of grids is rigid discs or strobe caps, known as grid spots. These are used in conjunction with reflectors and beauty dishes and also available in patterns ranging from 10º, 20º, 30º, and 40º. While historically black, white grid spots are now available, as well. These were developed by Mola Softlights for their line of beauty dishes and are now available for numerous brands via honeycombgrids.com. White grid spots still channel the light like their black counterparts do, but by their nature, they provide a more feathered edge, softer transitions, and a softer center core of light.
Soft and rigid grids are available for strobes, as well as speedlights, so there’s a grid for every level of lighting geek! A few of my favorites for speedlight use are the Rogue 3-in-1 Flash Grid, Manfrotto’s Strobo line, and Lastolite’s Ezybox line of fabric grids. Any one of these tools would be a great addition to a speedlighter’s toolkit!
Courtesy of Mola Softlights
Lighting Degrees
Black grids (both soft and rigid) focus and channel the light from a softbox or reflector, creating a central core of concentrated light with varying degrees of spread and falloff depending on the degree of the grid’s honeycomb cell structure. This results in a more defined circle, shaft, square, or rectangle of focused light. Because of this, you’re able to more confidently control where the pool of illumination from a strobe lands.
Grids are extremely useful multifaceted tools both in the studio and on location, so let’s take a look at the various ways grids are most commonly used.
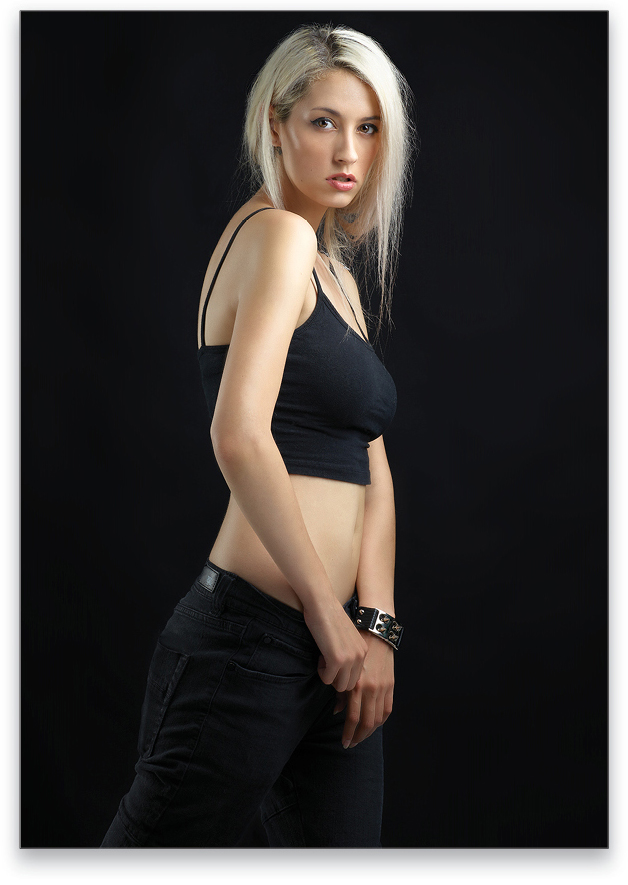
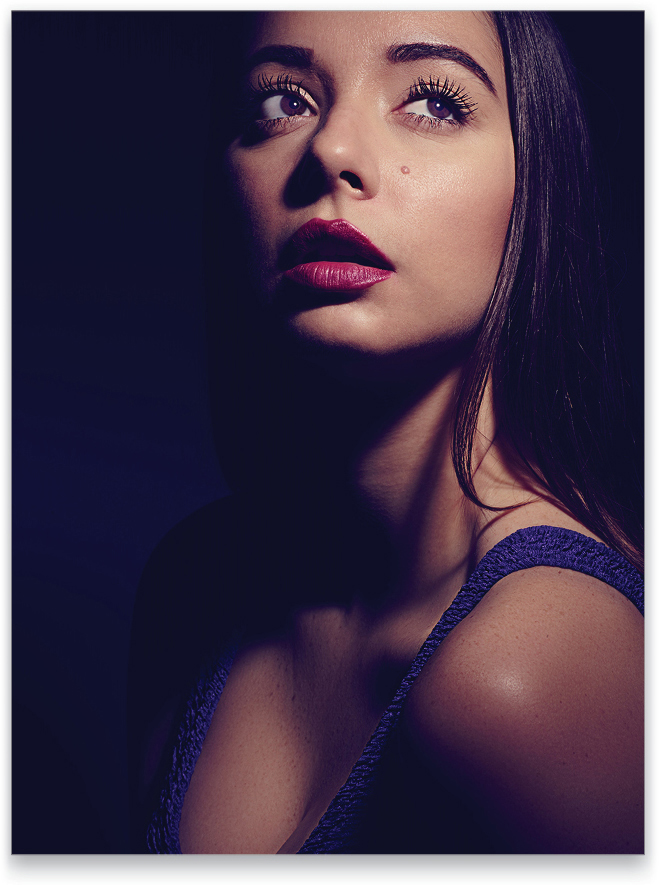
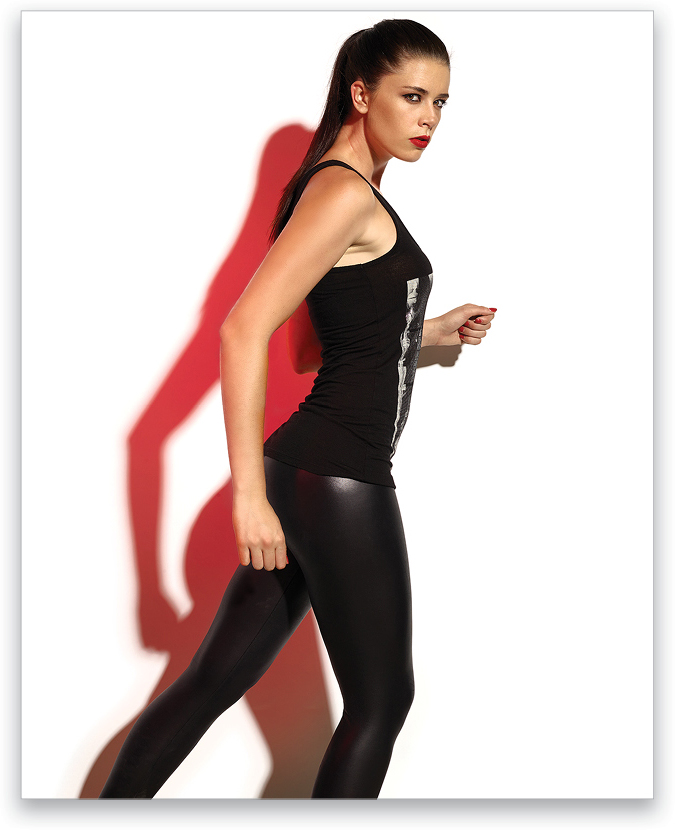
For this fashion portrait on black, I’m using two Elinchrom stripbanks, one medium for the accent light, and one large for the key light. Both are fitted with Lighttools soft egg crate grids to channel the light exactly where I want it while not contaminating the background.
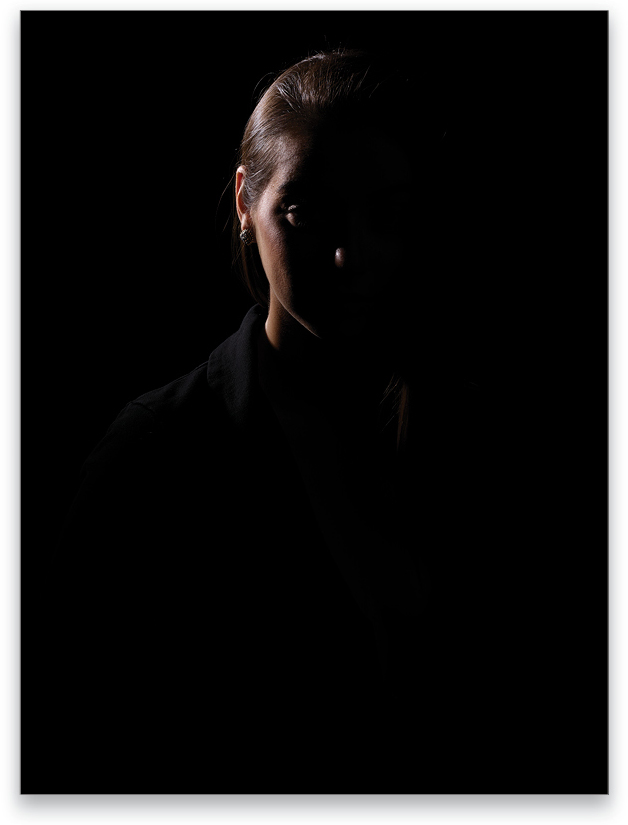
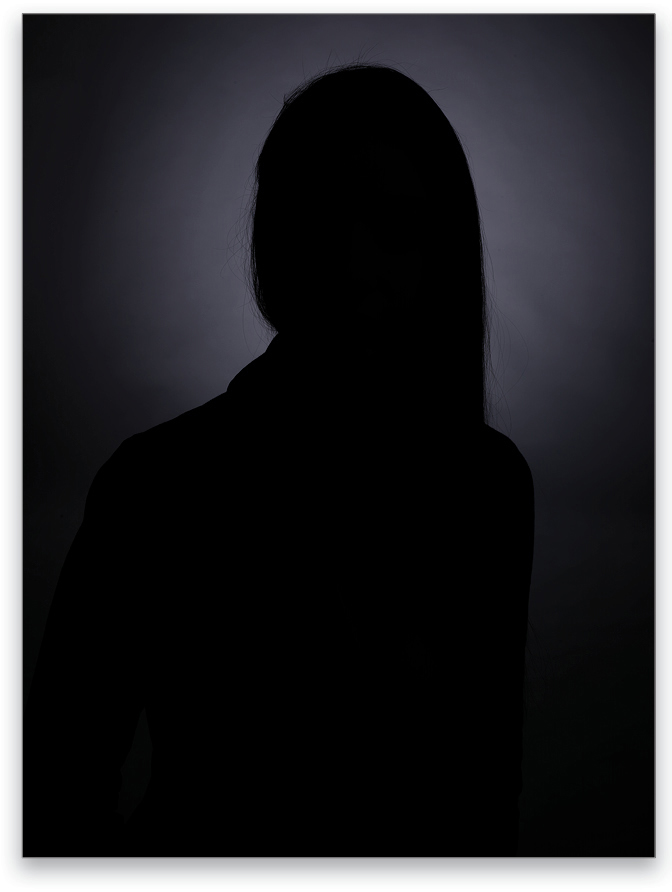
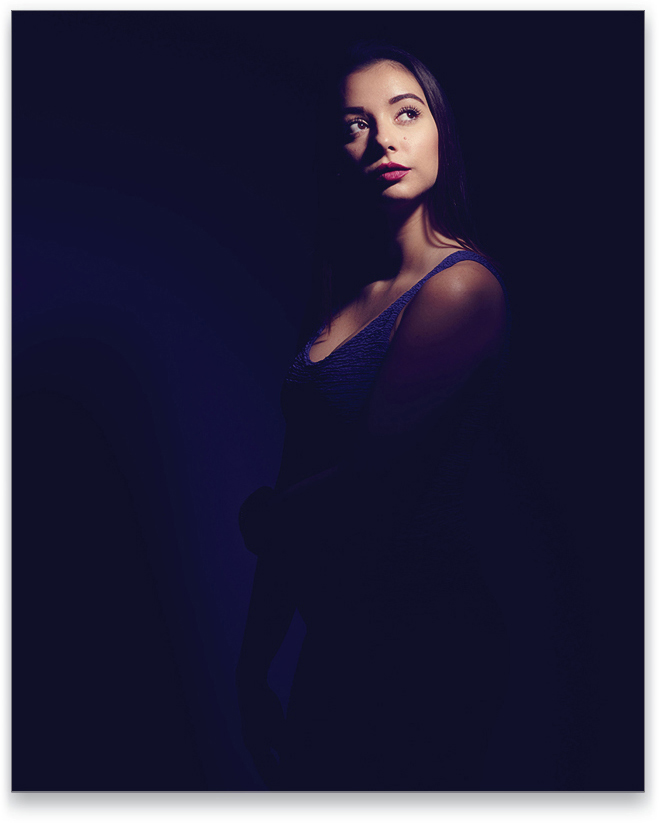
This image illustrates the effect of a reflector with a 10º grid spot used as an accent light. I’ve eliminated all other lights to clearly show the contribution the light with grid is providing.
Avoid Background Contamination
As mentioned above, grids excel at confining the light from your strobe into a narrower beam of light, and help you place it only where you want and nowhere else. This is exceptionally useful when it comes to eliminating light that’s spilling onto a background and causing unwanted illumination. This is also referred to as contaminating the background. Using a grid allows you to keep the light from your strobe on the subject and off your background. It’s especially helpful in smaller studios where you don’t have the benefit of distance to control background illumination.
Accent Lights
Another useful technique I often rely on is adding a grid to the stripbox or reflector I’m using as a rim, accent, or hair light. This is a great way to use either soft or rigid grids, again because they keep the illumination on the hair or accent area while avoiding unwanted areas such as bare skin on shoulders and other areas that can present problematic hot spots. I sometimes combine this technique with another useful light-shaping tool called a net. This allows me to cut some but not all of the light where needed.
Courtesy of Westcott
Background Illumination
Just as you sometimes need to avoid light spilling onto the background, sometimes you want to illuminate the background. Grids are great for this, as well. Different photographers prefer different methods; some use grid spots and others use soft egg creates. In the end, they’re both doing the same thing, creating a defined, controllable shape of illumination on the background. With a grid spot this will be a soft circular shape, while a soft box will cast a soft rectangle, octagon, or square pattern.
The grid spot I’m using here creates a soft circle of light with gradual “fall off” behind the model.
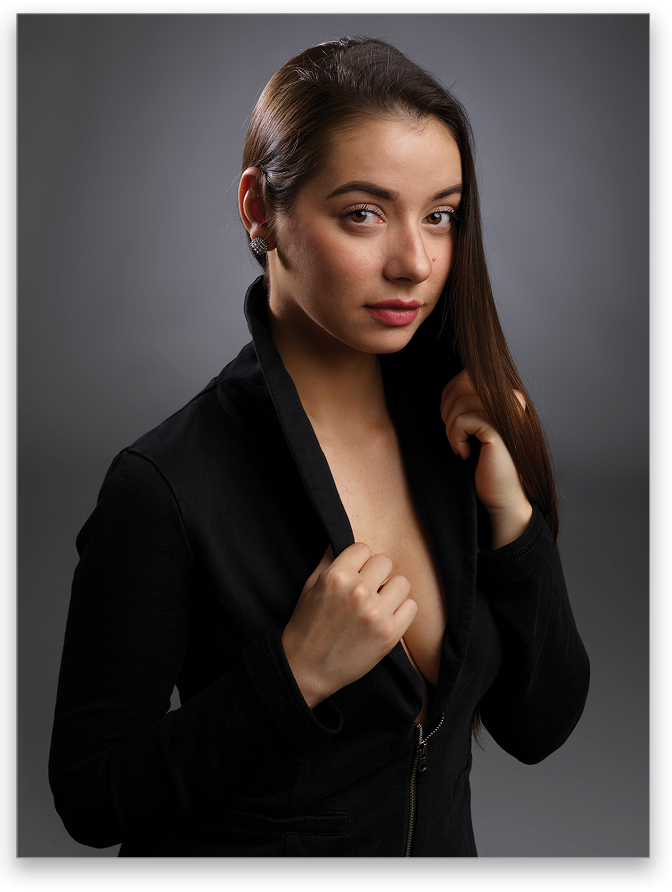
Here’s the final image with all the lights turned on. Grids allow me to put the light exactly where I want.
Fill Lights
For the same reasons that grids are useful as accent and hair lights, they also shine when used as fill lights. When I’m using a beauty dish as a key light, I’ll often add a stripbox just below it to add fill light on the model’s clothing. Adding a grid to the stripbox helps control its light, keeping it on the clothes and off the background. Other times, my fill light is on the opposite side of the key light. In this case, using a grid serves the same purpose, keeping the fill light where I want it rather than all over the place.
Lens Flare
There are many lighting patterns that require lights pointed toward the camera position. In these cases, the interaction between the lights and camera lens can easily cause unwanted lens flare. Adding grids to these lights is a quick-and-easy way to eliminate flare. This technique is used for a variety of lighting effects from edgy sports portraits to high-key fashion looks.
Turn up the Drama
The ability of grids to quickly amp up the drama in your lighting is another checkmark in the plus column for these versatile tools. Attaching a 10º grid spot to the front of a 7” reflector and using it as a closely placed key light is a surefire path to dramatic lighting with lots of deep shadows and rapid transitions to highlights, contrast, and deep falloff. This is a great technique to use when you need to eliminate light that’s spilling onto the background. The same technique can be used with a beauty dish using a black or white grid spot to create a softer effect without background spill.
Using a grid spot on a reflector is an excellent way to create dramatic lighting and eliminate any unwanted light spilling onto your background. I shot this image using a 10º grid spot with the model right up against a white backdrop.
Here’s a medium shot using the same setup as the image above. As you can see, the grid puts nearly all the illumination from the strobe only on the model, leaving the white background nearly black.
Adding Contrast to Soft Light
If you’re looking to create soft light overall but want a way to add some additional illumination and contrast on your subject’s face, grids are perfect. Using a large source such as an Elinchrom Octa softbox for the key light and a beauty dish with a grid for a fill light is my go to setup. Using this method is a great way to add a subtle pop of light and contrast on your subject’s face. You’ll have a controllable source just for the face, channeled light, and additional contrast without sacrificing the overall soft look.
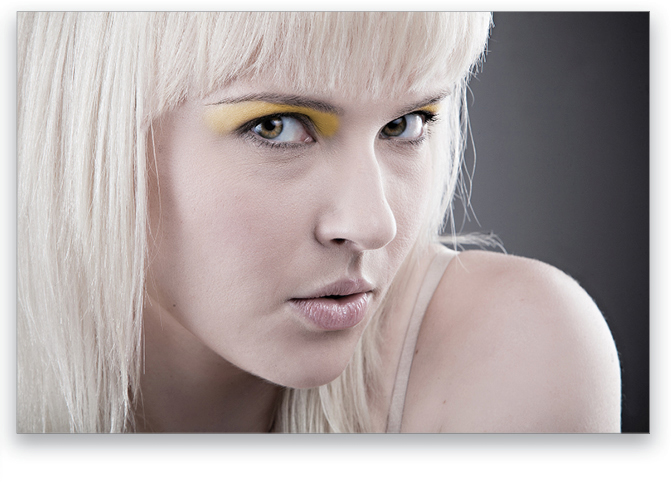
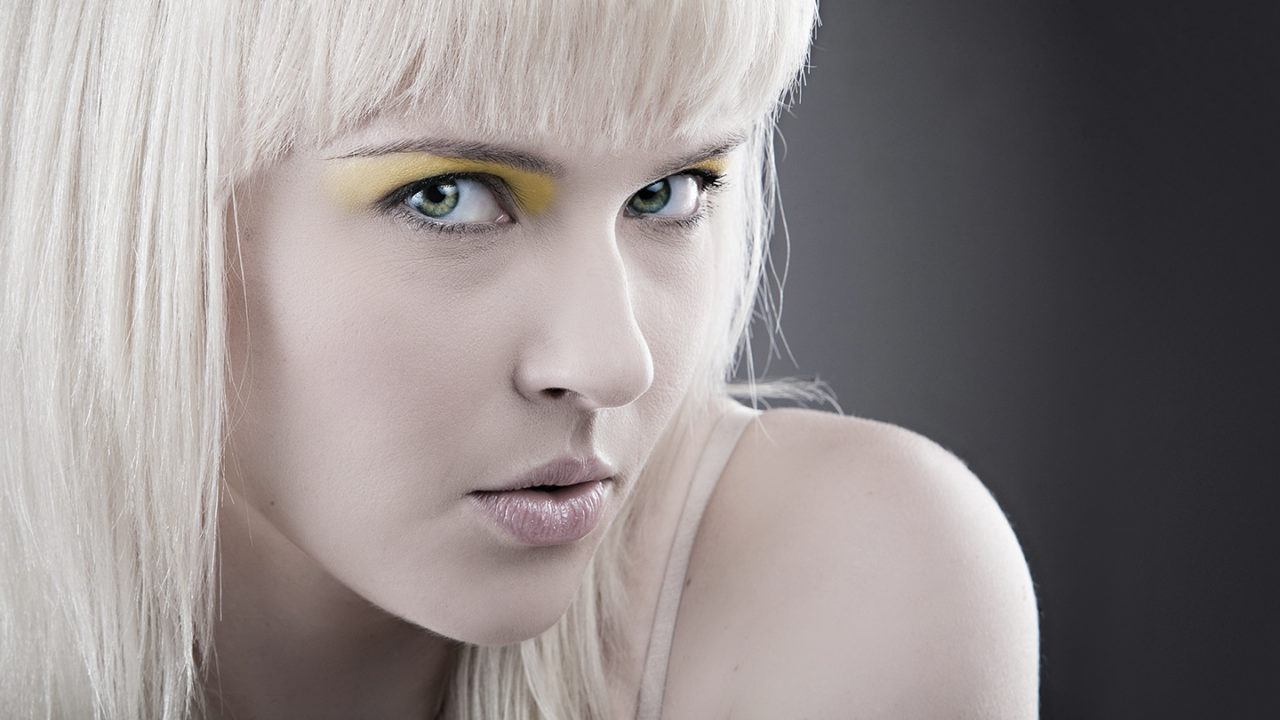
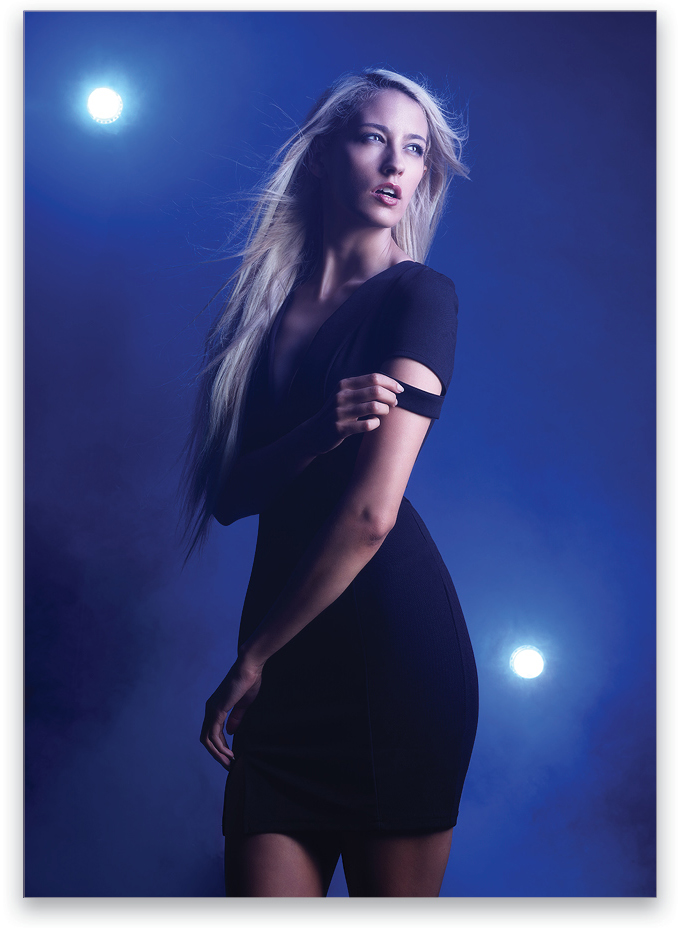
Just as grids excel at creating an edgy look, they also do double duty with soft light. For this high-key fashion portrait, two large Elinchrom softboxes with Lighttools 40º soft egg crate grids have been placed right and left of the model for the side light.
Super Edgy Sports Portraits
That crazy cool sports portrait look! You know the one I mean, where there are two lights, one on the left and one on the right, creating that super-edgy, chiseled, athletic look that drives people nuts. Grids are your friends there too, helping create the look, keeping the light where you want it, and preventing unwanted lens flare. Essentially the same technique can be used with a few simple changes to modifier size and distance to create a much different-looking high-key fashion look! Check out Joel Grimes for more on both of these methods.
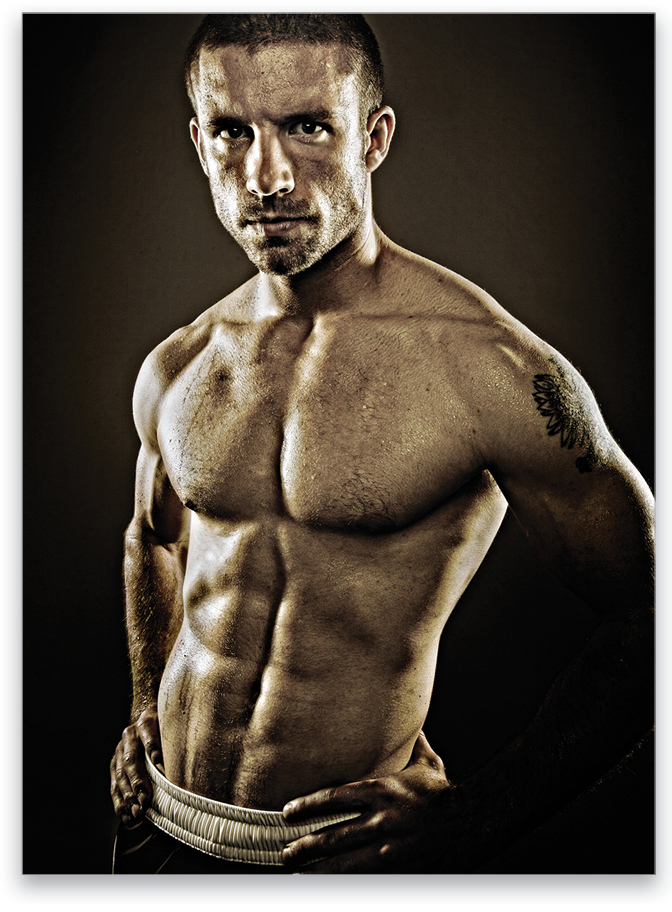
For this sports portrait I’m using two small softboxes on either side of the subject to create an edgy effect.
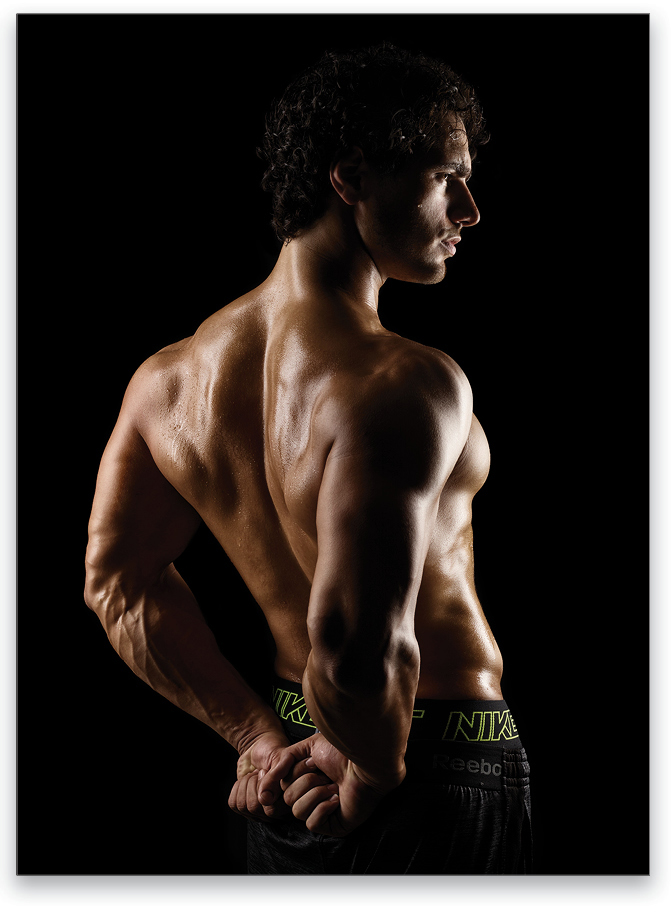
Here I’m using a Lighttools soft egg crate grid on a large Elinchrom stripbox for my key light. This helps confine the light and create a dramatic focused effect.
Adding color to shadows is another fun way to use grids. Here I’m using a Lighttools soft egg crate grid on a medium Elinchrom stripbox to fill in the model’s shadow with colored light while not contaminating any other areas of the image.
As you can see, grids offer a tremendous amount of utility and creative options. They’re certainly a tool I wouldn’t want to be without. If you haven’t worked with grids yet, I encourage you to check them out. And if you have used grids, hopefully this article has provided some inspiration and new ways to think about using them in your work!
This article originally published in the April, 2016 issue of Photoshop User magazine.
ALL IMAGES BY MICHAEL CORSENTINO EXCEPT WHERE NOTED


