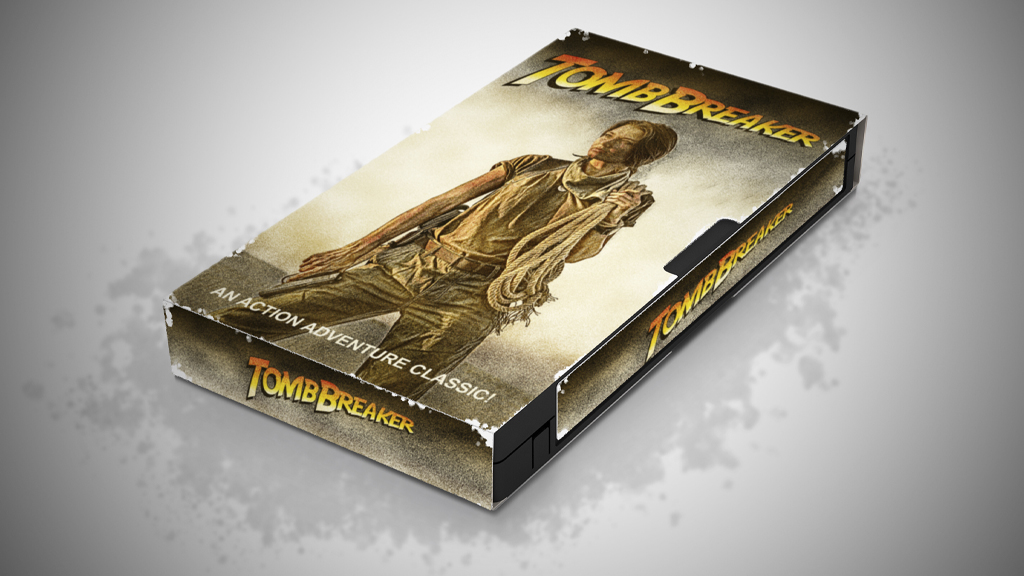
There’s a handful of recent entertainment properties that bank on the sweet nostalgia of the 1980s. Even the recent Marvel series Moon Knight featured glimpses of an old pulp adventure show recorded on VHS tapes. The whole idea is still deliciously inspiring and a lot of fun to craft yourself in Photoshop. In this project we take a blank VHS mockup and create our own label design inspired by the adventure films of the 80s, but with our own unique spin. Grab your fedora and follow along on this old-school adventure!
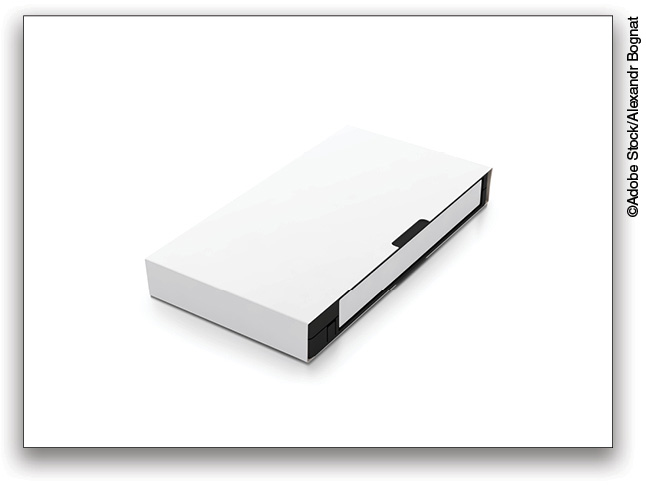
STEP ONE: In Photoshop, use File>New to open the New Document dialog. Name the document “VHS Mockup Design;” set the file Width to 3000 pixels, the Height to 2200 pixels, and the Resolution to 72 ppi; and click Create. Then use File>Place Embedded to place the VHS tape mockup stock image into the file. This will serve as the base document for the project.
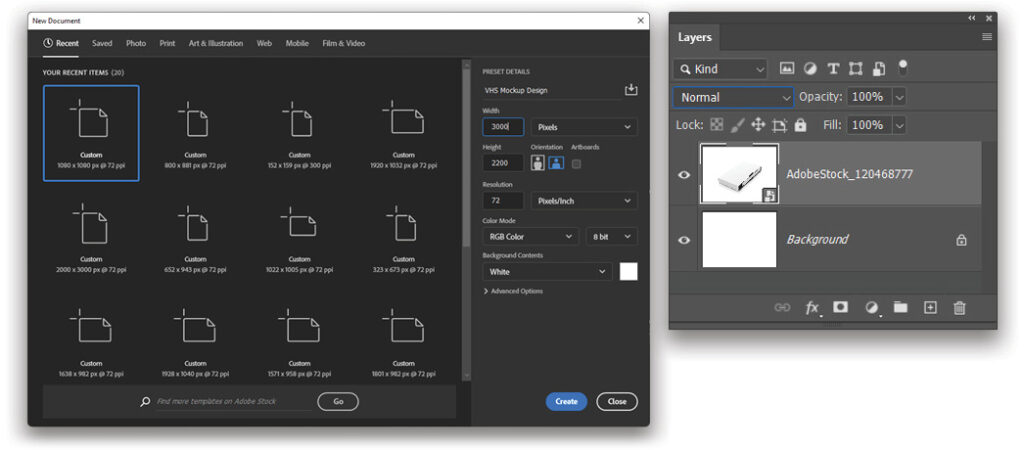
If you’d like to download the low-res watermarked version of this image to follow along, click this link, log in with your Adobe ID, and click the Save to Library button. Drag the image from the Libraries panel (Window>Libraries) to the file you just created. Use the bounding box to resize and place the tape as shown here, and press Enter.
STEP TWO: Create another new document for the VHS cover art but use the dimensions of 1500×2500 pixels at 72 ppi. Then use File>Place Embedded and select a photo to use as the basis for the cover art. Here we used the stock image of an adventurer/heroine character. You can find and download the preview image of this image from Adobe Stock by clicking here. Drag it from the Libraries panel into the new file, and resize and position it so it fills the image.
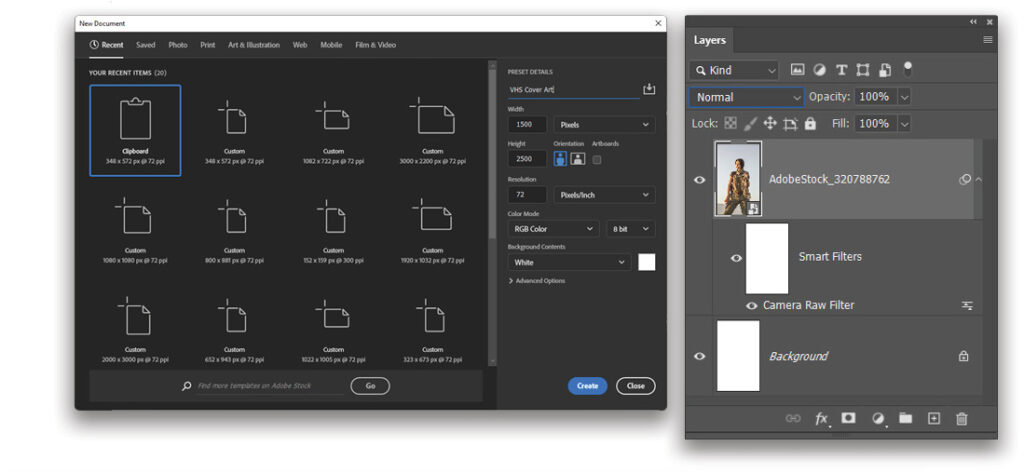
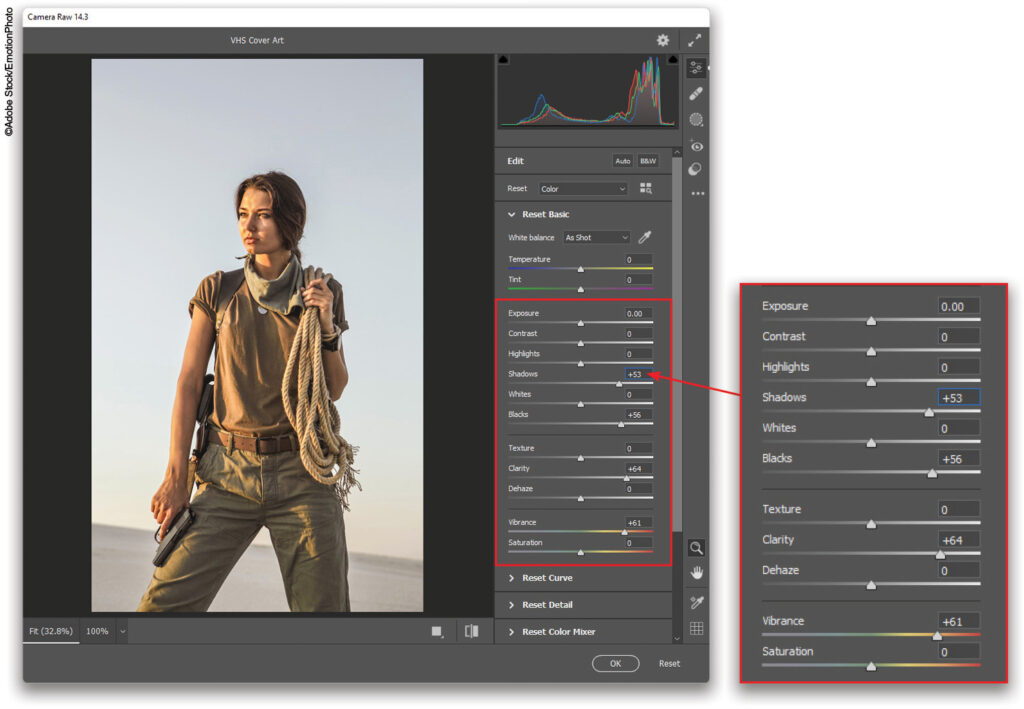
Conveniently, Photoshop automatically places the image in as a smart object so filters are applied nondestructively. Go to Filter>Camera Raw Filter and, in the Basic panel, increase the Shadows to +53, Blacks to +56, Clarity to +64, and Vibrance to +61. Click OK. This helps create a more vibrant image to be used in the next step.
STEP THREE: To add a stylistic, slightly illustrated look to the image, go to Filter>Neural Filters and switch on the Style Transfer filter. Select Image Styles above the image thumbnails and choose the sketch style that looks like a pen and ink drawing of a woman with curly hair. Set the Strength to 10, Style Opacity to 77, Detail to 100, and be sure to check the Preserve Color option box.
After clicking OK to apply the filter, if the effect looks strange on the character’s face, grab the Brush tool (B) and select the Soft Round brush at a low Opacity in the Options Bar. Click on the Smart Filters mask thumbnail in the Layers panel to make it active, set the Foreground color to black (press D then X), and paint to fade the effect on the face.
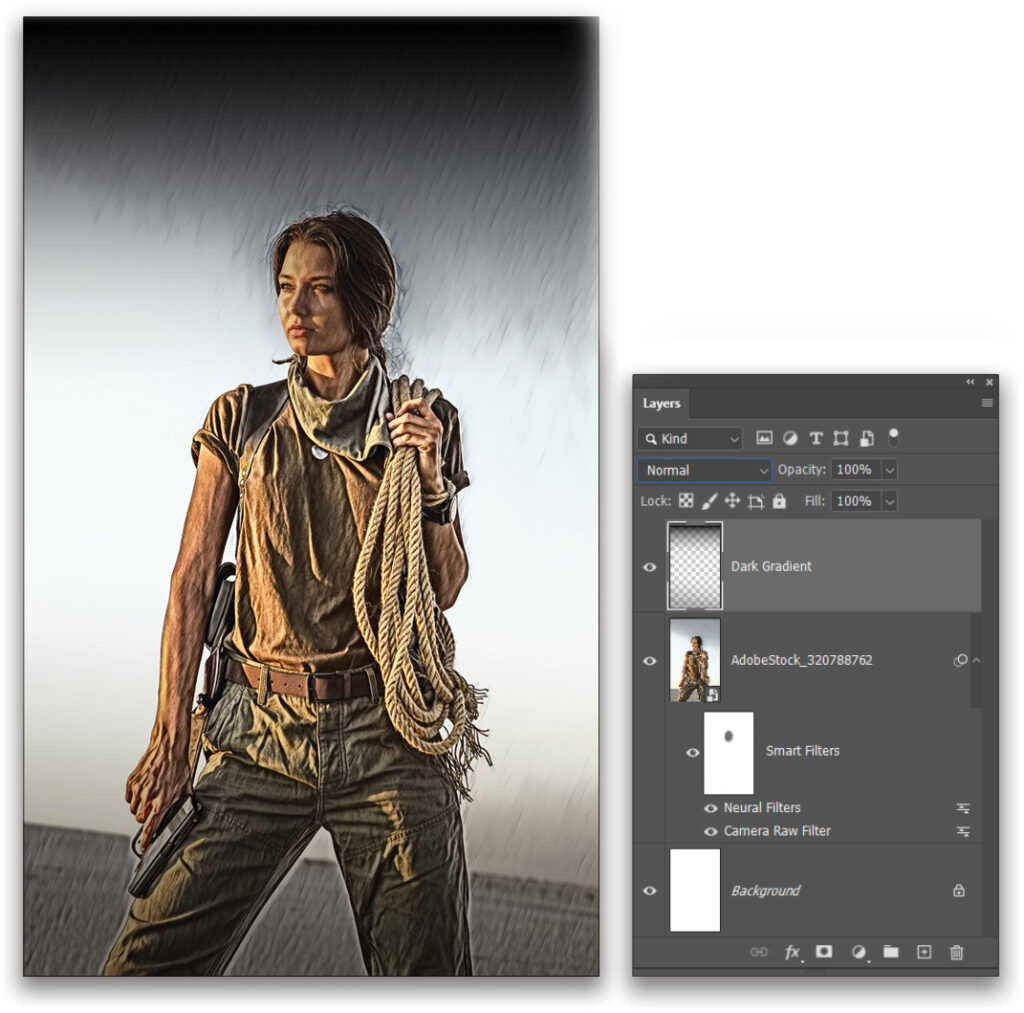
STEP FOUR: Click the Create a New Layer icon (+) at the bottom of the Layers panel to add a new layer. Double-click its name and rename it “Dark Gradient.” Press D to set the Foreground color to black and grab the Gradient tool (G). Click the gradient preview thumbnail in the Options Bar to open the Gradient Editor, select the Foreground to Transparent preset in the Basics folder, and click OK to close the Gradient Editor. Click on the Linear Gradient icon in the Options Bar.
Drag a gradient down from the top edge of the canvas to darken the top third of the image. Then reduce the tool’s Opacity to 50% in the Options Bar, and drag a gradient from the bottom edge upward to add a slightly less dark gradient at the bottom.
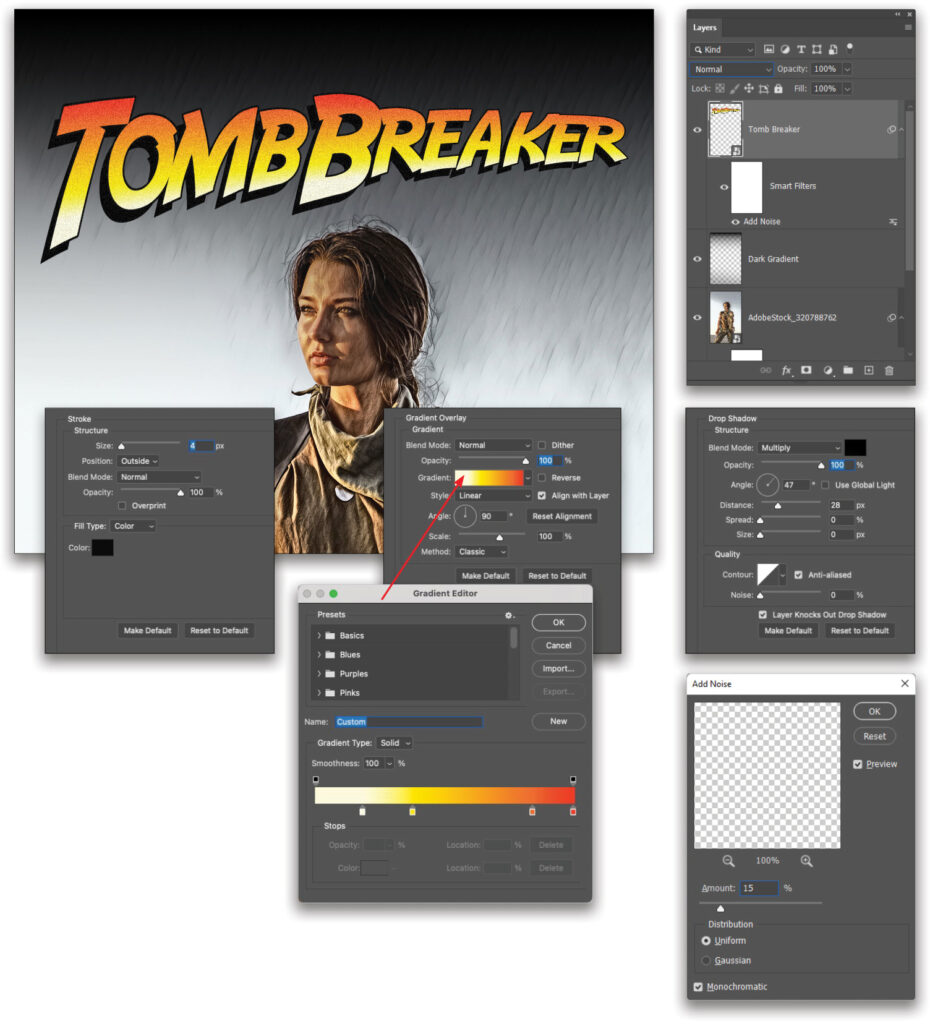
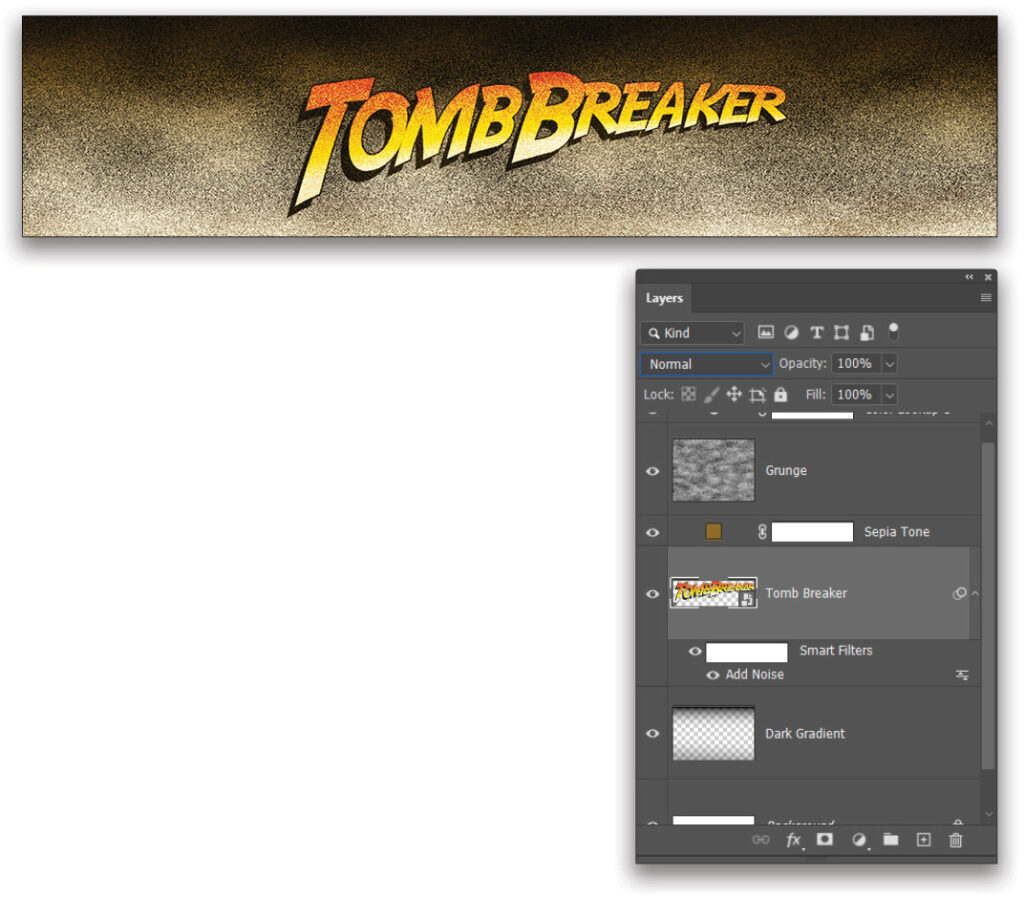
STEP FIVE: Use the Type tool (T) to add your own title. In this example we used a font called Adventure from dafont.com. Type “TOMBBREAKER” at around 260 pts. Select the T in “Tomb” and set it to around 300 pt, and do the same for the “B” in “Breaker.”
Double-click to the right of the type layer’s name in the Layers panel to open the Layer Style dialog, and add a Gradient Overlay, Stroke, and Drop Shadow using the settings shown below. Click OK to close the Layer Style dialog.
Turn the layer into a smart object with Layer>Smart Object>Convert to Smart Object. Then use Edit>Transform>Warp and, in the Options Bar, select the Arch preset, set the Bend to around 10%, and the Height to around –20% to give the text that characteristic curve. Press Enter, and then use Edit>Free Transform to tweak the letterforms as desired (rotate, resize, distort, etc.). Follow this with Filter>Noise>Add Noise, set the Amount to 15%, turn on Monochromatic, and click OK.
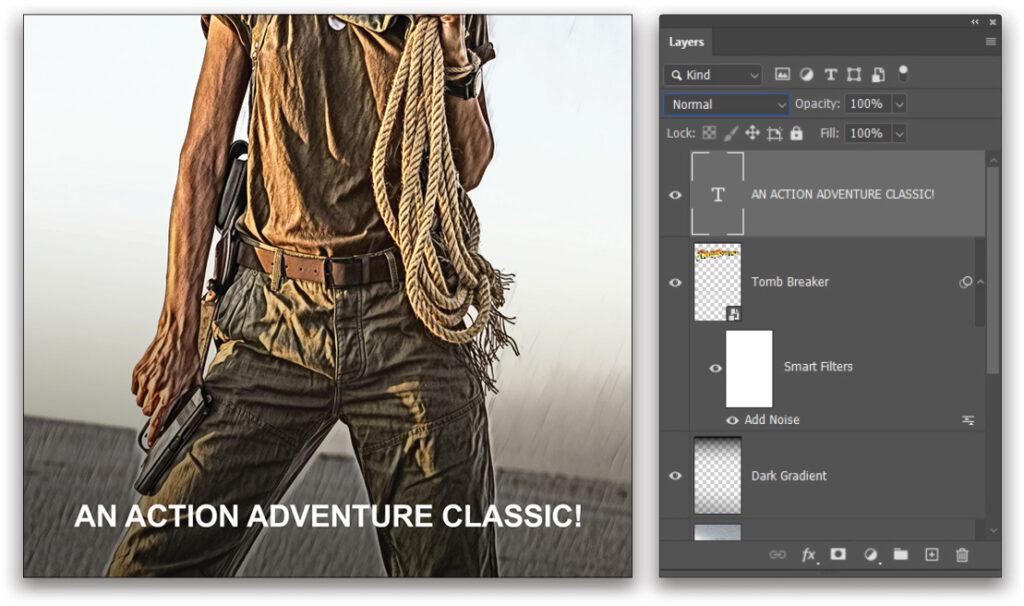
STEP SIX: Next, use the Type tool to add a subtitle at the bottom of the design. Change up the font to some-thing simple, like Arial Bold in white. It shouldn’t compete with the title, which has visual hierarchy.
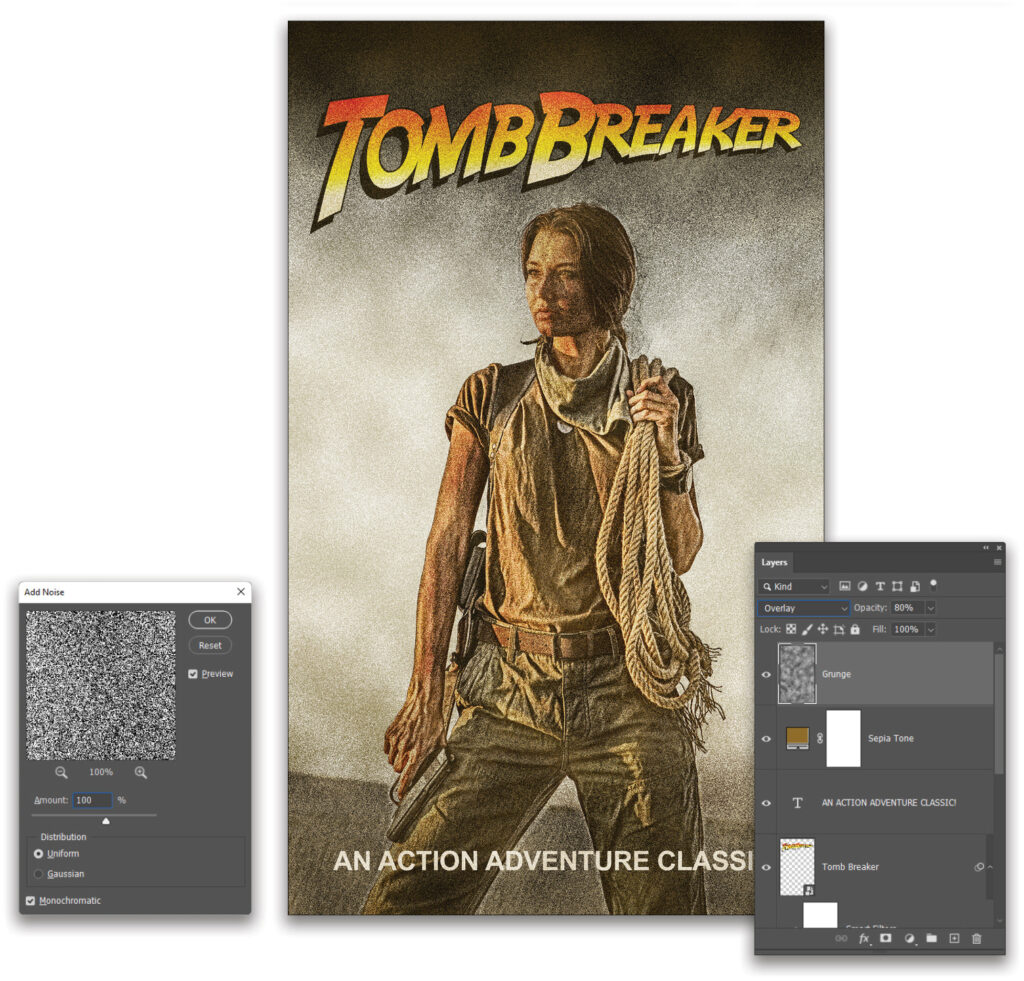
STEP SEVEN: Go to Layer>New Fill Layer>Solid Color, set the color to a sepia tone (#8f6b1d), and click OK to close the Color Picker. Reduce the layer Opacity to 25%. Then, add a new layer and name it “Grunge.” With the Foreground and Background colors set to the default black and white (press D), go to Filter>Render>Clouds and then Filter>Noise>Add Noise with the Amount set to 100%. Click OK. Set the Grunge layer’s blending mode (near the top left of the Layers panel) to Overlay and reduce the Opacity to 80%.
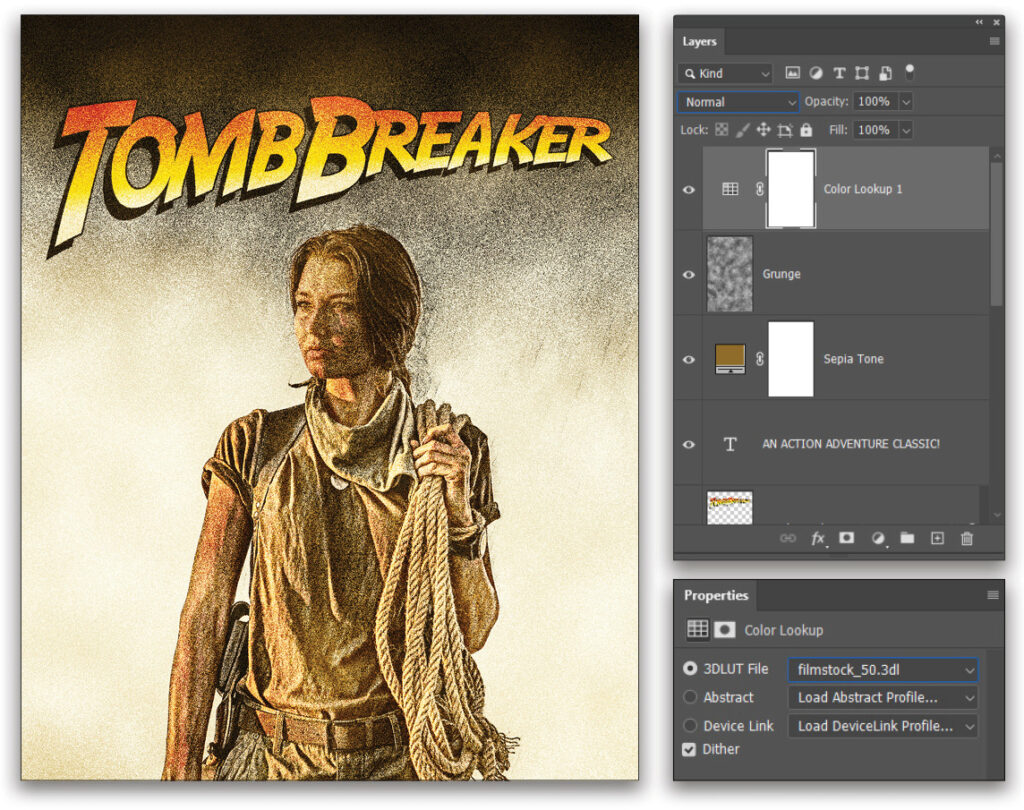
STEP EIGHT: Go to Layer>New Adjustment Layer>Color Lookup and, in the Properties panel (Window>Properties), set the 3DLUT File drop-down menu to filmstock_50.3dl. At this point the image should look pretty old and grungy, just like an old VHS label from the 80s. Save the document as a PSD, but leave it open in Photoshop, as we’ll need to come back to it later.
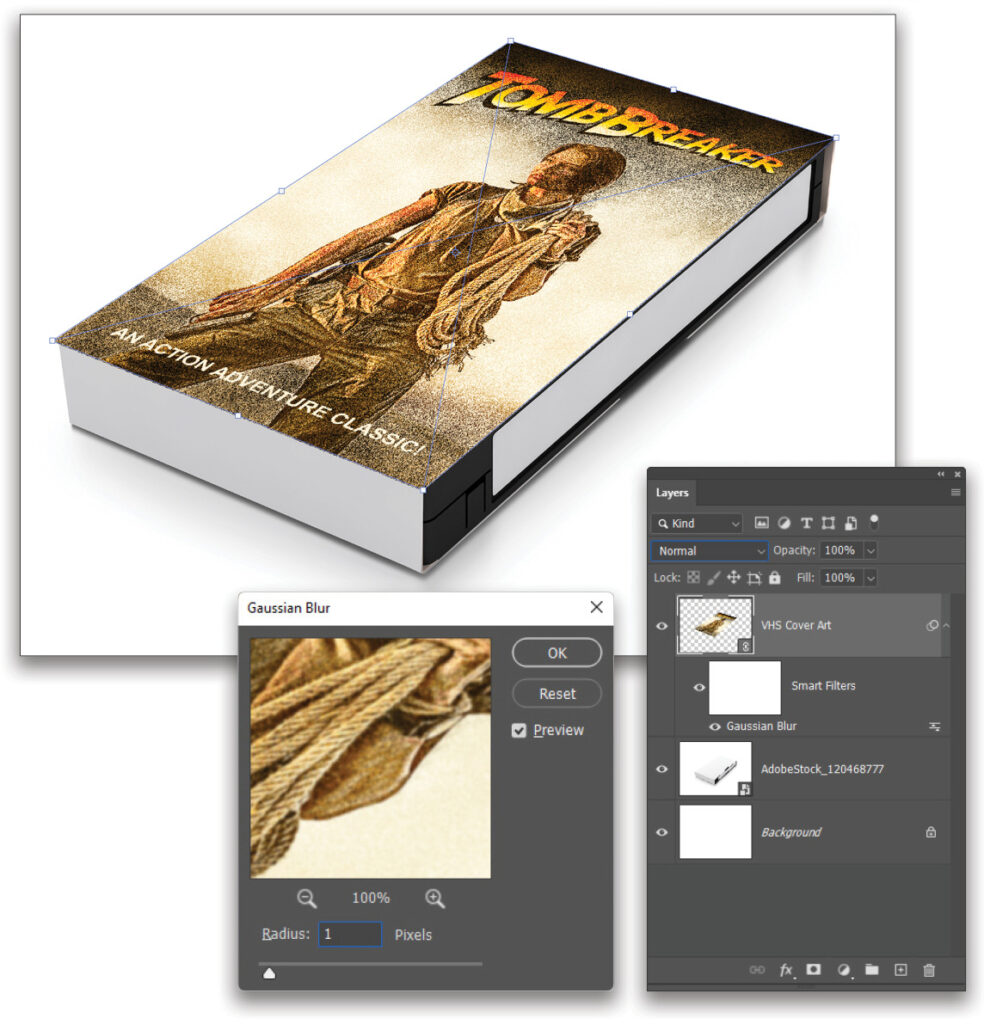
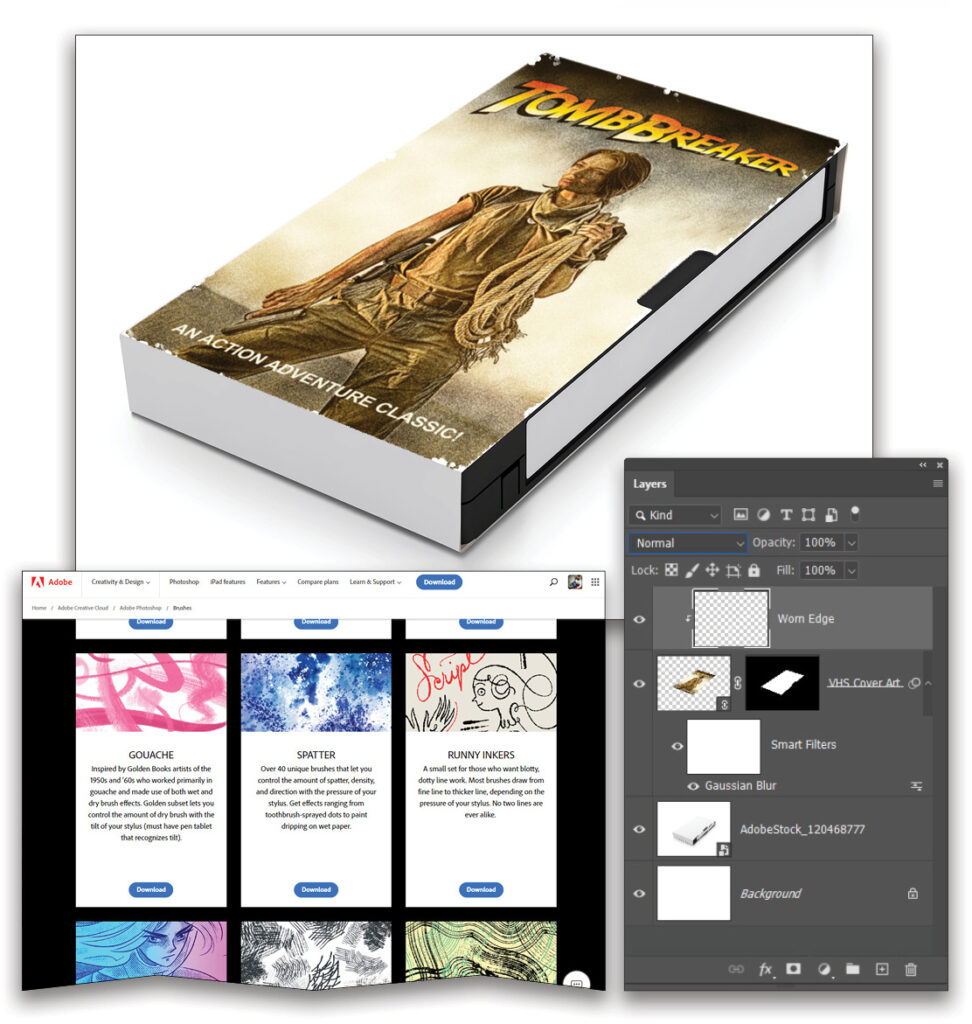
STEP NINE: Go back to the VHS Mockup Design document. This time use File>Place>Linked (not Embedded) and select the VHS Cover Art file that you just saved. Right-click inside the bound-ing box, and choose Distort. Drag the corners of the bounding box to match the top corners of the VHS box so the image covers the front face of the box and matches its perspective.
After pressing Enter to apply the transformation, go to Filter>Blur>Gaussian Blur and use a Radius of 1.0 pixel to add a very subtle blur to the image.
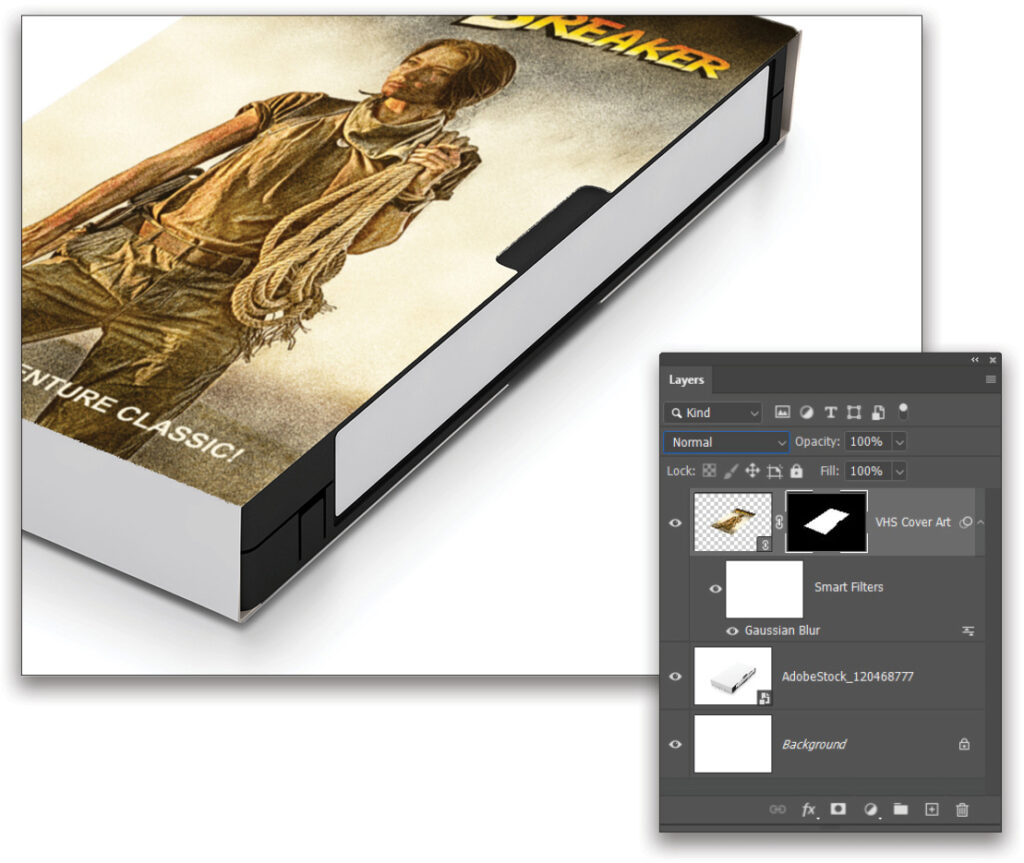
STEP 10: Click the Eye icon in the Layers panel to hide the VHS Cover Art layer. Then use the Quick Selection tool (nested with the Object Selection tool [W] in the Toolbar) to create a selection of the white area on top of the box. Watch carefully how the tool selects the corners around the little thumb indent on the right. When you’re happy with the selection, reveal the VHS Cover Art layer again by clicking where its Eye icon used to be. Click the Add Layer Mask icon (circle in a square) at the bottom of the Layers panel to create a layer mask from the selection to constrain the cover art to the very front of the box, leaving the thumb indent visible.
STEP 11: Create a new layer above the VHS Cover Art layer and call it “Worn Edge.” Go to Layer>Create Clipping Mask to clip the new layer to the cover layer beneath it. Then open the Brushes panel from the Window menu. In the panel’s flyout menu at the top right, choose Get More Brushes to launch a page from Adobe’s website. Download the Spatter brush set from Kyle Webster and double-click the downloaded .abr file to automatically install it in Photoshop. Back in the Brushes panel, select a spatter brush from the collection, set it to around 125 px, press D then X to set the Foreground color to white, and brush in the worn areas around the edges of the cover.
STEP 12: Go back to the VHS Cover Art document, and go to Image>Duplicate. Name the new duplicate “VHS Label Art,” and click OK. Then go to Image>Canvas Size, change the width to 3,085 pixels and the Height to 700 pixels, and click OK. Click Proceed in the warning dialog that pops up.
Click on the Grunge layer to make it active and press Command-T (PC: Ctrl-T) for Free Transform. While holding the Shift key, drag the top corners of the bounding box to the top corners of the canvas so it covers the new width (don’t worry about the bottom corners), and press Enter. Repeat with the Dark Gradient layer, but also, while still holding the Shift key, drag the bottom-middle point way down so more of the top dark gradient covers the image.
Drag the image layer of our action hero to the Delete Layer icon (trash can) at the bottom of the Layers panel. Using the Move tool (V), drag the title layer so it’s centered on the new canvas, and then save the document as a PSD.
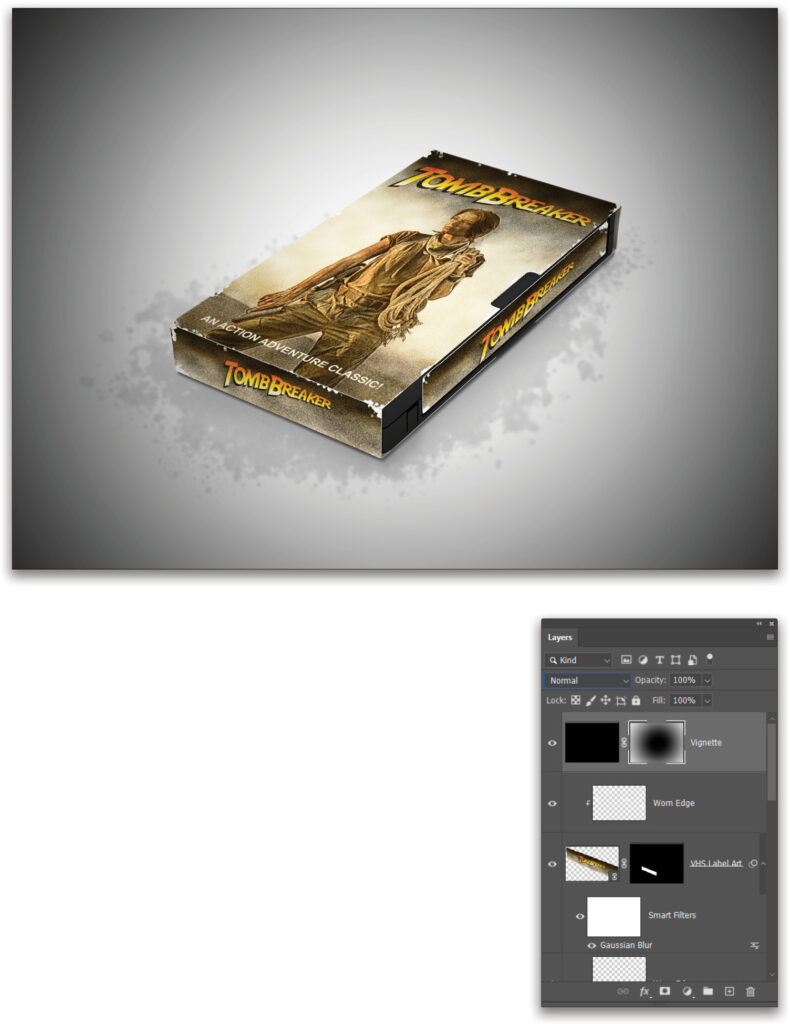
STEP 13: Return to the main project document and use File>Place Linked to add the new VHS Label Art document. Then, using the same process as we did in Steps 9–11 for the cover, distort the image so it matches the sticker of the VHS tape, add a Gaussian Blur, select the label to create a layer mask, clip a “Worn Edge” layer, and use the Spatter brushes to create worn areas around the edges. Repeat the process once more to add the label to the bottom of the box.

STEP 14: Add a new layer above the base VHS tape stock layer called “Table Grunge.” Use a different brush from the Spatter set with a dark gray color to paint in some splashed grunge on the tabletop. Set the blending mode to Multiply and reduce the layer Opacity until the effect is very subtle.
Click on the VHS tape layer in the Layers panel to make it active, and create a selection of the entire box using the Quick Selection tool. Click back on the Table Grunge layer, and go to Layer>Layer Mask>Hide Selection to hide the grunge effect from the tape itself. If needed, add a gradient to the layer mask to fade the effect out as it gets closer to the top of the canvas.
STEP 15: Add a new layer to the very top of the layer stack and call it “Vignette.” Go to Edit>Fill, set the Contents drop-down menu to Black, and click OK to fill this layer with black. Then add a layer mask and grab the Gradient tool again. Press D to set the Foreground color to black and, in the Options Bar, select the Radial Gradient icon and set the Opacity to 100%. Still using the Foreground to Transparent preset, draw out a gradient on the mask starting at the center of the image and stretching out to beyond the bounds of the canvas. This should hide the black color from the center of the canvas and leave it just around the edges (see next page).
The real value of this approach to label design is that the base image can easily be swapped out for a different image. Just double-click the thumbnail of the VHS Cover Art layer to open the smart object that contains the stock image and place a new image in there. Drag the Smart Filters from the original image layer to the new image layer, and then hide or delete the original image layer. Once that file is saved and closed, the other file will automatically update to include the new image. So this means the project can be kept as a template and the style work doesn’t need to be redone each time. Just update the image and enjoy your throwback VHS design!
This article originally published in the June, 2022 issue of Photoshop User magazine.
About Photoshop User and KelbyOne
Photoshop User magazine comes out digitally 12 times a year and is part of KelbyOne, the leading educational resource for Photoshop, Lightroom, and photography. Pro members have access to more than 900 video courses and 100 back issues of Photoshop User. To learn more about KelbyOne, click here.


