Howdy, pardners! Before I round up my best horse-photography tips, for the greenhorns who are reading this article, here’s some background on the terms giddy-up, pardners, and greenhorns. These are cowboy terms: When a cowboy wants his horse to get moving, he says “giddy-up!” A pardner is a friend or companion. And a greenhorn is a person who’s inexperienced when it comes to riding a horse. Okay, let’s ride!
Photographing horses is a ton of fun. It can also be a challenge. In this article I’ll share with you some tips that will make your horse photography fun and rewarding. These tips will also help you to meet the challenges of photographing fast-moving, and sometimes unpredictable, subjects. But first, we need to find horses to photograph.
Where to Get Horse Photographs
If you do a Google search on Equine, Equestrian, or Horse Photography Workshops, dozens of workshops in the U.S. will show up in a few seconds. I’d suggest researching each workshop carefully, as some offer western-style riders while others offer English-style riders.
Some workshops offer horse photo opportunities without riders. At these workshops, cowboys/cowgirls/gauchos get the horses into the best positions for good photographs. (FYI, all of the photographs in this article were taken at workshops.)
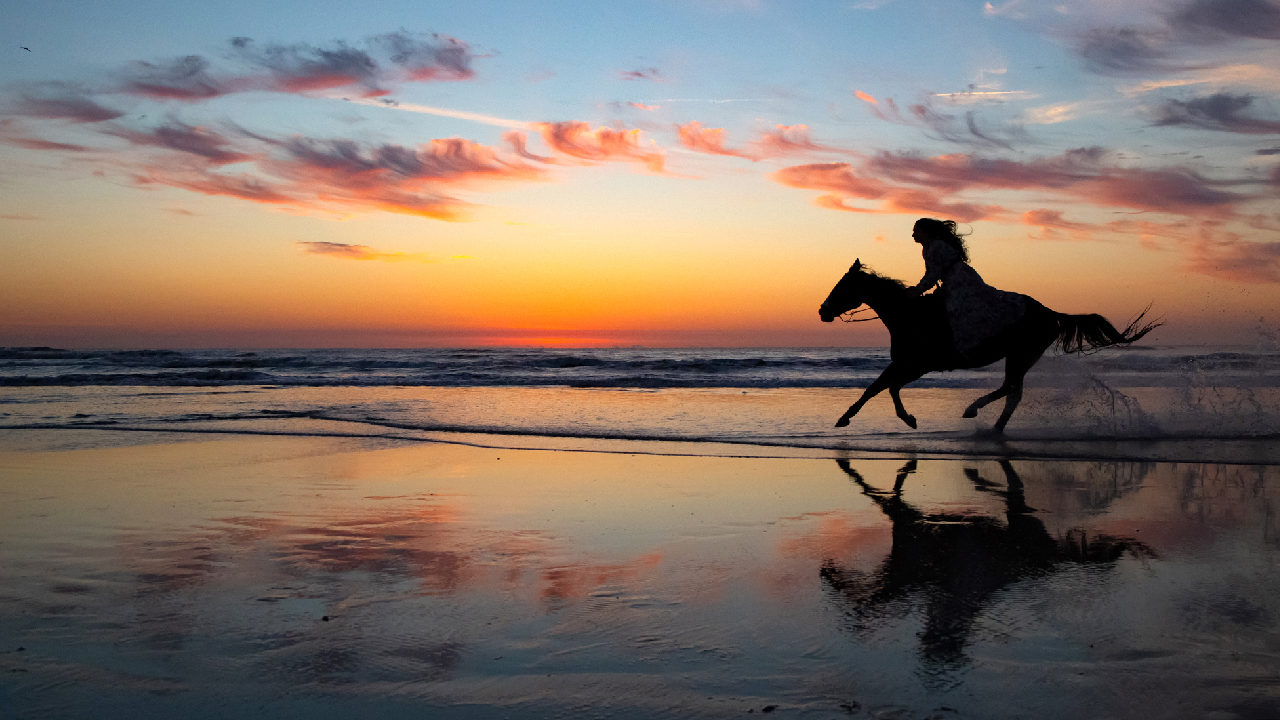
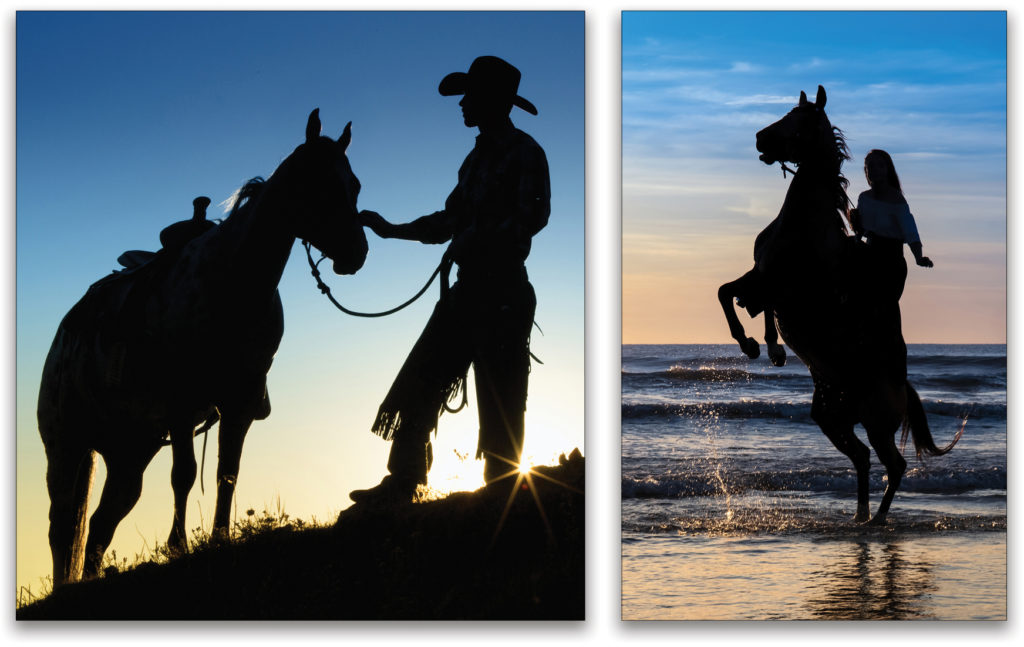
Another workshop consideration is the setting/location. Some workshops, such as the annual Florida’s Birding & Photo Fest held in April each year at St. Augustine, Florida, offer “horses on the beach at sunrise” photo sessions. The opening image for this article was taken at the 2019 event. I used a 24–105mm lens set at 24mm to capture the horse and rider and the beautiful surroundings.
Some workshops, usually held out West in the United States, offer horses running with and without riders against backdrops, like you’d see in cowboy movies or television shows.
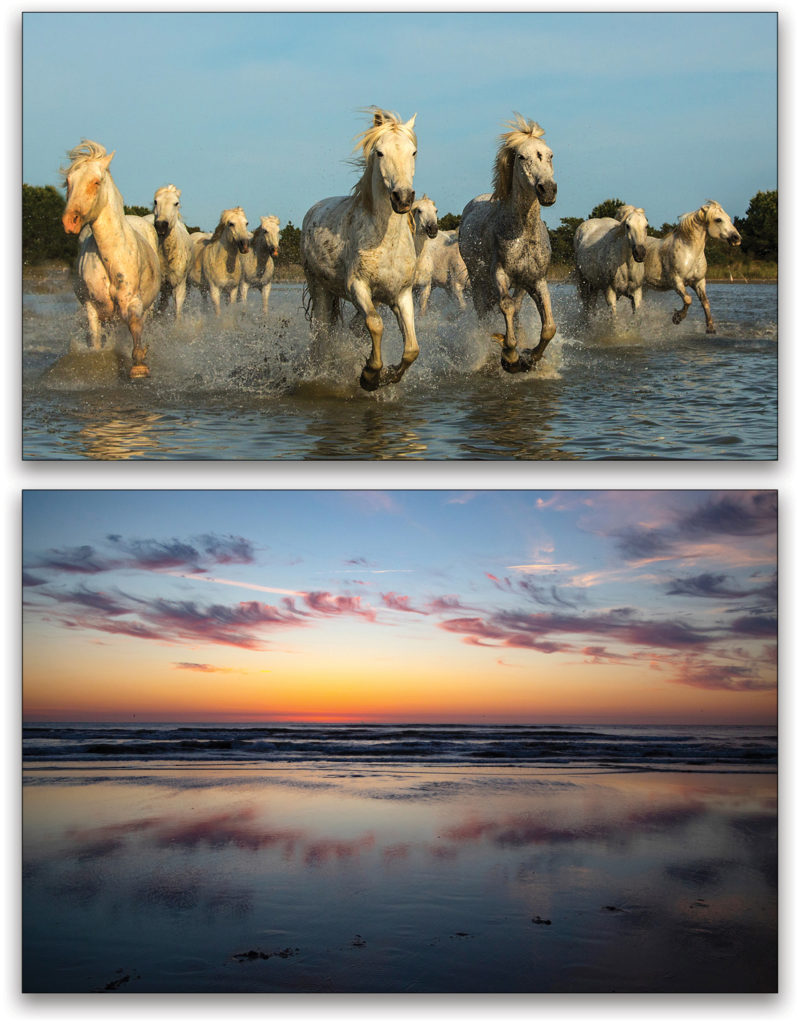
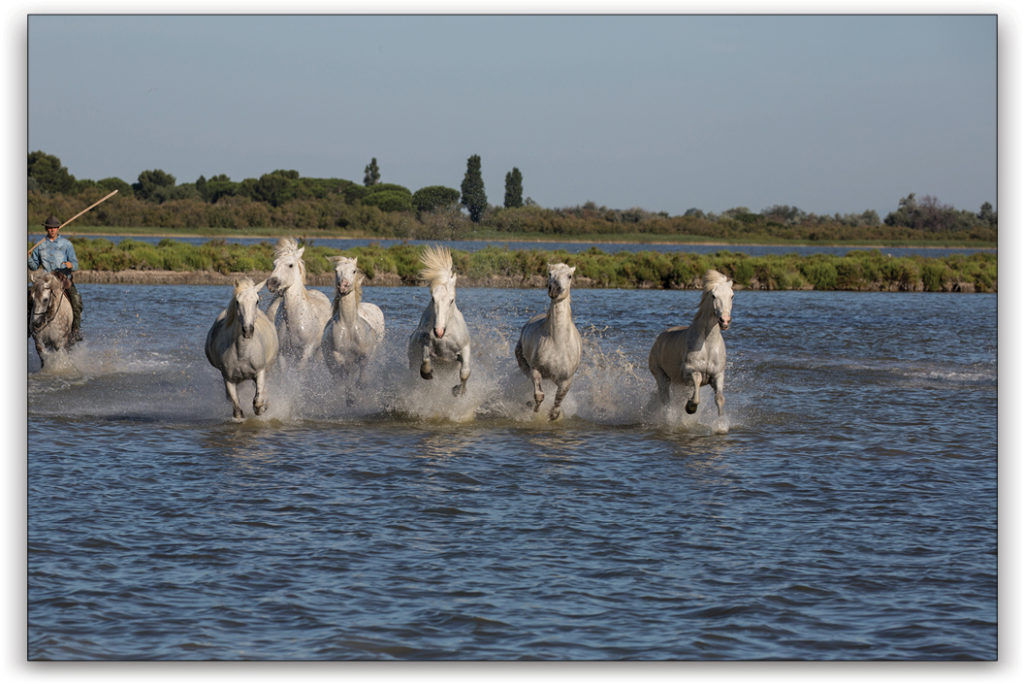
You’ll also find horse photography workshops in Provence, France, where I took the shot above of the Camargue horses. Here, too, a Google search will show several workshops.
Of course, you could drive around in “horse country” and look for, and hopefully find, and then photograph, wild horses. To do that, you need time and patience. I know people who have done that on Cumberland Island in Georgia, U.S., and I’ve done that in the Conwy Valley in North Wales.
Plan your workshop carefully, and you’ll have fewer surprises on site.
Planning Your Shot
Getting back to the opening image, this was the result of planning and envisioning the end result. When I arrived at the beach that morning in St. Augustine, I immediately saw the beautiful sky and its reflection in the water, with the perfect opening in the clouds for a horse and rider (see below). Although there were dozens of possible background and foreground compositions, this scene was perfect—for me.
Before taking the shot, I waited and watched as the horse and rider rode back and forth in the scene several times. On the last run, with my Canon EOR set on High Frame Rate, I began shooting as the subjects came into the scene. I got the shot, again by envisioning the end result.
In a situation like this one, rather than taking a million shots of running horses against an ever-changing background, as well as changing exposures, think about that one best shot.
Gesture
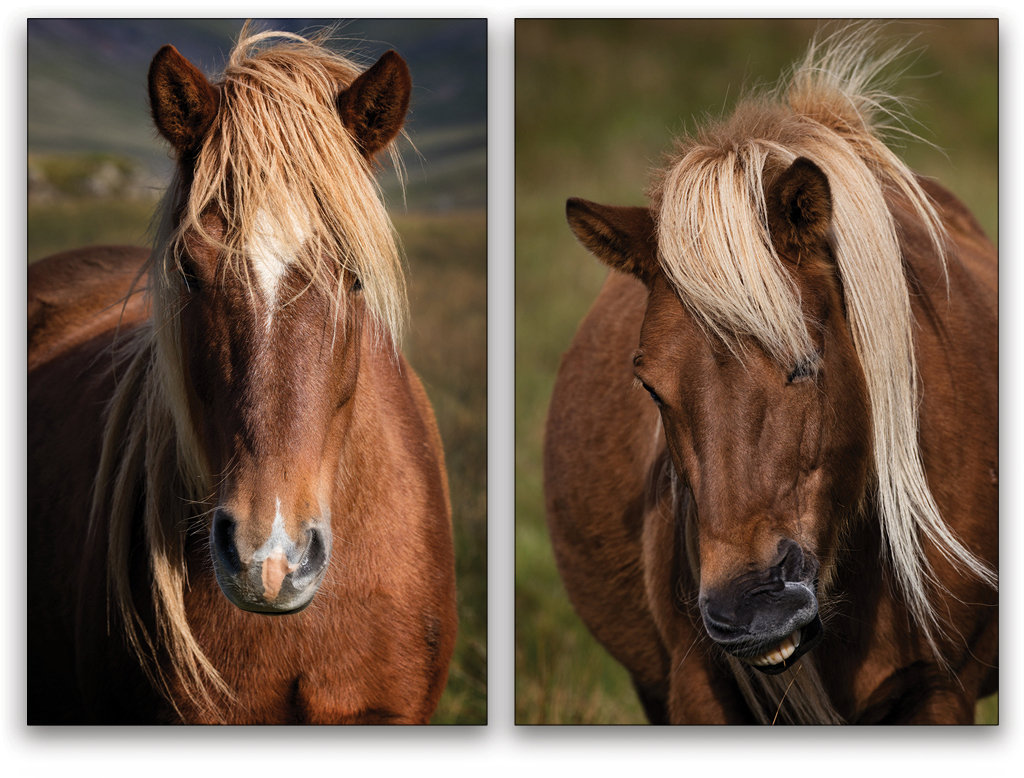
Check out these two images, taken with my 100–400mm IS lens set at 200mm. In the snapshot on the right, it looks as though the horse just sneezed—very unappealing. Now look at the portrait on the left. See how the horse’s mane frames its face. The difference between the two images is gesture. It’s key in horse photography, as well as in all wildlife and people photography.
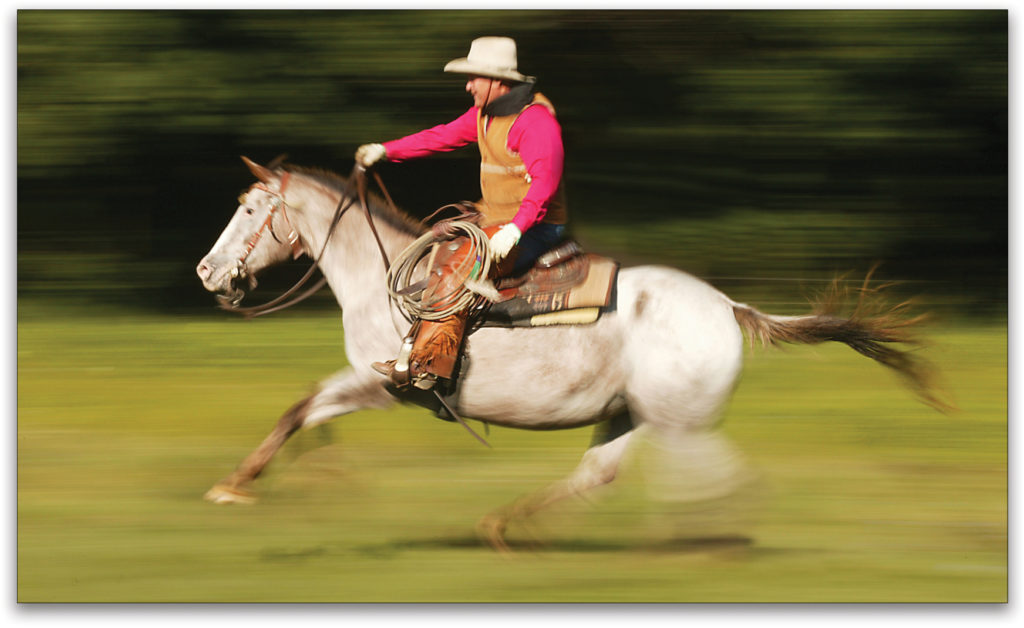
Timing
These two photographs illustrate the importance of timing in horse photography. For the photograph on the left, I timed my shot so that the sun was just peeking over the horizon. I used an aperture of f/22 to get the starburst effect. For the photograph on the right, I timed my shot to capture the peak of action. Here I set my camera to the highest frame rate to achieve that goal.
Panning
Panning, or streaking the background while the subject remains relatively sharp, adds a sense of motion to a still image. The basic concept is to set a slow shutter speed, hold your camera level, follow the subject as it moves to the position directly in front of you, shoot when the subject is at that point, and then continue to follow the subject—without stopping after you click the shutter.
To get a good panning shot, you need something very important: luck. To increase your luck, you’ll need the subject to make several runs. Also experiment with different slow shutter speeds, say from 1/30–1/5 second. The perfect shutter speed depends on how fast the subject is moving. If you’re a bit shaky, a tripod will help you get a sharper shot.
When it comes to focus, set your camera to focus tracking, which adjusts the focus right up to the moment of exposure so you get a sharp shot.
Double JJ Ranch, Michigan
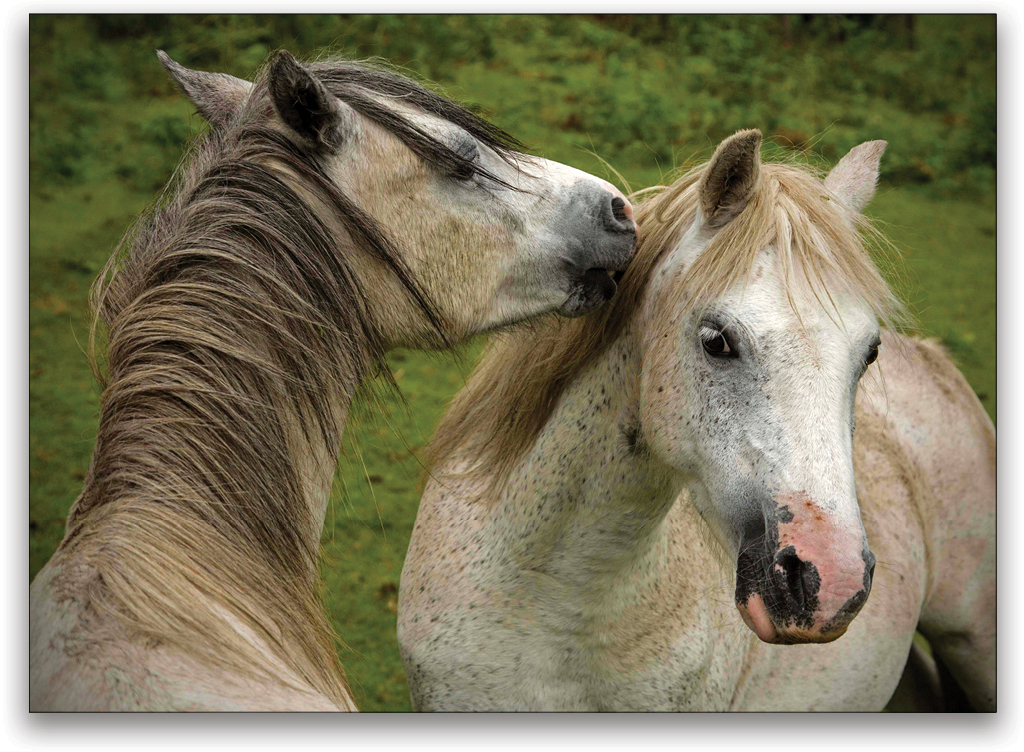
Behavior
Portraits can be pleasing, but behavior shots tell more of a story and are often more interesting. I took this photograph of white, wild horses in the Conwy Valley in North Wales. My main tip here is: Be ready to shoot, because you never know what will happen with horses. Also, be prepared with a telephoto zoom lens so you can get the shot without getting too close to the animals, which might frighten them away.
Reflections
Horses are usually found around water, and that makes for great reflection shots (see previous page). When composing for a reflection, be very careful not to cut off the top of the subject in the bottom of the frame. If you wear glasses, that’s easy to do if you shoot tight and don’t have your eye close to the viewfinder eyepiece. If you compose with a mirrorless camera or smart phone, checking your composition on the screen is easy.

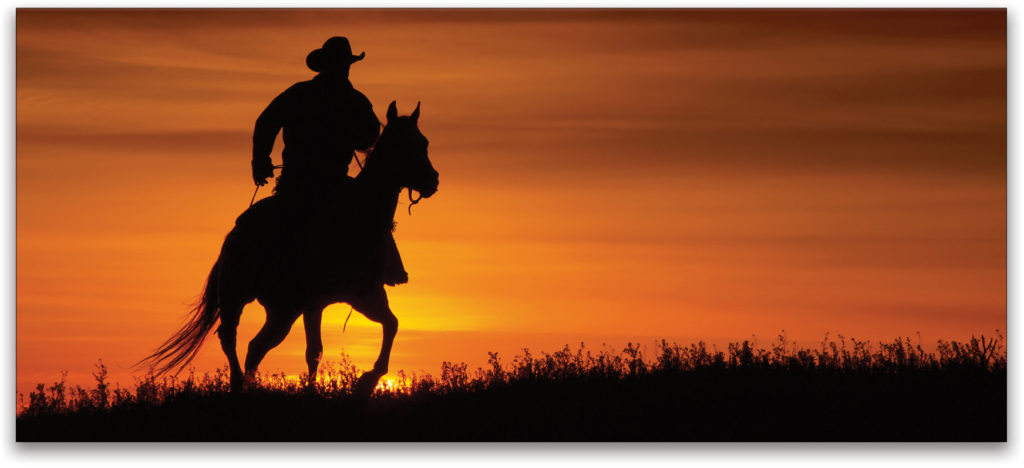
Silhouettes, Highlights, and Space
The photograph at the bottom of the previous page illustrates three important tips: (1) For a dramatic silhouette, be sure you set your exposure for the highlights (by checking your camera’s highlight alert) so they’re not overexposed in the scene. Also, slightly underexpose the scene for a more dramatic and more colorful silhouette. (2) Photograph the subject from the side, as opposed to it looking at you or coming toward you. Side-view silhouettes show more detail than straight-on silhouettes. (3) Leave space in the frame into which the horse can run. For this photograph, I used my 70–200mm lens set at 176mm.
Look for a Picture Within a Picture
Here’s a straight-out-the-camera Camargue horses image. I shot wide because I’ve learned from experience that there are often several pictures within a picture. For this image, I used my 100–400mm lens set at 320mm.
The numbers in the frame at the bottom of the page indicate the different picture possibilities, by way of simple cropping, that I found in the original image. The numbers indicate my first to last choice. If I could only pick one picture, it would be #1. What would be your choice?
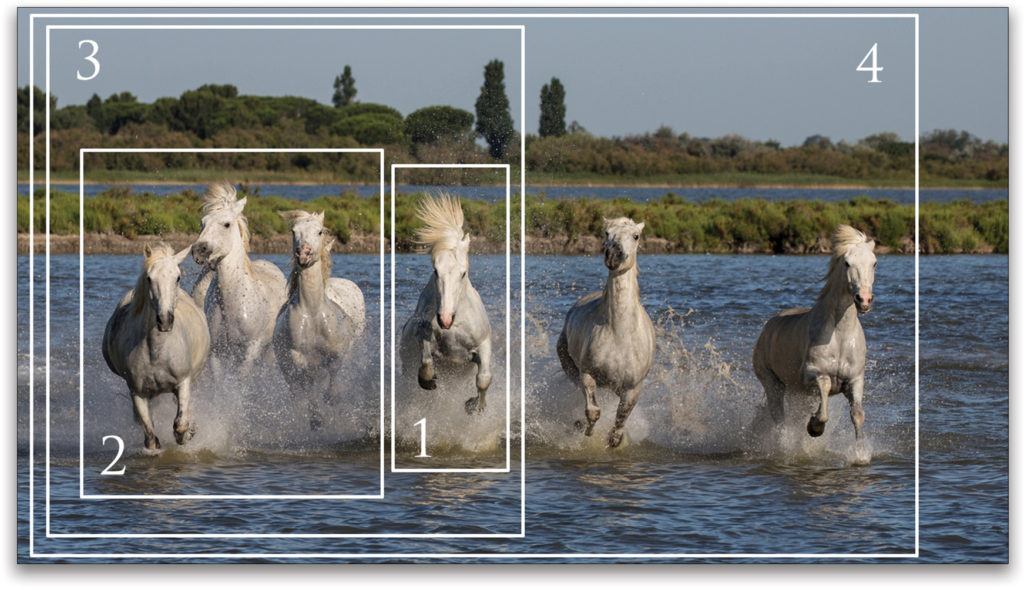
Quick Tip: Shoot at the lowest ISO so you get the cleanest (least amount of noise) possible picture. That way, you can make bigger enlargements from cropped areas of the file than if you had set a higher ISO.
Image Processing
This photograph of a Camargue horse is my all-time favorite horse action photograph, because it shows the beauty and power of the horse, which is isolated against a nice clean background. Here I used my 24mm–105mm lens set at 40mm.
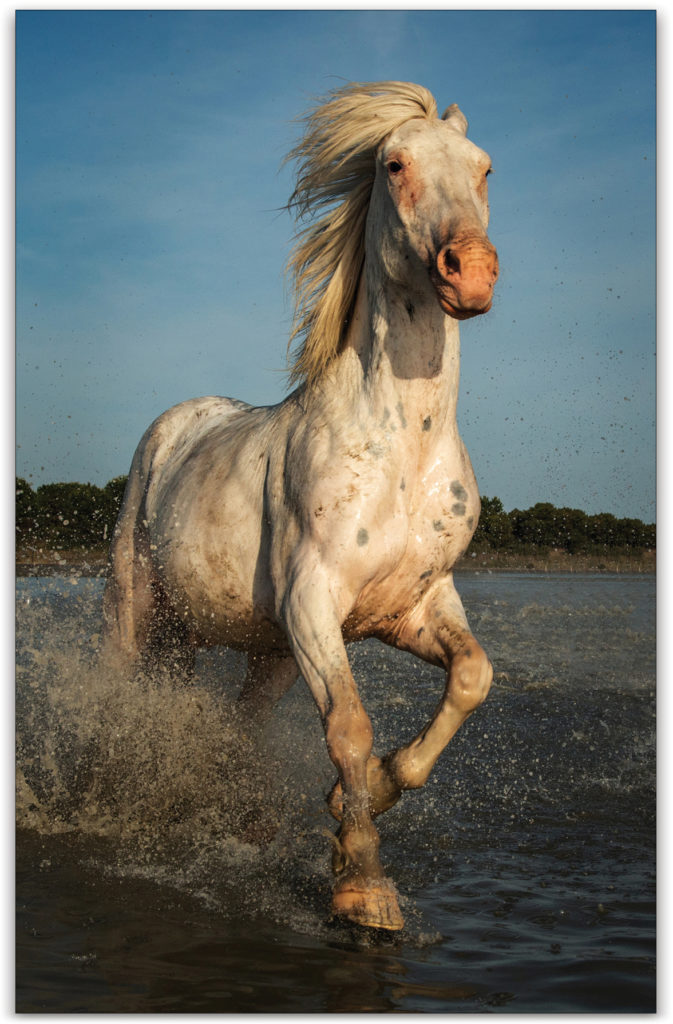
In a minute I’ll share the original image with you. For this end-result image, I cropped and straightened the image, selectively sharpened the horse just a bit (to make it stand out more in the frame), used a Radial Filter to slightly darken the edges (again to make the subject stand out in the frame), decreased the exposure a little (which resulted in a slightly darker image with slightly stronger colors), and finally I boosted the contrast (because the original RAW file, taken on a slightly overcast day, was a bit flat).
As you’ll see, it’s not hard to turn a snapshot (my original image) into a great shot, if you envision the end-result in camera and in Lightroom or Photoshop.
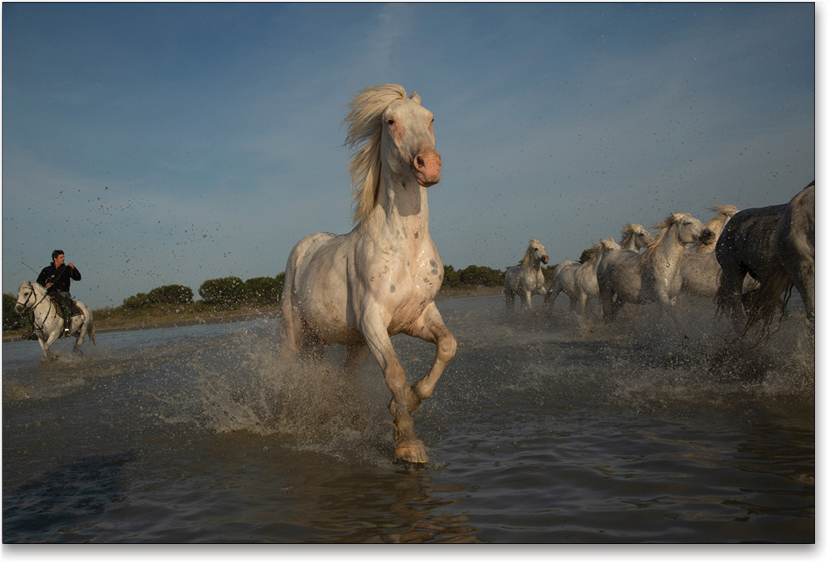
Below right you’ll see the original shot from which I made my favorite horse action shot. Like the opening image for this article, it’s the result of planning.
Here’s the story: I was standing in the water, along with 10 other photo workshop participants, while the local “cowboys” drove the horses toward us. What I had in mind was a shot of a single horse that, as I mentioned, showed the power and beauty of the horse.
To create that sense of power, I held my camera down low to the water. I set the zoom to 40mm (for a fairly wide view), the manual focus to about 10′ (where, after two previous runs, I knew the horse would be), selected a small aperture (for good depth of field), and set my camera to the highest frame rate (which increased my chances of getting the shot). As the horses approached, I started clicking, hoping that at least one horse would be separated in the scene. Hard work, and luck, worked together for the shot.
Speaking of separation, check out the photograph earlier in this article where you can see nine horse heads separated. When photographing multiple horses, look for separation and hope for luck!
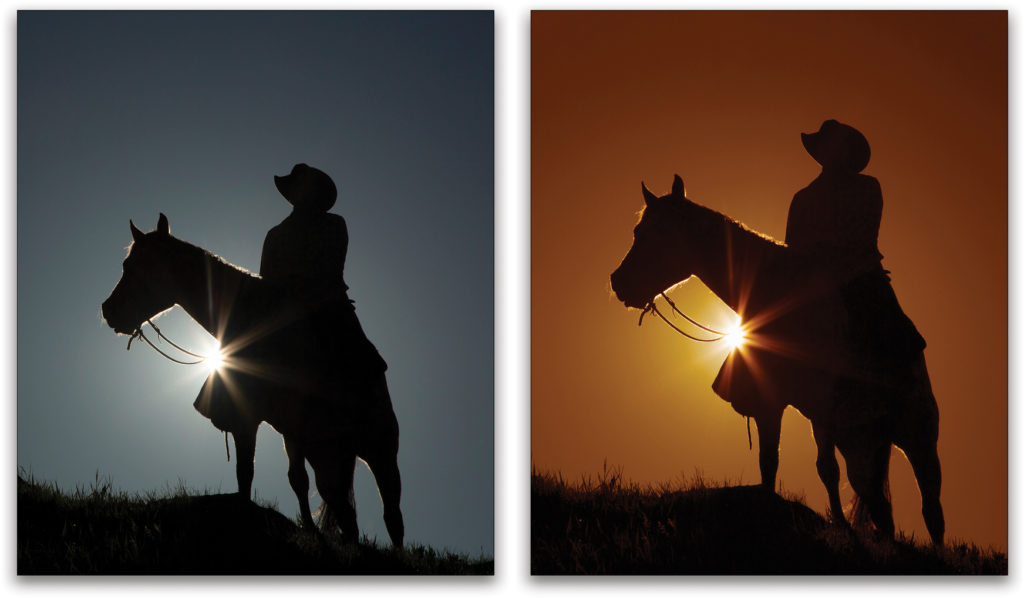
Above is another example of creative image processing. On the left is my original image, which shows that we had a lackluster sunset. On the right I simply added an orange Graduated Filter in Lightroom for an image that illustrates a beautiful sunset on a hilltop in the Old West.
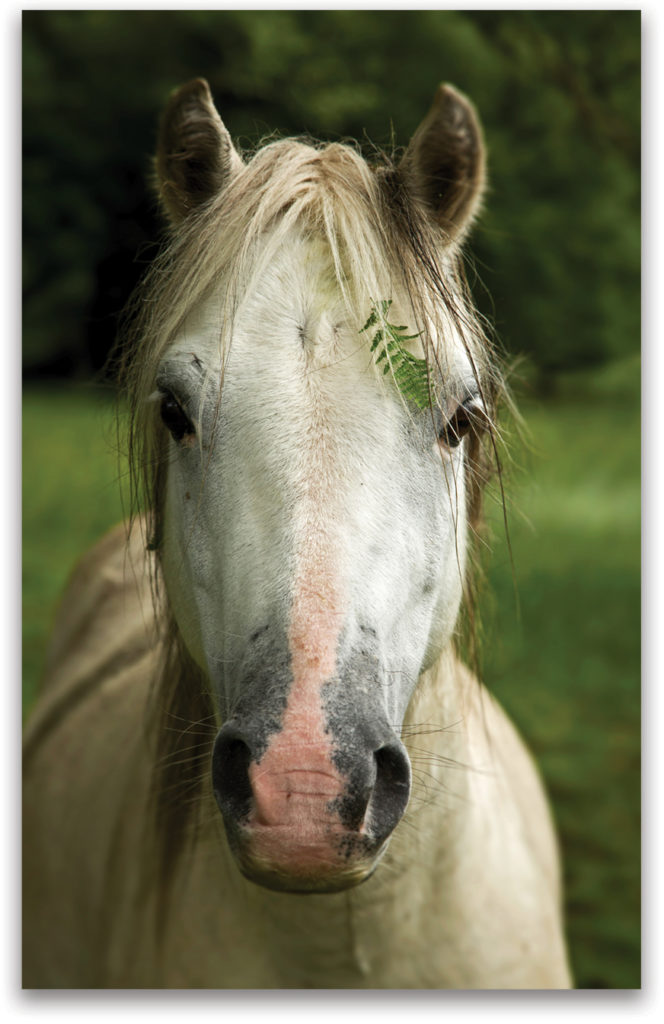
Portraits
Earlier in this article, I said that behavior photographs are usually more interesting than portraits. Portraits, however, can be striking, too. So before I ride off into the sunset, I’d like to share with you my favorite horse portrait, taken in the Conwy Valley in North Wales. What I like about this photograph is conveyed in these two tips: (1) Photograph eye-to-eye, so the viewer of the photograph can relate more to the subject than if you photographed from above or below eye level. (2) Blur the background to make the subject stand out in the scene, accomplished here by using a telephoto lens and a wide aperture.
“Happy trails!” That’s how cowboy Roy Rogers ended each episode his 1950s TV series, so I thought it would be a good ending for this article.
All images by Rick Sammon. This article originally published in Issue 53 of Lightroom Magazine.