
Let’s think of mockups as content placeholders. They allow us to place our content on a given template and Photoshop automatically makes adjustments to it to match the template. The applications of mockups are limitless, from e-commerce (such as selling T-shirts, mugs, mobile cases, etc.) to creating powerful templates for your social media.
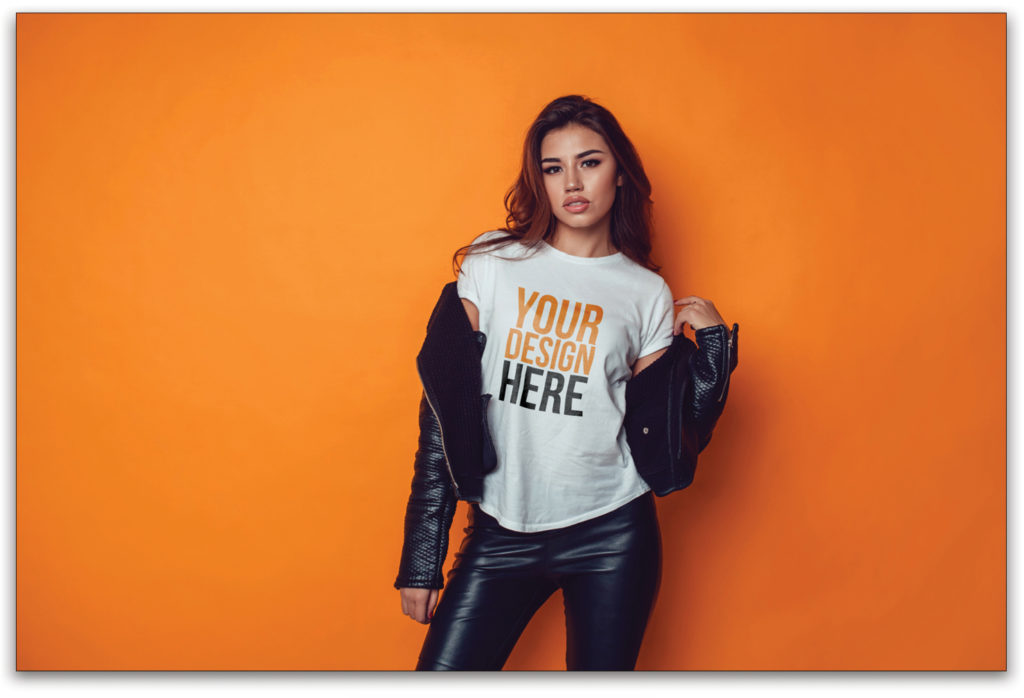
In this article, we’ll create a mockup for a white T-shirt. After creating the file, you’ll be able to drag-and-drop any design on the T-shirt, and the effects to make it look realistic will be applied automatically. So, without any further ado, let’s get started!
Step One: Open the Image
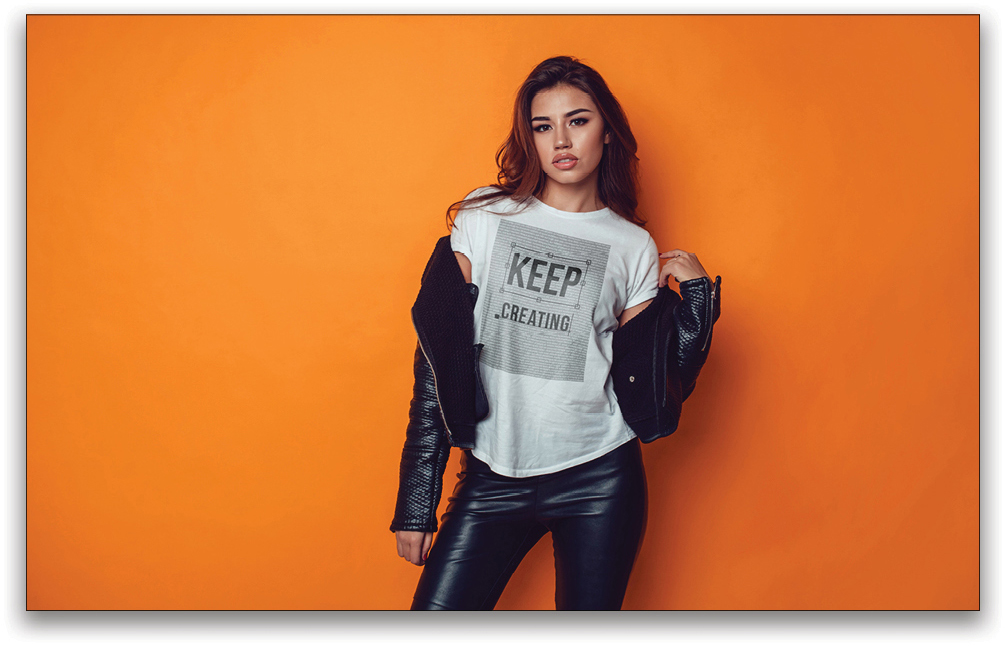
Let’s open the image of the subject into Photoshop, as this is where we’ll be placing the design. (If needed, you can make changes in Lightroom or Camera Raw first.) For this technique, use anything with a white surface (like the T-shirt in the image we’re using here). The technique might be slightly different if the surface is black or any other color; however, the concept of placing designs will remain the same.

If you want to follow along with the photo used here, you may download the JPEG preview for free or license the full-resolution version from Adobe Stock by clicking here. After logging in with your Adobe ID and clicking Save to Library to download the file, you can double-click the image in the Libraries panel (Window>Libraries) to open it.
If you’re using one of your own images, go to File>Open, locate your image, and then click Open. Or, while Photoshop is open in Application Frame, go to Finder (PC: Explorer), locate your image, and drag-and-drop it into Photoshop.
(Note: If you wish to work with materials on any color other than white, please refer to this article. You can use any technique you want, but make sure you work with smart objects and a design placeholder layer.)
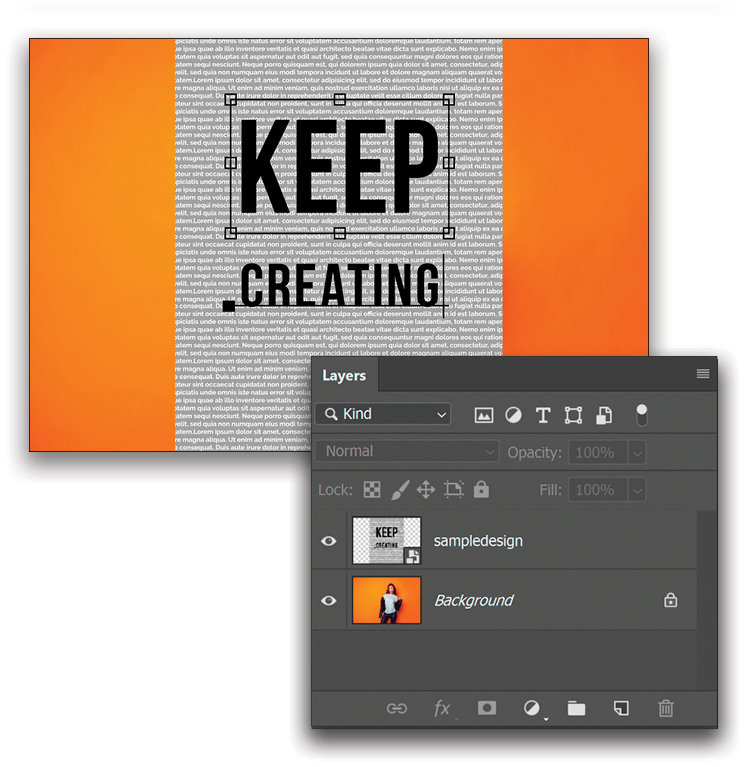
Step Two: Place the Sample Design
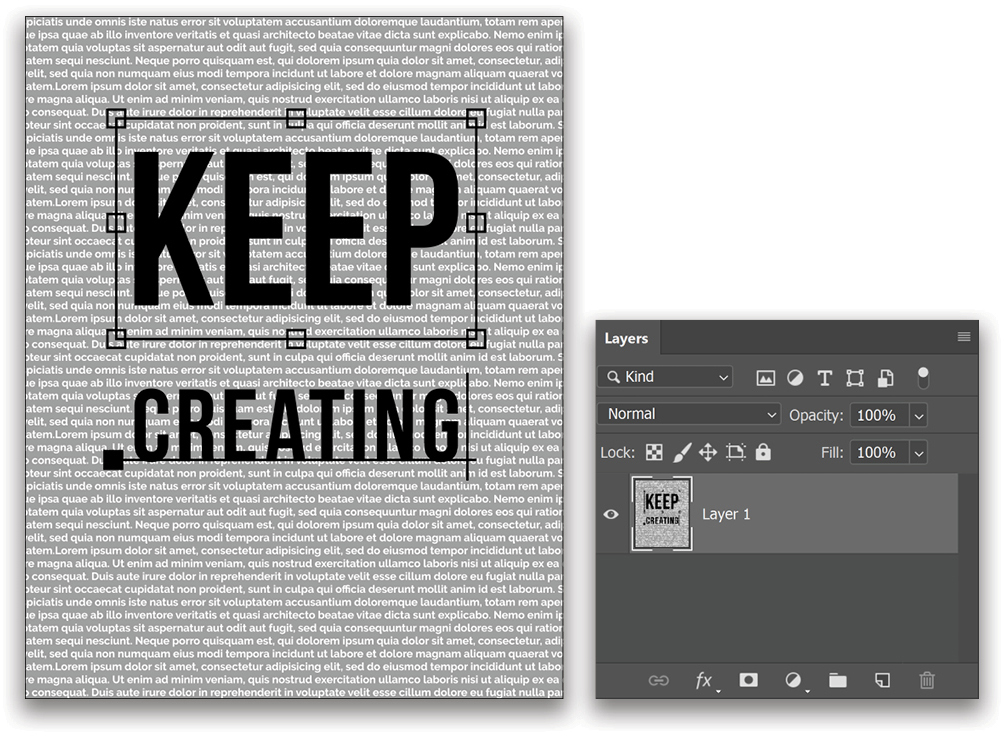
Download the sample design I created for this tutorial here or by visiting kelbyone.com/magazine. You can also use your own sample design, but make sure that the design covers the entire placeholder area you want to establish on the T-shirt. Keep in mind that this is just a sample design to save the adjustments.
Go to File>Place Embedded. Locate the design and click the Place button. Then, press Enter. Note: Make sure the sample design layer is a smart object: There should be a small symbol at the bottom-right of the layer thumbnail. If it isn’t a smart object, go to Filter>Convert for Smart Filters.
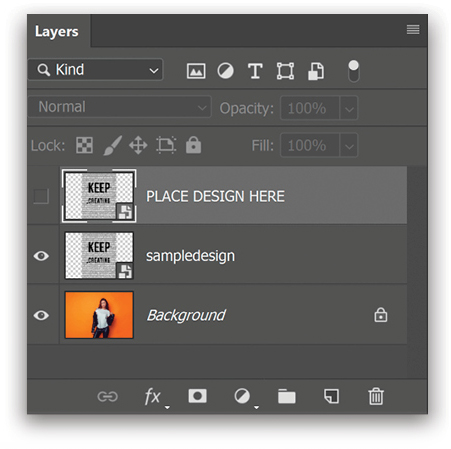
Step Three: Create a Design Placeholder
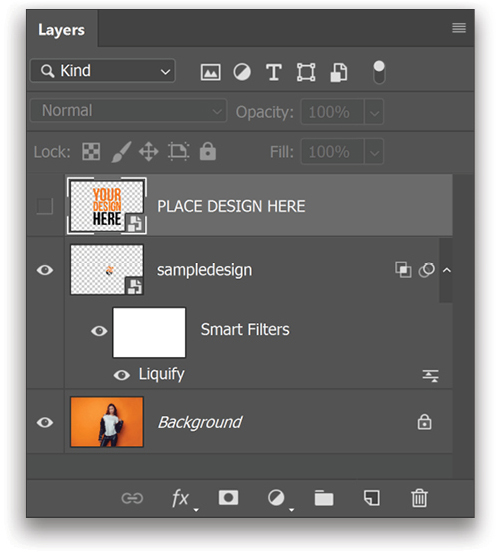
With the sampledesign layer selected, press Command-J (PC: Ctrl-J) to make a duplicate layer and name it “PLACE DESIGN HERE” (double-click on the layer name, type in the new name, and press Enter). Then, click on the Eye icon next to the layer’s thumbnail to turn off this layer. Later, we’ll use this layer to replace the design with anything we wish.
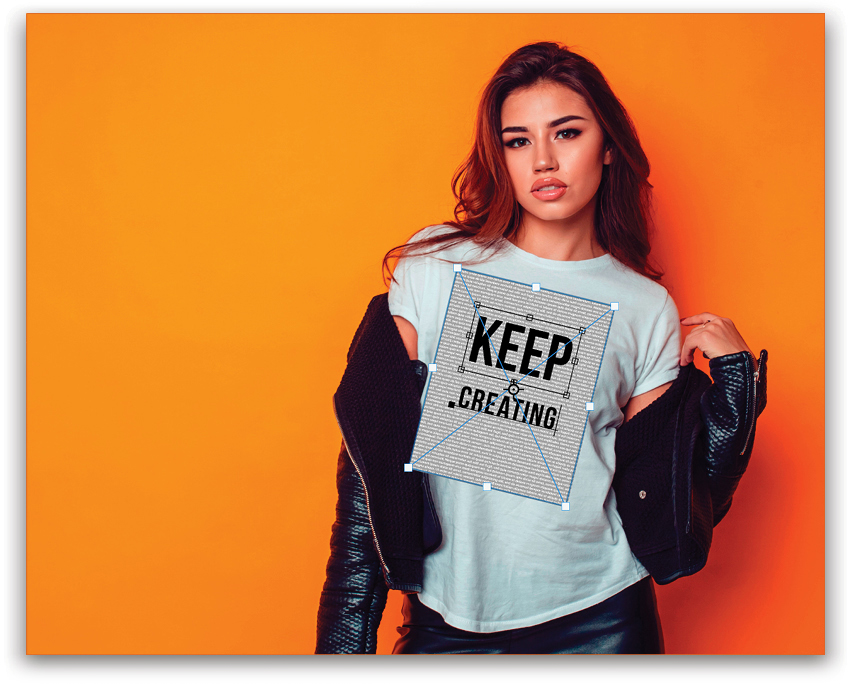
Step Four: Resize and Adjust the Design
Click on the sampledesign layer to make it active, and then press Command-T (PC: Ctrl-T) to enable Free Transform. Rotate and resize the design as you want it on the T-shirt. Once you’re satisfied, press Enter.
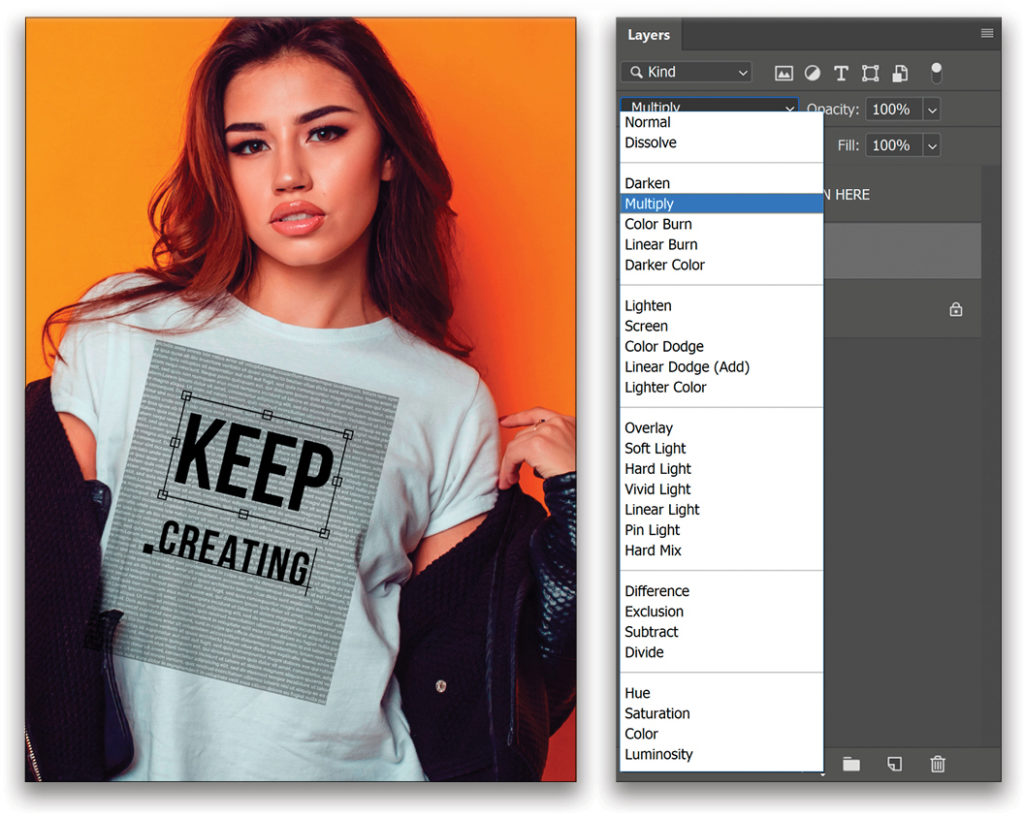
Step Five: Change the Blend Mode
As the T-shirt is white, the white areas of the design just won’t print. Also, the only thing that the design will do to the T-shirt is darken it. Why? Because the T-shirt is already white, and there’s nothing brighter than white!
So, what’s the blend mode that darkens and hides the whites? Multiply! Click on the blend mode menu in the Layers panel and change the blend mode of the sampledesign layer to Multiply. This also helps to hide the design where it went over her jacket because the jacket is darker than the design.
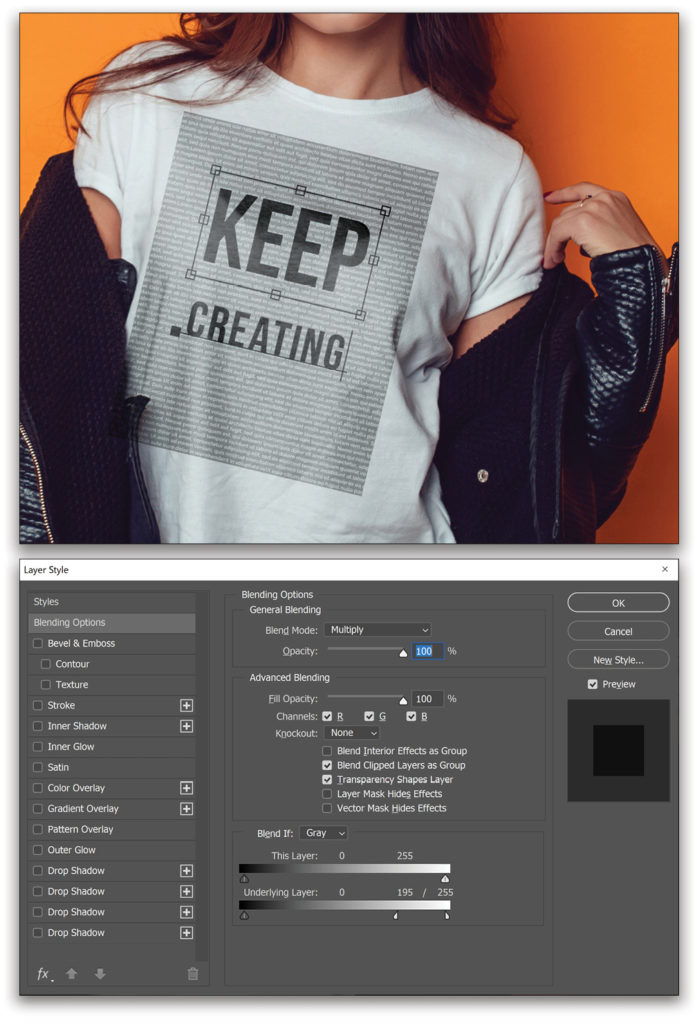
Step Six: The Magic of Blend If
Right-click on the sampledesign layer and select Blending Options. In the Blend If section at the bottom, drag the white Underlying Layer slider to the left. You’ll notice that the transition looks very harsh, so Option-click (PC: Alt-click) on the white Underlying Layer slider to split it and drag the two halves (as shown). In this example, the positions of the two halves are 195 and 255. Click OK once the design looks natural and realistic.
Step Seven: Apply Liquify
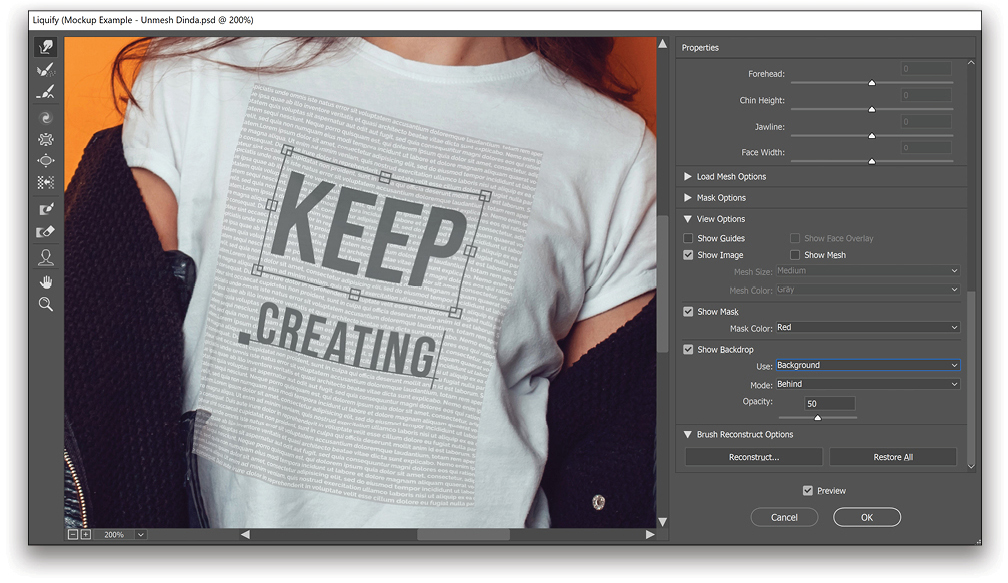
The design looks like it’s on the T-shirt, but it doesn’t curve with the folds. To manually add these folds, let’s use Liquify: Go to Filter>Liquify.
In the Liquify Properties dialog on the right, scroll down and check Show Backdrop. Set the Use menu to Background, and the Mode menu to Behind. Decrease the Opacity enough so that you can see the creases of the T-shirt. In this case, we’ve set Opacity to 50, but change this as you’re working on the image.
Select the Forward Warp Tool (W) and simply nudge the design to match the folds in the T-shirt. Click OK when it looks good.
Step Eight: Save the File
Congratulations! The mockup file is now ready. Save the document as a PSD by going to File>Save As. Let’s save it as “white_tshirt_mockup” and set the Format type to PSD. Click Save. Close the document, as you may wish to use it later.
APPLYING THE MOCKUP TO ANY DESIGN
Step One: Open the Mockup File
Open the white_tshirt_mockup.psd that we created in the previous steps by going to File>Open and locating the file.
Step Two: Open the Smart Object
Double-click on the thumbnail of the PLACE DESIGN HERE layer. A new document will open.
Step Three: Replace the Smart Object Content
You can now replace the design with anything, whether it’s simple text or a complex design. For this example, I just used the Type tool (T) and typed: YOUR DESIGN HERE.
Go to File>Save and close the current document. Go back to the white_tshirt_mockup.psd document, and you’ll see that the design is now updated. It’s as simple as that!
This technique allows a smart object to be replaced without affecting the filters applied to it. Although this was a simple example, you can use multiple copies of the smart object to make complex mockups with many more layers. Even then, by just replacing the contents of the design placeholder layer, every layer will be updated automatically.
This article originally published in the October, 2019 issue of Photoshop User magazine.


