
Photoshop includes a lot of pattern presets, though it’s surprisingly simple to create your own. You can create a pattern from just about anything that lives on a single layer: an isolated object in a photo, a brushstroke, a shape, and so on. In this column, you’ll learn how to make a custom pattern out of a leaf.
Step One: Open the image or document that contains the item from which you want to create a pattern preset, like the fall-colored leaf shown here. To download the water-marked JPEG preview of this Adobe Stock image directly to your Libraries panel (Window>Libraries), click on the link for
the image below. When the Adobe Stock web page opens, make sure you’re logged in to your Adobe account, then to the right of the image, you’ll see the option to Save Preview to My Library (you can click on My Library to select a different library or download option). Click on the cloud-with-an-arrow icon, and the preview image will automatically be downloaded to your Libraries panel in Photoshop. Double-click the file in the Libraries panel to open it in Photoshop.
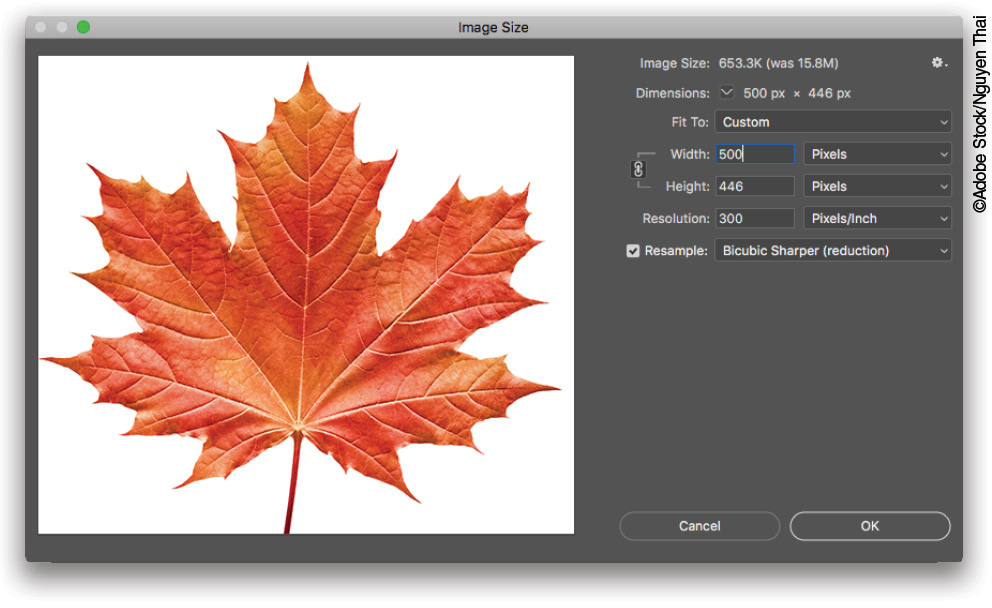
Let’s make the leaf a bit smaller by choosing Image>Image Size. In the dialog that opens, turn on Resample, set the menus on the right to Pixels, and enter 500 into the Width field. Click OK.
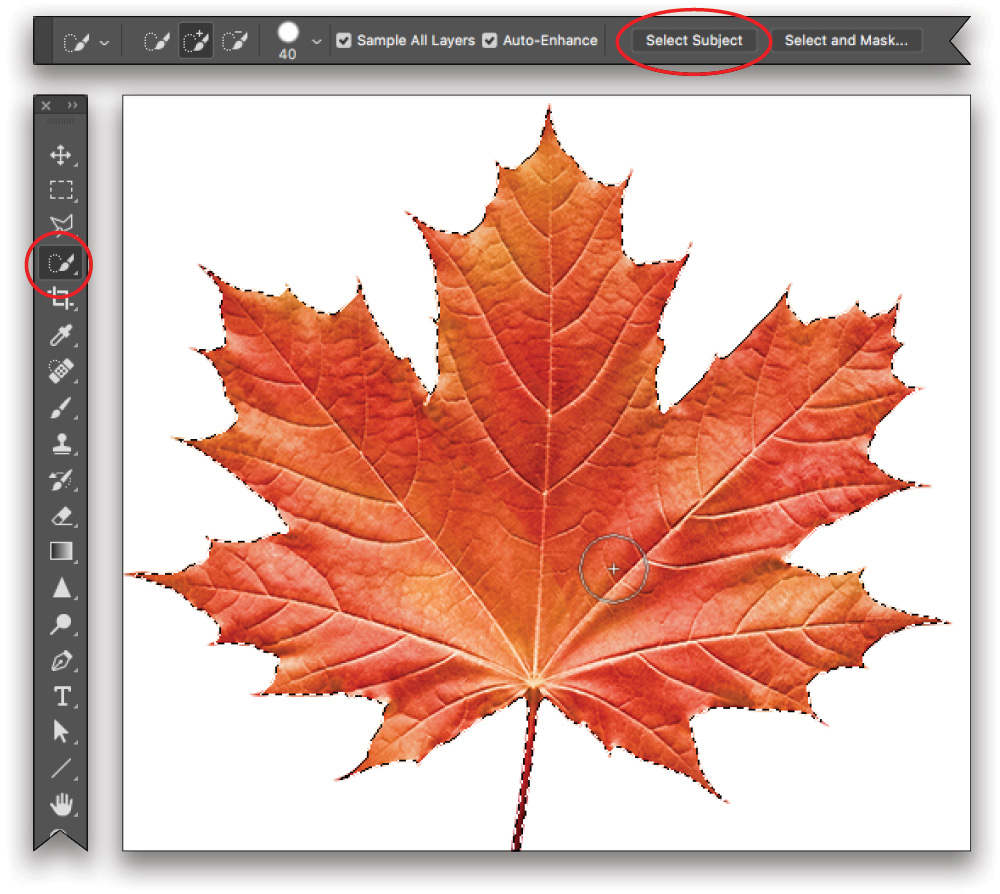
Step Two: If you want the pattern to have a transparent background, you need to hide the background with a layer mask. Press W to grab the Quick Selection tool (circled); you can press Shift-W to toggle between the Quick Selection tool and the Magic Wand. In the Options Bar, click Select Subject (also circled) and Photoshop magically selects the leaf. This trick works well because the leaf has high contrast edges on a white background. If it doesn’t work on your image, use the Quick Selection tool to drag across an object to select it. Be sure to vary brush size according to the size of the area you’re trying to select. (If you’re creating a seamless pattern—one that repeats or tiles with no apparent seams—you don’t have to hide the background.)
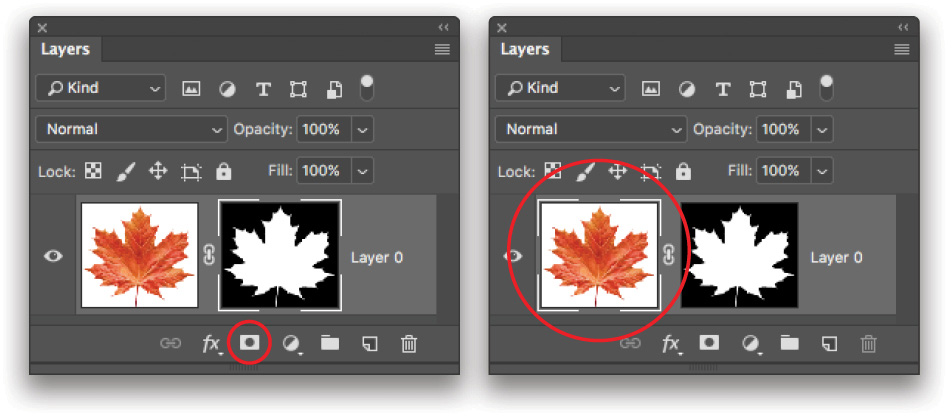
Step Three: Add a layer mask by clicking the circle-within-a-square icon at the bottom of the Layers panel.
Tip: The space between the pattern when it repeats is determined by how much space there is between the object and the document’s edges. In this example, there won’t be much space between leaves when you apply the pattern because the leaf’s edge is next to the document edges. If that’s okay with you—it is in this case—you don’t have to create a selection in order to create a pattern. If you want to tweak the amount of space between objects in your pattern, grab the Rectangular Marquee tool by pressing M. If you want some space between the leaves when they repeat, make your selection larger than the leaf. You could also add space around the leaf by increasing the canvas size (Image> Canvas Size).
Step Four: When you create a layer mask, Photoshop automatically activates the mask instead of the image. To activate the leaf image, click the leaf thumbnail in the Layers panel (circled here). The thin white border around the thumbnail lets you know which part of the layer is active—the leaf or the mask.
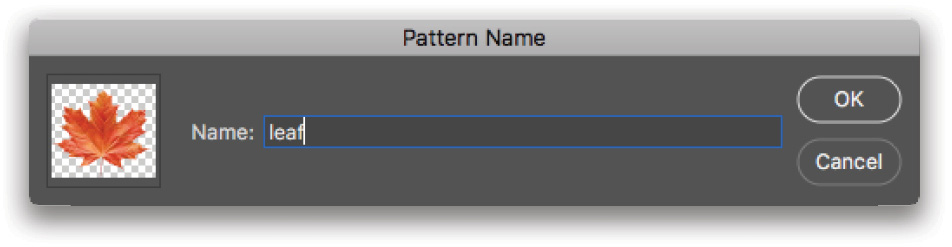
Step Five: With the leaf thumbnail active, choose Edit>Define Pattern. In the dialog that opens, enter a meaningful name, and click OK. Photoshop adds it to the list of pattern presets available in the Fill dialog (Edit>Fill) and in a Pattern fill layer (Layer>New Fill Layer>Pattern. (If you didn’t activate the leaf thumbnail in the previous step, the Define Pattern command will be dimmed in the Edit menu.)
Step Six: Choose File>Save As and, in the resulting dialog, give the document a name, for example, “leaf pattern,” and pick Photoshop from the Format drop-down menu. Click Save. This saves the document so you can edit the pattern later (if, say, the object in the pattern needs to be a different size or if it needs more or less space around it).

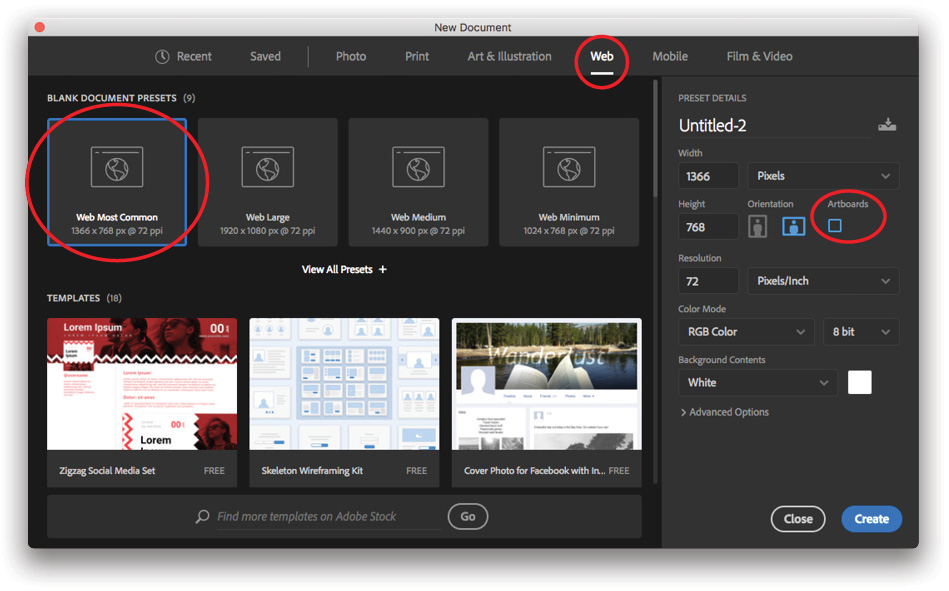
Step Seven: Create a new document where you can apply the pattern by choosing File>New. In the dialog that opens, choose the Web category and click the Web Most Common preset. Turn off the Artboards checkbox, and click Create.
Step Eight: Add a new layer by clicking the Create a New Layer icon at the bottom of the Layers panel.

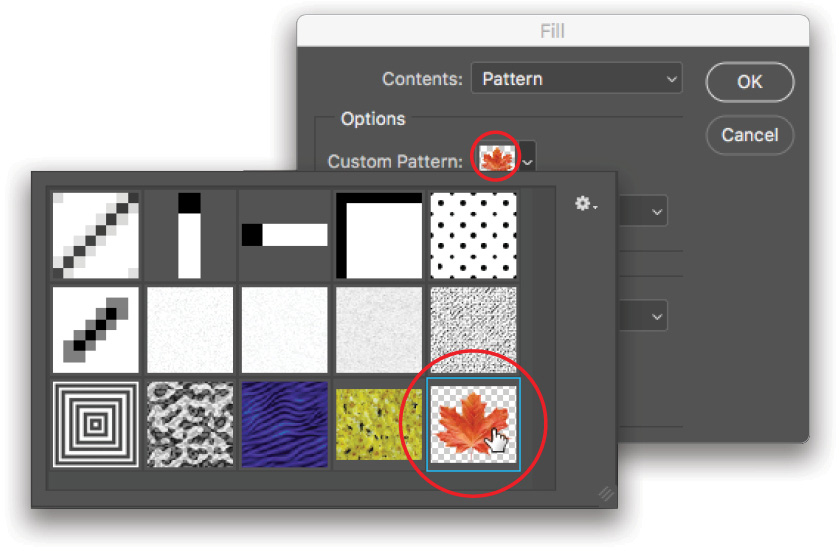
Step Nine: Choose Edit>Fill, and in the dialog that opens, choose Pattern in the Contents drop-down menu. Click the preview next to Custom Pattern, and in the Pattern Picker that opens, pick the pattern preset you created earlier. Click somewhere else in the dialog to close the Picker. If you did nothing else in this dialog but clicked OK, Photoshop would repeat the leaf in a grid-like pattern, spaced according to how much empty space you had around the object when you defined it as a pattern. Don’t click OK yet, however—hold your horses and proceed to the next step for something much more creative.
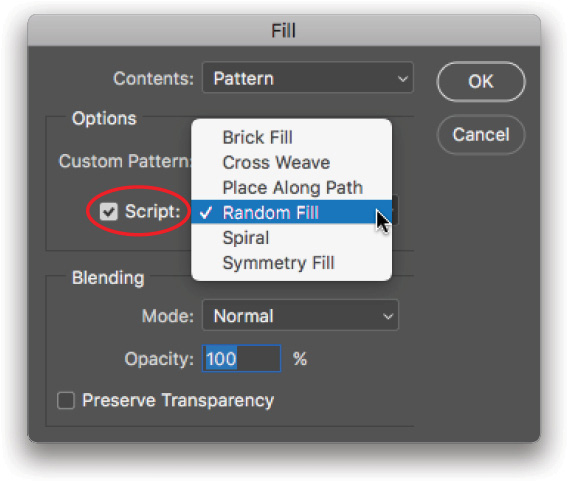
Step 10: In the Fill dialog, turn on the Script checkbox, which lets you create patterns that are random in shape, color, size, and position (Photoshop uses JavaScript to get it done). Click to open the menu to the right of the checkbox and choose one of the six built-in scripts (Brick Fill, Cross Weave, Place Along Path, Random Fill, Spiral, and Symmetry Fill). For example, choosing Brick Fill makes Photoshop offset the pattern every second row by half the pattern’s width, and introduces a variety of colors based on the original pattern’s color. For this example, choose Random Fill and click OK.
Step 11: The next dialog lets you customize the pattern. The Density slider controls the number of repeated objects—drag it left for fewer or right for more. The Minimum and Maximum Scale Factor sliders control the smallest and largest objects’ sizes, respectively. The Rotate Pattern setting does just what you’d think: it rotates the object(s) in the pattern. The last two sliders let you control how much color or brightness shift Photoshop applies to the objects; by setting them both to 0, you get no shifts in color
or brightness.

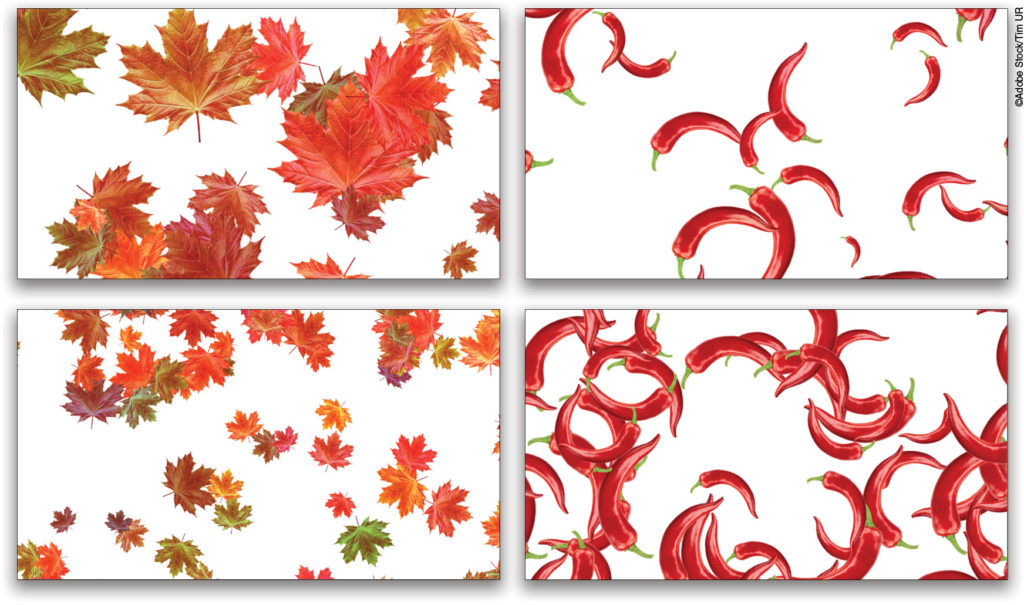
Step 12: You’ll get a different pattern each time you run the Fill command, so no two patterns will be the same. Above are a few examples, including one using a chili pepper. As you can see, this technique is a great way to create backgrounds for design projects.
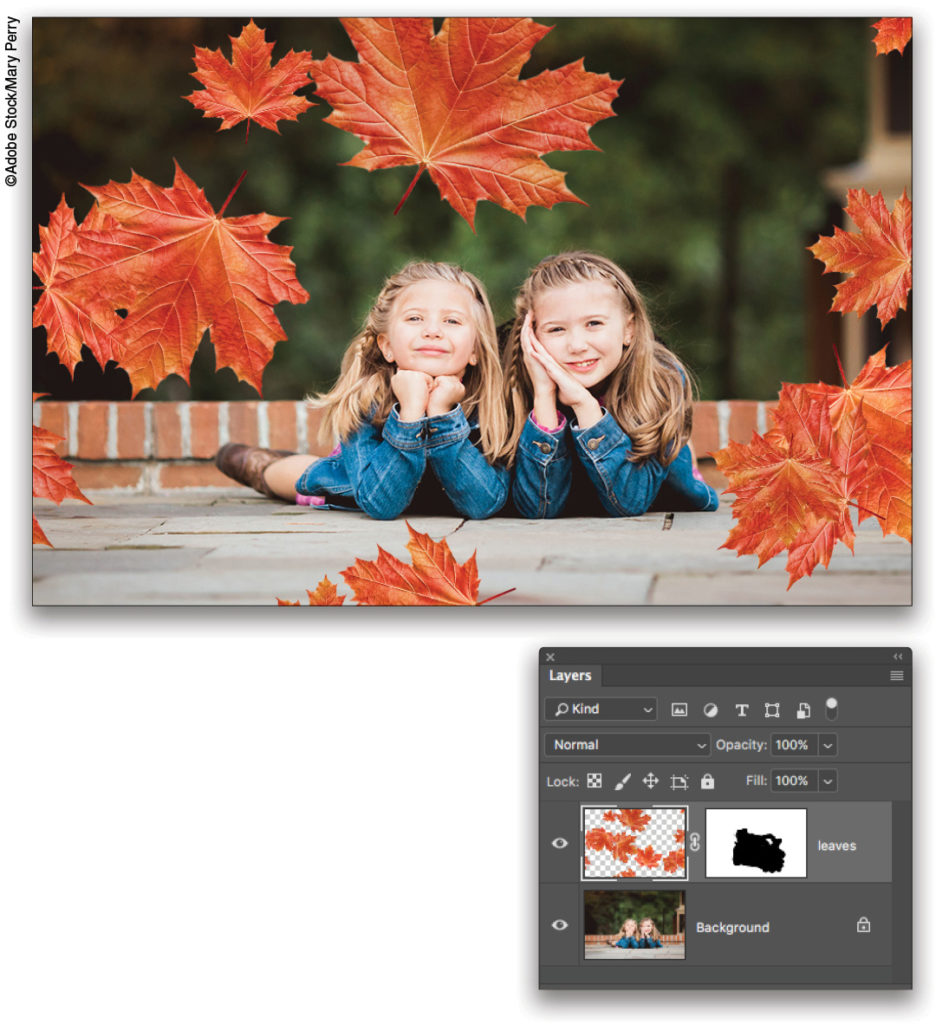
Step 13: And since you (wisely) created a pattern with a transparent background, you can even overlay a pattern onto a photo. Simply open a photo, create a new layer, and use the Fill command as described in this tutorial. Here’s an example. Note that I masked out the pattern where it appeared over the girls.
As you can see, there’s no end to the interesting backgrounds and textures you can create with scripted patterns! You can also experiment with regular fills using the Fill command or a Pattern fill layer (Layer>New Fill Layer>Pattern). Until next time, may the creative force be with you all!


