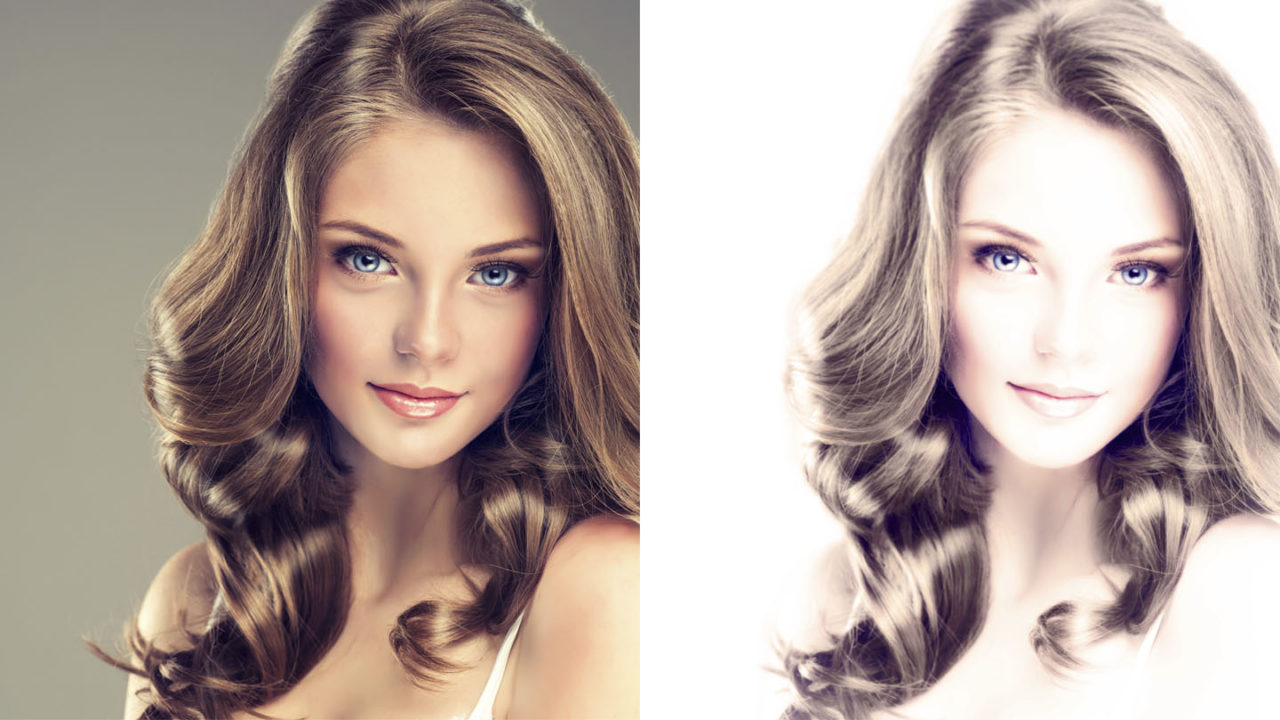
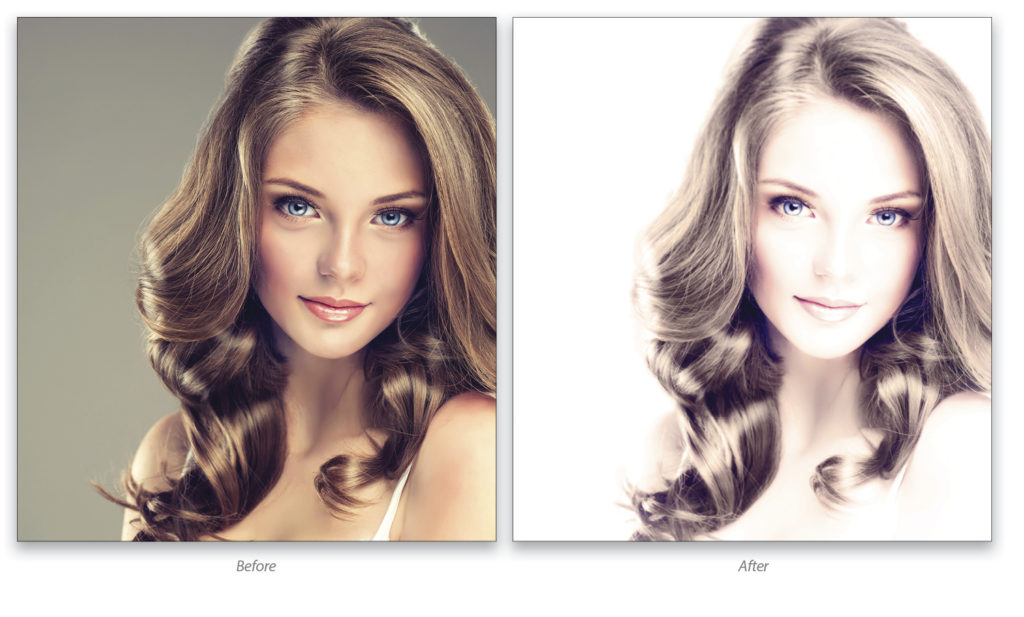
On the flipside of creating images that are tack sharp is the idea of embracing the beauty of a softer focus. Instead of being dismissed as a technical flaw, soft-focus projects can have a romantic, dreamy look. This idea matches well with a high-key approach that’s common in glamour photography. While this is typically accomplished in-camera, it can also be simulated easily in Photoshop with a variety of techniques. This tutorial steps through several techniques that individually can produce a soft-focus effect, but when used together they create a beautiful result that can be quite stunning!
Step One:
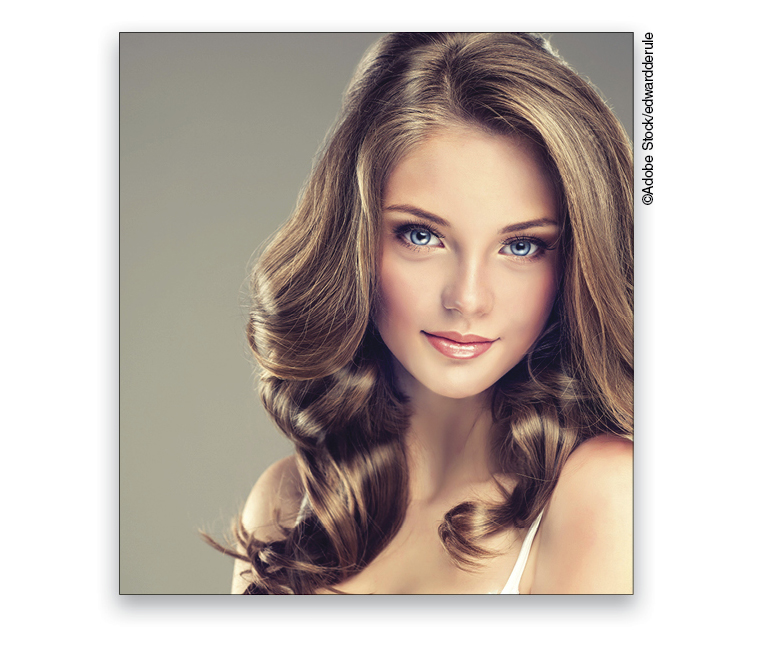
The real success of this technique fundamentally lies with the initial image selection. Ideally, the image should be a portrait with strong midtones and a solid color background. Bright, detailed eyes will also benefit greatly from this process. Here we’ve selected this gorgeous shot of a model. Her eyes are vibrant and clear, the image is well exposed, and the background is free of distractions.
[KelbyOne members may download the file used in this tutorial at http://kelbyone.com/magazine. All files are for personal use only.]
Step Two:
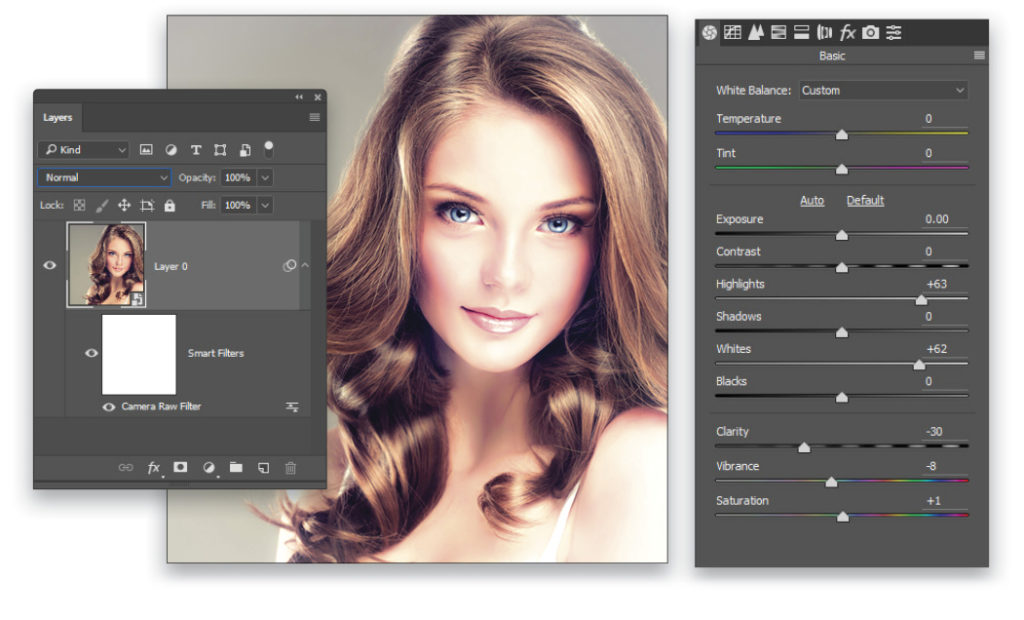
Turn the Background layer into a smart object with Layer>Smart Objects>Convert to Smart Object. Then, go to Filter>Camera Raw Filter. In the Basic tab, set the Clarity to –30. The negative value will begin to soften the image and desaturate the colors slightly. Then, pump up both the Highlights and Whites to around +63 to lay the foundation for the high-key effect. We also lowered the Vibrance to –8 and set Saturation to +1. Click the OK button to close the Camera Raw dialog.
Step Three:
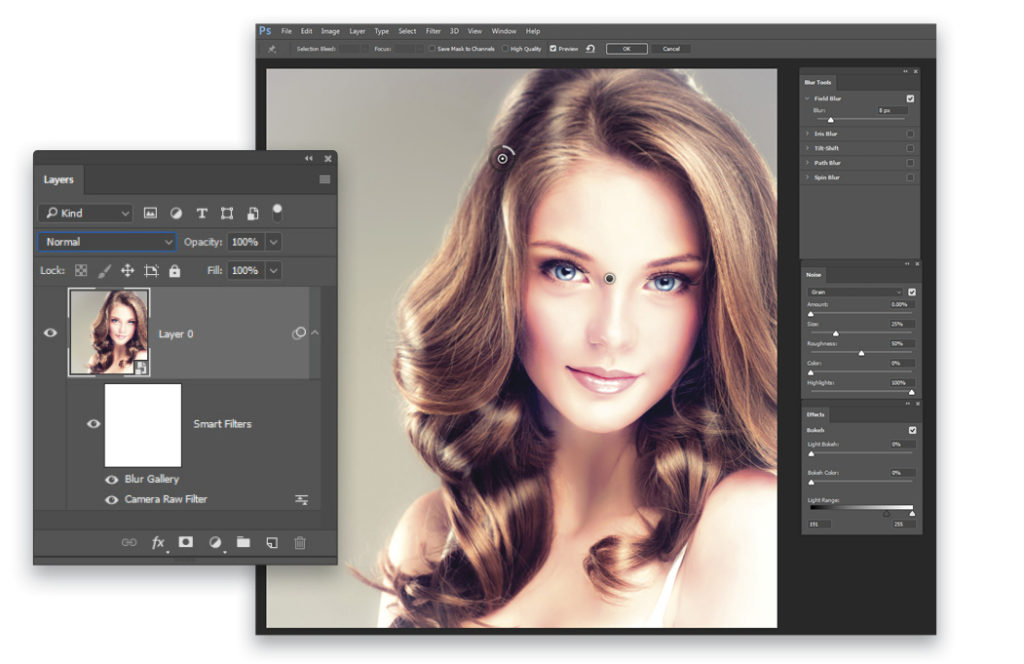
To further the softening effect, go to Filter>Blur Gallery>Field Blur. Click-and-drag the blur point directly between the model’s eyes and set the Blur to 3 px in the Blur Tools panel. Then click to place a second blur point at the edge of her hair and set that amount to 8 px. (Note: For the low-res practice file, use Blur settings of 1 and 3 pixels, respectively.) Then click the OK button in the Options Bar to apply the blur effect.
Step Four:
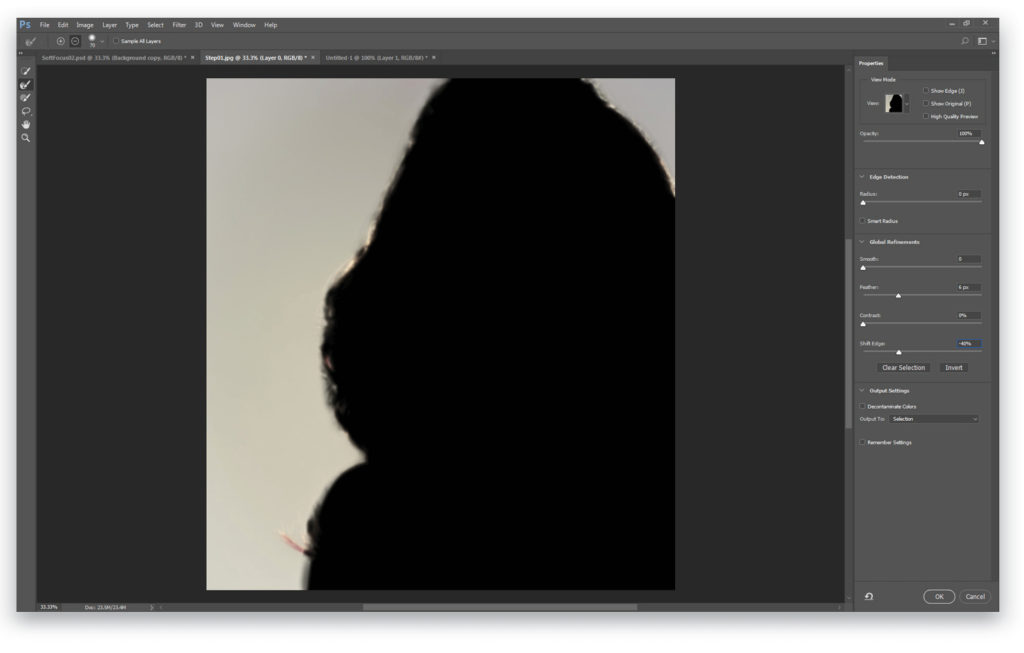
Use the Quick Selection tool (W) to select the background area, including the area in the top-right corner. Just drag over the background and the tool will create a large selection of that area. If the tool selects too much of the hair or any of the shoulder area, hold down the Option (PC: Alt) key and drag there to deselect those areas. Click the Select and Mask button in the Options Bar. In the Properties panel, set the View to On Black (A) and the Opacity to 100%. Use the Refine Edge Brush tool (R) to refine the edges of the selection. Set the Feather to 6 px and the Shift Edge to –40%. Then click OK to create the selection (Note: For the low-res practice file, use settings of 3 px and –20%, respectively.)
Step Five:
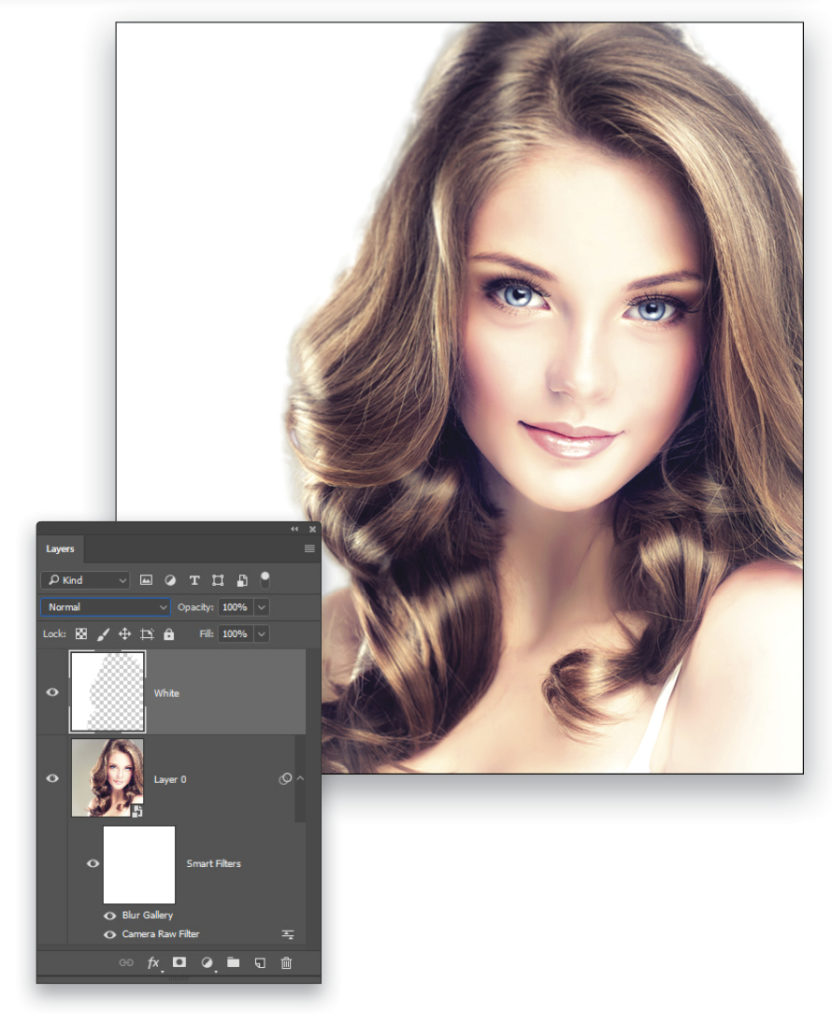
Add a new layer with Layer>New>Layer (or press Shift-Command-N [PC: Shift-Ctrl-N]), name it “White” in the New Layer dialog, and click OK. Tap the D key to set the colors to their default of black and white, and tap the X key to switch the colors so the Foreground color is white. Then fill the selection by holding down the Option (PC: Alt) key and pressing the Delete (PC: Backspace) key. Cancel the selection with Select>Deselect.
Step Six:
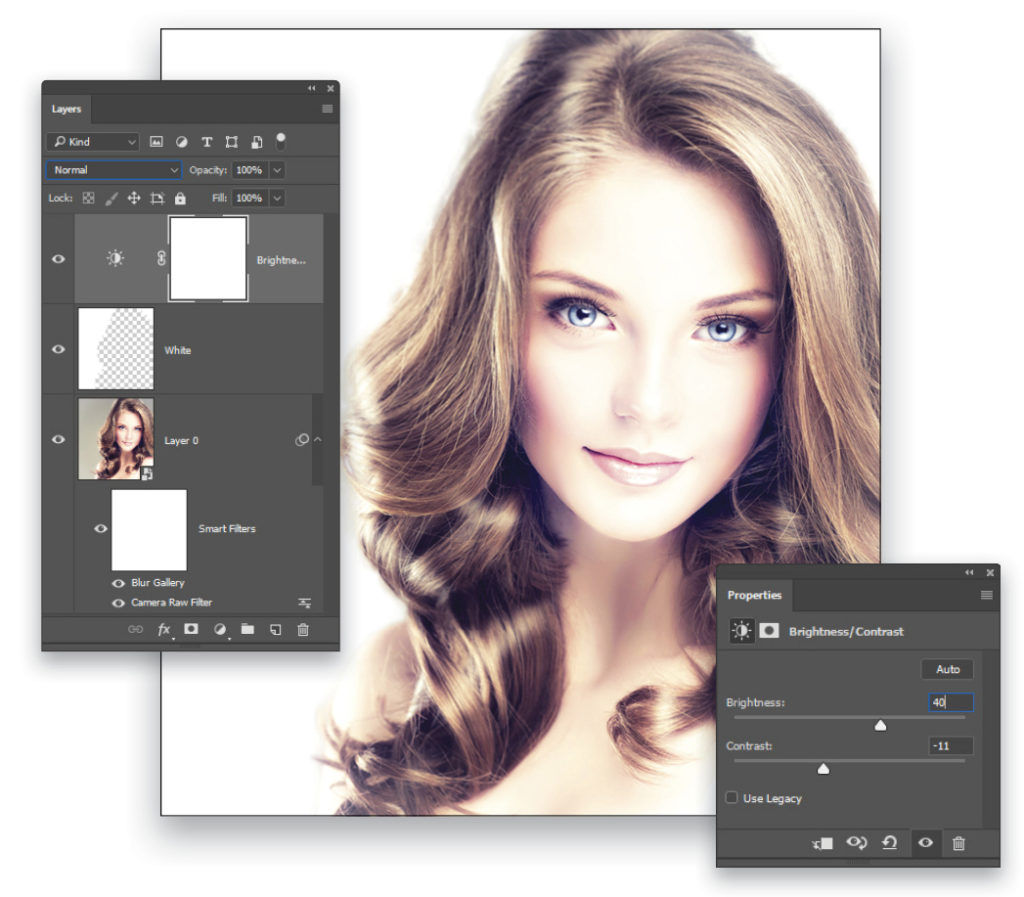
Add a Brightness/Contrast adjustment layer by using the Adjustments panel (Window>Adjustments) and clicking the icon that looks like a half-filled sun. In the Properties panel, set the Brightness to 40 and the Contrast to –11. This does add a brighter appearance to the image, but there’s still some other steps to take that will craft an even more sophisticated effect.
Step Seven:
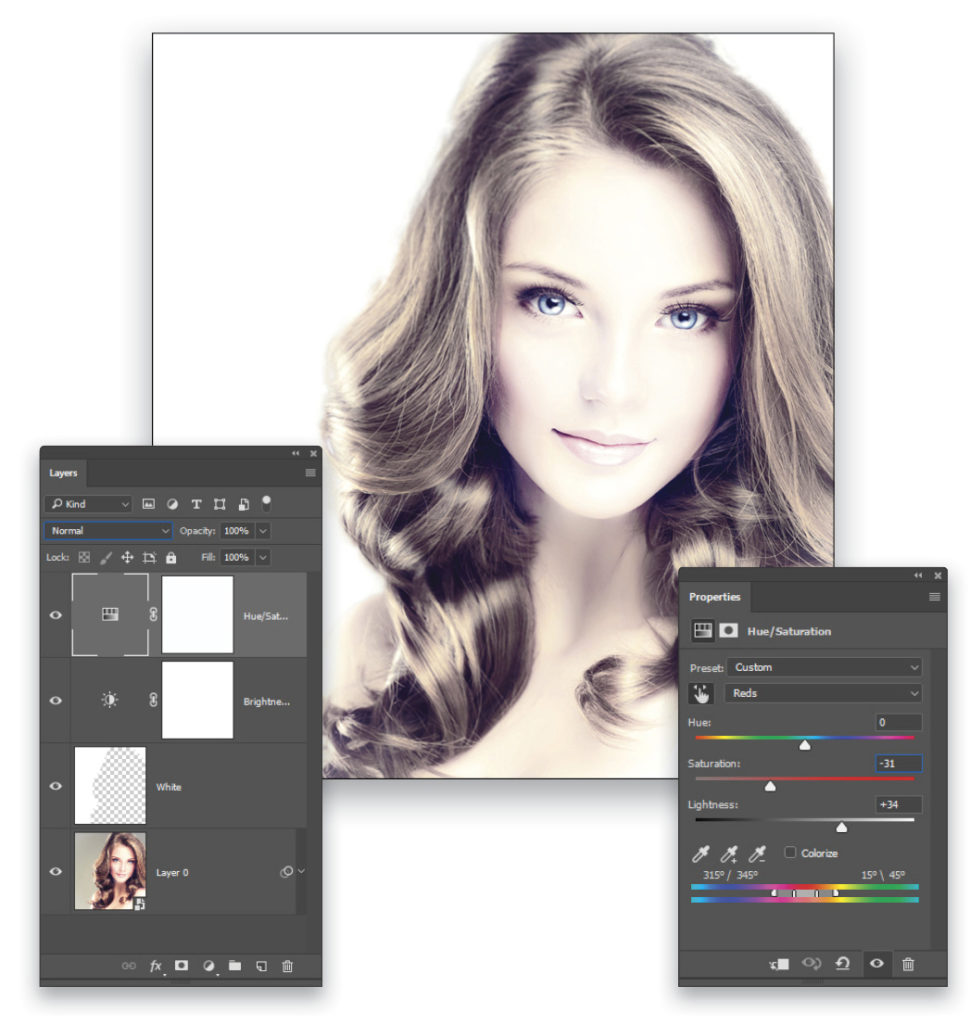
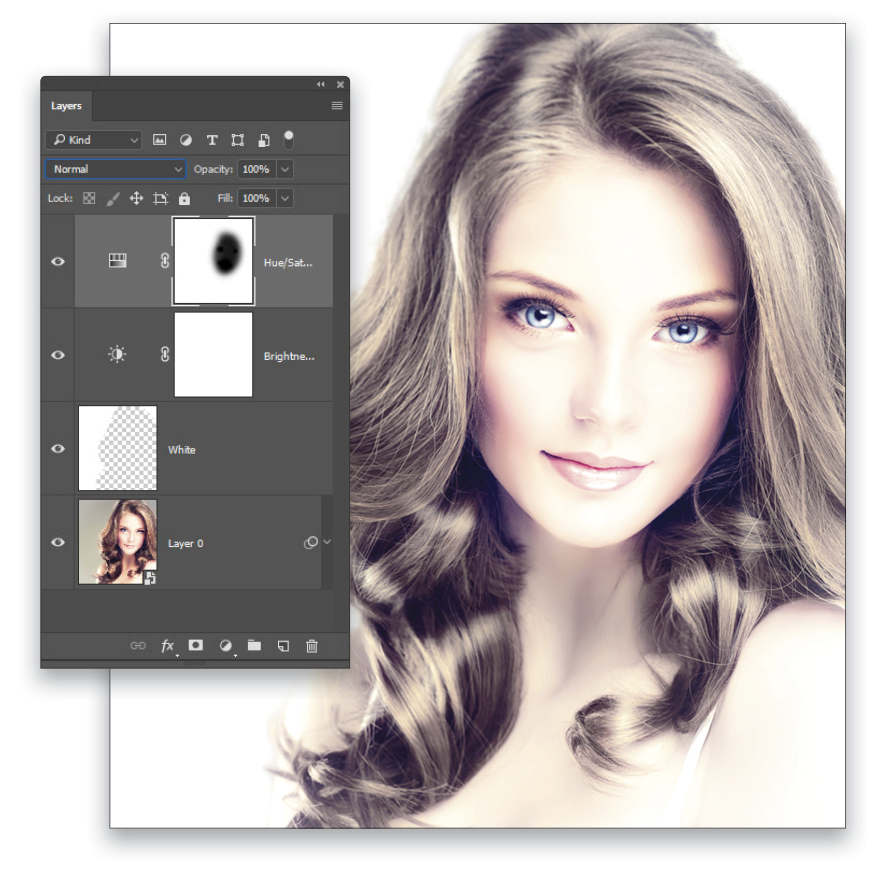
To create a more washed-out color tone, add a Hue/Saturation adjustment layer in the Adjustments panel. In the Properties panel, look for the onscreen adjustment tool; that’s the icon that looks like a pointing hand with two little arrows beside it. Use this to sample a dark area of her skin. Photoshop detects the color value, in this case the Reds, and allows direct adjustment of those tones. In this same area of the skin, click-and-drag the cursor toward the left to desaturate the red values. Then increase the Lightness value to +34.
Step Eight:
The desaturated effect works well for her hair but many of her facial features have been completely lost. Click the mask thumbnail next to the Hue/Saturation thumbnail in the Layers panel to make that the active element. Then use the Brush tool (B) with a Soft Round Tip and black paint to paint directly on the mask. This will remove the effects of the adjustment layer from the areas that are painted. Do this to make sure her eyes, lips, and nose are all still visible.
Step Nine:
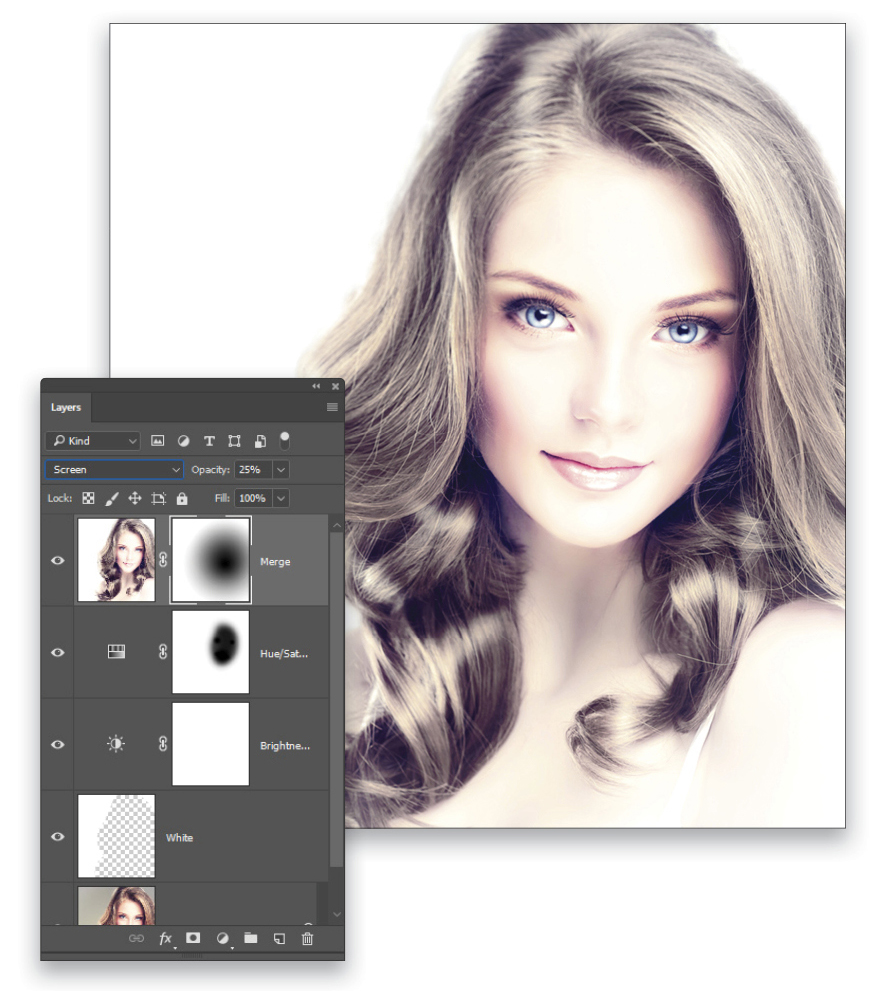
Create a merged layer by holding down the Option (PC: Alt) key and going to Layer>Merge Visible. Double-click this layer’s name and rename it “Merge.” Change the blend mode to screen and reduce the Opacity to 25%. Once again, the effect is nice, but too strong on her facial features. Add a layer mask with Layer>Layer Mask>Reveal All. Switch to the Gradient tool (G), and in the Options Bar, click on the Radial Gradient icon, then click on the gradient preview thumbnail. Select the Foreground to Transparent preset and click OK to close the Gradient Editor. Use this gradient on the mask to reveal her facial features.
Step 10:
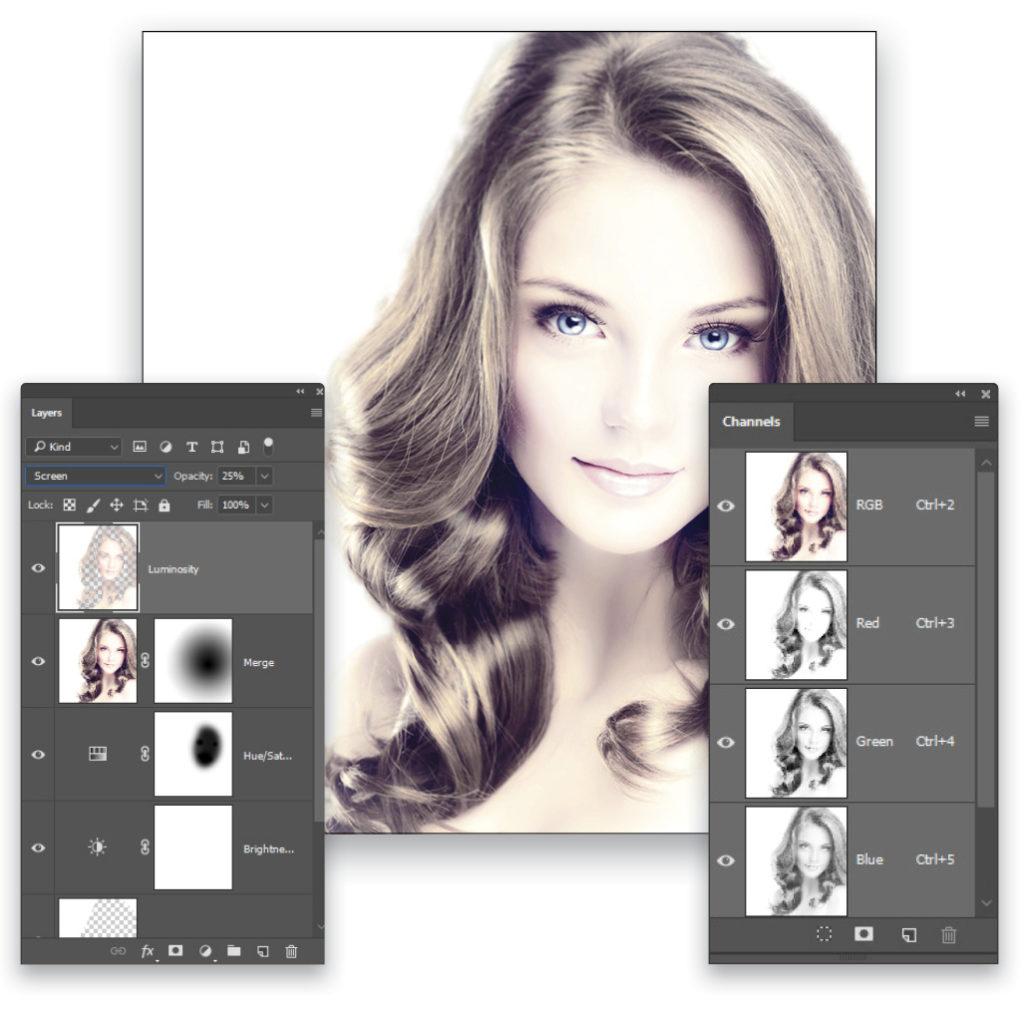
Another powerful technique to add to the workflow is to use the luminosity values of the image to create the soft-focus, high-key effect. Switch over to the Channels panel and Command-click (PC: Ctrl-click) on the composite RGB channel. This loads the luminosity values as a selection. Switch back to the Layers panel, make sure the Merge layer thumbnail is the active element (not the mask thumbnail), and press Command-J (PC: Ctrl-J) to copy those selected pixels to a new layer. Name this layer “Luminosity.”
Step 11:
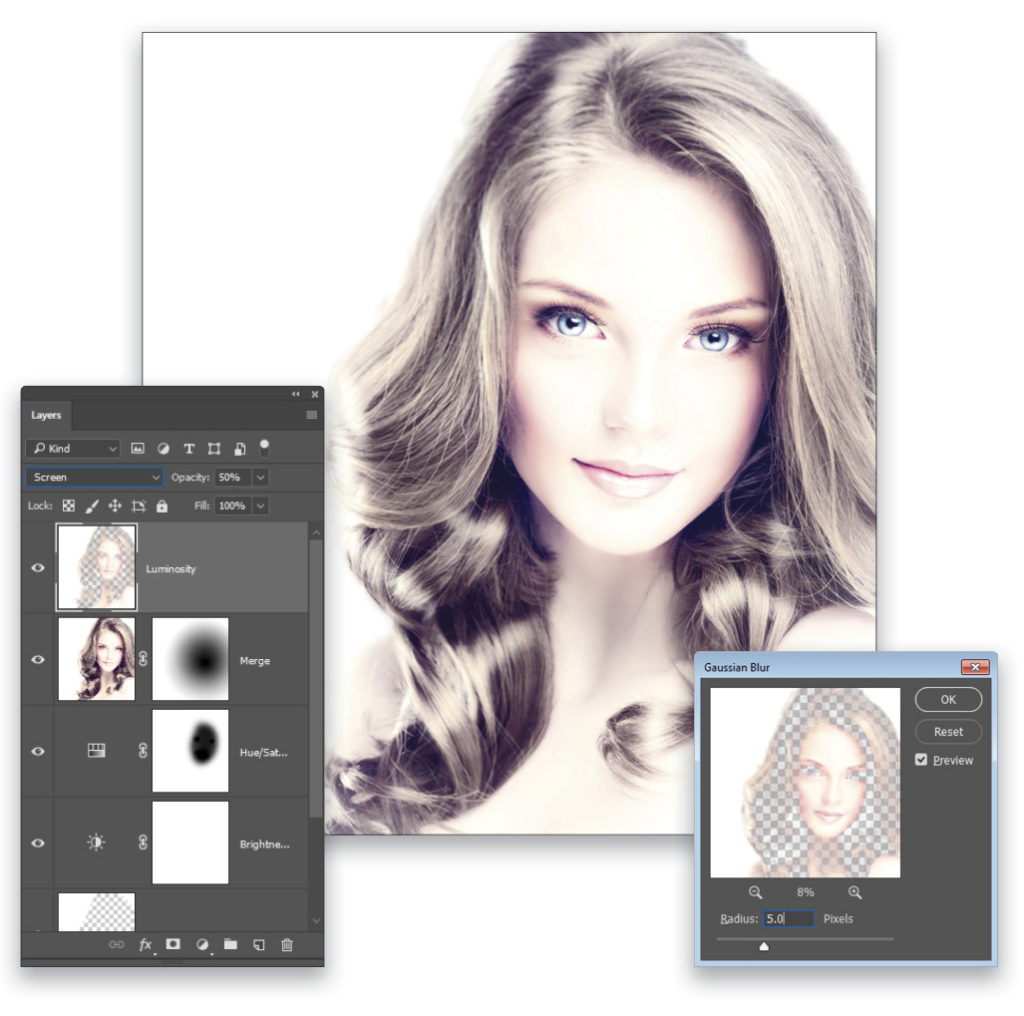
Notice that the Luminosity layer inherited the layer properties of the Merge layer. Keep the blend mode as Screen, but increase the Opacity to 50%. Then go to Filter>Blur>Gaussian Blur, set the blur Radius to 5 pixels, and click OK to apply the filter.
Step 12:
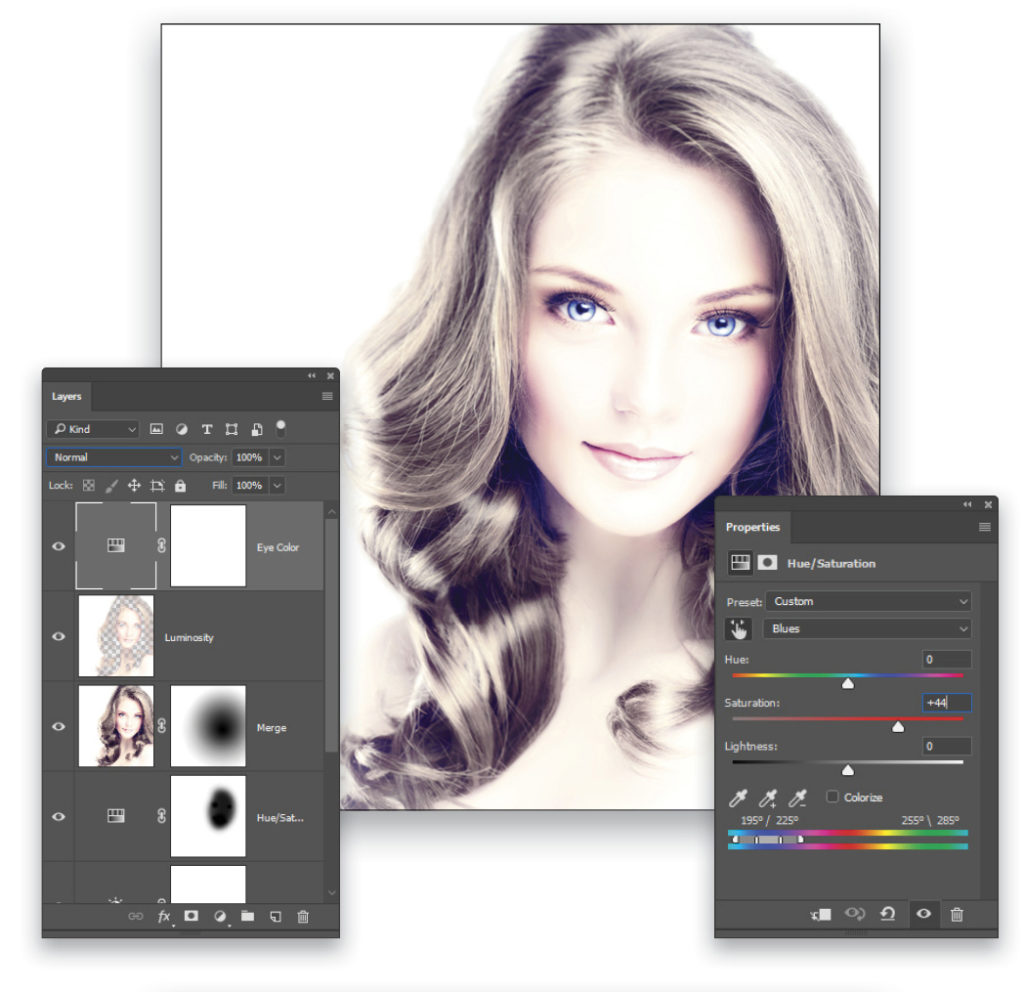
The bright brilliance of her blue eyes has also been lost, so to bring it back, add another Hue/Saturation adjustment layer and name it “Eye Color.” Then use the onscreen adjustment to sample the blue of her eyes. Slide the tool to the right to increase the saturation to about +44. If needed, sample closer to the pupil to make a similar edit to the cyan color tones as well.
Step 13:
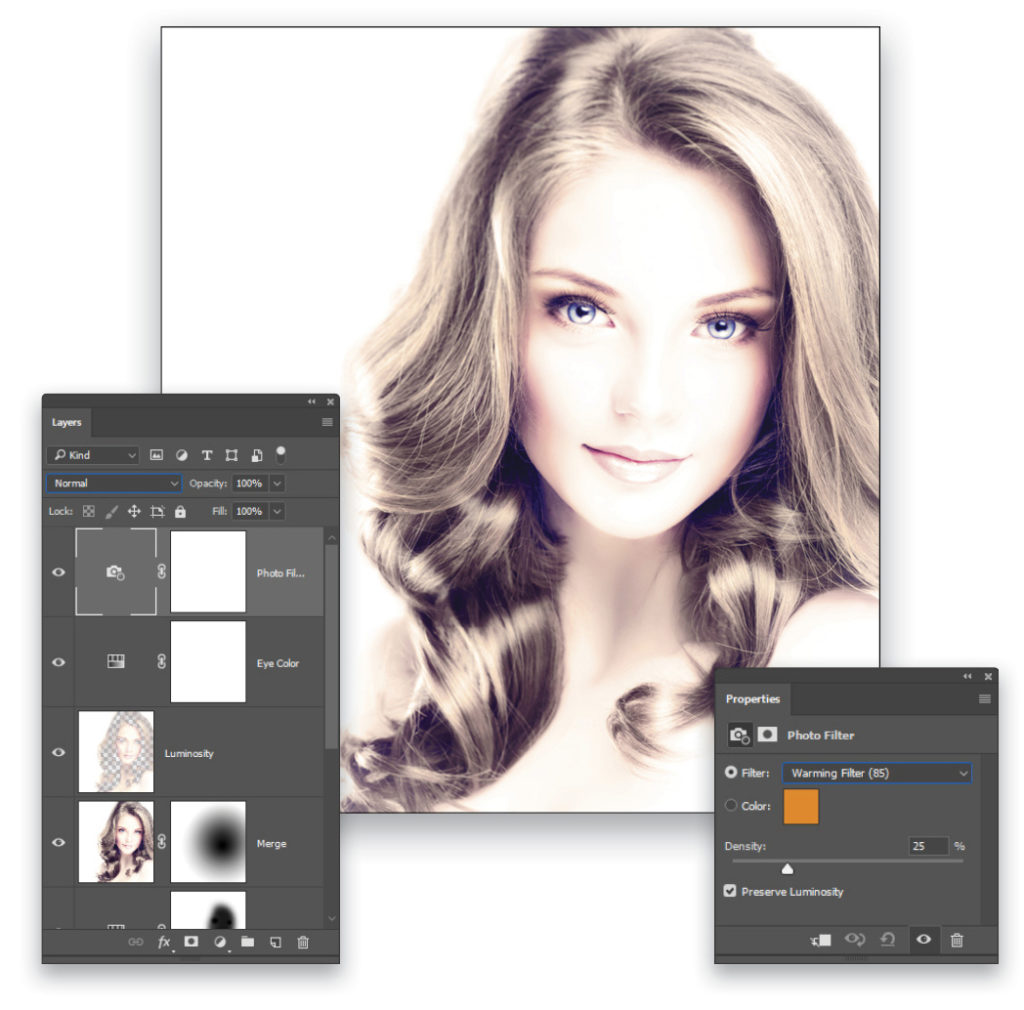
For a finishing touch, add a Photo Filter adjustment layer. That’s the icon that looks like a camera in the Adjustments panel. Use the Warming Filter (85) and set the Density to 25%. This adds a warm glow to the image that complements the softer focus.
Be aware that it’s easy to overdo the soft-focus effect and create an image that just looks blurry and overexposed. The idea is that the local contrast is reduced, not simply blurred. The final image should look like the effect is intentional, not a mistake. There’s a delicate balance to strike, but when that’s found, the results can be unique and rewarding.
This article originally published in the February, 2017 issue of Photoshop User magazine.


