
Leaf shadows add a lot of visual interest to a photo. And by adding the shape of a tropical leaf, you can make a photo look like it was taken beachside instead of in a basement. While the perfect leaf shadow may be evasive to capture in-camera, today you’ll learn how to make one from a photo of a leaf instead. Read on!
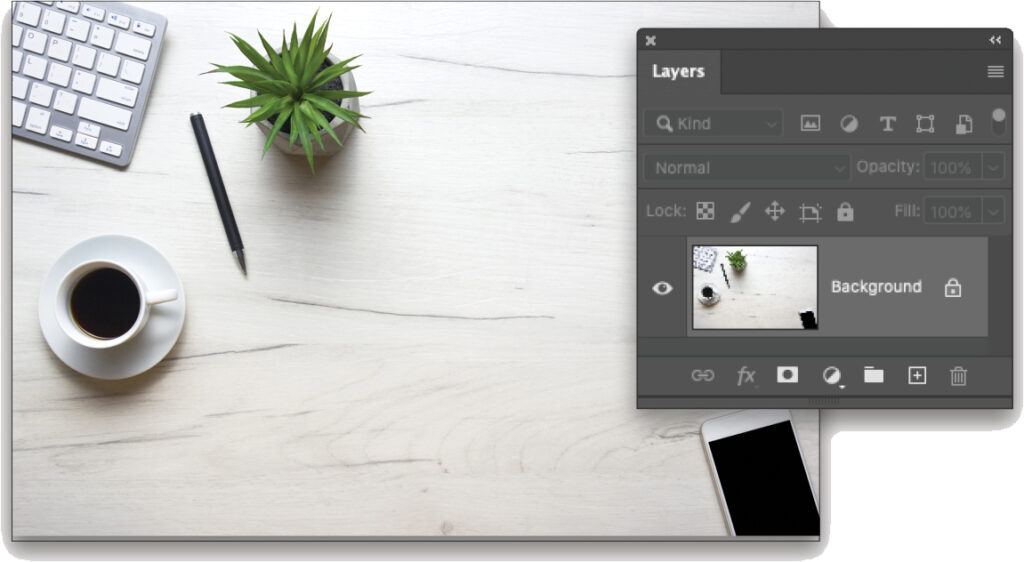
STEP ONE: Choose File>Open and navigate to the photo to which you want to add the leaf shadow, such as this tabletop image that’s free from Adobe Stock. If you’d like to download this image to follow along, click this link, log in with your Adobe ID, and click the License for Free button. This will download the image to your computer as well as add it to your Libraries panel (Window>Libraries). Double-click the image in the Libraries panel to open it in Photoshop.
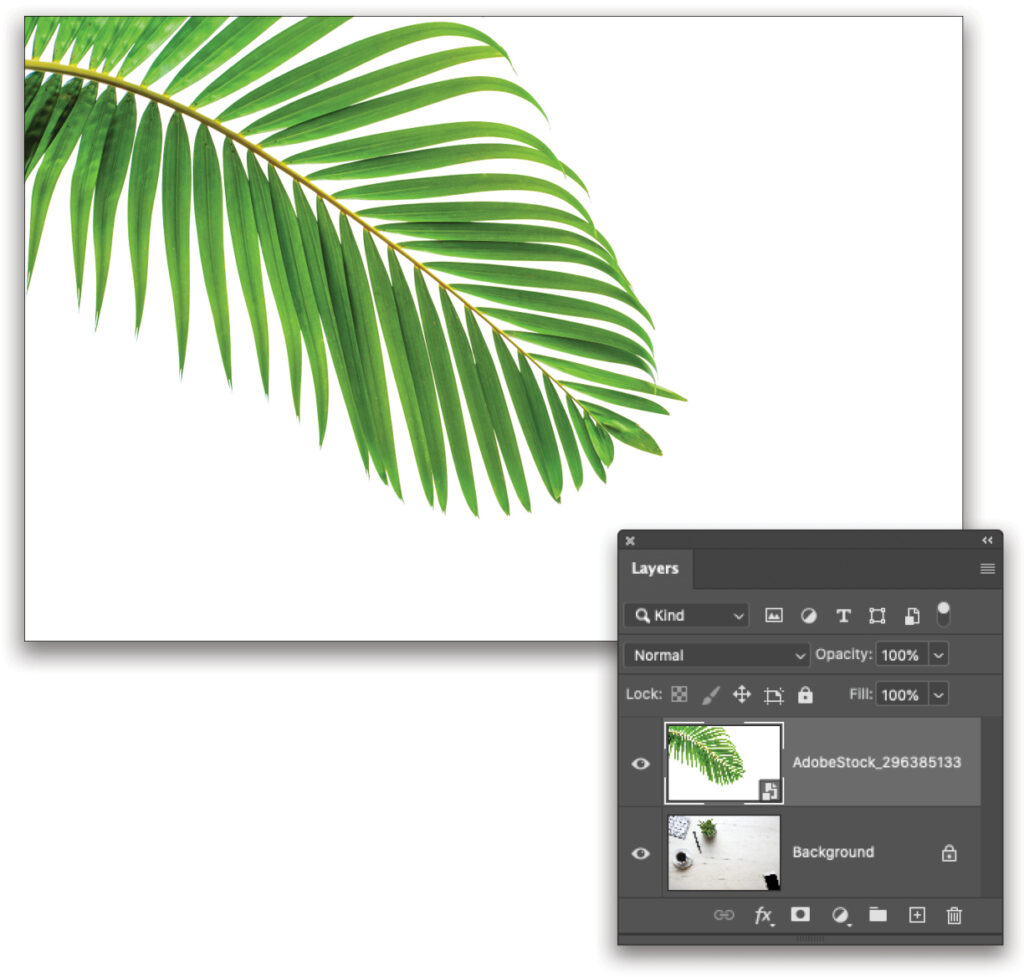
STEP TWO: Choose File>Place Embedded and navigate to the photo of a leaf. (This one’s free from Adobe Stock, too, and you can find and download it here. If you download this image from Adobe Stock, you can also drag-and-drop it from the Libraries panel into the tabletop image.) Photoshop places a bounding box around it; you can Shift-drag any corner point to resize the image, but this leaf is fine the way it is. Just make sure the layer is centered in the document. Press Enter on your keyboard to dismiss the bounding box. The leaf layer should be above the table layer in the Layers panel.
Tip: If you’re starting in Lightroom, you can skip the first two steps and select two thumbnails in the Library module, and then choose Photo>Edit In>Open As Layers in Photoshop.
STEP THREE: We need to select the leaf. There are several ways to go about this, including using Select>Subject or Select and Mask, but sometimes it’s easier to select the background and then invert the selection. This is especially true if the background is a solid color, as we have here. To do that, hold the Shift key and tab W to until you have either the Quick Selection or Magic Wand tool; it really doesn’t matter which one, though the Magic Wand was used here. Click once within the white background with the Magic Wand to create a selection; if you’re using the Quick Selection tool, you’ll need to click-and-drag. Neither tool will select all the white areas, but we’ll fix that in the next step.
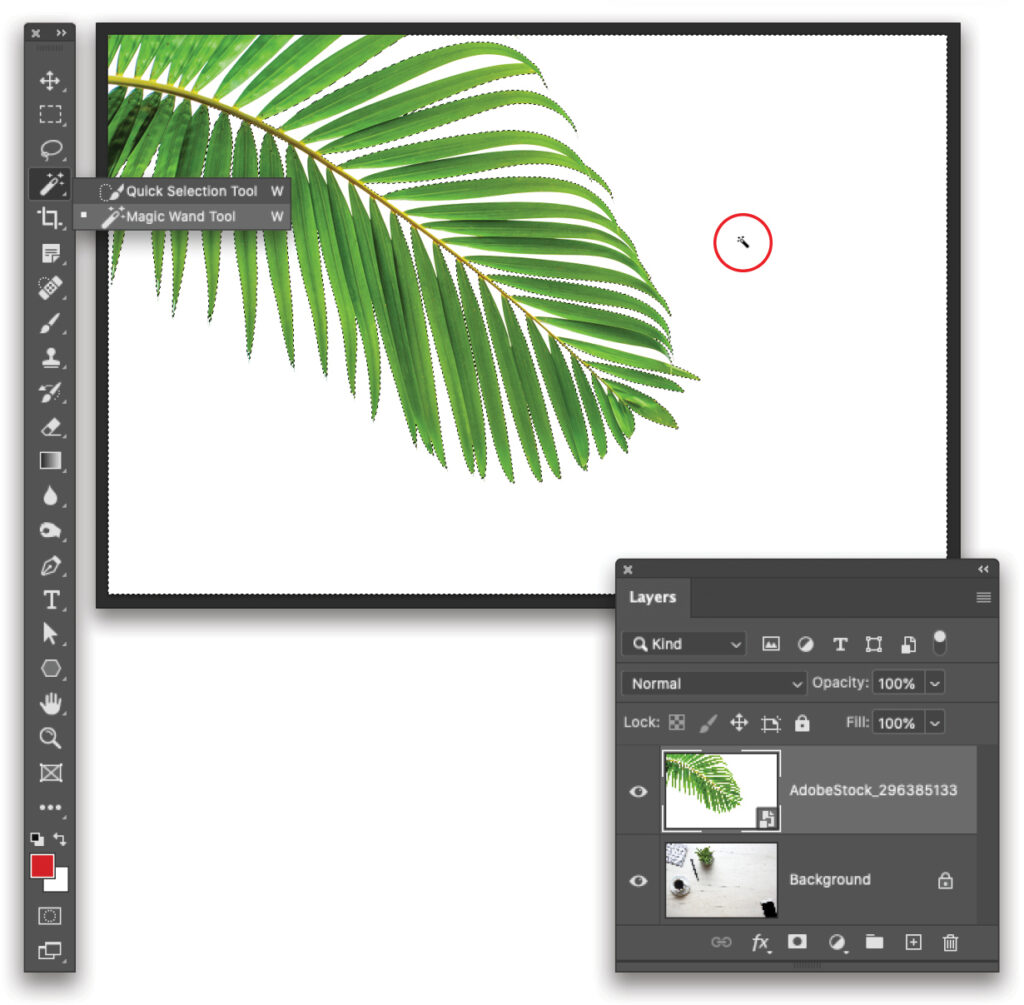
STEP FOUR: Now choose Select>Similar, which adds the white areas between the leaves to the selection. To select the leaf instead of the background, choose Select>Inverse.

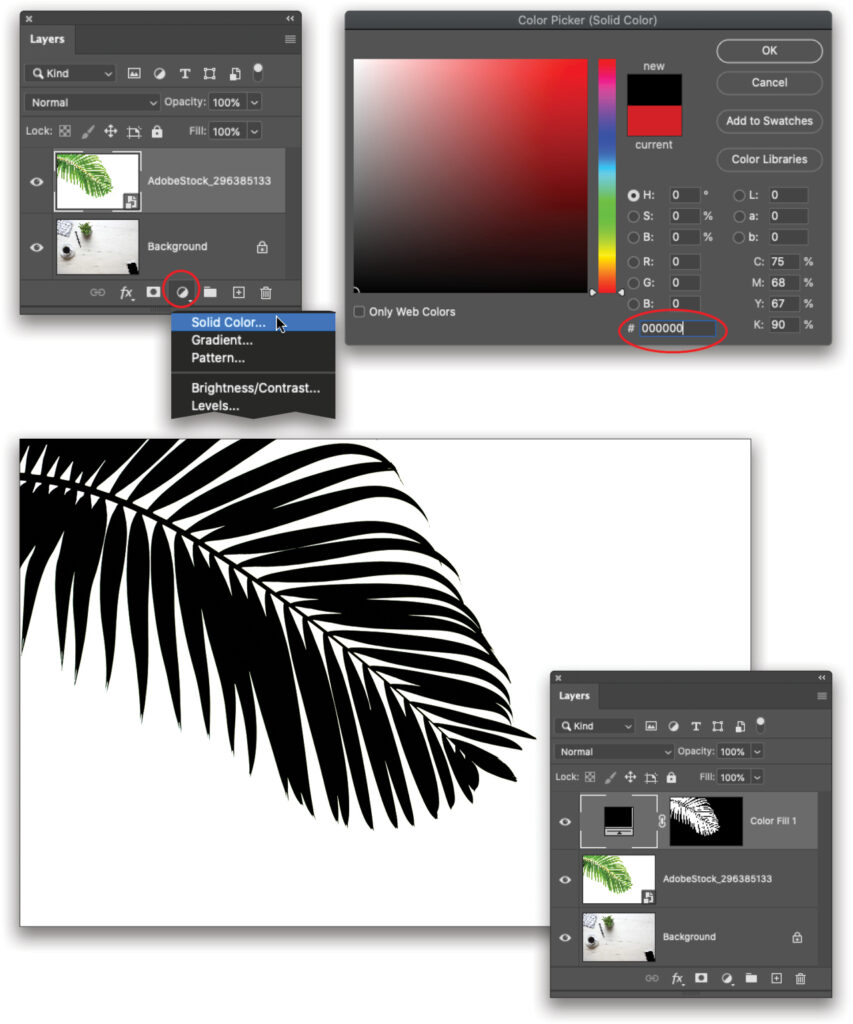
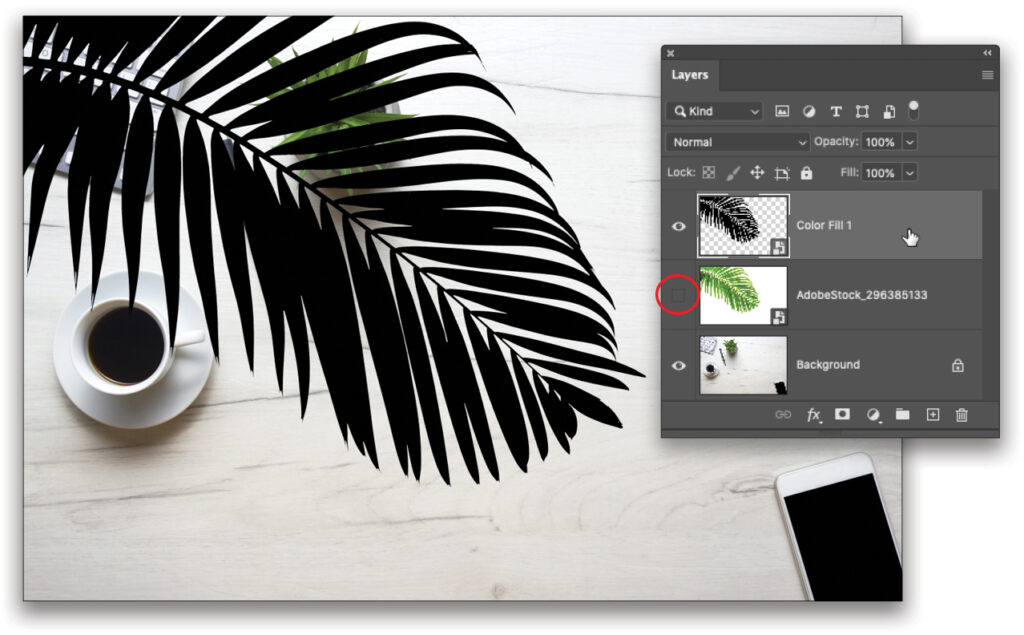
STEP FIVE: The next goal is to fill the leaf selection with black, but on its very own layer. Click the half-black/half-white icon at the bottom of the Layers panel (circled) and choose Solid Color. In the Color Picker that opens, choose black or simply enter 000000 into the # field (also circled). Click OK.
STEP SIX: With the new Color Fill layer active in your Layers panel, choose Filter>Convert for Smart Filters. This preps the layer for the two filters we’re about to run. At this point, we’re finished with the original leaf photo layer, so click the Eye icon on its left (circled) in the Layers panel to turn off its layer visibility.
STEP SEVEN: With the Color Fill 1 layer still active, choose Filter>Blur>Gaussian Blur. In the resulting dialog, enter a Radius of around 25 pixels for this high-resolution image (it’s 5,184×3,456 pixels). Click OK.
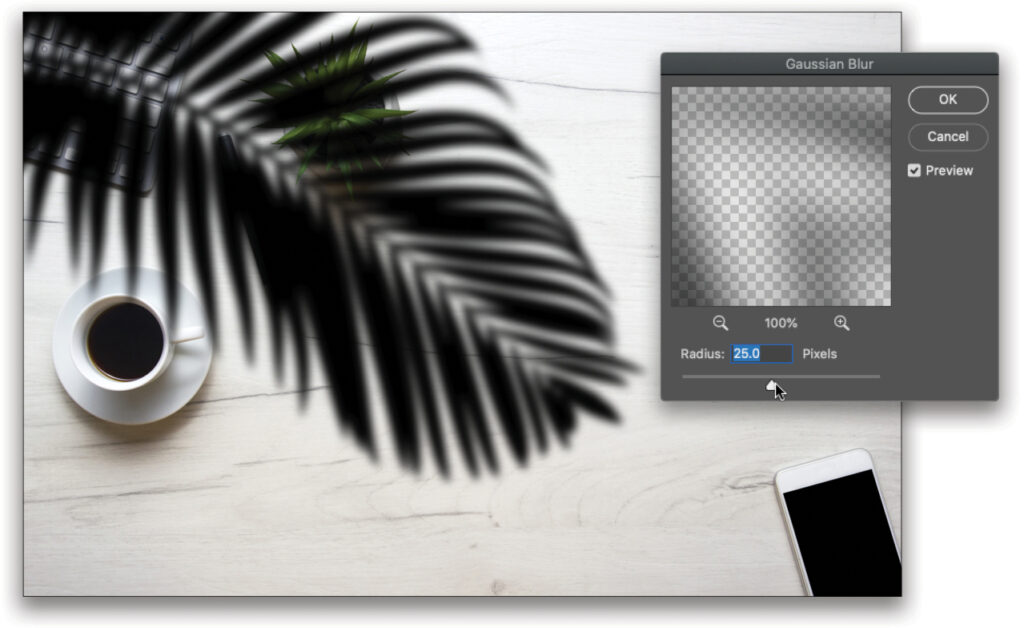
STEP EIGHT: Now choose Filter>Blur>Box Blur and, in the dialog that opens, enter a Radius of about 60 pixels. Click OK. This particular filter creates beautifully soft edges all the way around the leaf, which makes for a more realistic shadow.

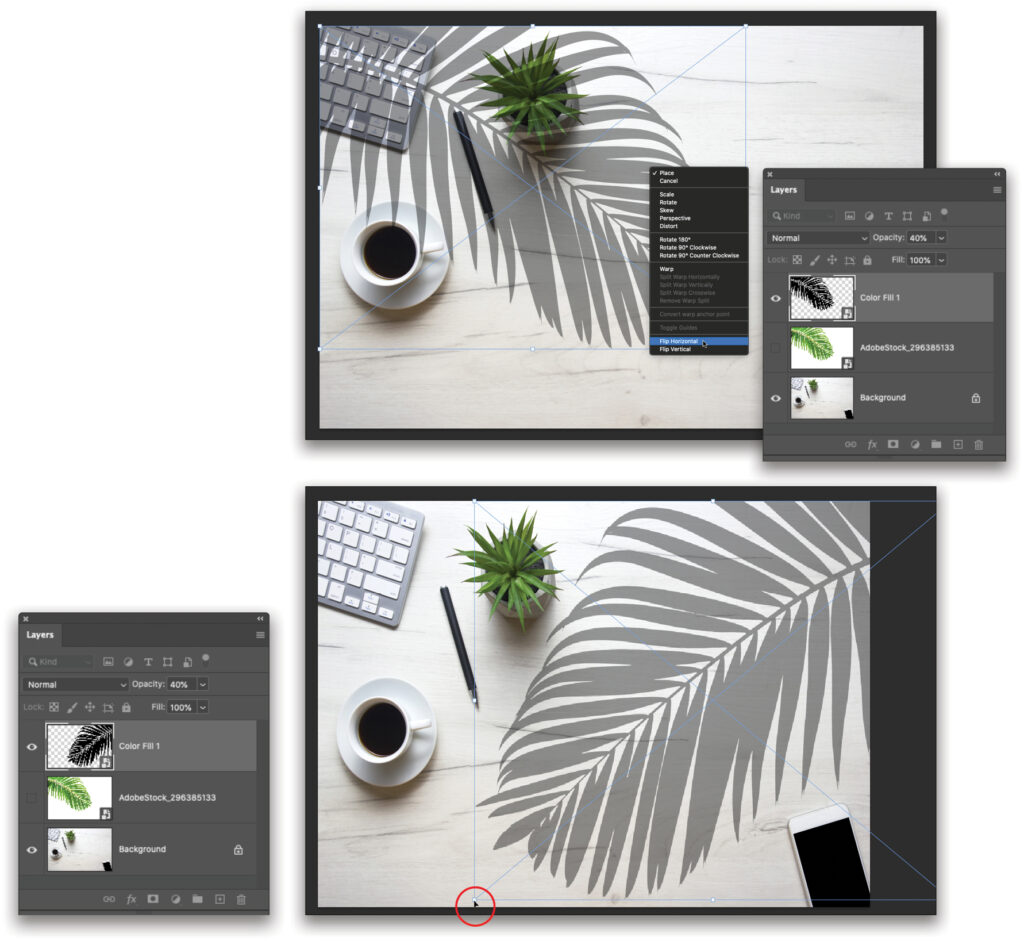
STEP NINE: Over in the Layers panel, lower the Opacity setting (circled) of the Color Fill 1 layer to around 40%.

STEP 10: Let’s switch the leaf to the other side of the table and make it a little bigger. With the Color Fill 1 layer active, press Command-T (PC: Ctrl-T) to summon Free Transform. (If a dialog asks if it’s okay to temporarily turn off Smart Filters, click OK.) Right-click within the bounding box and choose Flip Horizontal. Drag within the bounding box to reposition the leaf so it’s against the right edge of the photo. To enlarge the leaf, Shift-drag a corner handle outward (circled). Reposition and resize to get the look you want, and then press Enter on your keyboard when you’re finished.
Here’s the final result. Can you smell the ocean air?
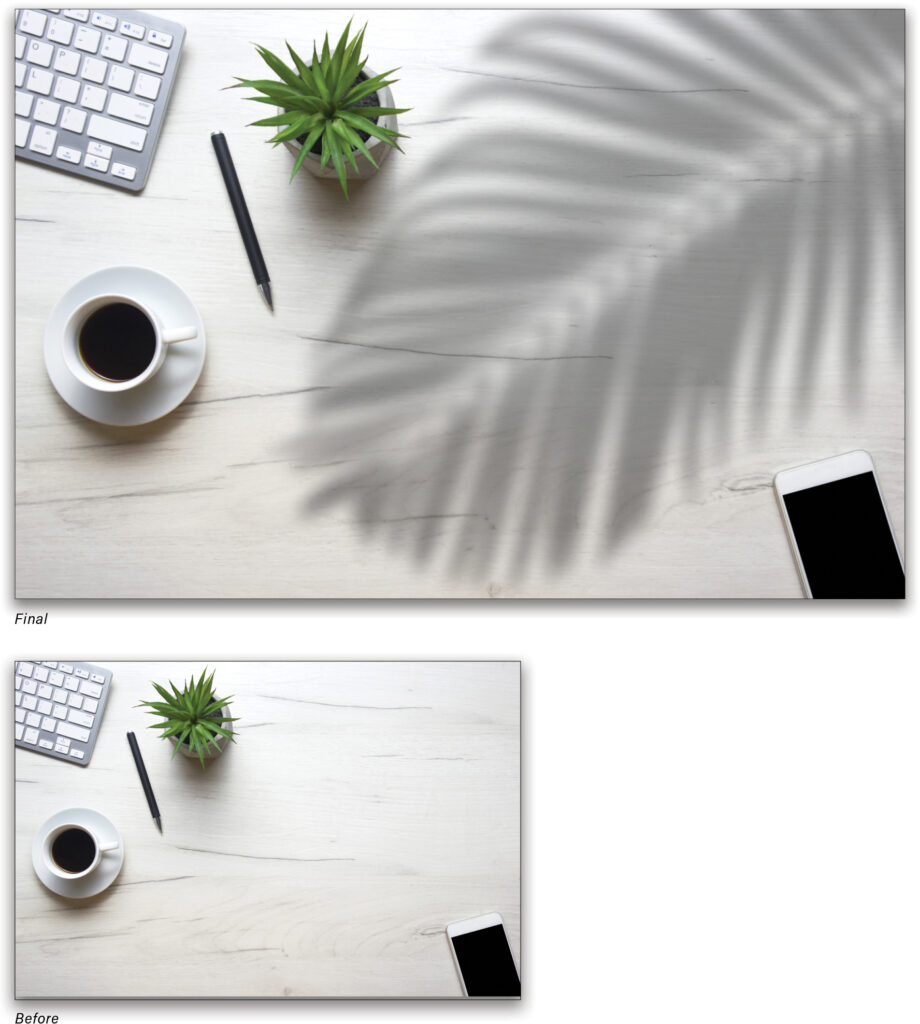
That’s all there is to this incredibly flexible technique. It’s flexible because you can adjust either blur filter by double-clicking its name in the Layers panel, which is why we converted the Color Fill layer for smart filters to begin with. Of course, you can also adjust the layer Opacity to make the shadow lighter or darker. Lastly, the whole technique is nondestructive, meaning we didn’t harm either original image during the making of the shadow.
In addition, you can save the leaf shadow to use later. To do that, delete all the layers except for the Color Fill 1 layer and then choose File>Save As. In the dialog that opens, choose Photoshop from the Format menu and click Save. Now you have a beautiful palm leaf shadow that you can use on any photo, anytime you want.
Until next time, may the creative force be with you all!
This article originally published in the May, 2022 issue of Photoshop User magazine.
About Photoshop User and KelbyOne
Photoshop User magazine comes out digitally 12 times a year and is part of KelbyOne, the leading educational resource for Photoshop, Lightroom, and photography. Pro members have access to more than 900 video courses and 100 back issues of Photoshop User. To learn more about KelbyOne, click here.


