Pixel Stretch Design Effects by Corey Barker
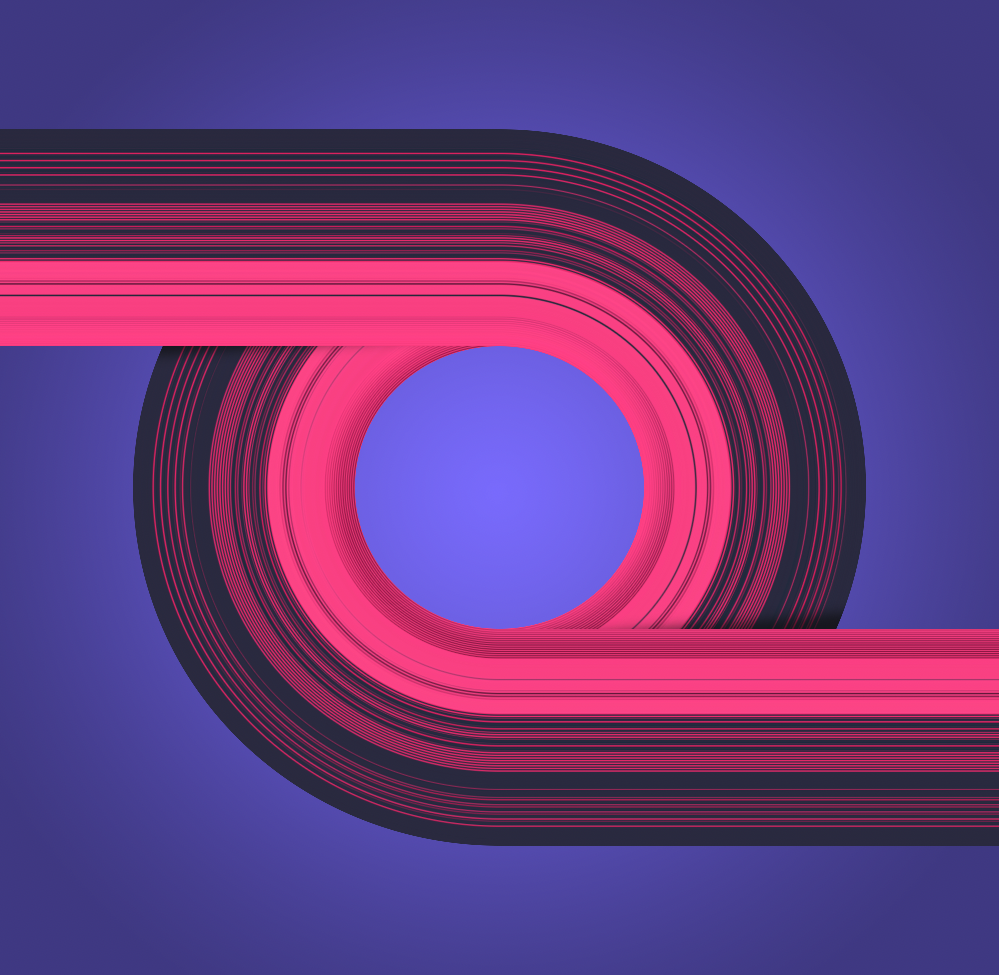
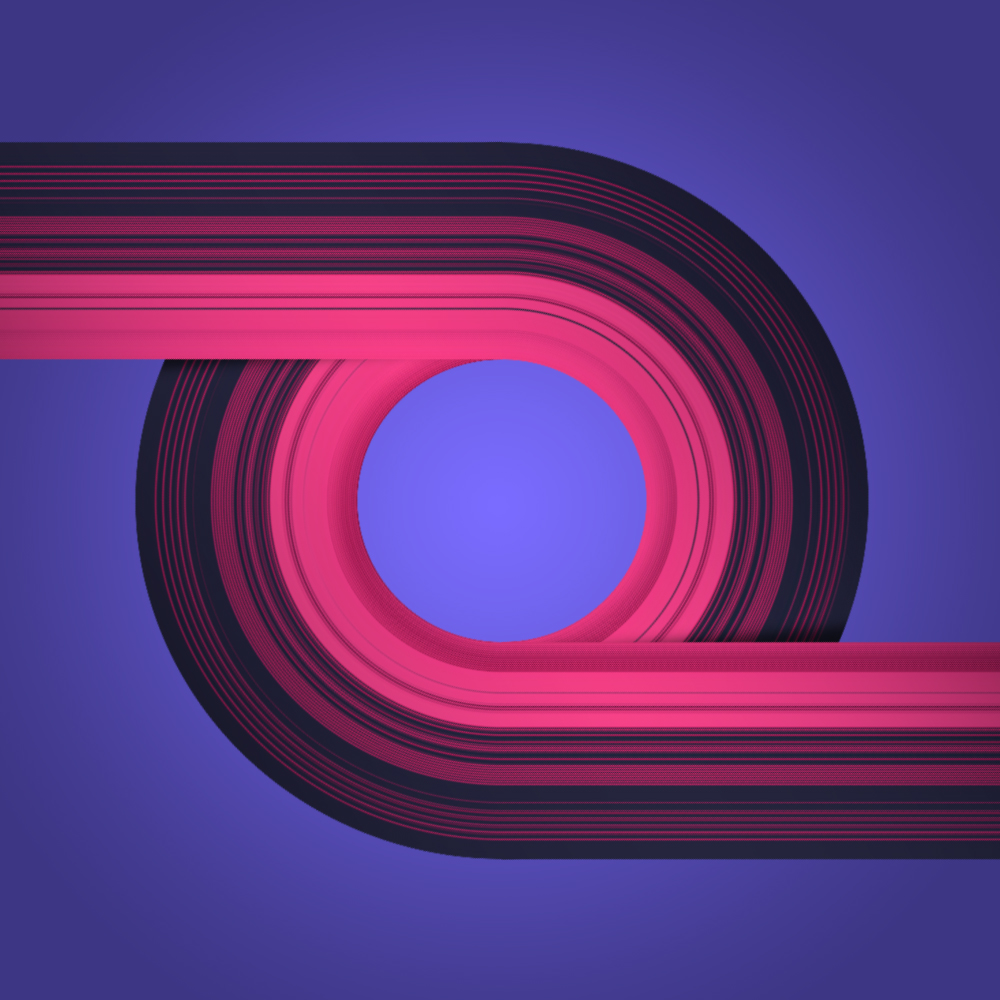
You’ve no doubt seen this effect before and there are certainly a number of ways to achieve it. Using a small part of an image, you can create a variety of stretched effects that can be used for background and even custom text, if you feel so inclined. Here we’ll create a background effect for a commercial sports image.
Step 1:
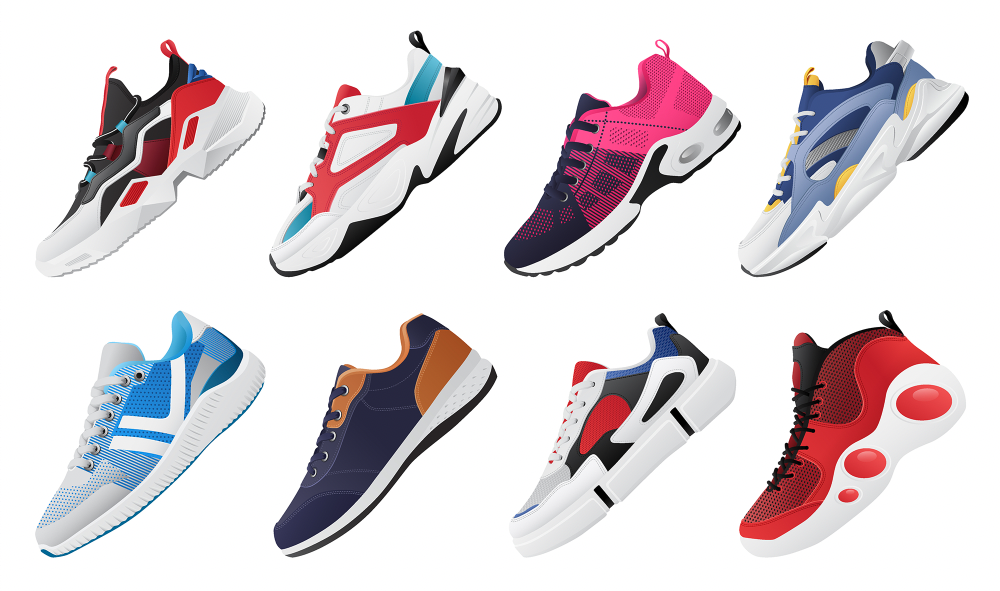
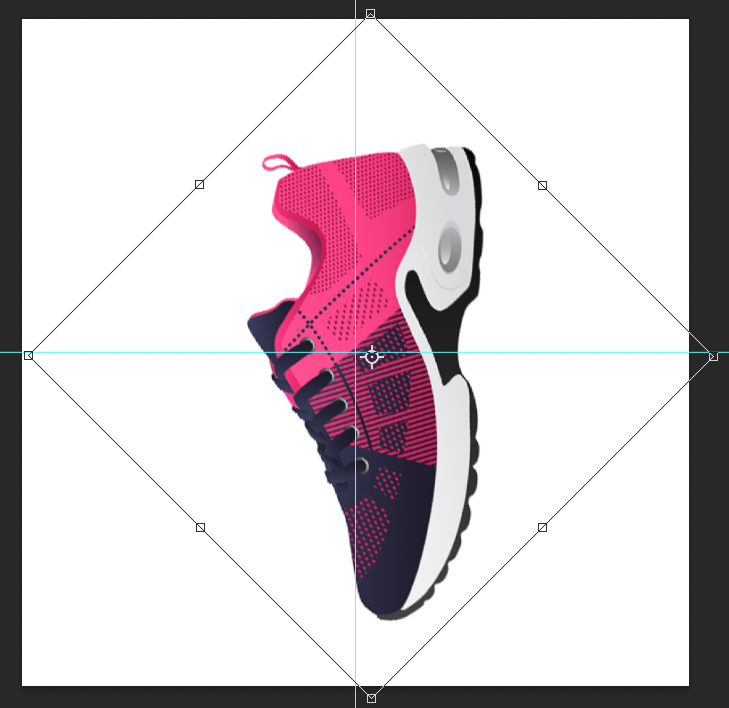
The stretch effect often uses parts of the main subject, but sometimes the subject doesn’t work well for the effect, or perhaps you want to use something with different colors altogether. In this case, keeping with the sports theme, we’ll use a sneaker to create the effect. Here we have a collection of colorful sneakers that gives us a variety from which to choose. Once the effect is done, you’ll see how you can create abstract elements like this from just about any image.
If you’d like to download the low-res watermarked versions of this image to follow along, click this link, log in with your Adobe ID, and click the Download Preview button. In Photoshop, go to File>Open, navigate to the downloaded file, and click Open. Make sure the Resolution is set to 300 ppi in the Rasterize EPS Format, and click OK to open it in Photoshop.
Step 2:
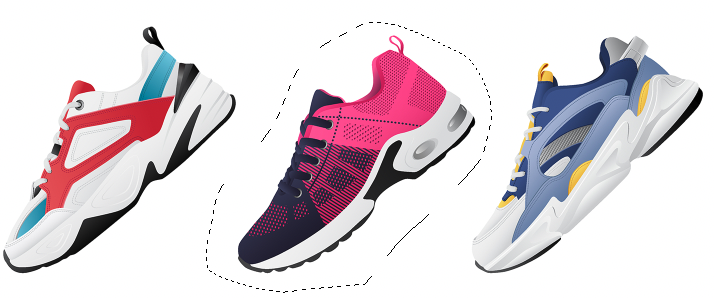
Select the Lasso tool (L) in the Toolbar and draw a loose selection around the pink and purple shoe, as you see here. Press Command-C (PC: Ctrl-C) to copy the selection to the clipboard.
Step 3:
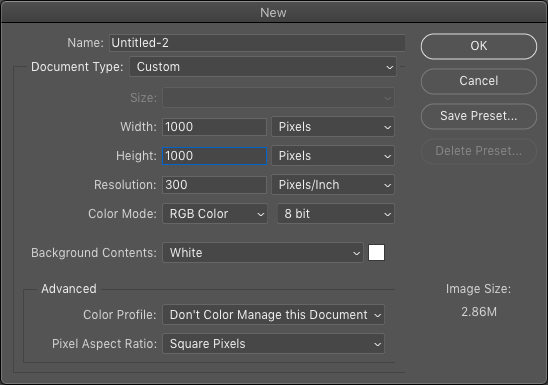
Press Command-N (PC: Ctrl-N) to create a new document. Set both the Width and Height to 1000 pixels, the Resolution to 300 ppi, the Color Mode to RGB Color, Background Color to White, and click OK.
Step 4:
Press Command-V (PC: Ctrl-V) to paste the copied shoe into the new canvas. It will automatically create a new layer in the Layers panel. Press Command-T (PC: Ctrl-T) to activate Free Transform, and rotate the object counterclockwise so the shoe is fully vertical. Resize it and position it on the canvas as shown here. Press Enter when done.
Step 5:
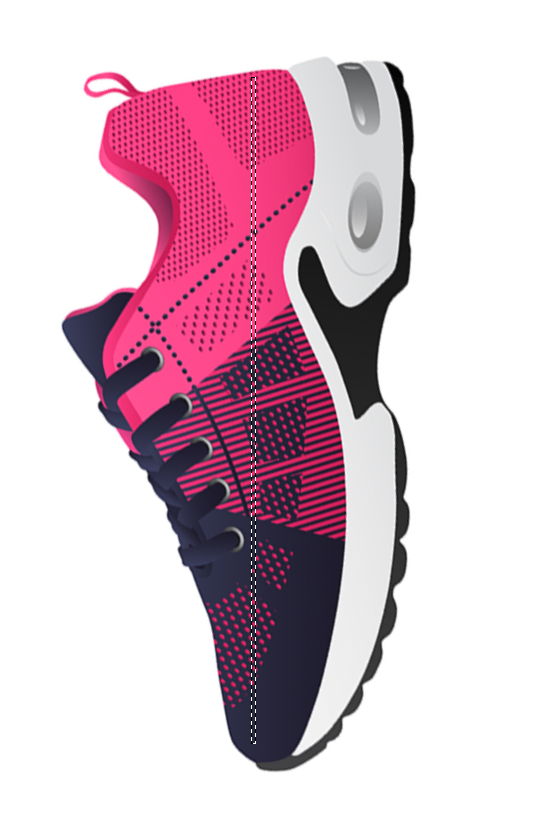
Select the Rectangular Marquee tool (M) in the Toolbar. Starting at the top middle of the shoe in the pink area, draw a very thin vertical selection down the long axis. Here we’re making sure to include various colors and shapes from the sneaker. You can press-and-hold the Spacebar to reposition the selection while you’re drawing it, or you can use the Arrow keys after you complete the selection to nudge it into place.
Step 6:
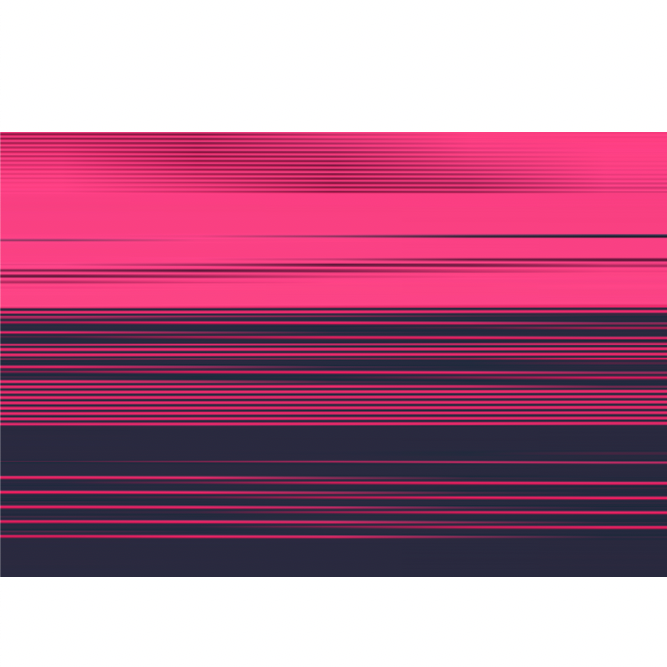
Once the selection is complete, press Command-J (PC: Ctrl-J) to copy the selected area to a new layer. Turn off the original shoe layer below by clicking its Eye icon in the Layers panel, and you’ll see just the thin sliver of the shoe that’s been extracted.

Step 7:
Press Command-T (PC: Ctrl-T) again to activate Free Transform. Hold down Shift-Option (PC: Shift-Alt) to transform from the center outward without maintaining proportions, and drag the right-middle control point to the edge of the canvas. Once the object fills the width of the document, press Enter. You’ll see the stretch effect already taking shape.
Step 8:
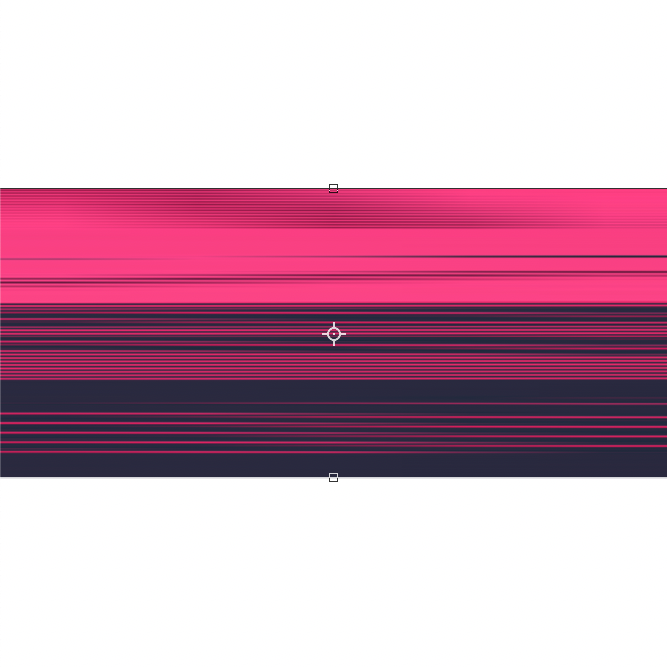
It’s a little too tall because the initial selection was rather long to get all the various colors of the shoe, but let’s scale it down vertically. Press command-T (PC: Ctrl-T), hold Shift-Option (PC: Shift-Alt) again, and this time drag the top-middle control point down to squash the shape a little bit. Press Enter.
Step 9:
Before moving on, let’s make sure the object is centered in the canvas area. Press Command-A (PC: Ctrl-A) to select the entire canvas, switch to the Move tool (V), and then click the Align Horizontal Centers icon and the Align Vertical Centers icon in the Options Bar. Press Command-D (PC: Ctrl-D) to deselect.

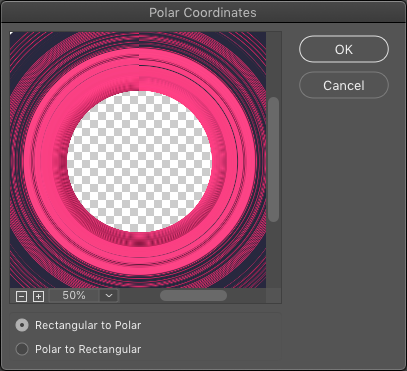
Step 10:
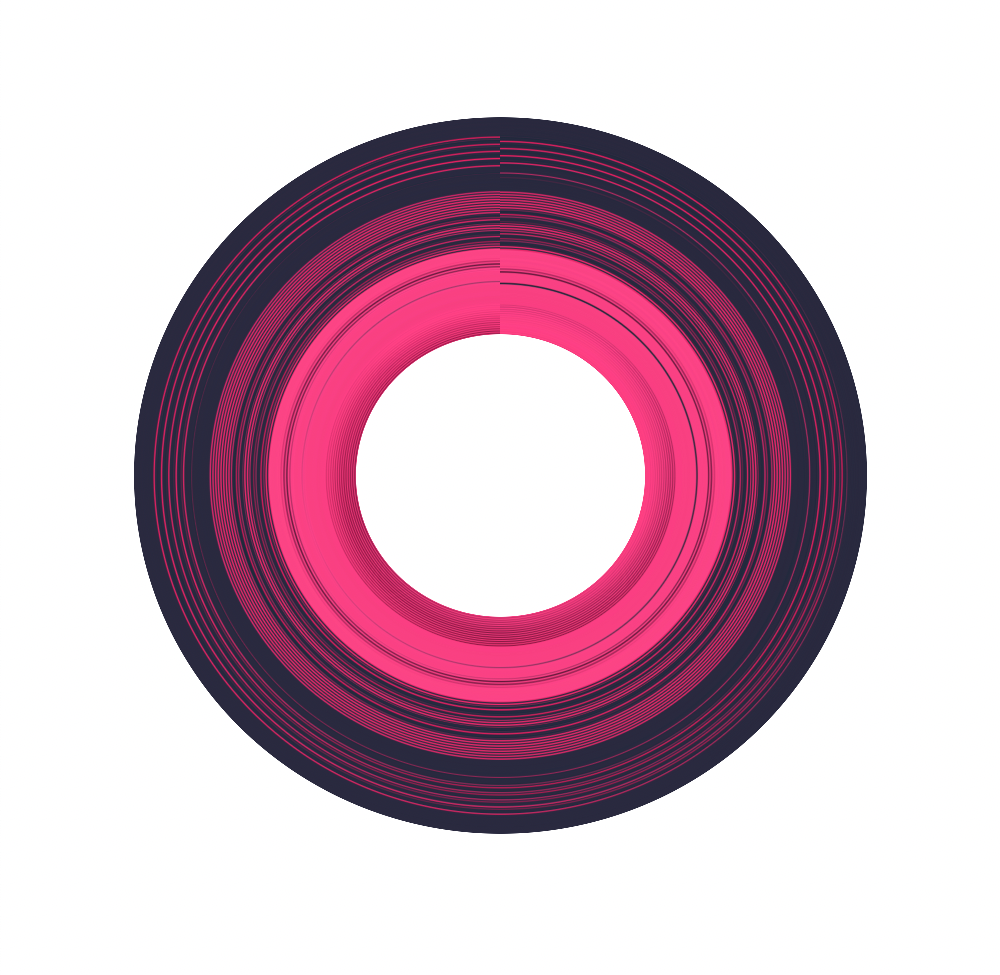
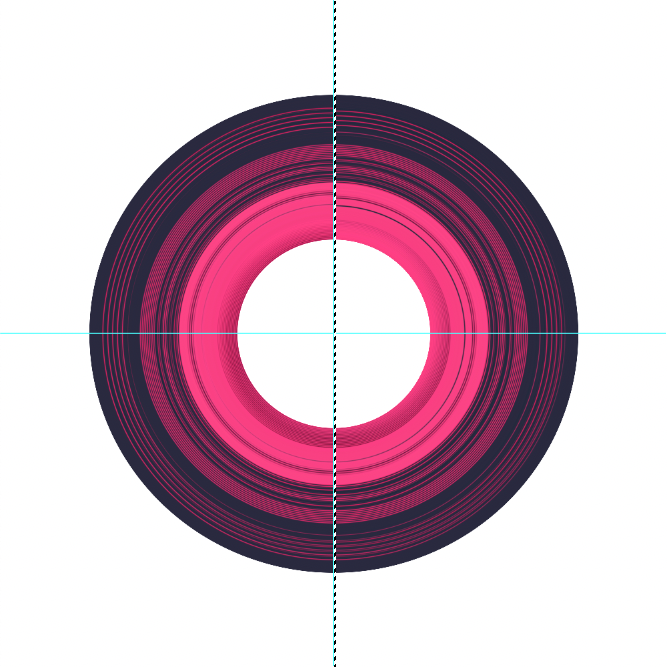
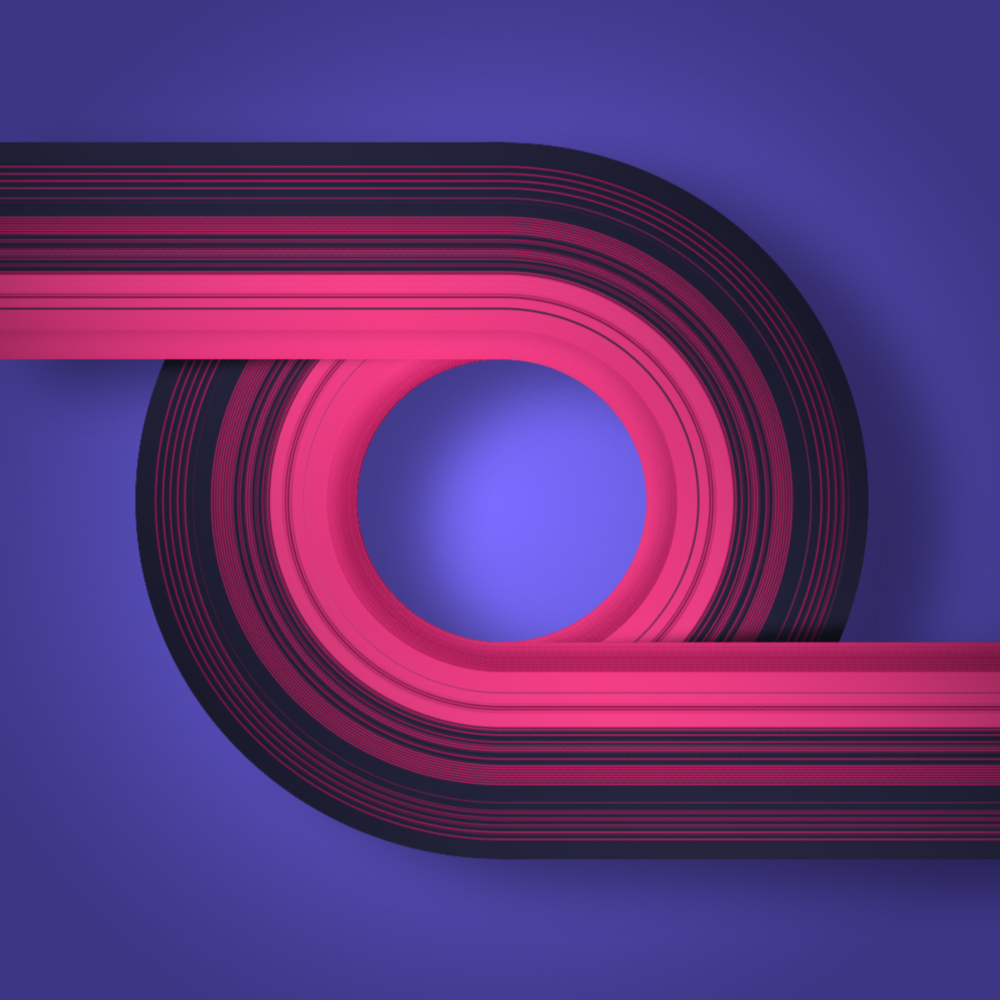
Go under the Filter menu, to Distort, and choose Polar Coordinates. Make sure it’s set to Rectangular to Polar, and click OK. This will transform the stretched colors into a ring shape. You can see at the top where the lines don’t line up but that’s to be expected. We’ll cleverly hide that in a moment.
Step 11:
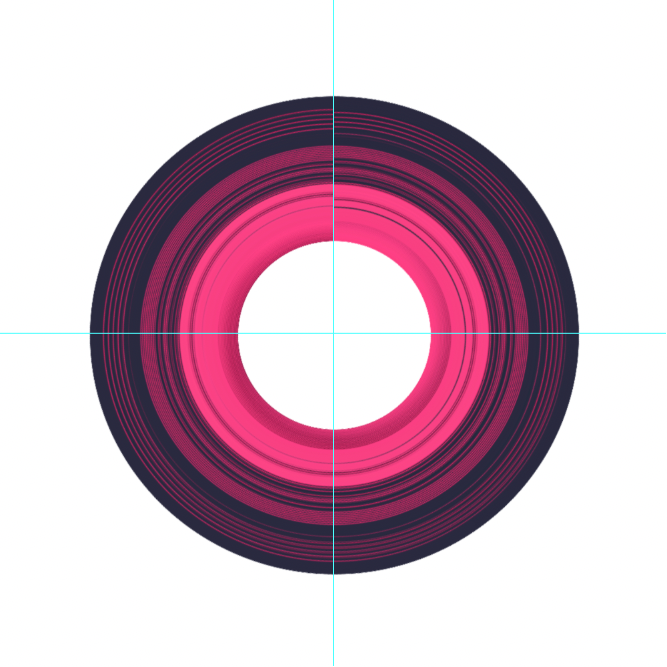
Press Command-R (PC: Ctrl-R) to turn on the rulers. Click on the vertical ruler and drag out a guide until it snaps to the center (if it doesn’t snap, make sure View>Snap is turned on). Drag a guide from the top horizontal ruler, as well, until it snaps to the center.
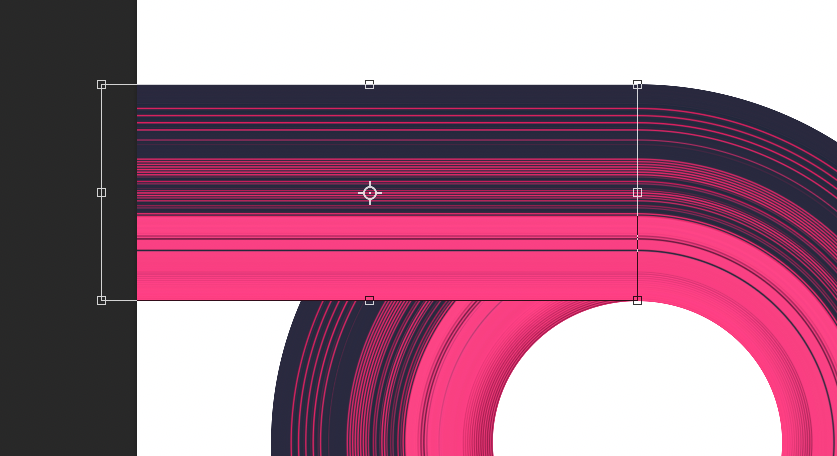
Step 12:
In the Toolbar, click-and-hold on the Rectangular Marquee tool and choose the Single Column Marquee tool. Click just to the right of the vertical guide to add the selection, and then drag it close to the guide until it snaps to it (you might have to zoom in). Make sure the selection is on the right side of the guide.
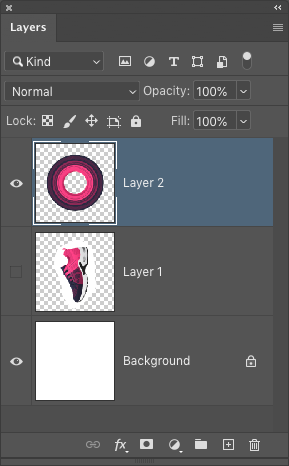
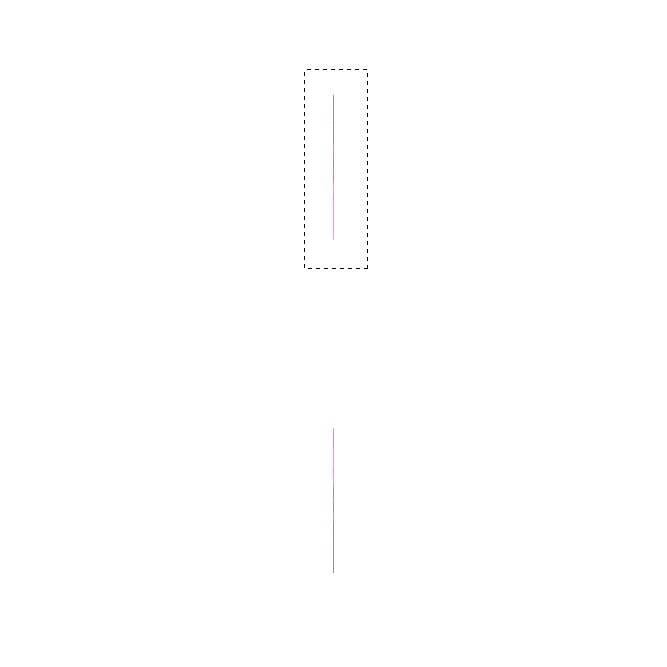
Step 13:
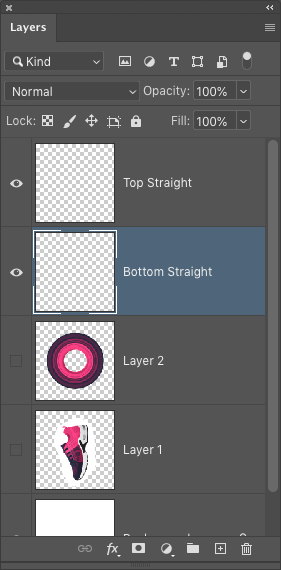
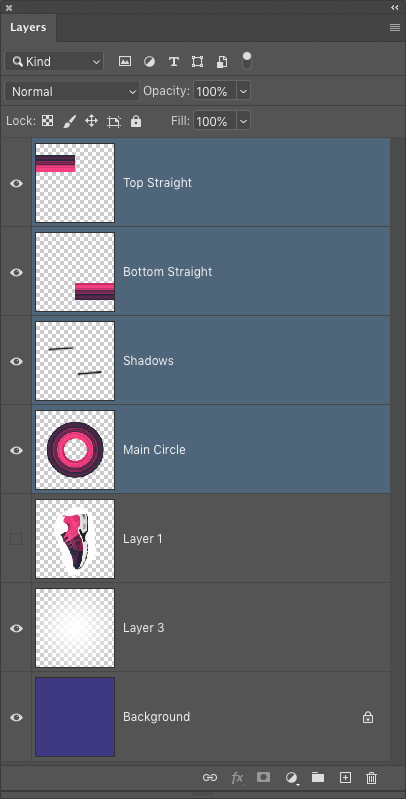
Press Command-J (PC: Ctrl-J) to copy the selected areas to a new layer. If you turn off the circle layer, you’ll see just two thin vertical pieces. These need to be on separate layers so use the Rectangular Marquee tool to draw a selection around the top line and press Shift-Command-J (PC: Shift-Ctrl-J) to cut the selection to a new layer. Since they’re so small, it’s hard to tell which layer is which in the Layers panel, so rename them like we did here to make it easier to identify them. Simply double-click a layer’s name to rename it.
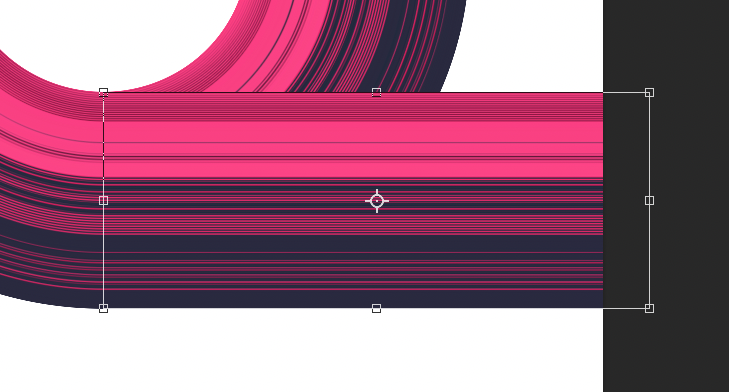
Step 14:
Turn the circle layer back on, click on the Top Straight layer in the Layers panel to make it active, and press Command-T (PC: Ctrl-T) to activate Free Transform. Hold the Shift key. Grab the left-middle control handle, and drag it left a little ways past the canvas edge. Press Enter when done.
Step 15:
Now select the Bottom Straight layer and do the same thing, but this time stretch it to the right a little ways past the canvas edge. Press Enter.
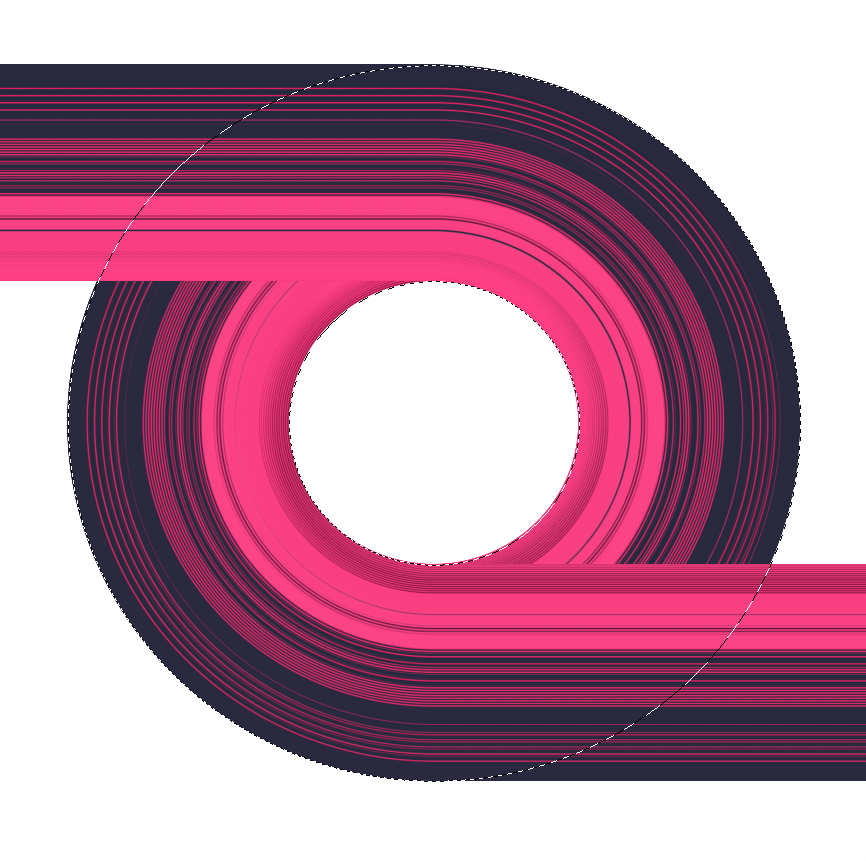
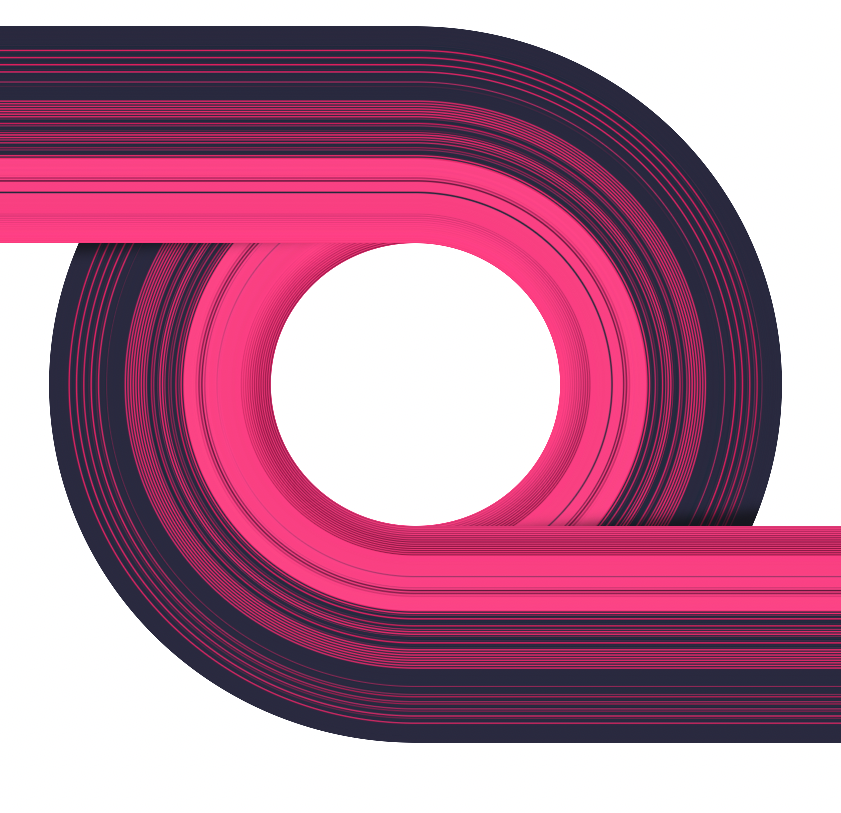
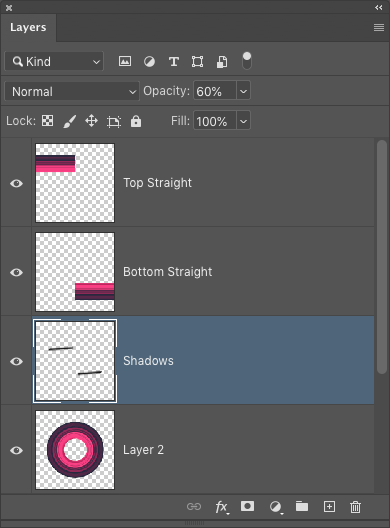
Step 16:
Create a new layer, name it Shadows, and place it below the two straight layers and above the main circle layer in the Layers panel. Hold down the Command (PC: Ctrl) key and click on the thumbnail of the circle layer to load the shape as a selection.
Select the Brush tool (B), set it to a small Soft Round brush in the Brush Preset Picker in the Options Bar, and press D to set the Foreground color to black. Paint a very narrow shadow line behind each horizontal shape.
Tip: Click once with the brush at the starting point, and Shift-click the ending point to paint a straight line between the two points. Lower the layer Opacity to around 60%. This shadow effect is optional but does create a little bit of depth between the objects. Press Command-D (PC: Ctrl-D) to deselect.
Step 17:
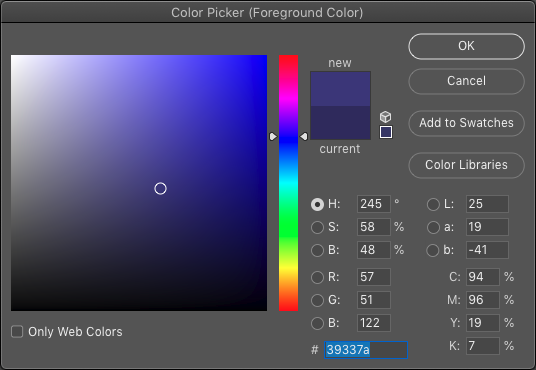
Click on the Background layer in the Layers panel to make it active. Click on the Foreground color swatch near the bottom of the Toolbar to open the Color Picker. Choose a color to go along with the color scheme of your stretch effect (we’re using a simple purple). Click OK to close the Color Picker, and press Option-Delete (PC: Alt-Backspace) to fill the Background layer with that color.
Step 18:
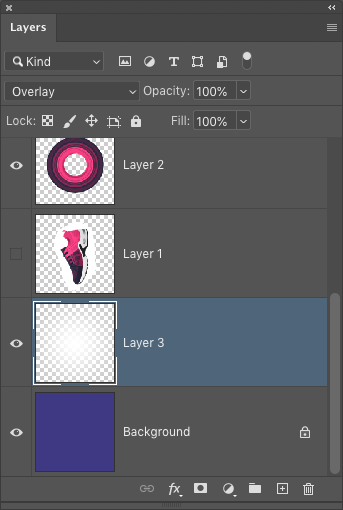
This is an old trick I use out of habit now that creates a nice gradient vignette effect. Create a new layer above the Background layer, and choose the Gradient tool (G) in the Toolbar. In the Options Bar, click the gradient preview strip, choose the Foreground to Transparent gradient preset in the Basics set in the Gradient Editor, and click OK. Select the Radial Gradient icon in the Options Bar.
Press D then X to set the Foreground color to white. Draw a gradient starting at the center of the canvas out to one of the corners. Change the layer blend mode to Overlay. If the gradient is too intense just dial down the layer Opacity.

Step 19:
In the Layers panel, click on the Top Straight layer at the top of the layer stack, and Shift-click the circle layer to select all of the layers that make up the stretched shape, including the Shadows layer. Press Command-G (PC: Ctrl-G) to place the layers in a layer group folder, and rename the group Main Background Object.
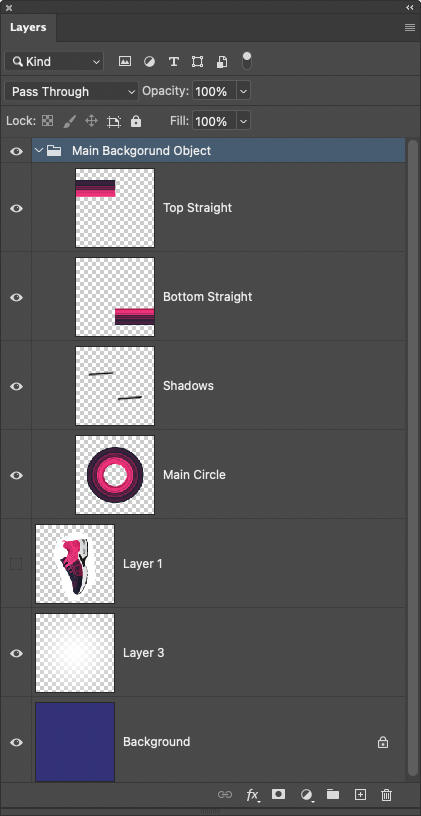
Step 20:
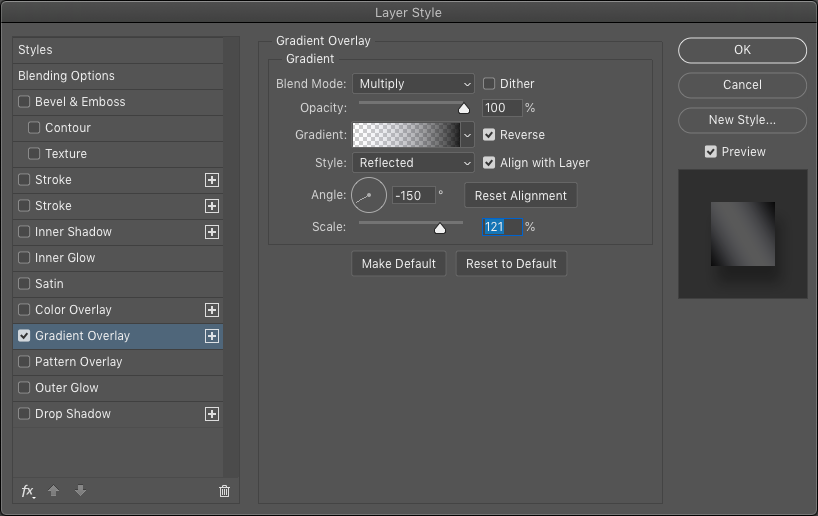
Putting these elements in a group allows us to apply layer styles to the overall shape without merging them. With the group active in the Layers panel, start by pressing D to set the Foreground color to black. Click on the Add a Layer Style icon (fx) at the bottom of the Layers panel and choose Gradient Overlay. Click on the Gradient strip, select the Foreground to Transparent gradient in the Basics set in the Gradient Editor, and click OK to close the Gradient Editor. Check on Reverse, and set the Blend Mode to Multiply, the Style drop-down menu to Reflected, and the Angle to –150°. This creates a light effect on the shape. You can manually move the gradient by clicking-and-dragging directly on the image, and then increase or decrease the Scale of the gradient depending on how focused you want the light effect to be. Don’t click OK yet.
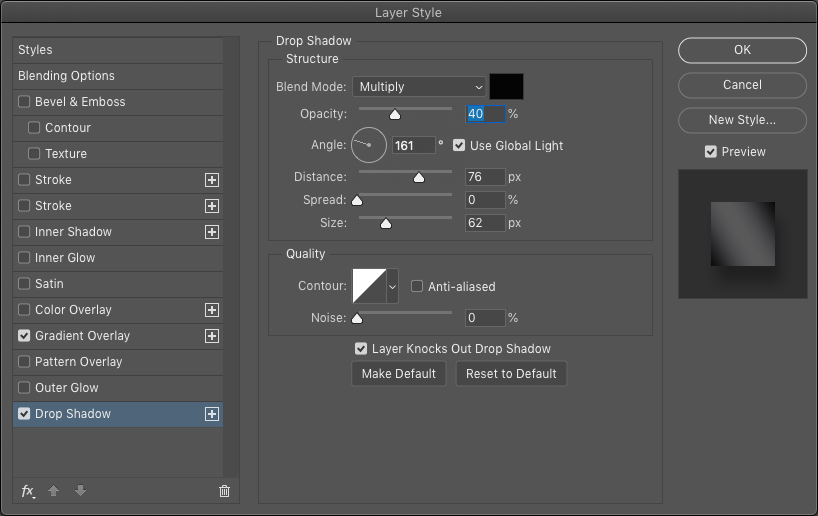
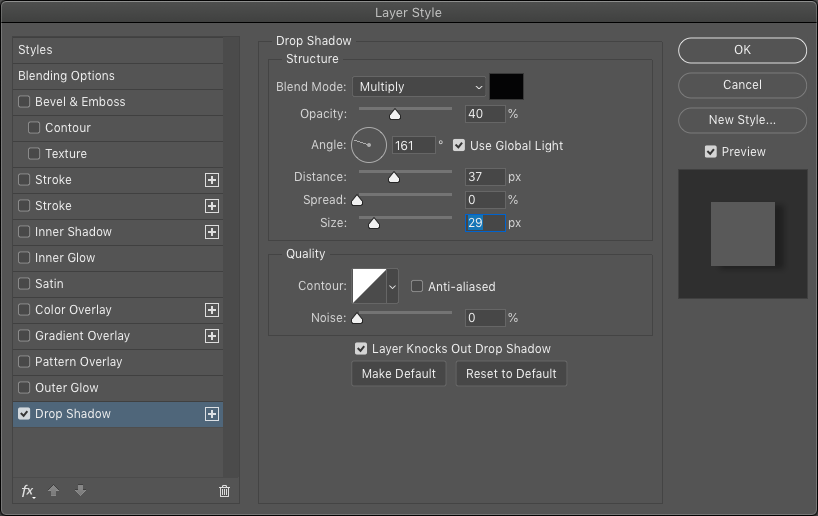
Step 21:
Click on the words Drop Shadow in the list of effects on the left side of the Layer Style dialog to activate it and access its settings. You can experiment with these settings to get different results but the settings shown here create a soft shadow that provides a sense of depth without being too harsh. Click OK when done.
Step 22:
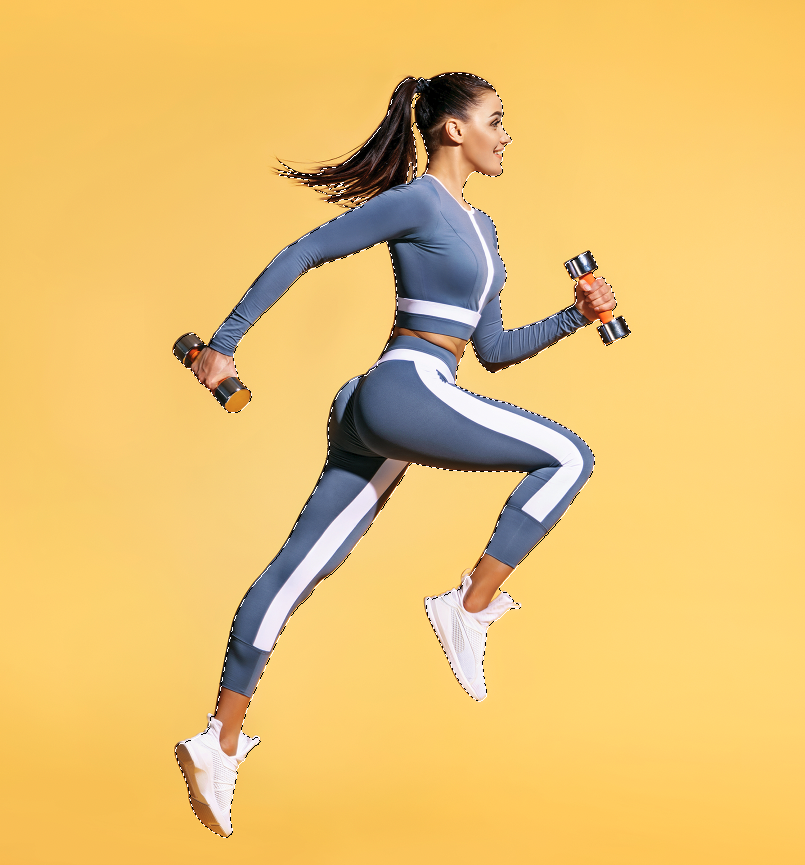
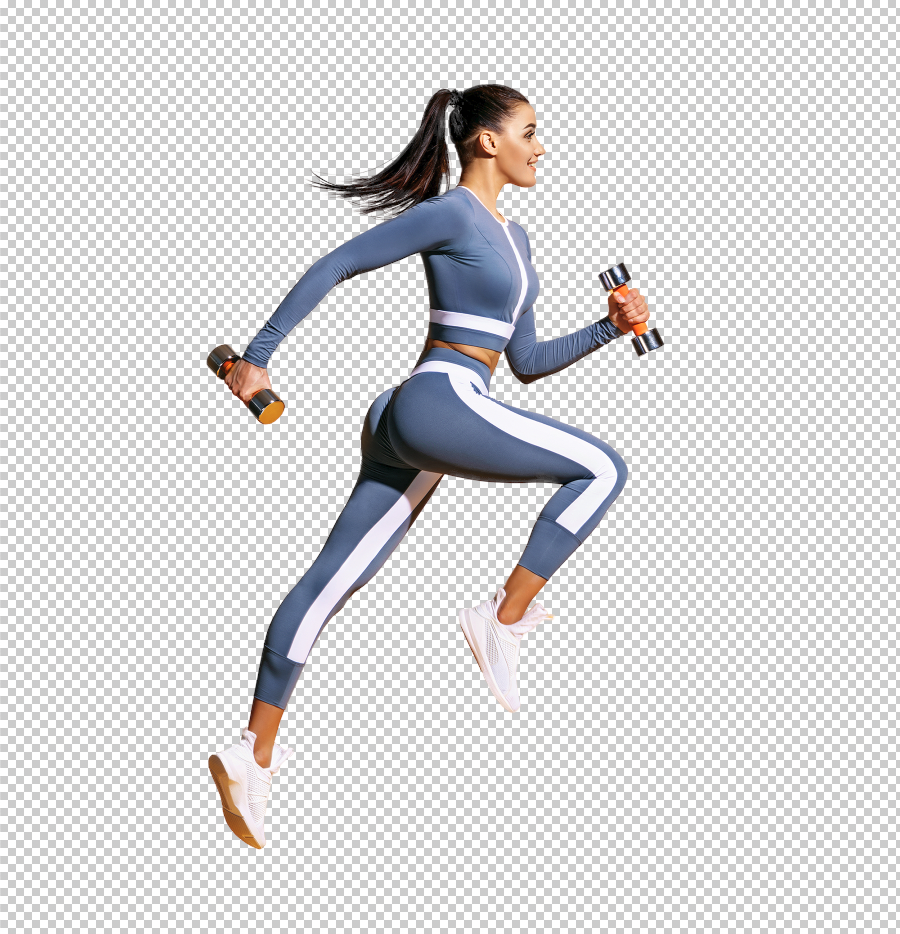
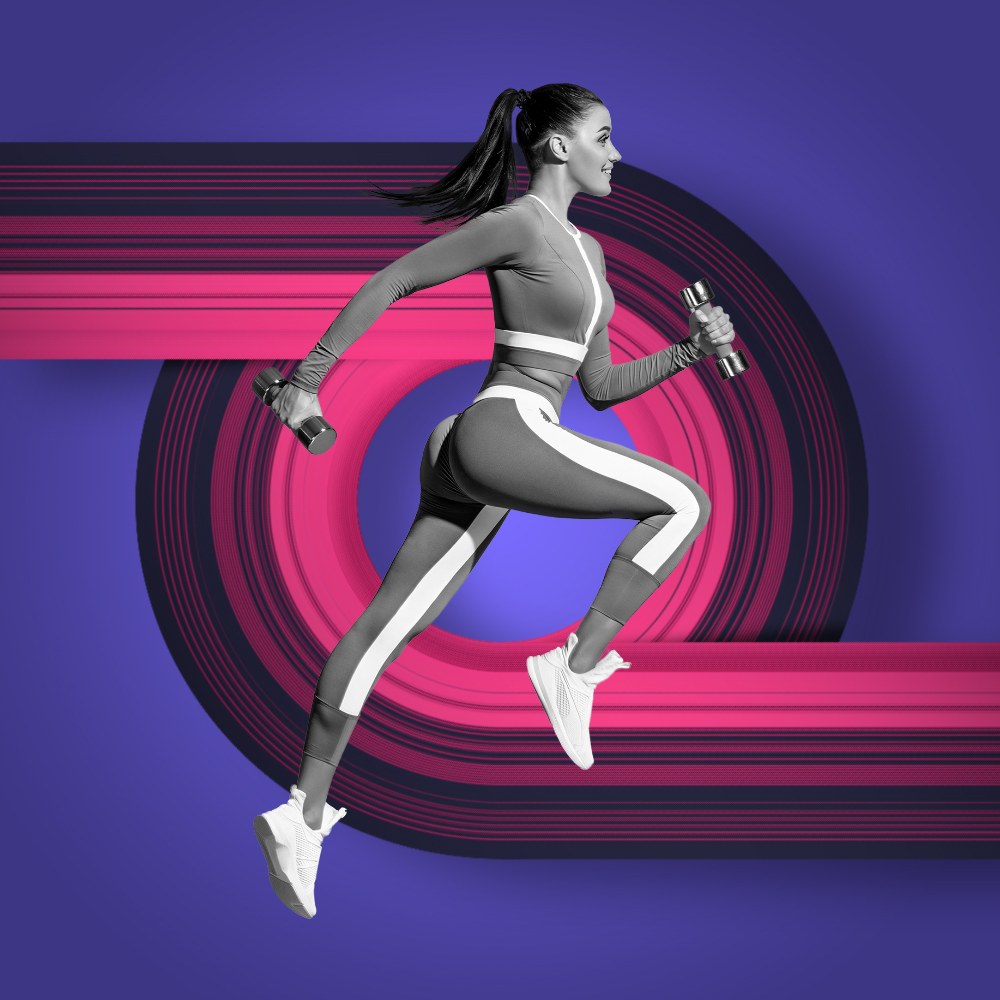
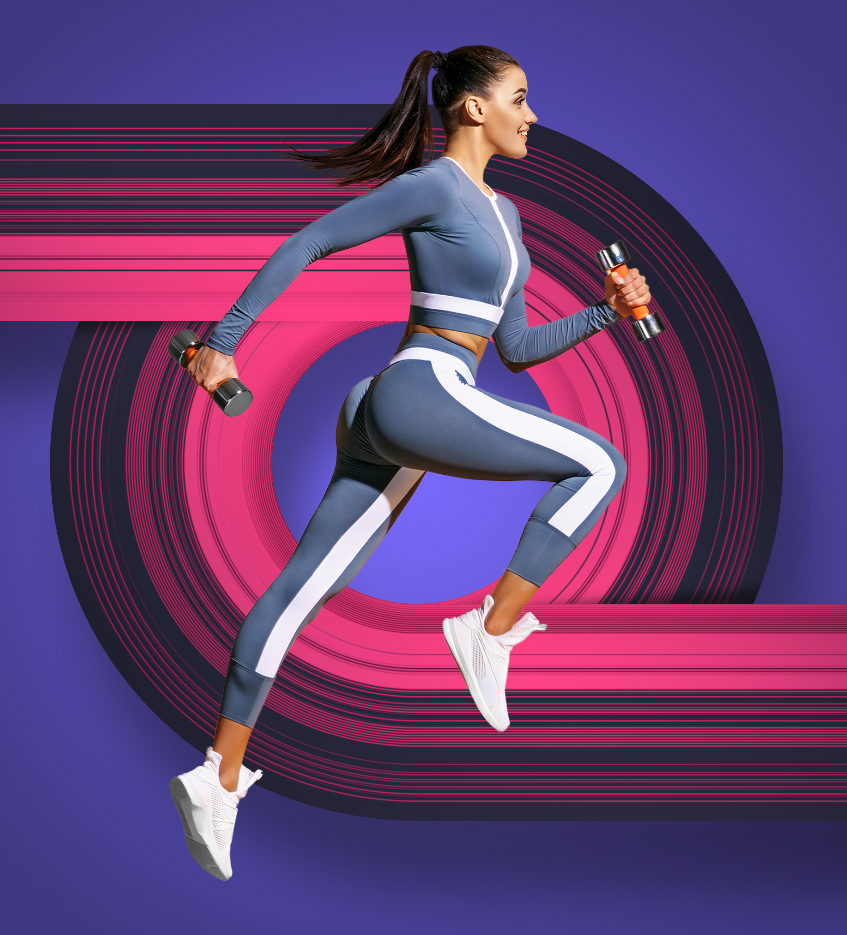
Now let’s add our main subject. Here we have a nice shot of a workout girl in a midair pose. She’s on a yellow background, which is reflected on some of her clothing. This could be an issue and the colors could clash a little with our main design but we’ll address that in a moment. First, let’s extract her from the background.
If you’d like to download the low-res watermarked versions of these images to follow along, click this link, log in with your Adobe ID, and click the Save to Library button. Right-click the image in the Libraries panel (Window>Libraries) and choose Edit to open it in Photoshop.
To make it easier to work with the image, increase the resolution of the practice file. (We normally don’t recommend enlarging images, but this is only for practice purposes.) Go to Image>Image Size, turn on the Resample checkbox, select Preserve Details 2.0 from the Resample drop-down menu, set the Width to 2,000 pixels, and click OK.
Once your image is open, go under the Select menu and choose Subject.
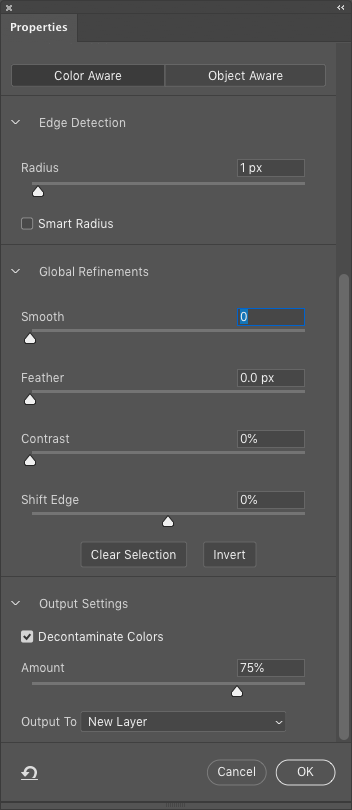
Step 23:
Click the Select and Mask button in the Options Bar to open the refine selection features. In the Properties panel, set the View drop-down menu to On Black (A) and the Opacity to 100%. Under Edge Detection, set the Radius to 1 px. Click the Refine Hair button in the Options Bar, and then use the Refine Edge Brush tool (R) in the selection toolbar on the left to paint away any of the yellow background that might still be visible, especially around her hair. Use the Bracket keys on your keyboard to quickly change the size of the brush as needed.
When done refining, go back to the Properties panel, scroll down to the Output Settings section, and activate Decontaminate Colors. Set the Amount to 75%. This will help with the yellow spillover on the subject from the background. Finally, set the Output To drop-down menu to New Layer and click OK .

Step 24:
Go under the Layer menu, to Matting, and select Defringe. In the Definge dialog, set the Width to 1 pixel and click OK.

Step 25:
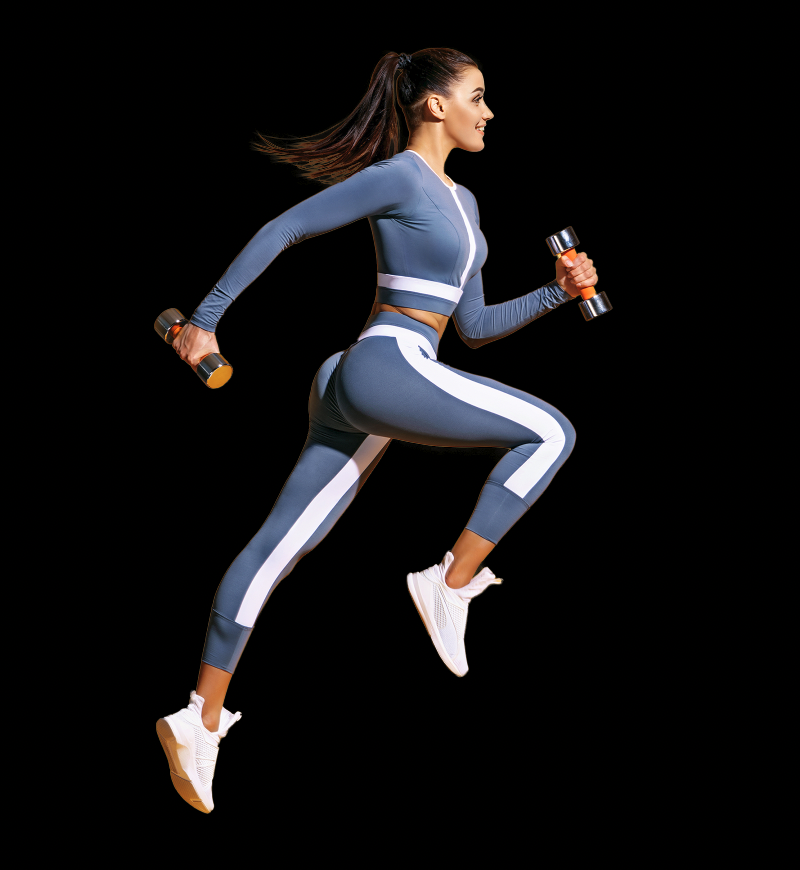
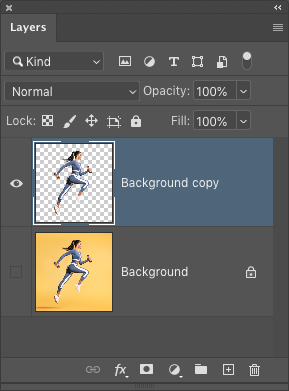
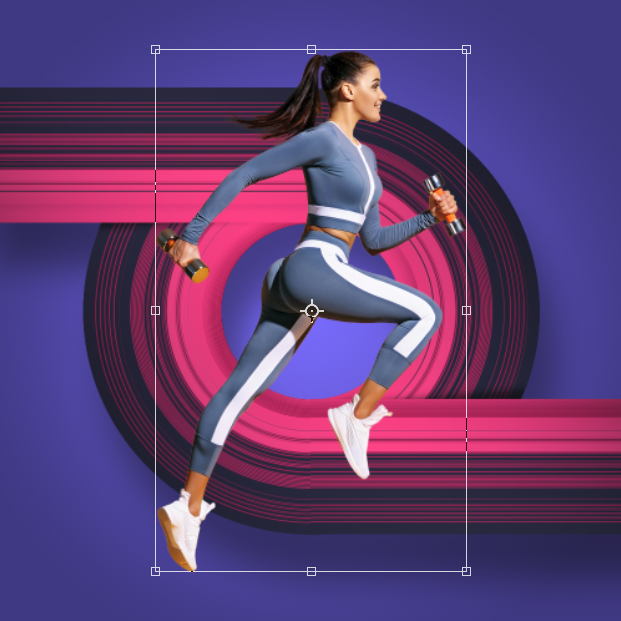
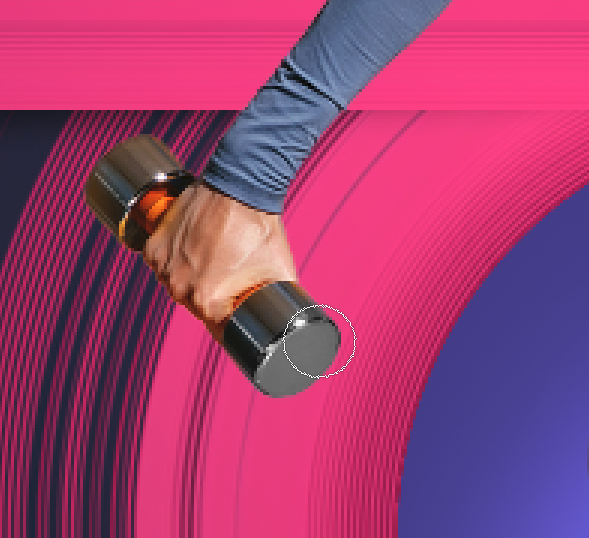
Even though this gave us a nice clean extraction, the original yellow background is still spilling over on some of the subject, especially on her shoes and the weights she’s holding. We’ll address this in a moment but let’s bring the subject into the main image first. Using the Move tool (V), drag the extracted subject over to the main working file. Make sure the layer is positioned at the top of the layer stack, and then use Free Transform to resize and position her as shown here.
Step 26:
Click on the Create New Adjustment icon (half-black, half-white circle) at the bottom of the Layers panel and choose Hue/Saturation. In the Properties panel (Window>Properties), set the Saturation to –100, which will desaturate the entire image. To isolate it to the main subject, just press Option-Command-G (PC: Alt-Ctrl-G) to clip the adjustment layer to the subject layer. Also, click on the layer mask thumbnail on the adjustment layer in the Layers panel, and press Command-I (PC: Ctrl-I) to invert it from white to black, which hides the entire adjustment.
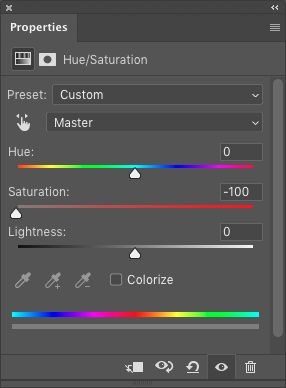
Step 27:
Now switch to the Brush tool (B) and choose a soft-edged round brush. With the layer mask thumbnail still active in the Layers panel, set the Foreground color to white by pressing D, and paint over the areas of the shoes and hand weights to remove the yellow cast from those parts.
Step 28:
To finish the design, make the main subject layer active again. Add a Drop Shadow to this layer like the one we added to the background object in Step 21. Here you can see we lowered the Distance and Size to make it appear the subject is close to the background element. Make sure you leave Use Global Light checked on so that, if you change the Angle of the shadow, it will do the same to all the Drop Shadow layer styles.
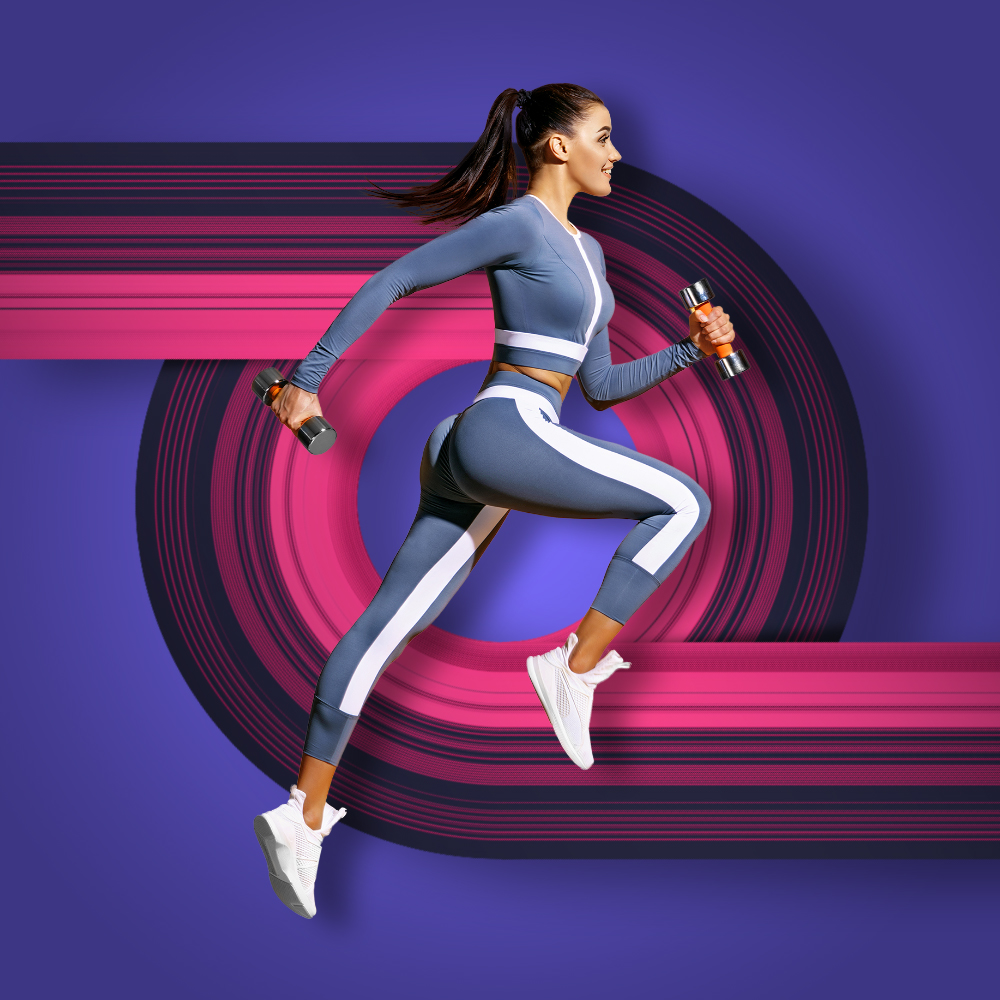
Hopefully, this gives you a new way to use your images to create colorful stretched graphics like these to use as background elements for just about anything. Also, with the stretched background shape contained in a layer group, you can use Free Transform to rotate the angle depending on the subject.
This article originally published in the July, 2021 issue of Photoshop User magazine.