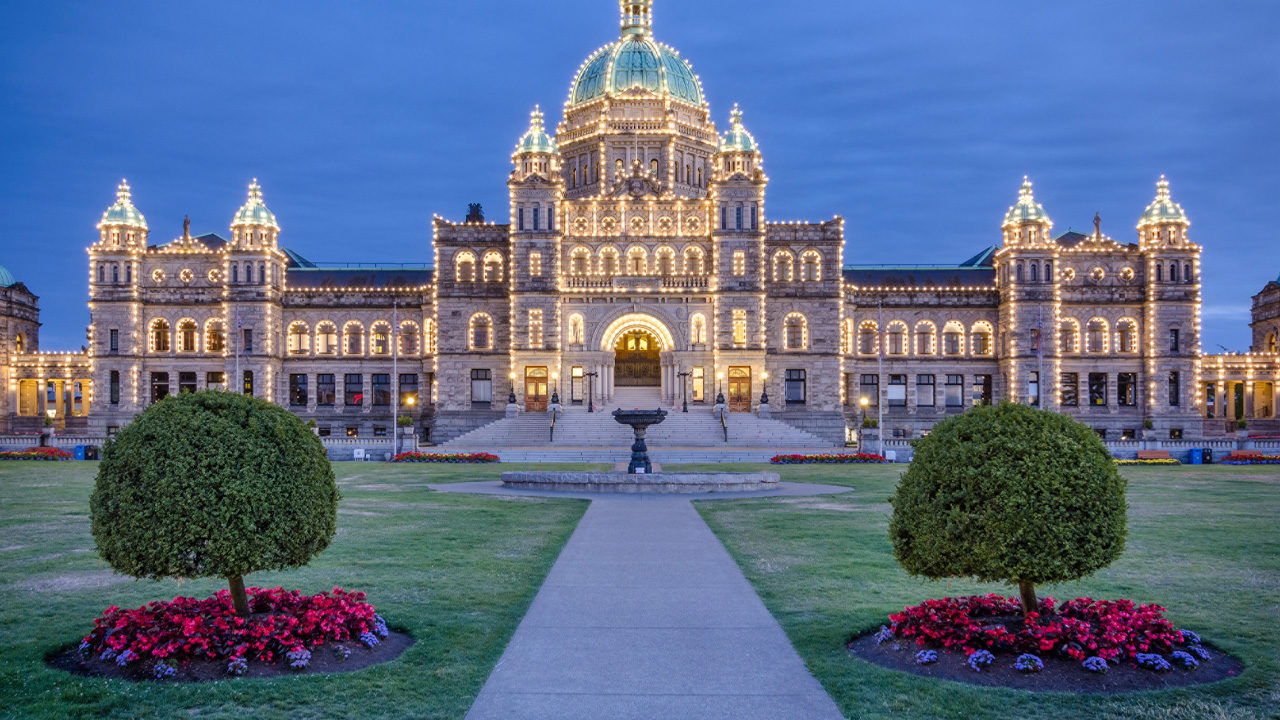
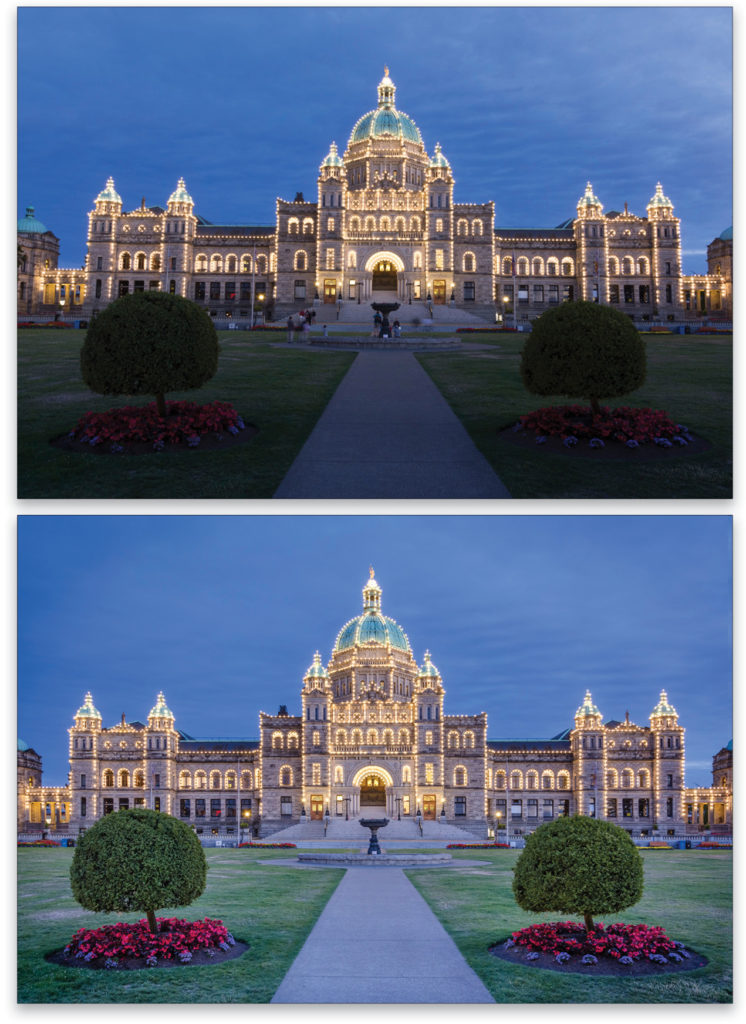
On one of my first visits to Vancouver Island, I was kindly shown around the capital city of Victoria, which included a nighttime visit to the main harbor area. It was here that I took this photo of the British Columbia Parliament Buildings. I set up the camera on a tripod just before dusk and then waited for the illuminations to be switched on. After half an hour or so, the balance between the ambient dusk light and the warm lights on the building was just about perfect.
When it comes to nighttime shooting urban scenes, you really don’t have much of a window to work within, although of course, it’s slightly easier at more extreme latitudes where the sun sets more slowly.
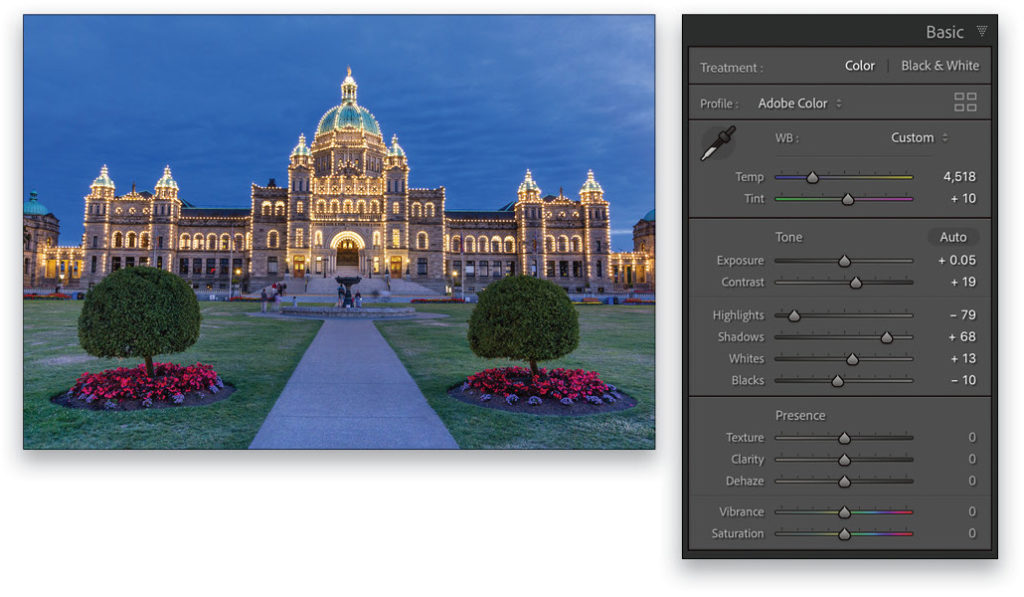
The before shot below shows how there were a number of tourists visible in the scene, such as those who were sitting on the steps or around the water fountain. By waiting patiently and shooting lots of photos, I was able to edit the images in Lightroom Classic and then auto-process the photos in Photoshop as a multi-layered image to make the tourists (mostly) appear to vanish. More specifically, I did this by merging a series of photos into a smart object and then applying the Median Stack Mode processing to remove the people, as shown in the following steps.
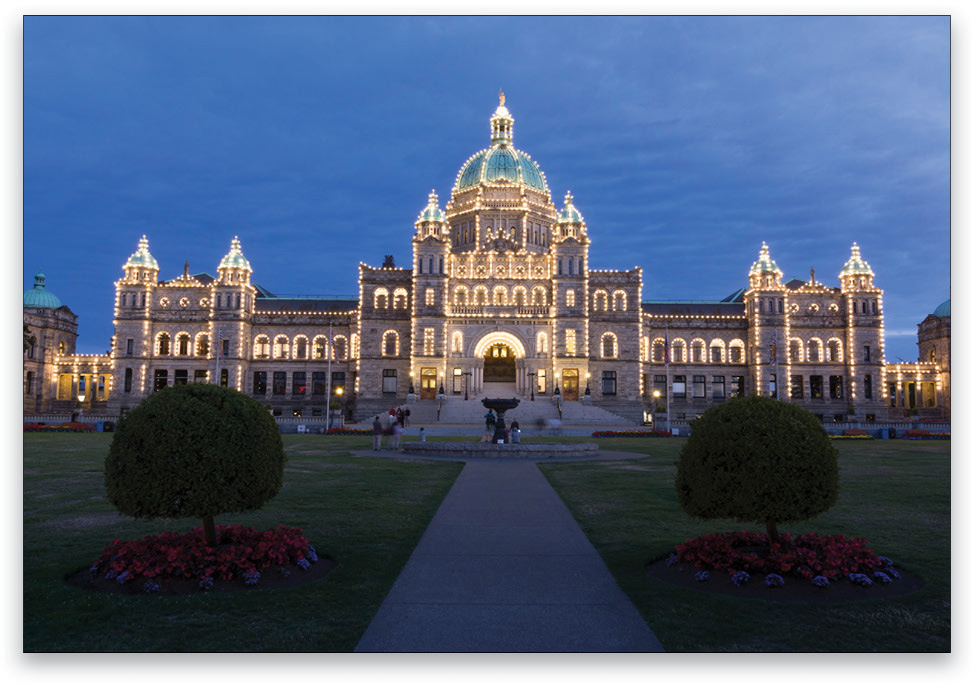
For the best results, set the camera on a tripod. If that isn’t possible, just try to keep the camera as steady as possible. In this case, it will also be necessary to select all the layers in Photoshop’s Layers panel and go to Edit>Auto-Align Layers prior to converting the layers to a smart object in Step Eight.
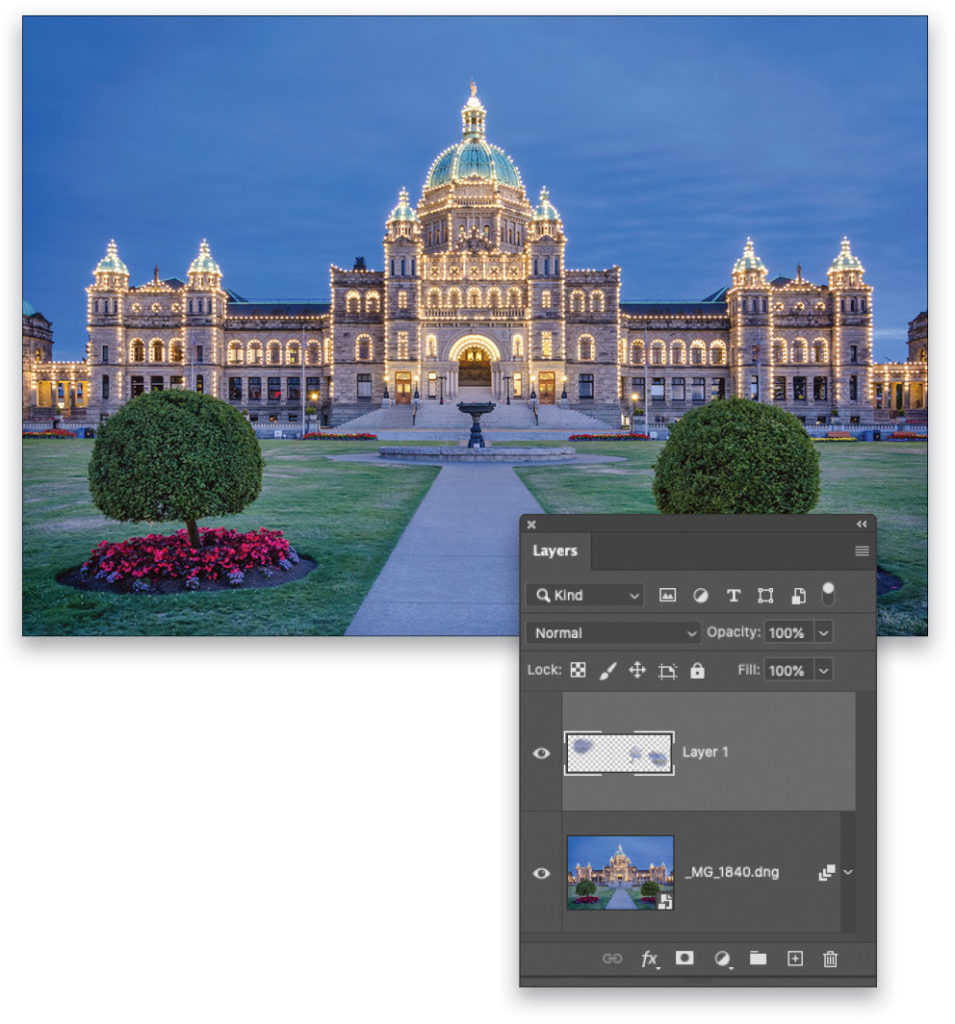
I find the Median Stack Mode processing method works well most of the time, but as I point out below, you may still end up with some blurry shadows. For perfect results, you may need to do what I did here and add an empty new layer to the top of the layer stack and use the Clone Stamp tool (S) or Spot Healing Brush tool (J) in Photoshop to tidy the final image. (KelbyOne members can click here to download downsized DNGs of these images to follow along.)
The Steps
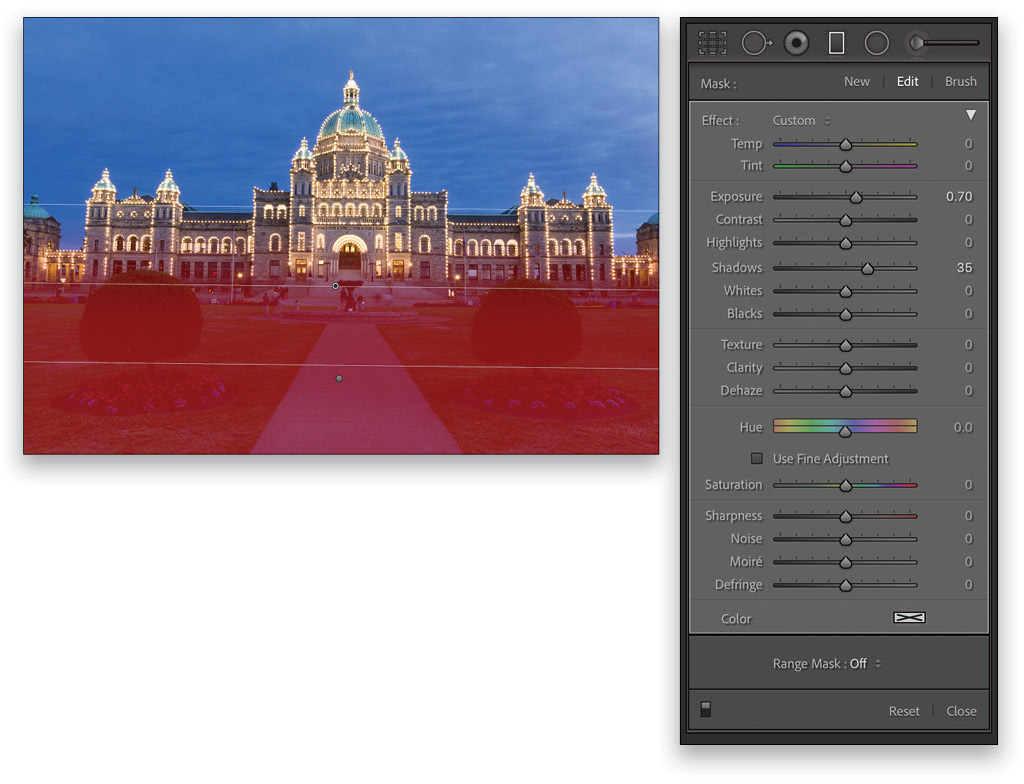
Step One: To start, I took this image of the Parliament building into Lightroom’s Develop module and set about fixing the biggest problem, which was to lighten the bottom half of the scene. To do this I added a couple of Graduated Filter (M) adjustments and lightened the Exposure and Shadows. The lower Graduated Filter has the Exposure set at 0.28 and Shadows at 67; the higher Graduated Filter has the Exposure set at 0.70 and Shadows at 35. Stacking and blending the Graduate Filters in this way creates more consistent lighting throughout the entire foreground. To add more than one Graduated Filter, simply click New at the top of its panel on the right and drag out another gradient.
Step Two: Having balanced the exposure between the foreground and the sky, I adjusted the Basic panel Tone settings as shown here to preserve the detail in the Highlights and Shadows and set the Whites and Blacks. I also adjusted the Temp and Tint settings.
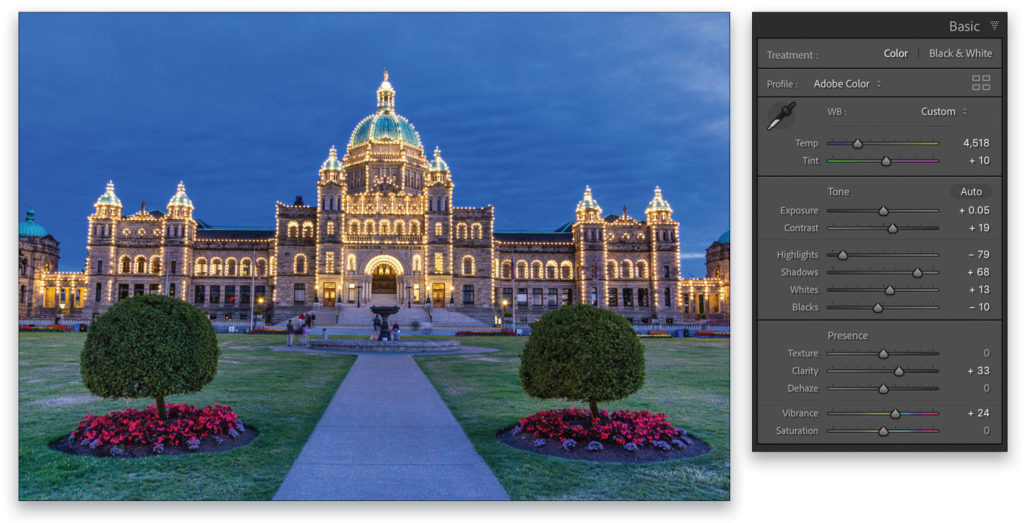
Step Three: In this step I boosted the Clarity to add definition and make the lights stand out more. I also increased the Vibrance to add some color saturation to the scene.
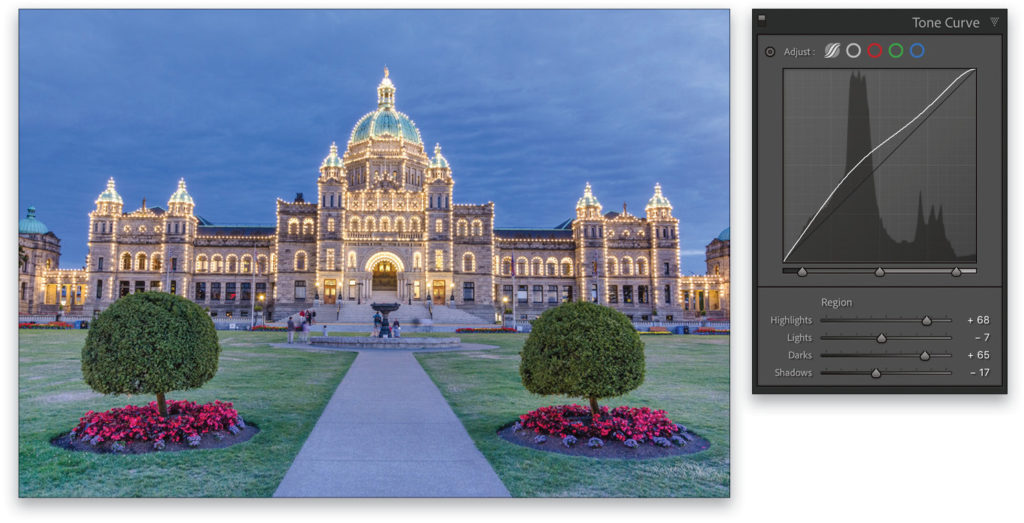
Step Four: In most instances I find I can make all the lightness and contrast adjustments using just the Basic panel controls. At the very least, I can use the Basic panel adjustments to do the heavy lifting and use the Tone Curve panel to fine-tune the contrast. Here, I edited the Tone Curve settings to lighten the midtones and add a contrast kick to the extreme highlights. Notice how I also dragged the shadow tone range split point slider (the slider below the curve on the left) as far left as possible, and the highlight tone range split point slider (the slider below the curve on the right) as far right as possible.
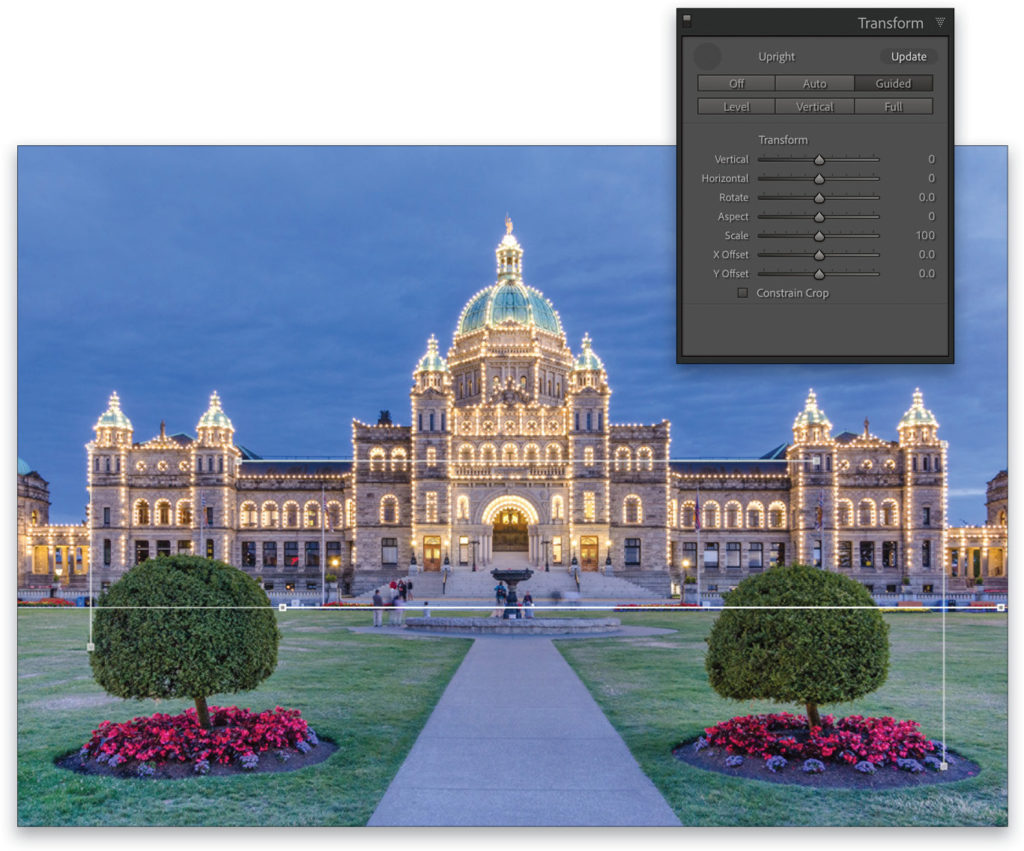
Step Five: In this step I went to the Transform panel. I selected the Guided Upright option and added horizontal and vertical guidelines along the edges of the building. Just click-and-drag to add a line, and then keep dragging to rotate the line into position. This applied a perspective correction that straightened the horizontal and vertical lines.
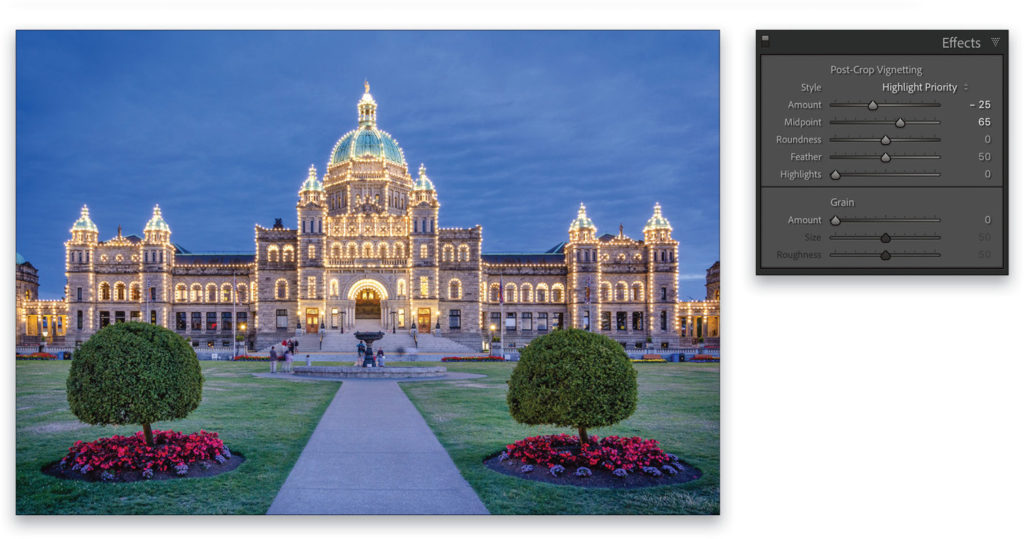
Step Six: I then went to the Effects panel and added a negative Post-Crop Vignetting Amount, using the Highlight Priority method in the Style drop-down menu, to darken the corners of the photo. I also adjusted the Midpoint of the vignette.
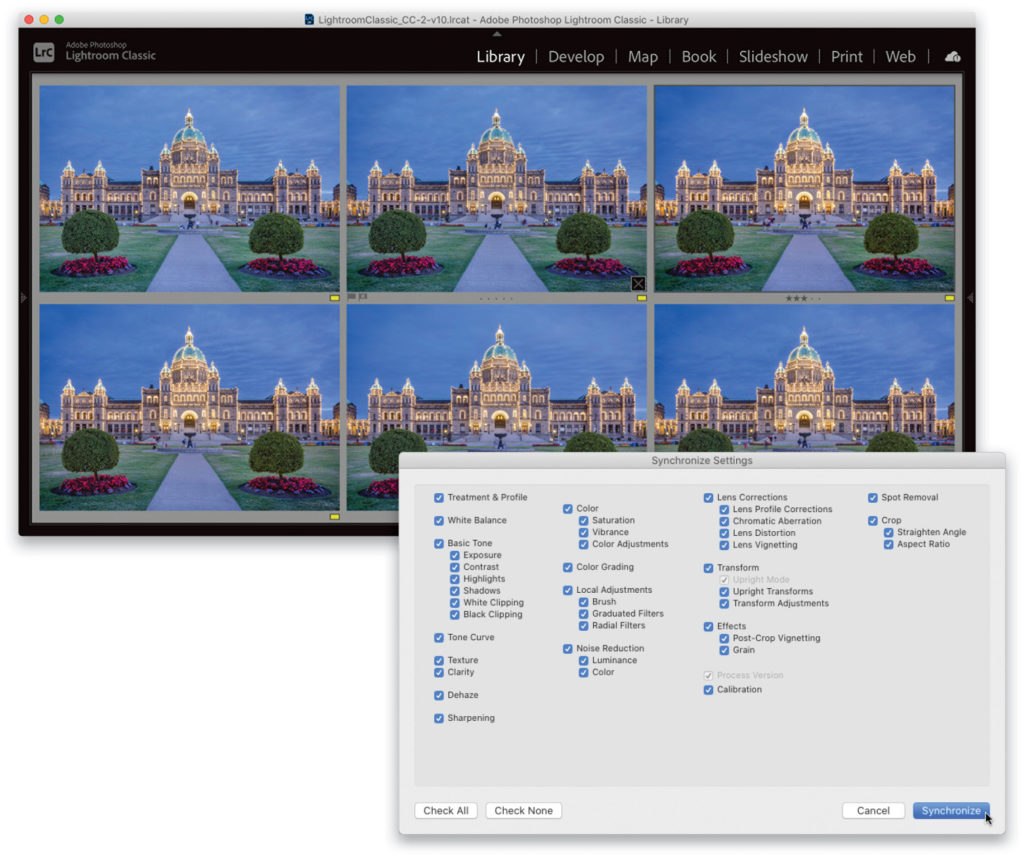
Step Seven: It was now time to sync the above Develop settings with the other photos that I had taken of the same scene. To do this, I made a selection of five other photos from the shoot by Command-clicking (PC: Ctrl-clicking) on them in the Filmstrip for a total of six selected photos. The edited image should be the “most selected” photo (lighter highlighting around its thumbnail in the Filmstrip), since it was the active image before selecting the other images. I selected Sync Settings from the Develop module Settings menu (Command-Shift-S [PC: Ctrl-Shift-S]). In the Synchronize Settings dialog I clicked the Check All button and then Synchronize to sync the Develop settings to all the selected photos.
Step Eight: With the Develop settings synced, and the six photos still selected in Lightroom, I chose Photo>Edit In> Open as Layers in Photoshop. This opened the photos and placed them as layers in a single Photoshop document. I then selected all the layers in the Layers panel (Command-Option-A [PC: Ctrl-Alt-A]) and chose Convert for Smart Filters from the Photoshop Filter menu. This merged the selected layers into one smart object layer.
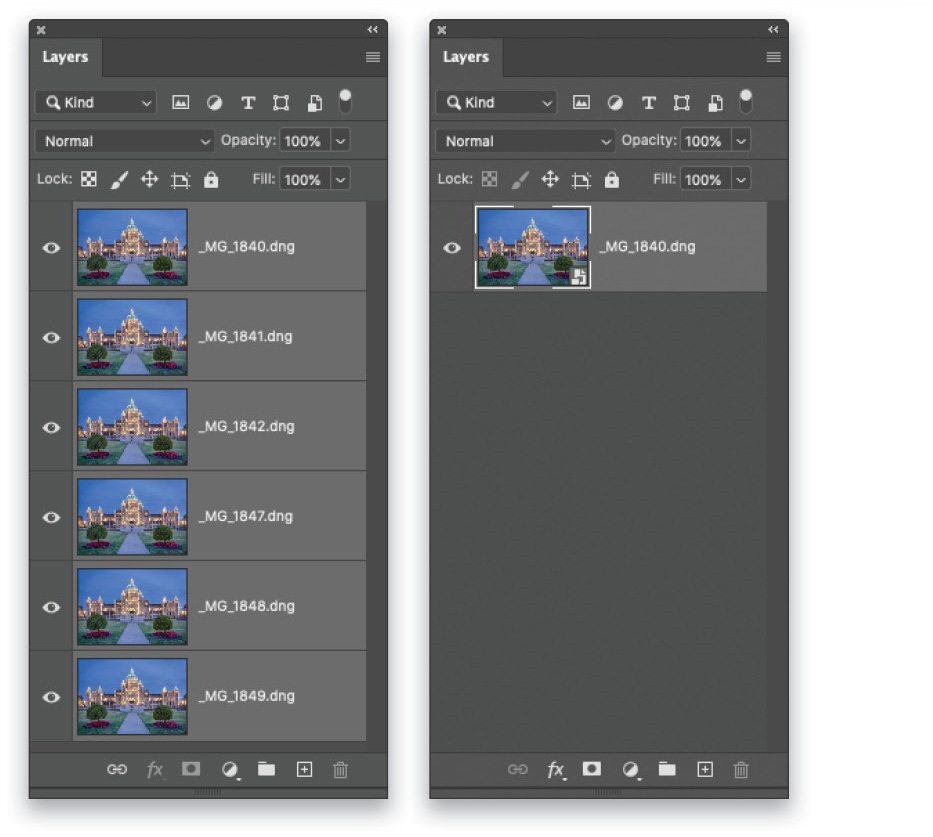
Step Nine: Next, I went to the Layer menu and chose Smart Objects>Stack Mode>Median. This Stack Mode processing method is good for removing differences from a layered set of photos in a smart object. In this example the smart object included six separate exposures, where in each of the photos the tourists appeared in different parts of the scene.
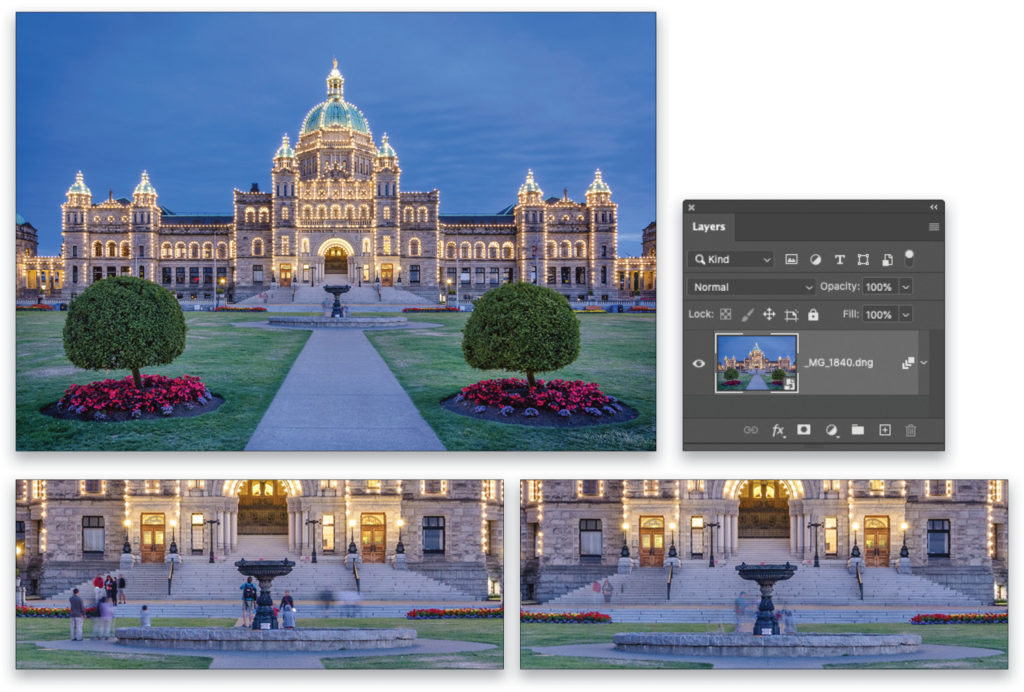
Step 10: The Smart Object Stack Mode processing did a fairly good job of removing the people from the scene. There were still some blurry areas, however, where a few ghost-like figures remained. In this final step, I added an empty new layer above the smart object layer in the Layers panel and used the Clone stamp tool (S) to remove these last traces.
To use the Clone Stamp tool, Option-click (PC: Alt-click) the area from which you want to clone, and then paint the area you want to clone over. You’ll see a preview of the sampled area inside the brush cursor, which will help you line up areas as you clone out the ghosts along the steps and grass. You can then save and close the image to return it to Lightroom.
Removing Tourists from a Scene
The Smart Object Stack Mode processing feature uses special formulae to determine how layered images are blended together. This feature was really designed as a tool for analytical work in areas such as forensics, medical imaging, and astronomy, but it also happens to have creative uses as well.
When it comes to removing tourists from a scene, the Median rendering is usually the most effective one to use. This is because it works by analyzing each and every pixel location in a stack of images and selects whatever is the most common pixel value to all the layers at a given point. A Median rendering can therefore be used to smooth out the differences found between individual exposures in a stack. [For a tip on using Stack Modes to remove noise, check out tip #30 in our “21st Annual 100 Photoshop Hot Tips” article by clicking here—Ed.]
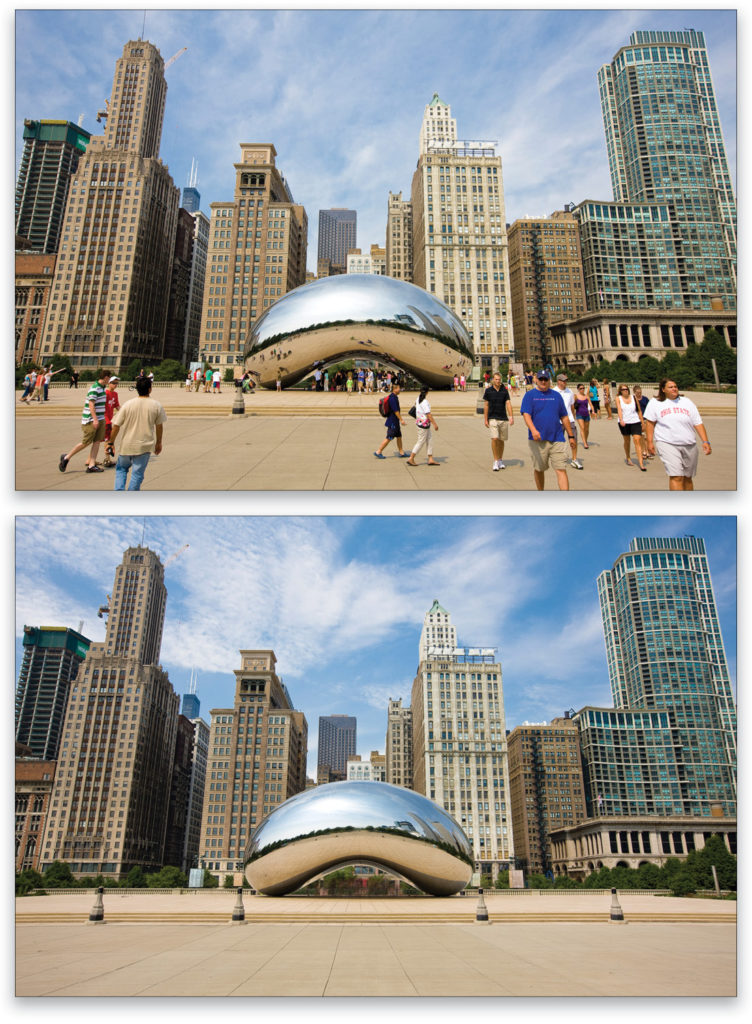
In the example shown here, my camera was set up on a tripod to photograph The Bean in Chicago’s Millennium Park. About a hundred or more exposures were captured over a period of an hour and these were then blended using the Median Stack Mode processing method described above. Despite having shot so many photos, it wasn’t possible to remove all the people who were congregated directly below the sculpture and so they ended up as a dark blur.
As I mentioned at the beginning, you’ll get better results if the camera is mounted on a tripod, although you can also get this to work where the photos have been captured handheld by selecting all the layers in Photoshop and going to Edit>Auto-Align Layers before converting them to a smart object.
Interestingly, while taking these photos, I met a young photographer from Denmark and explained to him the intended process. He quickly shot half a dozen frames with his camera handheld. The following day he emailed me his processed image. His wasn’t a perfect result, but I still thought it was really impressive considering he had created it from a series of handheld shots.
This article originally published in the February, 2021 issue of Photoshop User magazine.