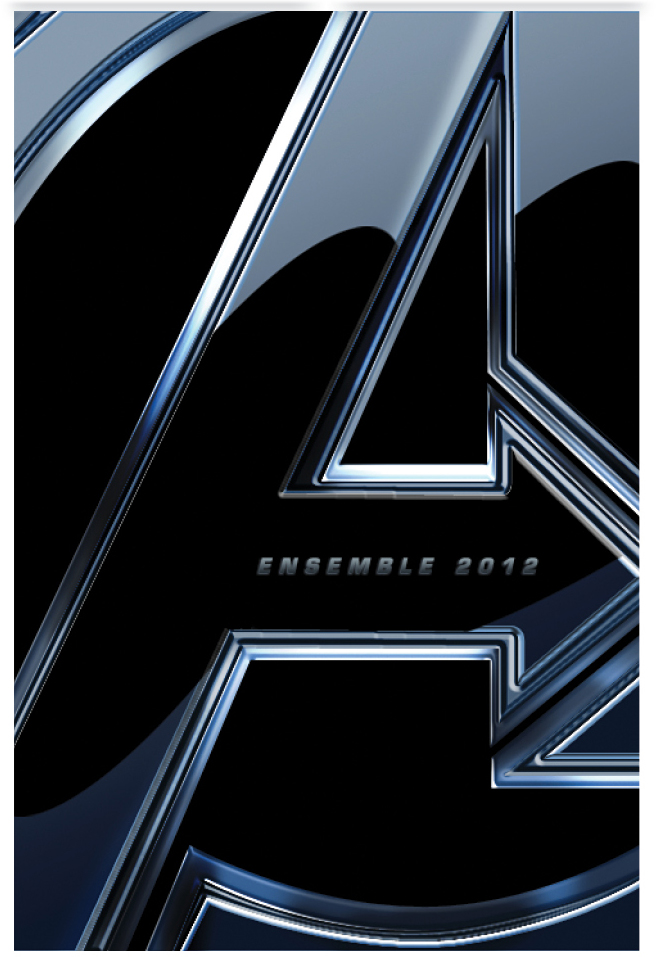
The promotional poster for The Avengers movie is a great example of how different layer styles, in combination, can produce extremely multidimensional effects. Of course, we can’t be sure they created the metallic, dark-chrome logo using Photoshop, but it’s how we’d do it—that’s just how we roll.
STEP ONE:
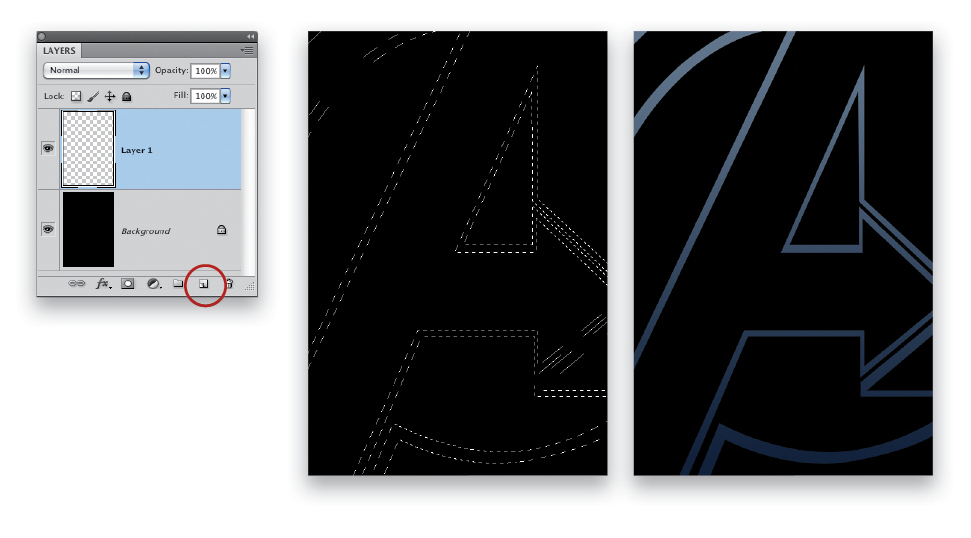
Open the LogoPaths.psd file. Click on the Foreground color swatch, choose a dark-blue color (R:0, G:25, B:55), and click OK. Click on the Background color swatch, choose a grayish-blue color (R:87, G:115, B:137), and click OK. Create a new layer (Layer 1) by clicking on the Create a New Layer icon at the bottom of the Layers panel. Command-click (PC: Ctrl-click) directly on Path 1 in the Paths panel to load it as a selection. Choose the Gradient tool (G) from the Toolbox. Click on the Gradient thumbnail in the Options Bar, choose the Foreground to Background preset, and click OK. Click-and-drag a gradient from the bottom toward the top of the selection.
STEP TWO:
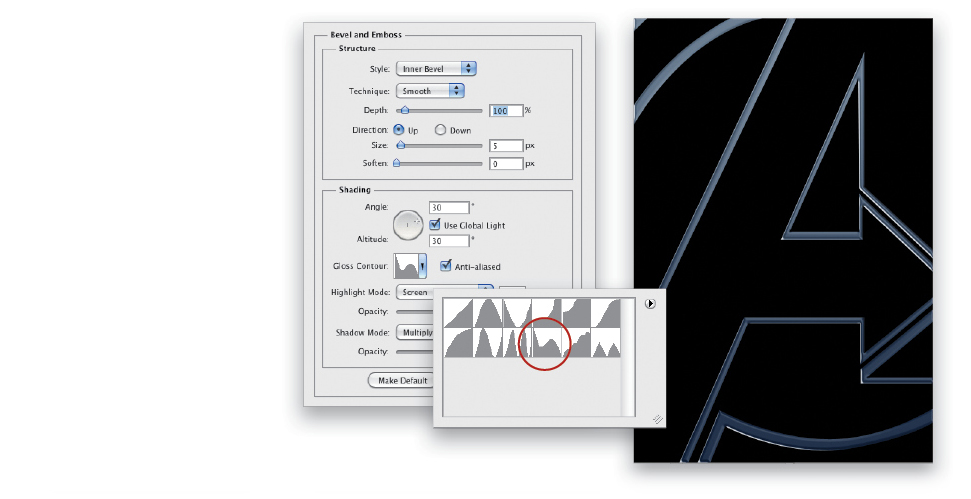
Press Command-H (PC: Ctrl-H) to hide the selection (or go to View>Extras if that keyboard shortcut hides your app on the Mac). Click on the Add a Layer Style icon (ƒx) at the bottom of the Layers panel, and choose Bevel and Emboss. Enter 30º for both Angle and Altitude. Click on the down-facing arrow next to the Gloss Contour thumbnail, and choose Rolling Slope – Descending in the Contour Picker. Click OK to apply the layer style.
STEP THREE:
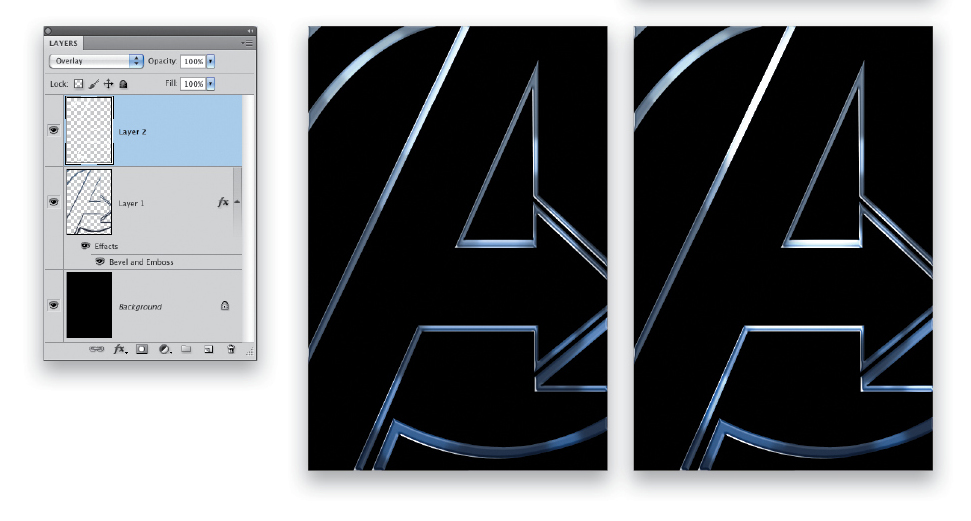
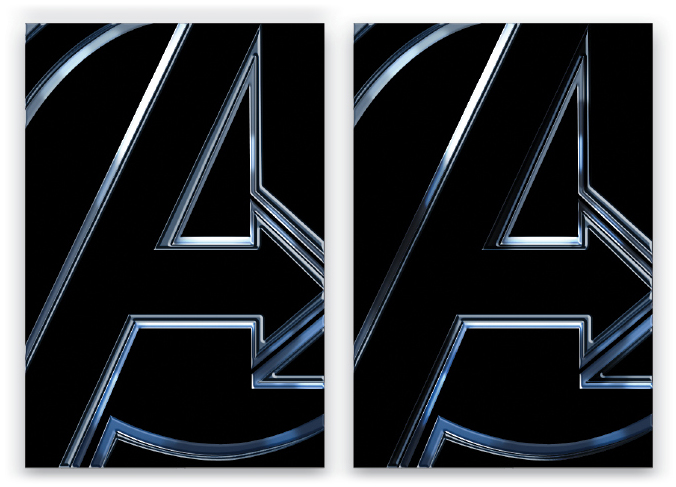
Create a new layer (Layer 2). Change the layer blend mode to Overlay. Press D then X to set the Foreground color to white. Choose the Brush tool (B) from the Toolbox. Lower the Opacity to 50% in the Options Bar. Choose a soft-edged brush and paint in some highlight areas (see example). Create another new layer (Layer 3), and change the layer blend mode to Overlay. Now, paint in some very strong highlight areas in the center and upper left of the logo (see example).
STEP FOUR:
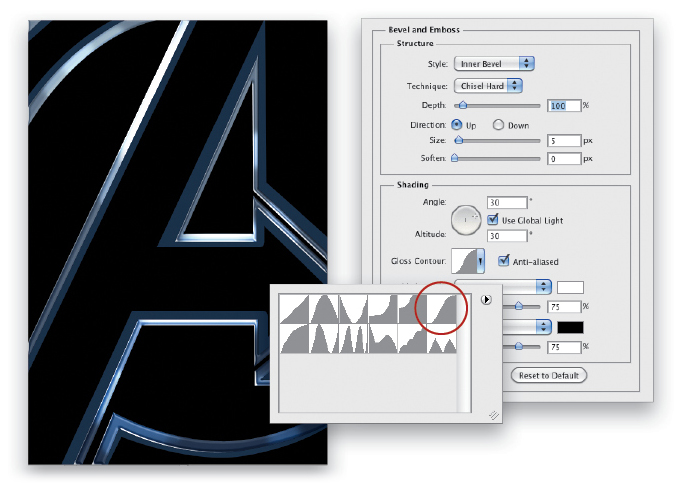
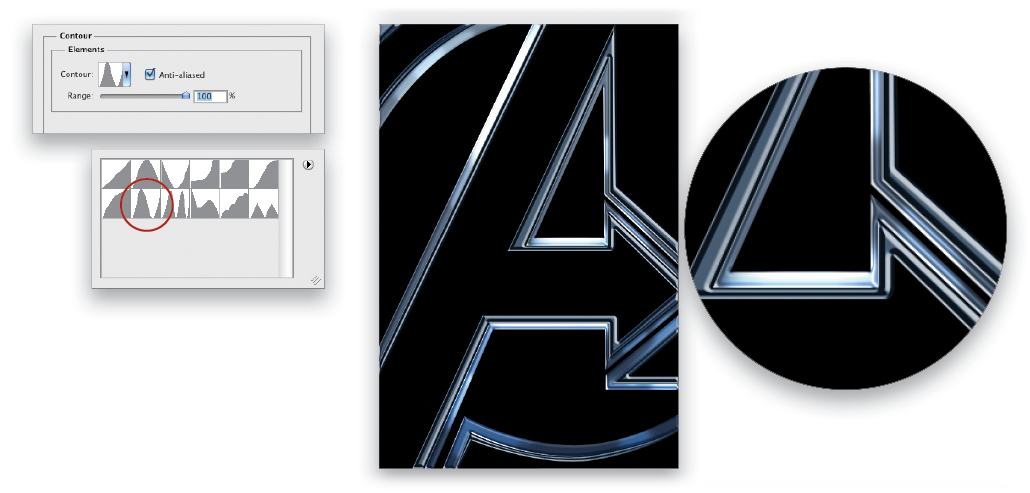
Create a new layer (Layer 4). Set the Foreground color to a dark blue (R:0, G:41, B:70), and the Background color to a royal blue (R:2, G:55, B:105). Command-click (PC: Ctrl-click) directly on Path 2 in the Paths panel to load it as a selection. Using the Gradient tool, click-and-drag a gradient from the bottom toward the top of the selection. Press Command-H (PC: Ctrl-H) to hide the selection. Click on the Add a Layer Style icon, and choose Bevel and Emboss. Enter 30º for both Angle and Altitude. Click on the down-facing arrow next to the Gloss Contour thumbnail, and choose Gaussian. Don’t click OK just yet.
STEP FIVE:
Click on the word “Contour” in the Styles list on the left side of the Layer Style dialog. Enter 100% for Range. Click on the down-facing arrow next to the Contour thumbnail, and choose Ring. Click OK to apply the style. Press Command-D (PC: Ctrl-D) to deselect.
STEP SIX:
Create a new layer (Layer 5). Change the layer blend mode to Overlay. Press D to set the Foreground color to black. Choose the Brush tool and using a large, soft-edged brush, paint shadowy or dark areas over some of the edges (see example).
STEP SEVEN:
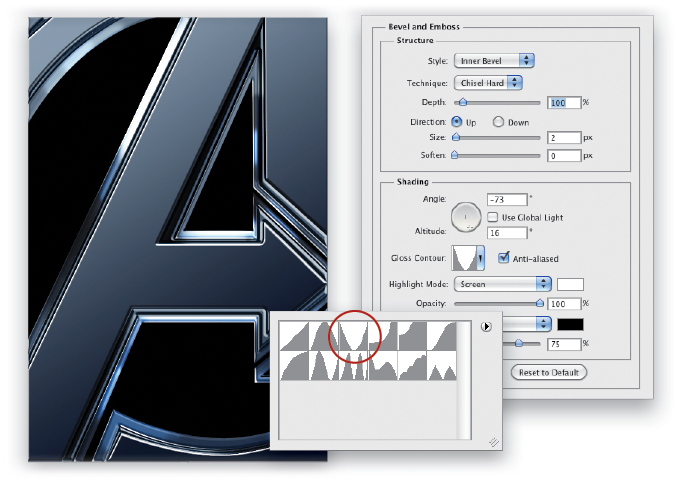
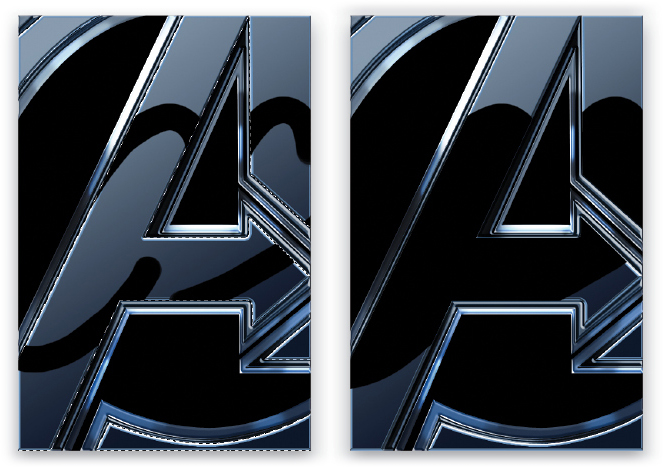
Create a new layer (Layer 6). Set the Foreground color to dark blue (R:0, G:14, B:38), and the Background color to a pale blue gray (R:134, G:164, B:185). Command-click (PC: Ctrl-click) directly on Path 3 in the Layers panel to load it as a selection. Using the Gradient tool, click-and-drag a gradient from the lower right toward the upper left of the selection. Press Command-H (PC: Ctrl-H) to hide the selection. Click on the Add a Layer Style icon, and choose Bevel and Emboss. Choose Chisel Hard for Technique, enter 2 px for Size, uncheck the Use Global Light box, and enter –73º for Angle and 16º for Altitude. Click on the down-facing arrow next to the Gloss Contour thumbnail, and choose Cone – Inverted. Raise the Highlight Mode Opacity to 100%. Don’t click OK yet.
STEP EIGHT:
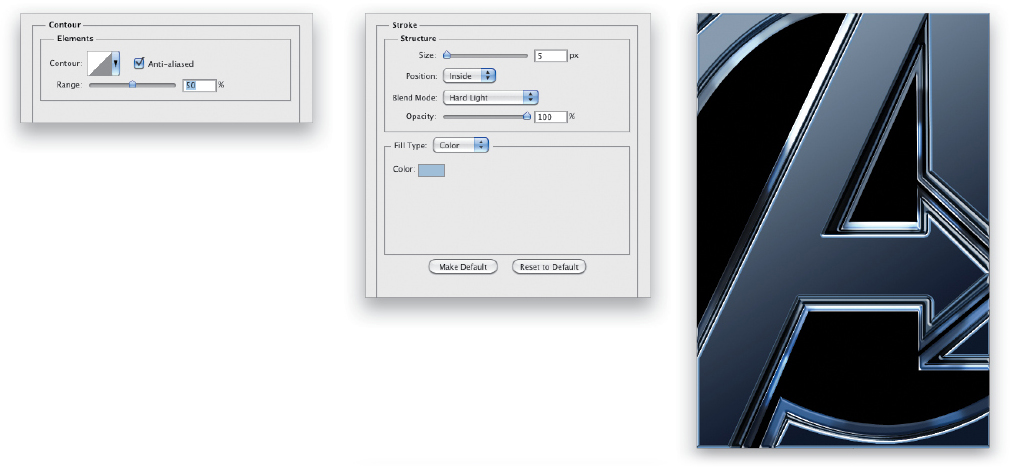
Click on the word “Contour” in the Styles list on the left side of the Layer Style dialog. Enter 50% for Range. Click on the word “Stroke” in the Styles list. Enter 5 px for Size, choose Inside for Position, and Hard Light for Blend Mode. Click on the Color swatch, choose a light-blue color (R:168, G:199, B:220), and click OK. Now, click OK to apply the layer styles.
STEP NINE:
Add another new layer (Layer 7). Set the Foreground color to black. Command-click (PC: Ctrl-click) on Layer 6 in the Layers panel to load it as a selection. Choose the Brush tool, and set its Opacity to 100% in the Options Bar. This time, using a hard-edged brush, paint in arched lines on the top and lower portions of the logo (see example). Using the same brush, paint in the areas between the arches (see example). Deselect to complete the effect.
Note: You can add additional layers (with the layer blend mode set to Overlay), using both black and white, soft-edged brushes to add more depth and detail to the final image.
This tutorial originally published in the January, 2012 issue of Photoshop User magazine.
![Creating Reflections in Photoshop [Flashback Friday!]](https://insider.kelbyone.com/wp-content/uploads/2017/05/FeaturedIMage-1-440x264.png)
![Line Burst Background Effect [Flashback Friday!]](https://insider.kelbyone.com/wp-content/uploads/2017/05/Heroimage-440x264.jpg)
![Nondestructive Dodge & Burn Shortcut [Tip Thursday!]](https://insider.kelbyone.com/wp-content/uploads/2017/05/AfterContour-440x264.jpg)