Composition is a huge consideration when we shoot, and once we get an image out of the camera and into our digital darkroom, we’re often limited in what we can do to edit its composition and control the path our viewer’s eye takes across the photograph. There are other things, however, that we can do in post to grab the attention of the viewer but with a bit more control and flexibility. One such thing that takes an equally high standing to composition is light.
Light and its quality can have a great effect on an image. We all know that our eyes are drawn to the brightest part of an image, and we’ll bear that in mind as we work through the following tutorial. It’s also worth considering that when the brightest part of an image is so bright that it loses definition, it becomes an element that we can use to manipulate our viewer’s attention without detracting from the subject or the composition. When we take advantage of this fundamental element of photography, it becomes important to pay close attention to its application: When it’s used correctly, it can offer a serious level of enhancement for such a basic adjustment; however, if it’s used incorrectly, it becomes evident that the image has been “Photoshopped,” and that, of course, isn’t what we want.
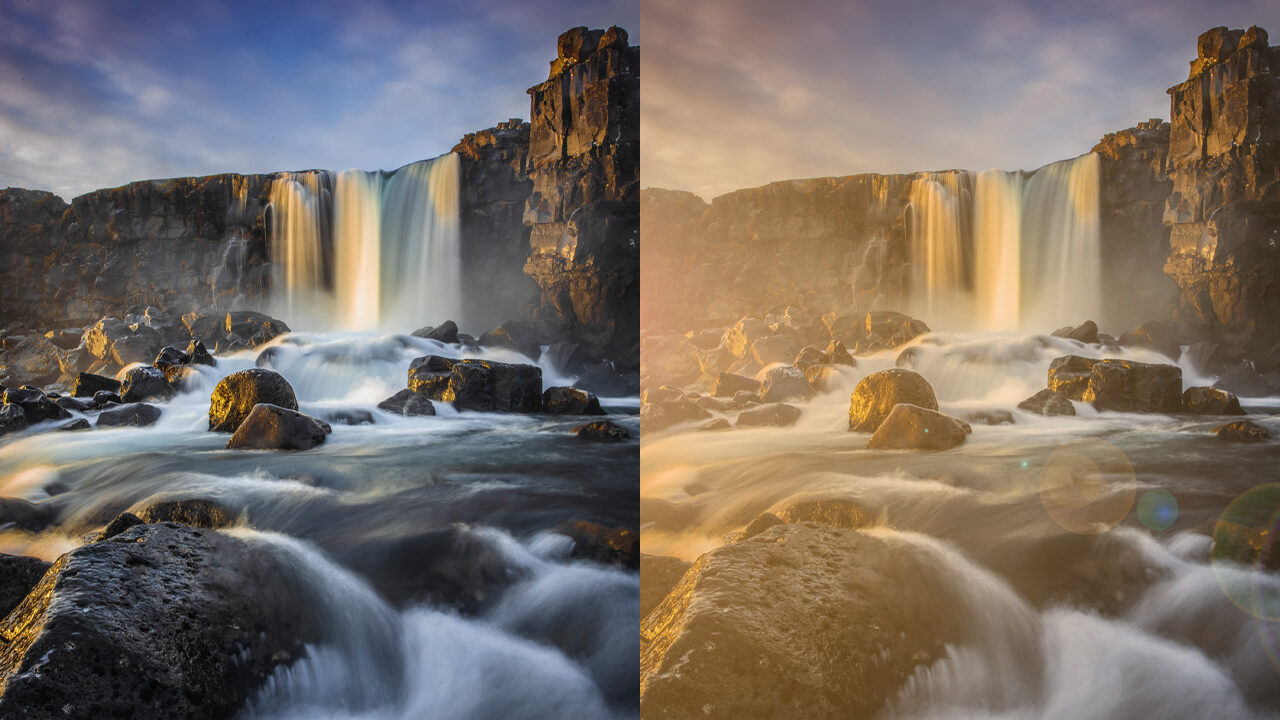
In this tutorial, we’ll place some light on the edge of the frame in the form of a glow and a flare. We must take care to maintain realism so it doesn’t distract our viewer’s attention from the main subject (I know I’m repeating myself, but it really is important to get it right). We can also add a lens flare if we wish, as that will give a subconscious indication to the viewer that the light they’re seeing is real.
The light we’ll add will be quite soft and diffused, with a tone similar to the ones in the image. We’ll consider the time of day the image was shot when we select a color for the light, and we’ll use the highlights on the elements within the scene to determine the origination of the light source, which will help maintain that sense of realism.
If we get this technique right, the result can be enticing and cinematic. This is an effect we often see on movie posters and vacation ads, and there’s a good reason for it. The atmosphere and ambiance created by this effect lures people in, and in a world where our images are increasingly scrolled past on social media and we’re head-on against a swath of Instagrammers looking for instant gratification, we need every advantage to gain the attention of the masses and reap the rewards of attractive photography. Let’s get started!
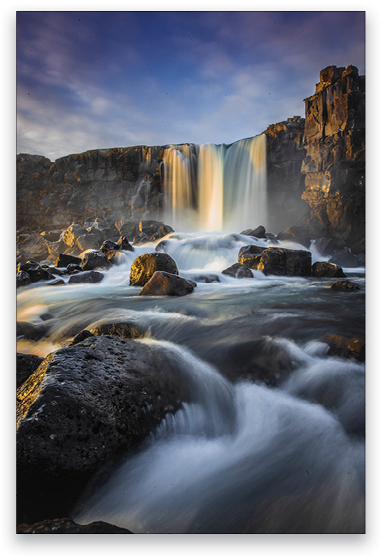
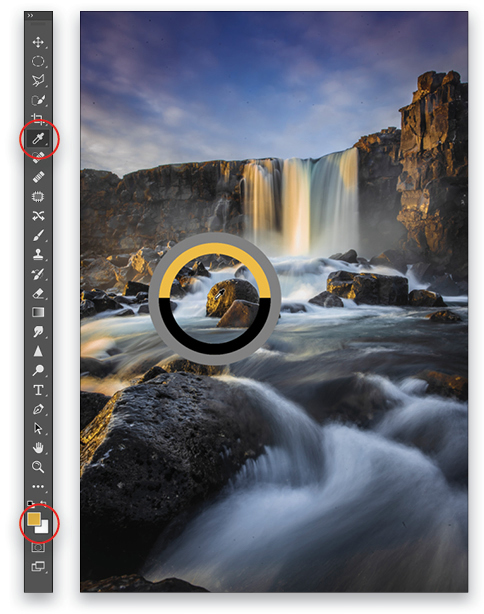
Step One: Open the image you want to use in Photoshop. Here’s the image we’ll be using, which was taken at Oxararfoss, Iceland, where a scene or two in Game Of Thrones was shot. The light cast from the setting Arctic sun is coming from the left, so we’ll need to match this angle of light and tone when we add our light. We’ve already made all the basic adjustments to this image, so we’ll only focus on adding the light effect.
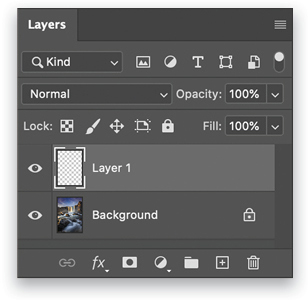
Step Two: Press Shift-Command-N (PC: Shift-Ctrl-N) to create a new layer. This will allow you to retain your original image layer while you work on the new layer.
Step Three: This technique is simple; the difficult element is the creative part, as we need to correctly place our glowing light. For this photo, we want to emulate and exaggerate the setting sun and make the flare from the sun more vivid.
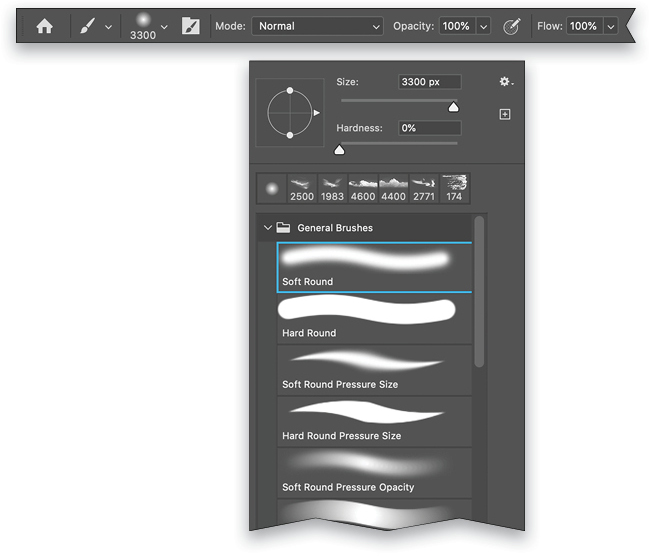
Once you’ve decided where you want to add your light, switch to the Brush tool (B). In the Options Bar, click the brush tip preview to open the Brush Preset Picker, select the Soft Round Brush in the General Brushes folder, and set the Hardness to 0%. In the Options Bar, set both the Opacity and Flow to 100%.
Step Four: We can now select a color for our light. In order to get the correct tone, we’ll use the Eyedropper tool; but first we need to click on the Background layer in the Layers panel to make the image layer active. With the Brush tool active, press-and-hold the Option (PC: Alt) key to temporarily switch to the Eyedropper tool, and click on a highlight within your image. We’ve clicked on a highlight cast from the setting sun on one of the rocks in the water, which sets this as our Foreground color (near the bottom of the Toolbar).
Tip: If you click-and-hold in the image while the Eyedropper tool is active, you’ll see concentric circles around the cursor. The bottom half of the inner circle represents the current Foreground color; the top half represents what the new Foreground color will be when you release the mouse button. While holding the mouse button, just drag around the image until the top half of that circle is the color you want.
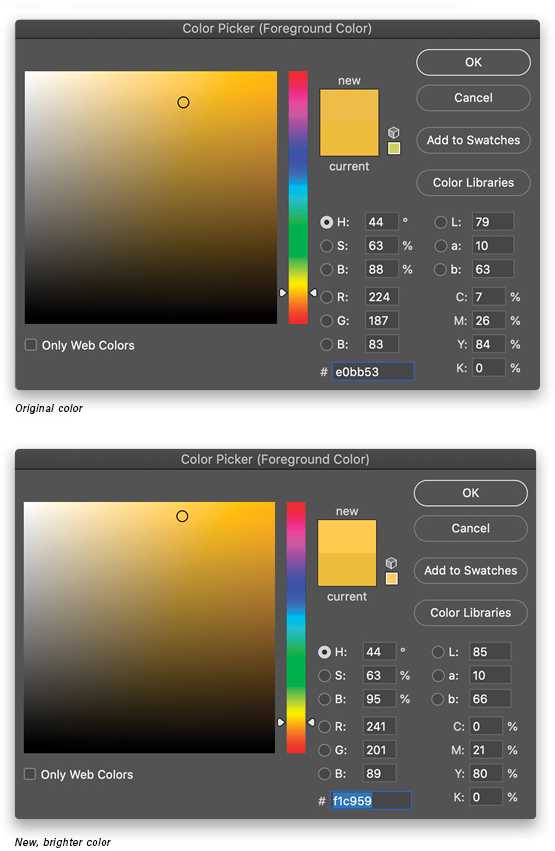
Step Five: Now we can make adjustments to that color, if necessary. Click on the Foreground color swatch at the bottom of the Toolbar to open the Color Picker. I like the yellow hue we’ve selected but I’d like it to be a little brighter for the glow we’ll add. The simplest way to do this is to click directly above the currently active color in the big square on the left in the Color Picker. This will keep the color the same, but make it brighter. Going from left to right in that big square controls the saturation of the currently selected hue; going from top to bottom controls its brightness. Click OK in the Color Picker.
Color contingency plan: If you don’t have a good reference point in your image for selecting a color with the Eyedropper tool, you can make an educated guess. Using the range of red to yellow in the Color Picker, choose a bright color that reflects the tone of the highlights within the image you’re adjusting. If the highlights are particularly warm, for example, select a color in the orange-to-red range, and set its brightness similar to that of the yellow in our example.
If the color you’ve selected doesn’t work well with your image when you’re a few steps in, create a Hue/Saturation adjustment layer (Layer>New Adjustment Layer>Hue/Saturation) and, in the Properties panel (Window>Properties), move the sliders gradually until you land on a color that works. Anyway, back to our regularly scheduled program.
Step Six: Now we’ll add the glowing light to our new layer, so click back on the blank layer in the Layers panel to make it active. Carefully place your brush cursor in a suitable and realistic position in your image and use the Left Bracket or Right Bracket keys ( [ ] ) on your keyboard to decrease or increase the brush size, respectively.
We’ve used a very large brush size of 5000 px and, with a single click of the mouse, added the golden color to the left of the image where the light originates. It looks ridiculous at this point, but that actually helps us to better place the light flare. If you’re not happy with the placement or size, press Command-Z (PC: Ctrl-Z) to Undo, and repeat the process until you’re satisfied. You can see now that this technique is more about creativity than technicality.
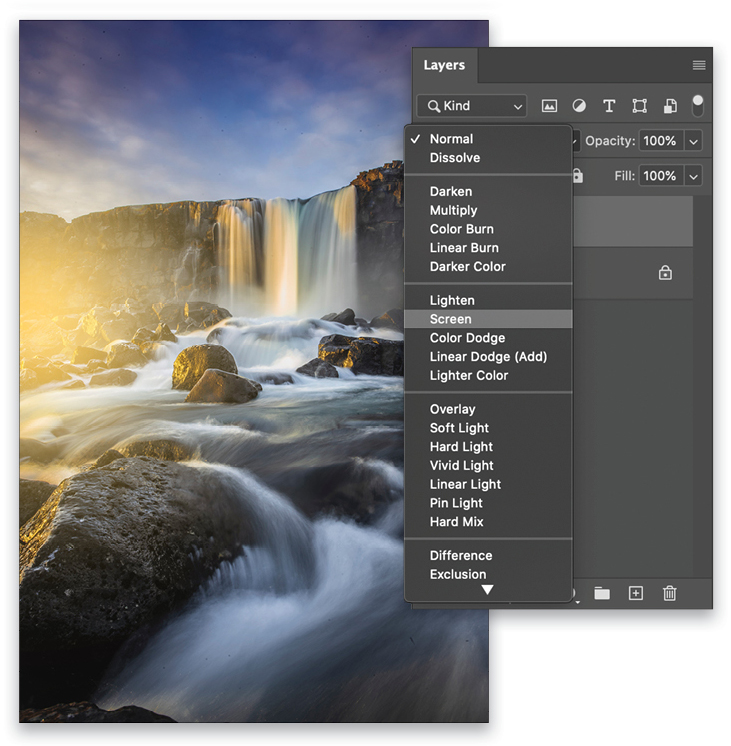
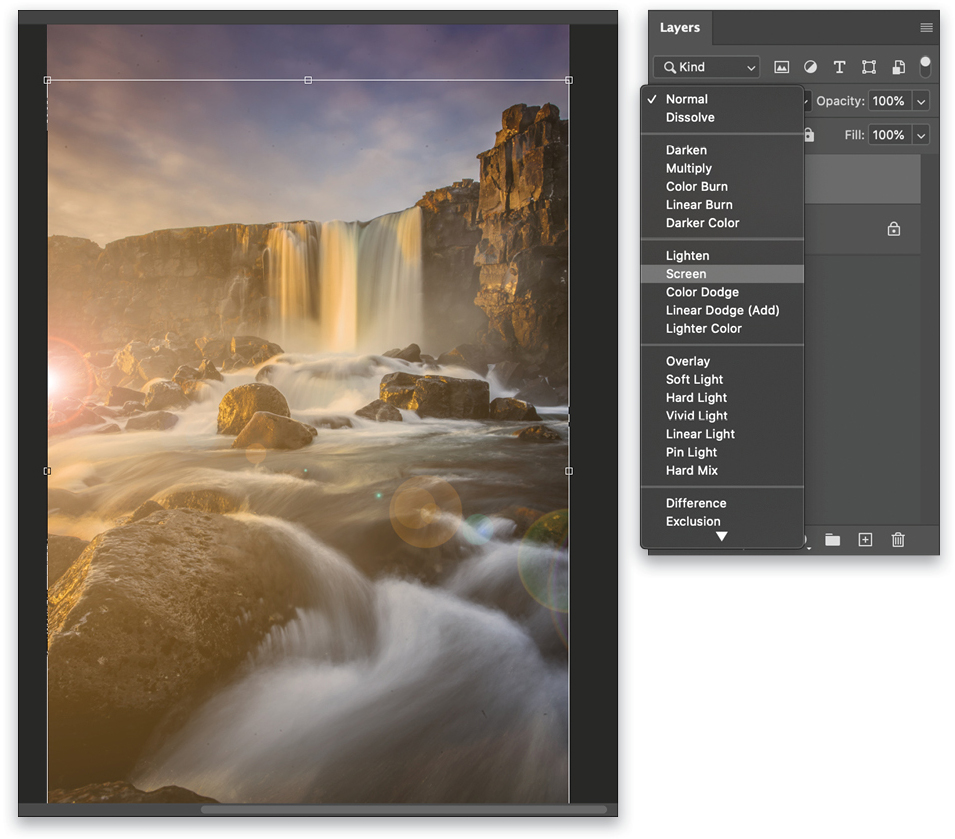
Step Seven: The next step is to change the blend mode of this layer from Normal to Screen in the drop-down menu near the top left of the Layers panel. What’s happening behind the scenes in the Photoshop algorithm when we select Screen is that both layers are inverted, multiplied, and the subsequent result is then inverted again. It happens so fast you won’t see it; you’ll only see the end result, which is that our glowing light blends in seamlessly with the image.
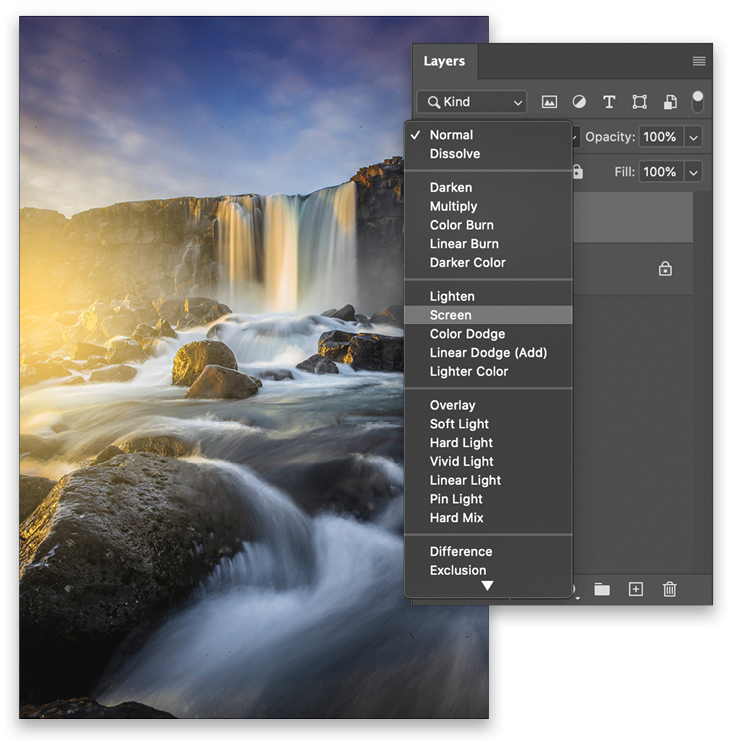
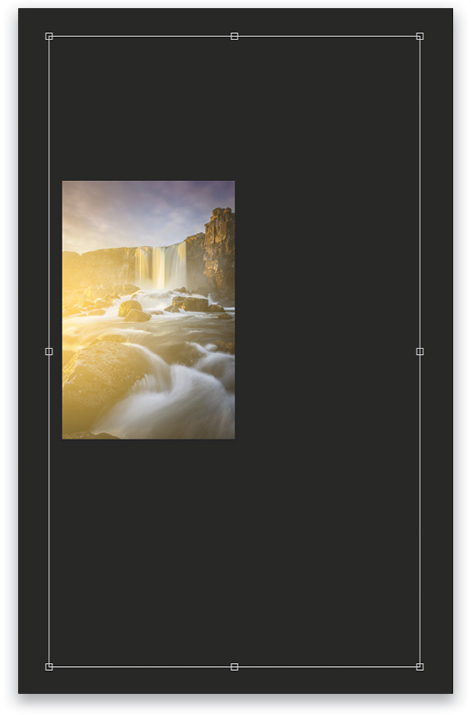
Step Eight: We need to fine-tune this glowing flare because, as photographers, we’re not often satisfied with our first go at something. Press Command-T (PC: Ctrl-T) for Free Transform, which will place a box with control handles around the glow. Simply drag out the corners and reposition the glowing effect until you like how it looks. We’ve increased the size of the light quite a bit in our example. Press Enter or click on the checkmark up in the Options Bar to commit the transformation.
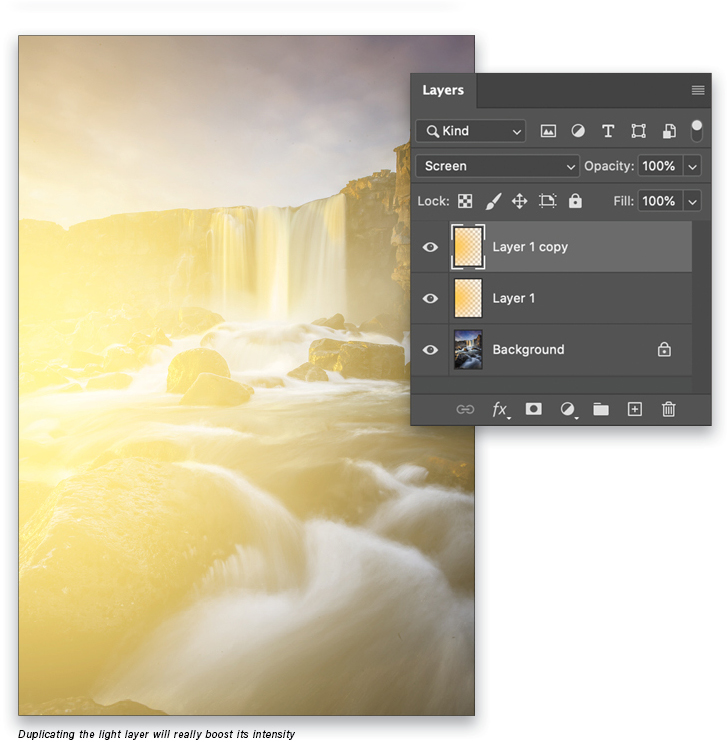
Step Nine: If the glowing flare is too intense, simply lower the Opacity of the light layer in the Layers panel. If it’s not intense enough, press Command-J (PC: Ctrl-J) to duplicate the layer, and use the Opacity slider on this new layer to dial in the glow until you feel your image is vibrant and bright enough. For our example, we just went with the single layer set at 100% Opacity.
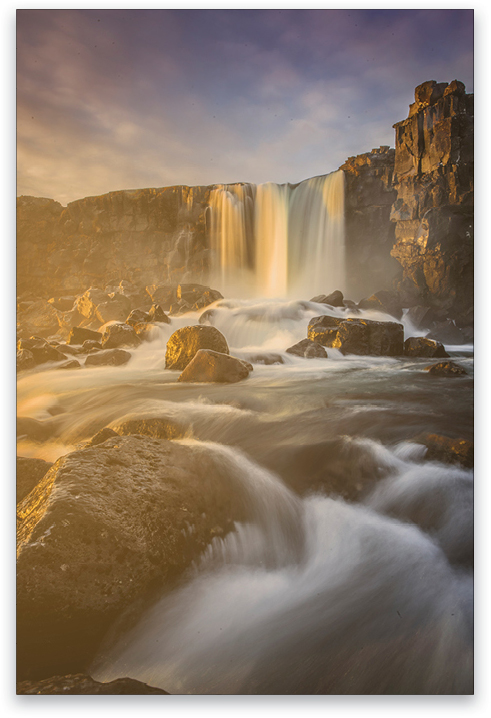
Here’s our final result: an adjusted image with an extra kick of realistic light, fine-tuned to perfection and glowing across our image as if we were there again.
Step 10: To add more realism to this image, we can add a Lens Flare. This will go a step further in applying a genuine physical effect caused by a strong light source flooding your lens with light. Simply add another new layer, press D to set the Foreground color to black, and press Option-Delete (PC: Alt-Backspace) to fill the layer with black.
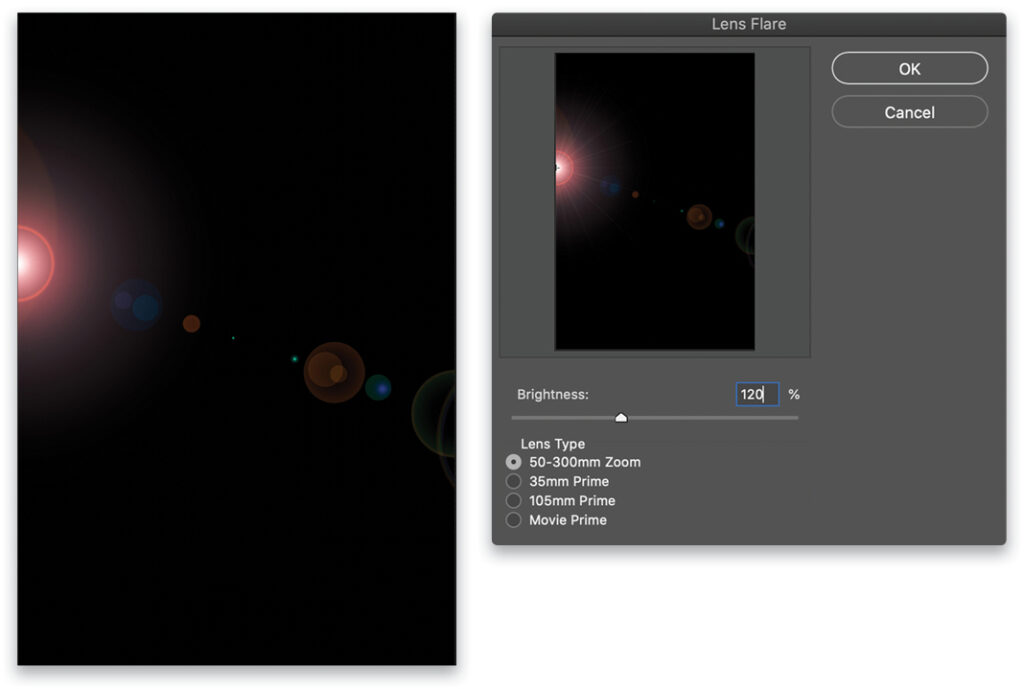
From there, go to Filter>Render>Lens Flare. The most common choice for Lens Type that best resembles what most people recognize as a lens flare is the 50–300mm Zoom. I like to add a little extra punch here, so I’ve set my Brightness to 120%. Drag the center of the lens flare in the preview area in the Lens Flare dialog to the approximate position you want it in your image, and click OK.
Step 11: Now we can blend our lens flare with the image the same way we did with our glowing light layer, using the Screen blending mode within the Layers panel.
Step 12: To retain the glow effect we just created so that it’s not outdone by the lens flare, use Free Transform to reposition the bright source of the flare outside the frame, which leaves us with the reflected flares we’d see caused within the elements of our glass. This offers a little extra touch to our warm, glowing image that we’ve totally transformed with light.
Here is the final image showing the flare added:
About Photoshop User and KelbyOne
Photoshop User magazine comes out digitally 12 times a year and is part of KelbyOne, the leading educational resource for Photoshop, Lightroom, and photography. Pro members have access to more than 900 video courses and 100 back issues of Photoshop User. To learn more about KelbyOne, click here.


