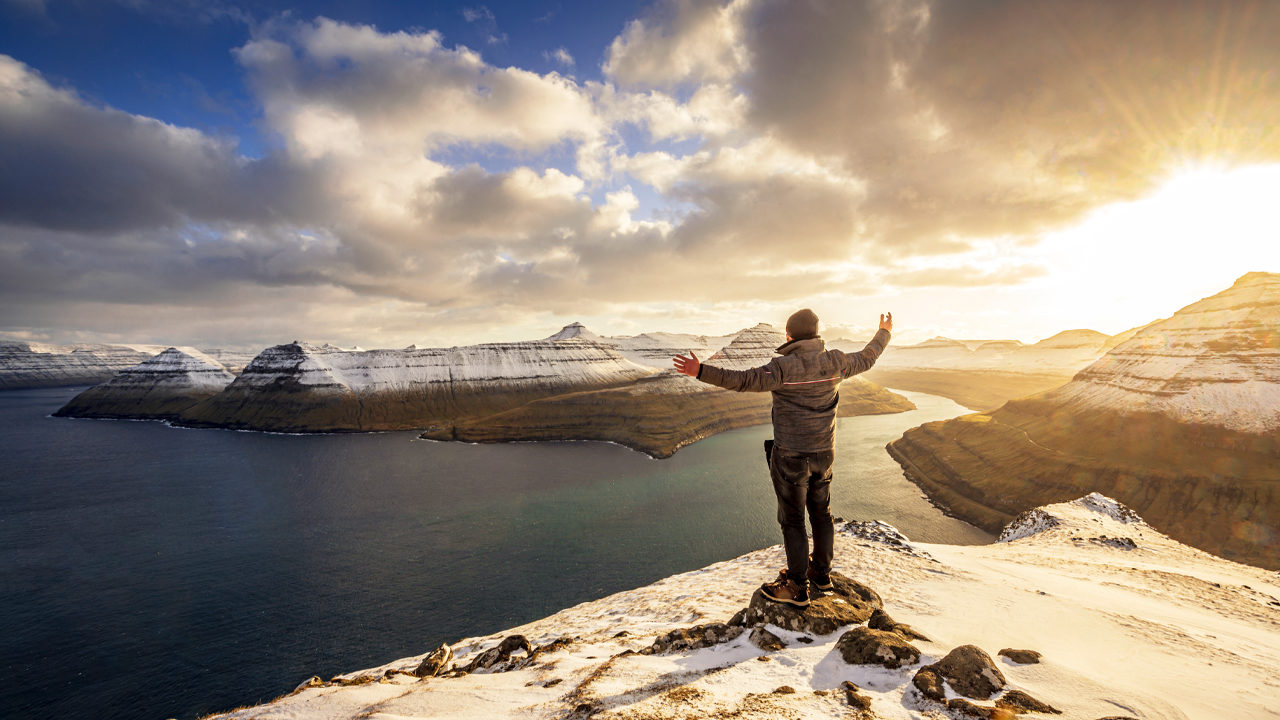
Winter photos are cold by their very nature, but there’s something we can do to help our winter photos stand out: warm them up a little. Using the color wheel, we know that blue and orange are complementary; that’s why sunset photos at the beach are so attractive. We can apply that very same principle to our photos of winter scenes to achieve the same result by adding the warmth of the sun to the coolness of water, snow, or ice.
One of the simplest ways to achieve this is in the highlights, because if we consider realistic ways for our winter scene to exude warmth, it’s in the lighting. To achieve a warm winter image, we’ll use the Apply Image feature in Adobe Photoshop. As this may be something many people have never used, here’s a brief explanation before we go any further.
Apply Image
Found under the Image menu, Apply Image applies a source image, layer, or channel to a target layer and then blends them using blending modes. We’ll use this later in this project to apply an image to a layer mask, but for now, here are all the options:
Source: Choose from any currently open image.
Layer: After you choose an image, you can select any layer from that image, or all the layers by selecting Merged.
Channel: Then you can drill down to individual channels for the selected layer, including alpha channels; you can even Invert the channels.
Target: This is the layer that was active when you invoked Apply Image.
Blending Mode: Select a blending mode to determine how the source blends with the target layer.
Opacity: Control the strength of the blend.
Apply Image is particularly useful for creating simple luminosity masks, as we’ll demonstrate in the following technique, or for frequency separation. But enough of the technical terms for now; let’s get back to warming up winter!
Adding Warmth to the Highlights
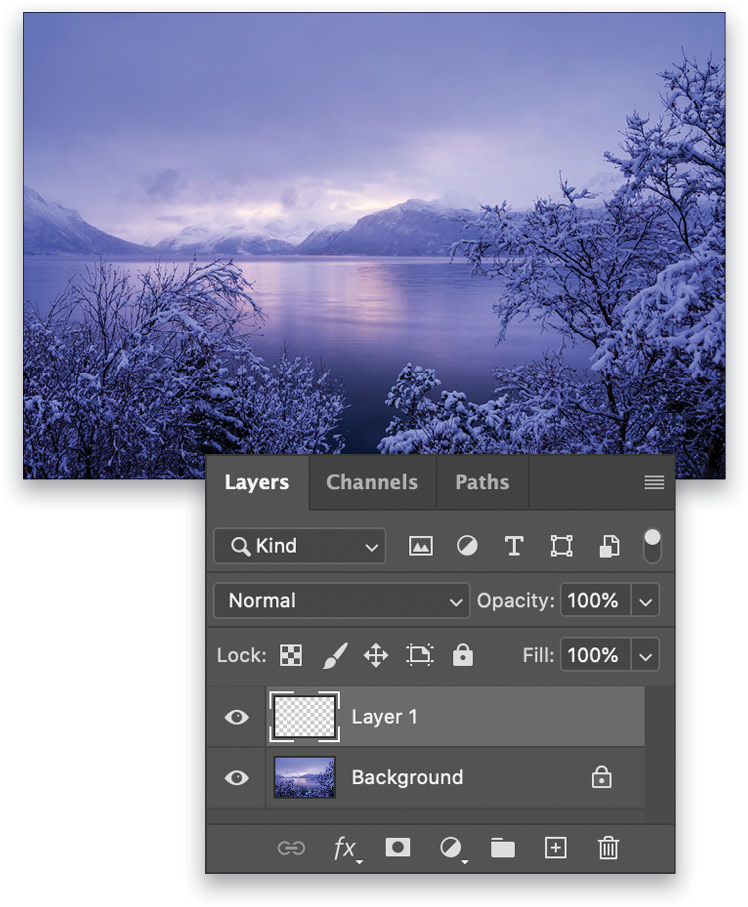
Begin by opening your image. If there’s already some warmth in your image, that’s fine; you can warm it up even further. It’s fine to start with an image that has no warmth, but this technique works best when there’s an obvious source of light, which will create a more realistic result when you warm up the highlights.
Step One: With your image open in Photoshop, the first thing you need to do is create a new, blank layer by clicking the Create a New Layer icon (+) at the bottom of the Layers panel, or by pressing Command-Shift-N (PC: Ctrl-Shift-N).
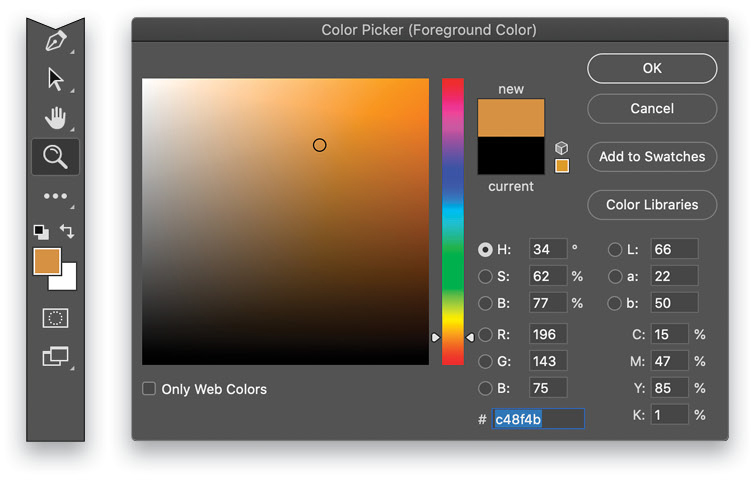
Step Two: Next up, select the warm color you want to use. Click on the Foreground color swatch near the bottom of the Toolbar to open the Color Picker. I’ve selected a shade of orange (#c48f4b) that I feel will complement this scene across Lyngen fjord in Norway. When selecting a color to warm up a winter scene, it’s safe to choose something in the red-to-yellow range, depending on the scene, to complement the cooler tones. Once you’ve chosen a color, click OK to close the Color Picker.
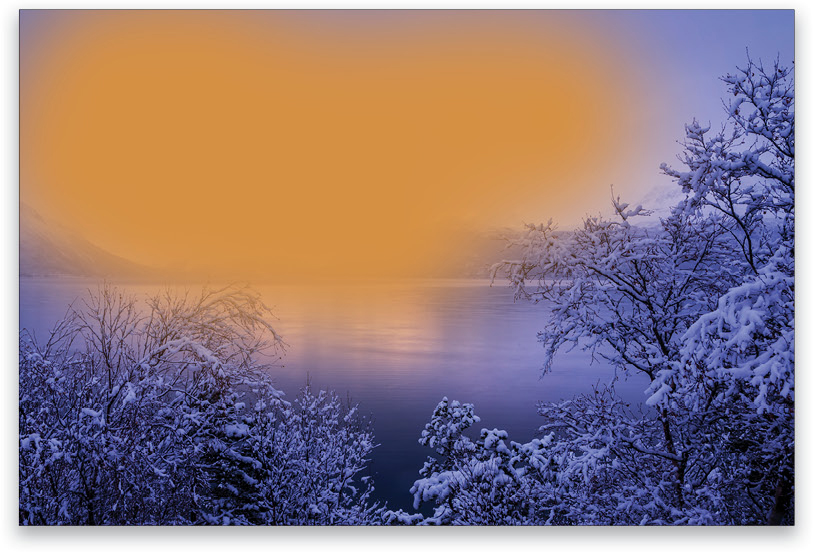
Step Three: Now you need to apply that color in the highlight areas of the image, as well as any other areas where you want it to affect the image. Select the Brush tool (B) and choose a large, soft brush in the Brush Preset Picker in the Options Bar. I used a brush Size of 2500 pixels and a Hardness of 0%, because for this image, there’s a large patch of sky to which I want to apply the effect; but the size of the brush will be determined by the size of the highlight area in your image.

Step Four: With the blank layer active, simply use the Brush tool to paint over the area of highlights in your image where you want to apply warmth. As you paint, it will add a blob of orange on top of your image, but don’t be put off by this, because it’s on its own layer. It’s safe to paint at 100% Opacity and be a little haphazard; we’ll fine-tune the application of the color in the following steps.
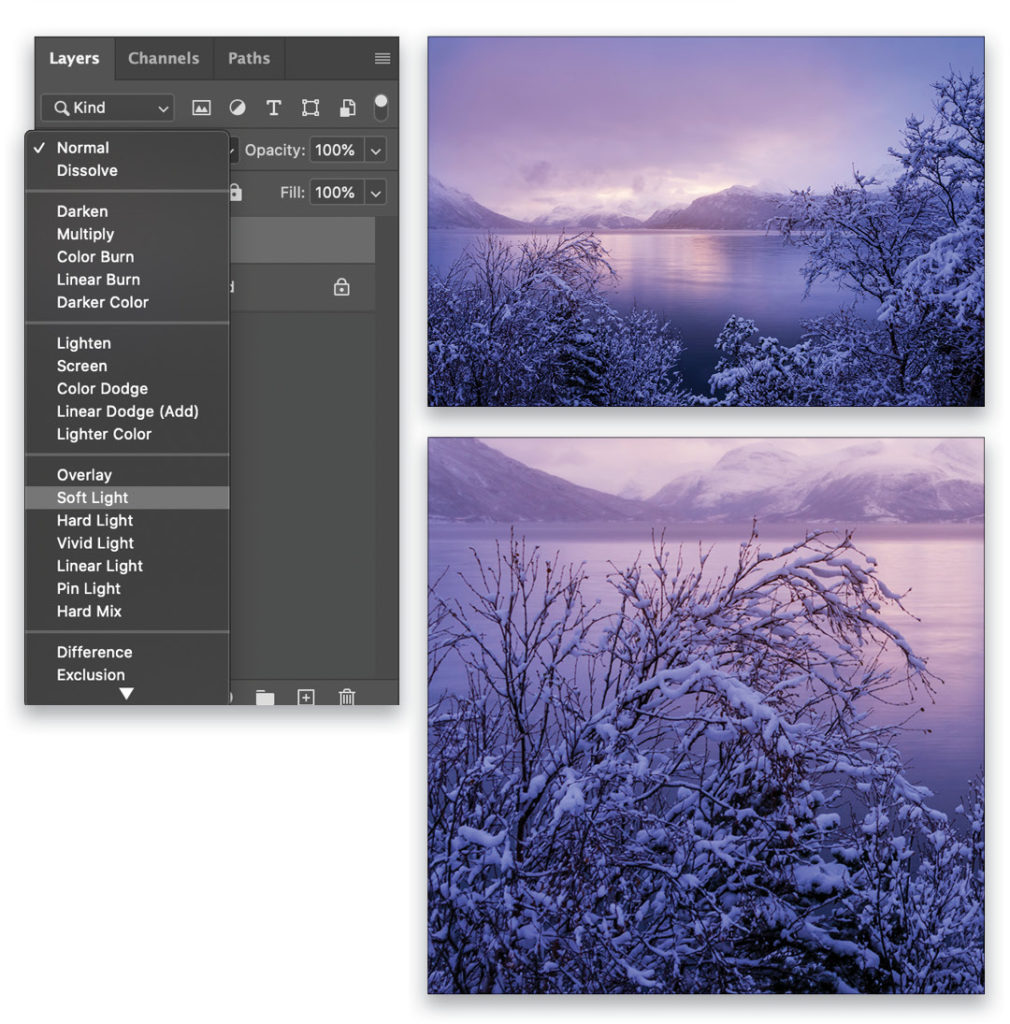
Step Five: Now that your image has been coated in warmth, let’s start to make it more realistic. First, soften the orange and allow the layer beneath to show through by changing the blend mode from Normal to Soft Light using the drop-down menu near the top left of the Layers panel.
We’re now partway to achieving the result, but it still doesn’t look as natural or as inviting as it could. The warmth has been applied across the entire area you painted, rather than being applied exclusively to the Highlights. As an example, take a closer look at the branches of the tree in the foreground in this image. If we can isolate the orange color to the highlights, we can make it far more realistic.
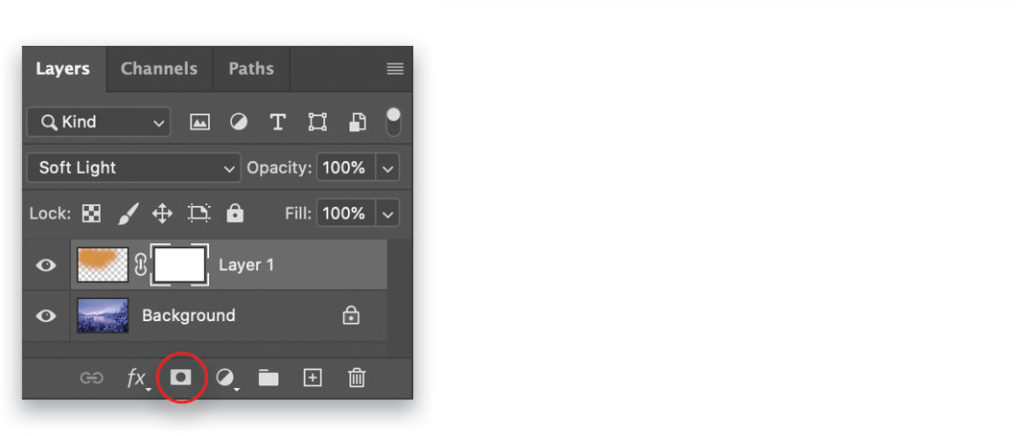
Step Six: Add a layer mask to the painted layer by clicking the Add a Layer Mask icon (circle in a square) at the bottom of the Layers panel.
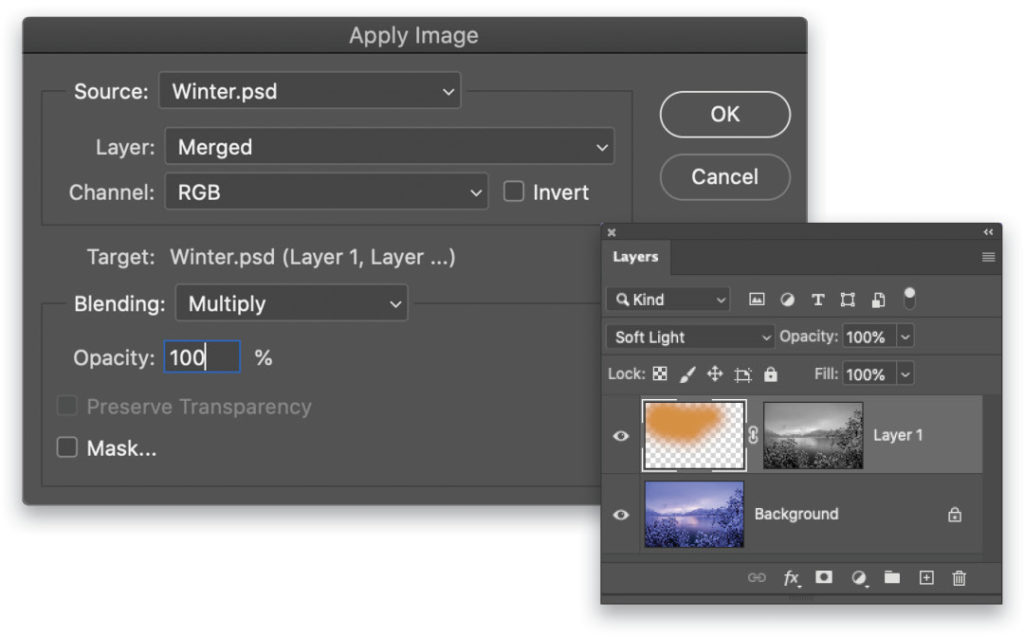
Step Seven: Now we’ll use Apply Image, so select it from the Image menu. In the Apply Image dialog, ensure the Source is the image itself, the Layer option is set to Merged, and the Channel is RGB. The Target can’t be changed; it’s the layer, or layer mask, that was active when you chose Apply Image. Also make sure the Blending option is set to Multiply, the Opacity is at 100%, and the Mask option is deselected. With all this set, click OK.
Step Eight: We now have a warmer winter image, and it’s all been achieved simply and realistically. If you take a look at the layer mask thumbnail, you can see that Apply Image created a mask based on the image itself. The darker areas on the mask hide the orange paint, while the lighter areas reveal it. Click the Eye icon off and on to see the difference the layer makes. You can also Shift-click the layer mask thumbnail in the Layers panel to turn the mask on and off so you can see the difference it makes.
Step Nine: If you still find the warm tones adversely affecting the shadow areas, simply repeat Step Seven again to apply another application of Apply Image to the layer mask. You’ll see the mask gets a little darker so it now only applies the warming effect to the very brightest parts of the image.
And if you need to add warmth in any other areas of the image, just click on the layer thumbnail in the Layers panel so it’s active and not the mask, and use the Brush tool to paint in more orange wherever you want to add it.
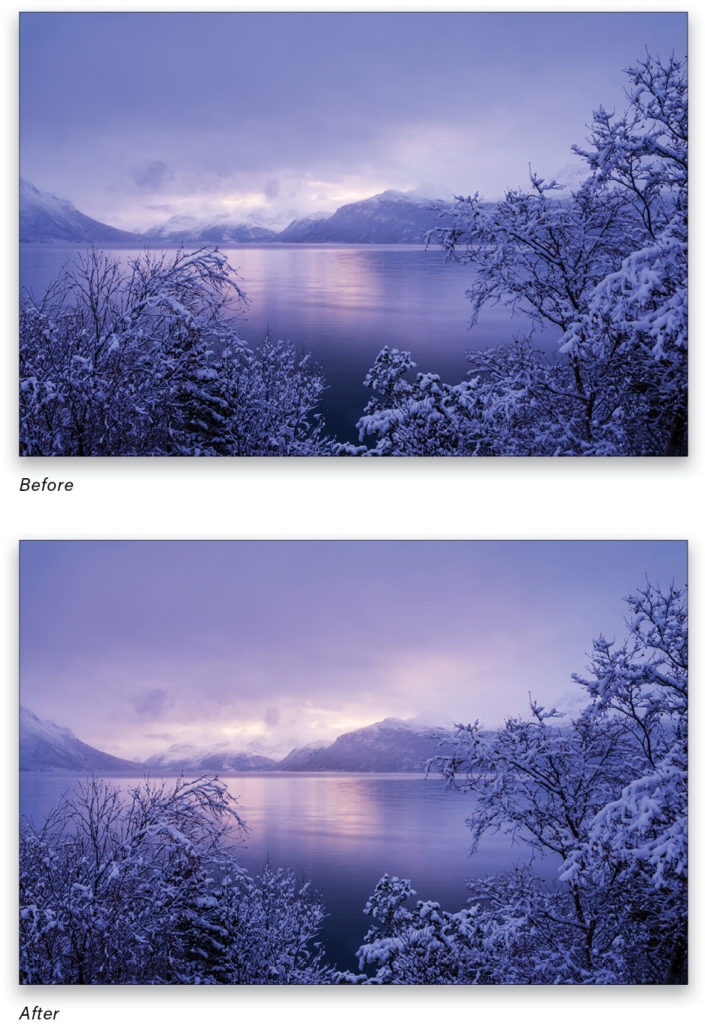
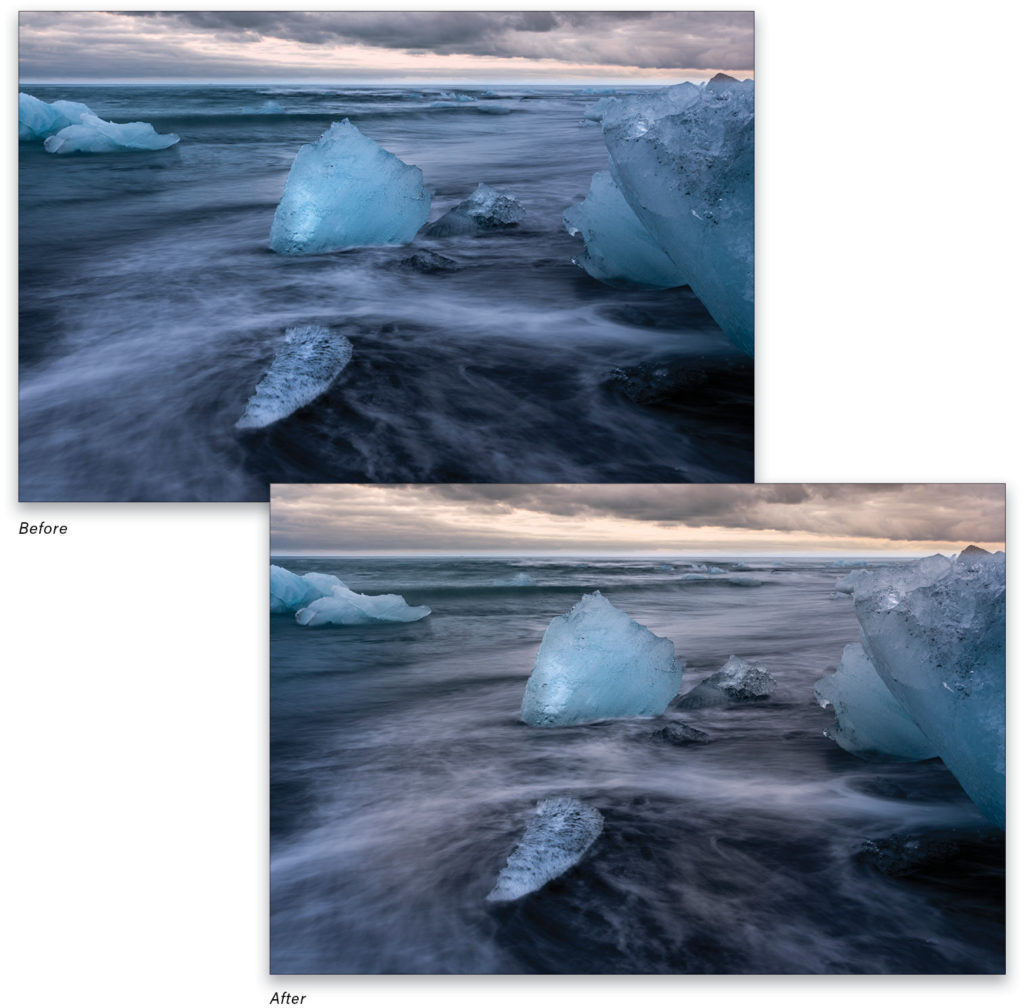
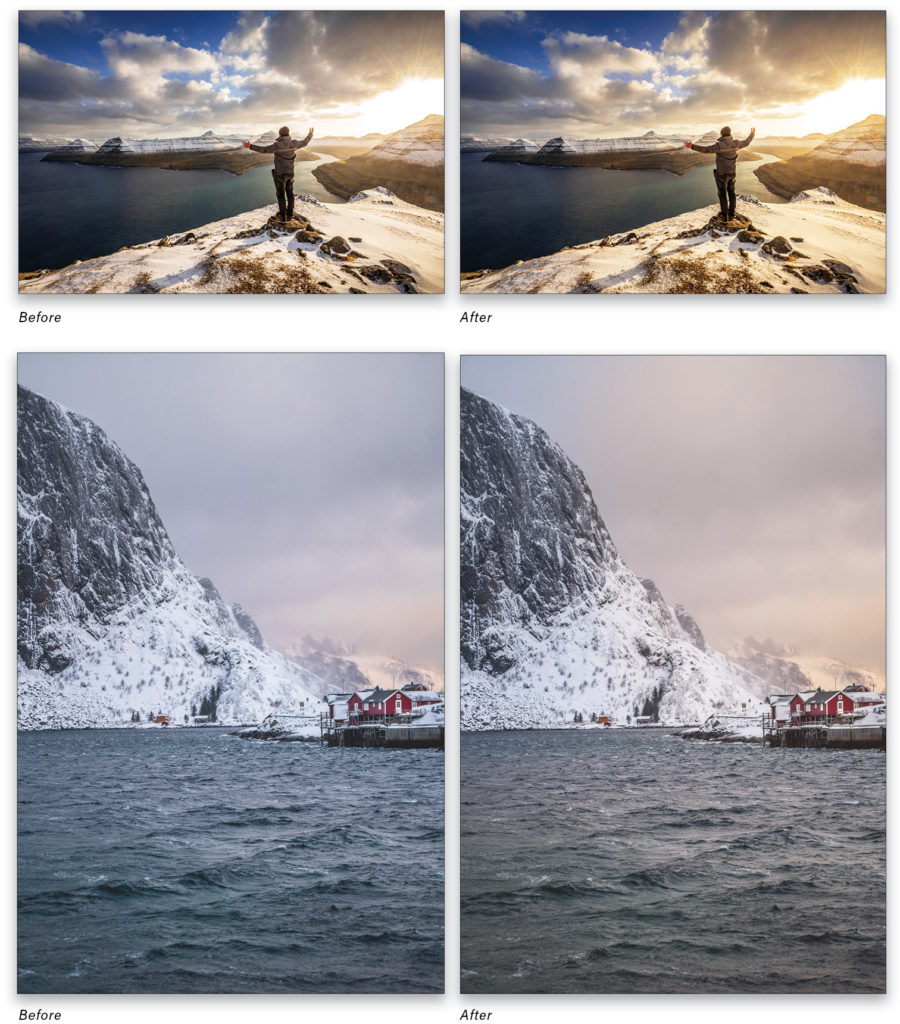
This is a great technique for adding warmth to the highlights in any image, not just winter scenes, and it makes it very easy to brush on the layer to add more of the effect or erase areas of the orange color where you don’t want it. Or you can edit the mask for even more control. Here are a few more before-and-after examples below using this technique.
This article originally published in the February, 2021 issue of Photoshop User magazine.


