In his popular class at last year’s iPhone Photography Conference, Jefferson Graham shared everything you need to know to capture time flying by in epic time-lapse videos. Keep reading or watch the video below.
The following blog post is Excerpted and Summarized from Special Effects: Time-lapse, Slo-mo & Pano from the iPhone Photography Conference 2024.
Join Jefferson and 13 other industry experts for this year’s iPhone Photography Conference. Plan your conference schedule and secure your spot now and save $150.*
Hey everyone, Jefferson Graham here! Let’s talk about one of the superpowers of the iPhone: making quick work of time-lapse photography! Of course, you can do time-lapse on your big camera, but it ain’t as easy.
Time-lapse is all about watching the world speed by. It’s about capturing changes over extended periods and condensing them into short, engaging videos. Think of clouds racing across the sky, the sun setting in minutes, or a flower blooming in seconds. To give you a better idea, let’s take a look at this time-lapse video example.
Gear Up: What You’ll Need
The beauty of iPhone time-lapse is that you don’t need much to get started:
- A Sturdy Tripod: This is crucial. You absolutely can’t handhold your iPhone for the extended periods needed for a good time-lapse.
- Smartphone Tripod Mount: To securely attach your phone to the tripod.
- Extension Cord or Power Brick: Especially if you plan on shooting for longer durations. You don’t want your battery to die mid-shoot!
Finding Your Spot and Mastering Patience
My process is simple: I find a location, assess the scene, set up my tripod, mount the phone, compose the image, and hit record. Then, the real key: patience.
A good time-lapse requires commitment. Aim for at least 30-45 minutes, or even an hour. Trust me, I’ve never regretted a time-lapse being too long, only too short. Remember, an hour of shooting might only give you 30 seconds of finished footage!
Frame Rate: Let the iPhone Handle It
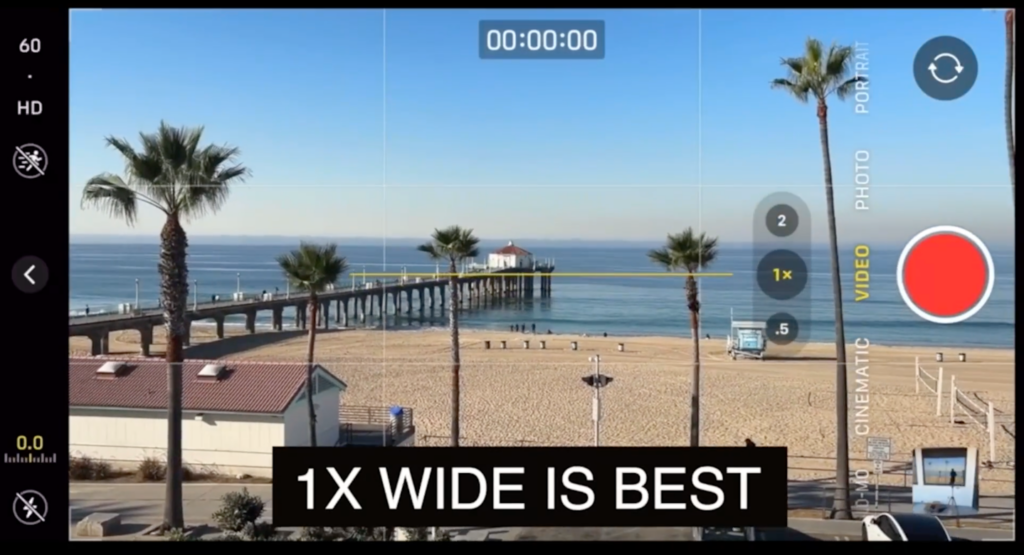
With the native iPhone camera app, you don’t get to choose the frame rate – Apple handles that for you. Your main decision is which lens to use:
- Ultrawide: Great for daytime shots, capturing a vast scene.
- Wide (1x): The sharpest and brightest lens, ideal for low-light situations or when image quality is paramount.
- Telephoto: Use it if you need to get closer to your subject.
Ideal Subjects for Time-Lapse Video
Looking for inspiration? Here are some fantastic subjects for time-lapse videos:
- Clouds: Always a classic!
- Day Shifts: Capture the transition from morning to afternoon, or night to morning.
- Urban Scenes: Fast-moving cars and bustling cityscapes.
- Shadows on Buildings: Watch how shadows change throughout the day.
- “Making Of” Processes: A photoshoot setup, a cooking demo, or even a building under construction.
iPhone vs. DSLR
Sure, you can do time-lapse with a DSLR, but it’s a lot more complicated. You’ll be dealing with thousands of photos, constantly adjusting settings as the light changes, and then spending hours processing and editing.
With the iPhone, it’s open the camera app, select time-lapse, and press record. Let it roll, then stop and enjoy!
Overcoming iPhone Limitations
The native iPhone camera app limits time-lapses to 30 seconds, no matter how long you record. To bypass this, use third-party apps like:
- Lapse It: A reliable option for longer time-lapses.
- BlackMagic Camera: A free app with excellent manual controls and time-lapse settings, allowing you to choose the recording interval (e.g., one frame every second, every 10 minutes, etc.).
Is Overheating a Concern?
In my experience, overheating hasn’t been an issue, even when recording for extended periods with the phone plugged in.
Hyperlapse: Time-Lapse on the Move
Hyperlapse is essentially a walking time-lapse. It can be tricky to pull off smoothly. you can do it on the iPhone, but you want to be kind of careful. A few things you have to make sure that you’re walking a straight line, that your camera’s not jerking up and down. To illustrate this, here’s a demonstration of the hyperlapse walk: good versus bad.
Time-Lapse Recap
Time-lapse photography with your iPhone is accessible, fun, and incredibly rewarding. Remember these key takeaways:
- Gear Up: Tripod, mount, and power.
- Be Patient: Good time-lapses take time.
- Choose Subjects Wisely: Clouds, cityscapes, and processes are great starting points.
- Consider Third-Party Apps: To overcome the 30-second limit.
- Go Longer. I’ve never seen a time lapse that I wished was shorter.
I hope this guide inspires you to start creating your own stunning time-lapse videos. And don’t forget to join me at the 2025 iPhone Photography Conference for even more in-depth tips, tricks, and inspiration!
Join us for iPhone Photography Conference, happening online on March 4th & 5th. Our industry experts will teach you how to master lighting, composition, editing, and more—all with the device already in your pocket. You’ll discover how to transform everyday photos into works of art, and learn insider tricks that’ll change the way you shoot forever. This is your chance to learn from the best, hone your skills, and start creating the kind of work you’ve always admired. Reserve your spot today! Get your ticket for only $149* during Early Bird Pricing (a savings of $150)!

*Early Bird Price Expires March 4, 2025, 11:00 am EST