
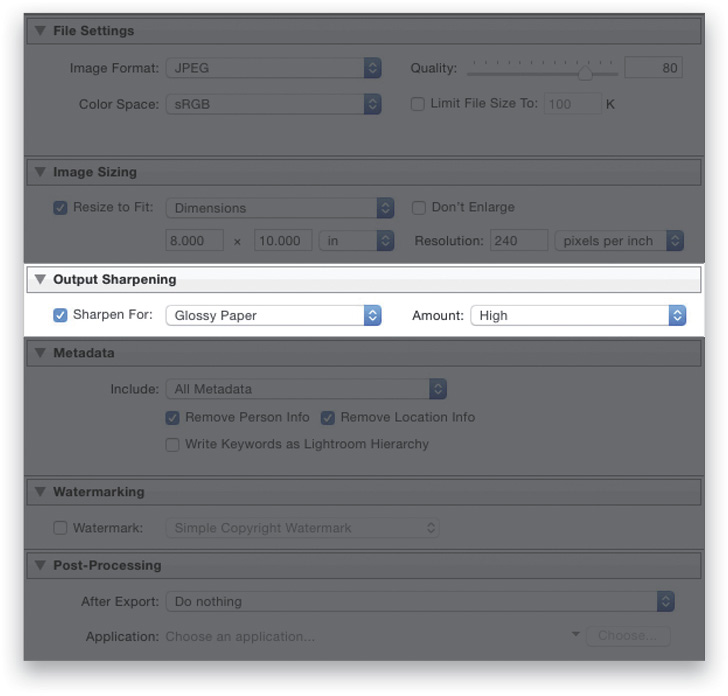
You’ll see this option as you scroll through the options in the Export dialog (Command-Shift-E [PC: Ctrl-Shift-E]), so go to the Output Sharpening section and turn on the Sharpen For checkbox. Once you turn that on, you need to tell it where this image is going to go (onscreen [on the internet, or in a slide show, or just to show on your mobile device or computer], or in print on glossy or matte paper). You choose this so it applies the right amount of sharpening automatically, but that amount is based on your next choice—how sharp you want that final image. There are three choices for Amount: Low, Standard, and High. Unfortunately, there’s no preview of how this sharpening is going to look, so you’re kinda “flying blind” on this, but you can always do a test—export an image, and then open it on your computer to see how the sharpening looks. Hey,
it’s worth a shot.
Excerpted from How Do I Do That In Lightroom by Scott Kelby.