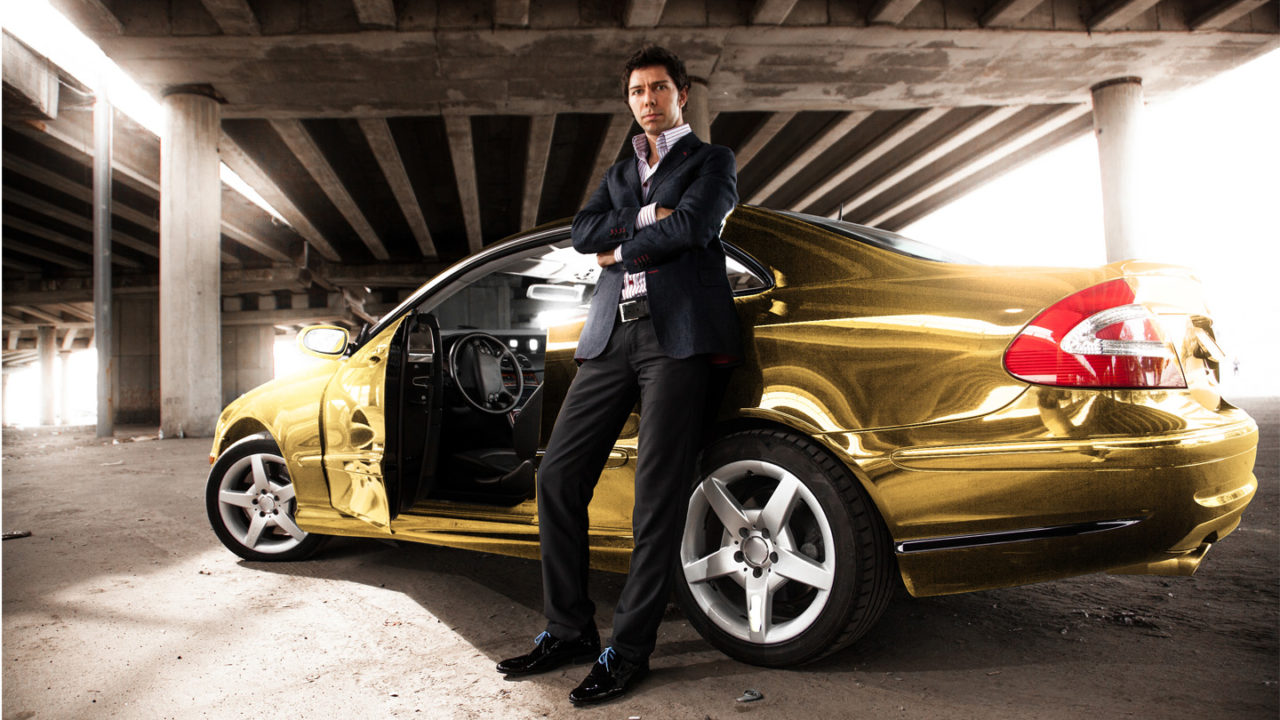
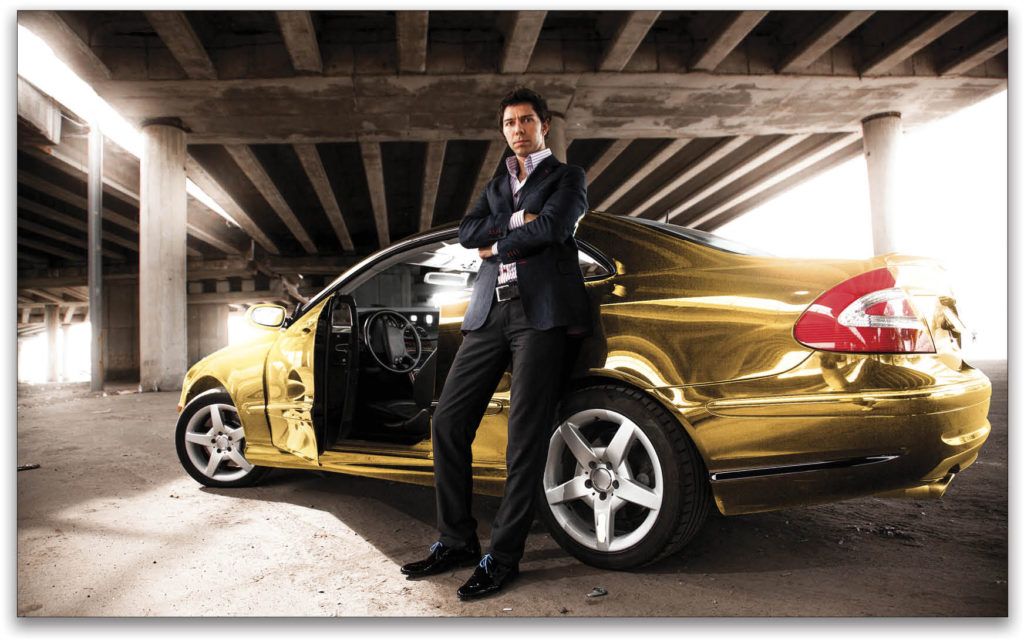
It’s extremely simple to change the color of an object if it already has some color. This can be done easily by using a Hue/Saturation adjustment layer and targeting that specific color. But what if the object is black or white? Today, we’ll learn the techniques to turn a black car to gold, or any other color you wish. In the end, don’t forget to post these to social media and make your friends envious. Just kidding.
STEP ONE: OPEN THE IMAGE
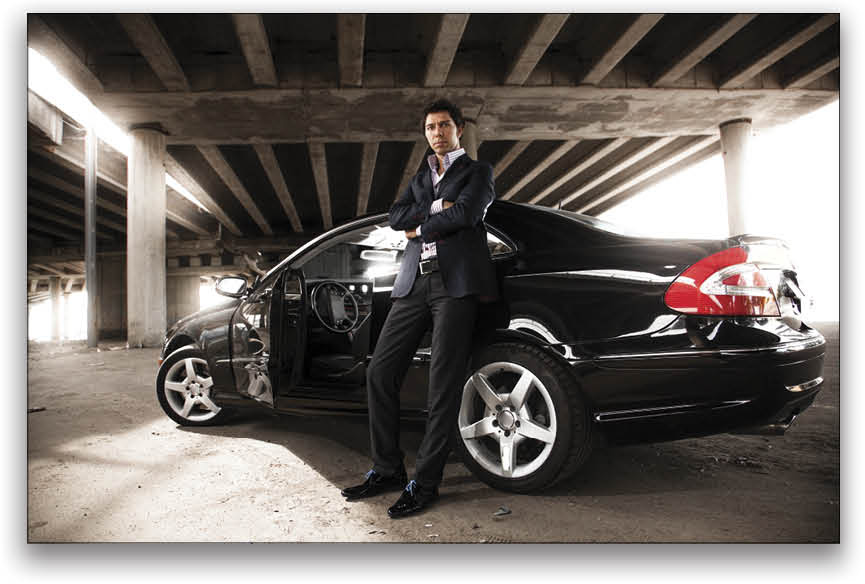
First, let’s open our image in Photoshop. You can use this technique with any surface that’s black and shiny. Whether it’s your phone or a simple pen, open up anything that you want to turn into gold. If you wish to follow along with the image used here, you may download the JPEG preview for free or license the full-resolution version from Adobe Stock using by clicking this link. To download the preview version, log in with your Adobe ID, and click the cloud-with- an-arrow icon next to Save Preview to My Library. The image will appear in your Libraries panel (Window>Libraries)
in Photoshop.

If you’re using your own image, go to File>Open, locate your image, and then click Open, or if you’re working in Application Frame, go to Finder (PC: File Explorer), locate your image, and drag-and-drop it into Photoshop. If you downloaded the image from Adobe Stock, you can load it from your Libraries panel by double-clicking it.
STEP TWO: USE THE PEN TOOL TO MAKE A SELECTION OF THE CAR
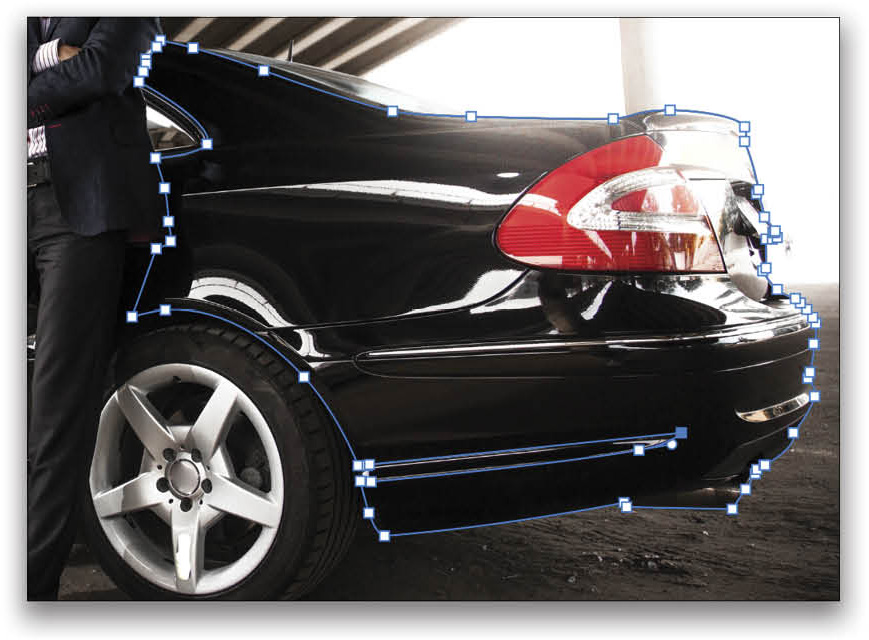
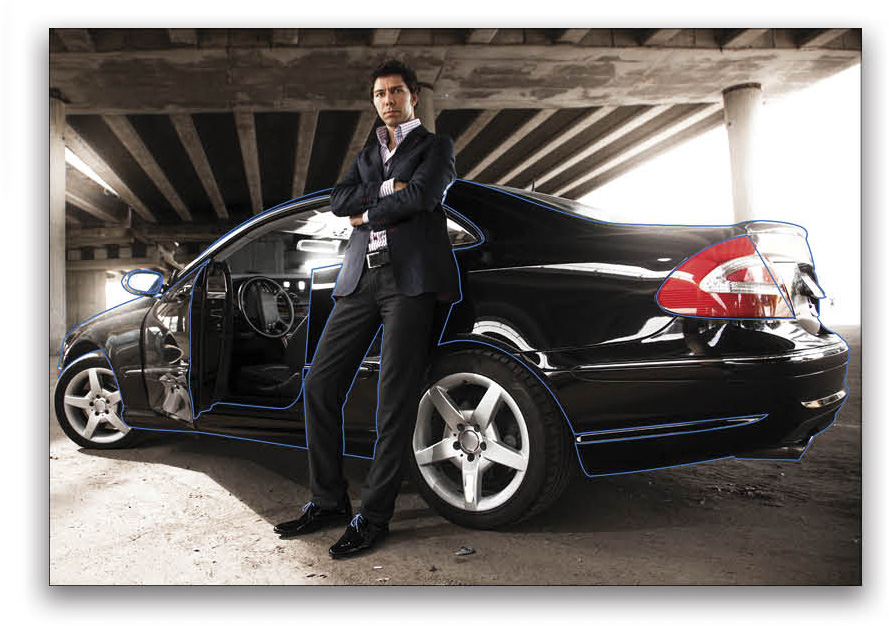
Select the Pen tool (P), and let’s start by making a path around the car. Click to make a point on the edge of the car, and then move your cursor along the edge and click again to create a straight-line path. Click-and-drag to create a curve. To learn how to use the Pen tool, click here for a complete guide by Pete Collins on KelbyOne, or from some quick shortcuts, check out Gilmar Smith’s Photoshop User article here.
Complete the path around the part of the car to the right of the man, as shown. For now, don’t worry about the areas that need to be excluded, like the taillights; we’ll take care of them later.

Now, let’s create paths around the rest of the car’s exterior, to the left and below the standing man.
STEP THREE: CREATE PATHS AROUND AREAS YOU WANT TO EXCLUDE
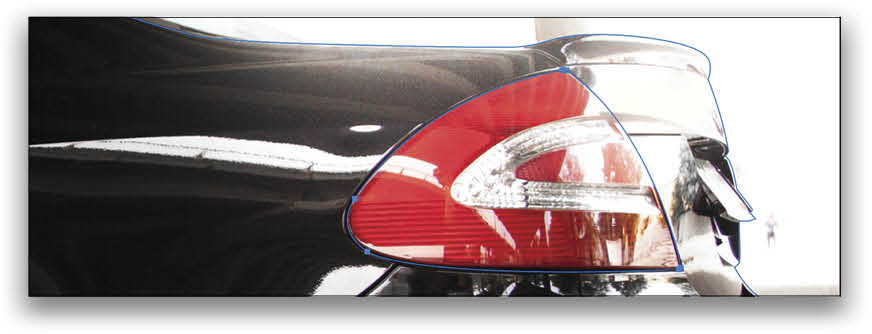
There are places, like the taillight at the back or the mirror at the front, where you don’t want to add the golden color. Therefore, we need to exclude them. With the Pen tool still selected, draw paths around areas inside the previous paths that you want to exclude, as shown.
STEP FOUR: CONVERT THE PATH TO A SELECTION
Now, hold down the Command (PC: Ctrl) key and click anywhere on the canvas away from the Path to make sure that no single path is selected. It should look like you see here. Note: If your path disappears for some reason, go to the Paths panel (Window>Paths) and click on the Work Path.
Then, Right-click on the image and choose Make Selection. In the dialog that appears, set the Feather Radius to 0 pixels, make sure Anti-aliased is selected, and click OK.

STEP FIVE: CREATE A SOLID COLOR ADJUSTMENT LAYER
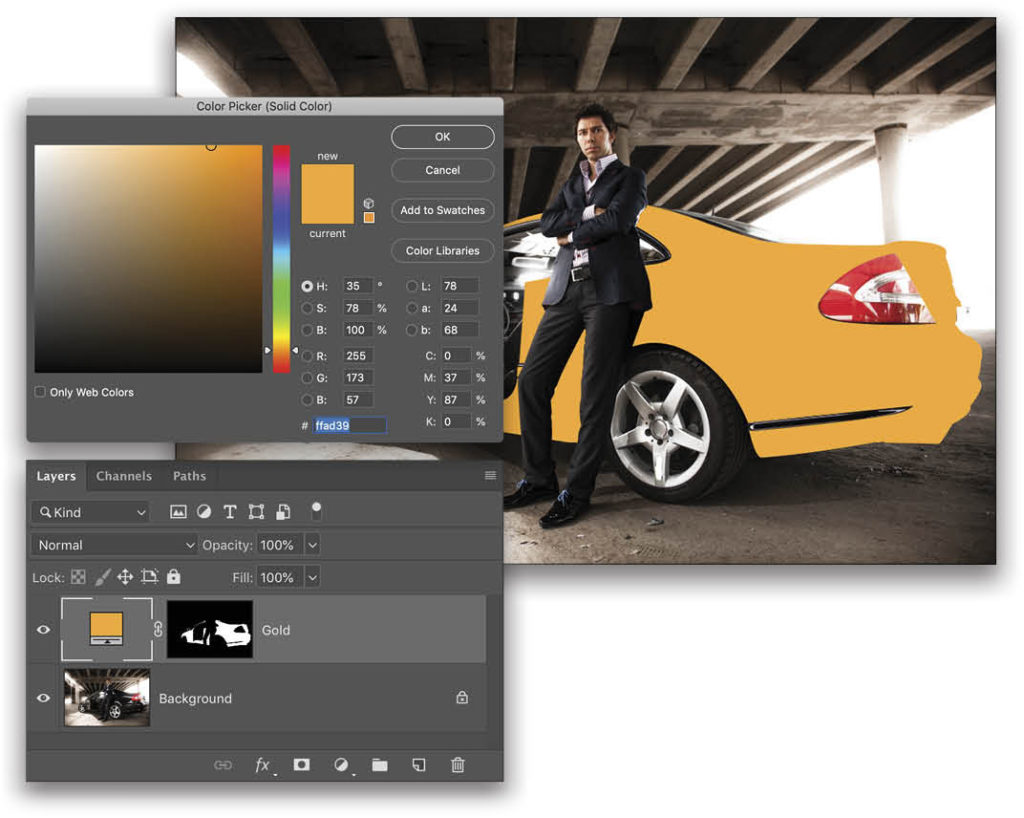
While the selection is active, click on the Create New Adjustment Layer icon (half-black, half-white circle) at the bottom of the Layers panel and choose Solid Color. For this example, let’s choose a shade of orange gold (R: 255, G: 173, and B: 57) and click OK. Double-click on the name of the Color Fill 1 layer and rename it “Gold.”
STEP SIX: CHANGE THE BLEND MODE TO SCREEN
Change the blend mode of the Gold layer from Normal to Screen to the top left of the Layers panel.
STEP SEVEN: USE BLEND IF TO REMOVE THE DARK AREAS
Double-click on the right side of the Gold layer (or Right-click on the layer and choose Blending Options) to open the Layer Style dialog. In the Blend If section, drag the left Underlying Layer slider to the right.
The transition from the dark areas to the light ones is harsh, so hold the Option (PC: Alt) key and click on the left slider to break it apart. Then, drag the two parts separately to make the transition smoother and more realistic. For this example, we’ll set the two halves at 0/105, and then click OK.

STEP EIGHT: DUPLICATE THE LAYER
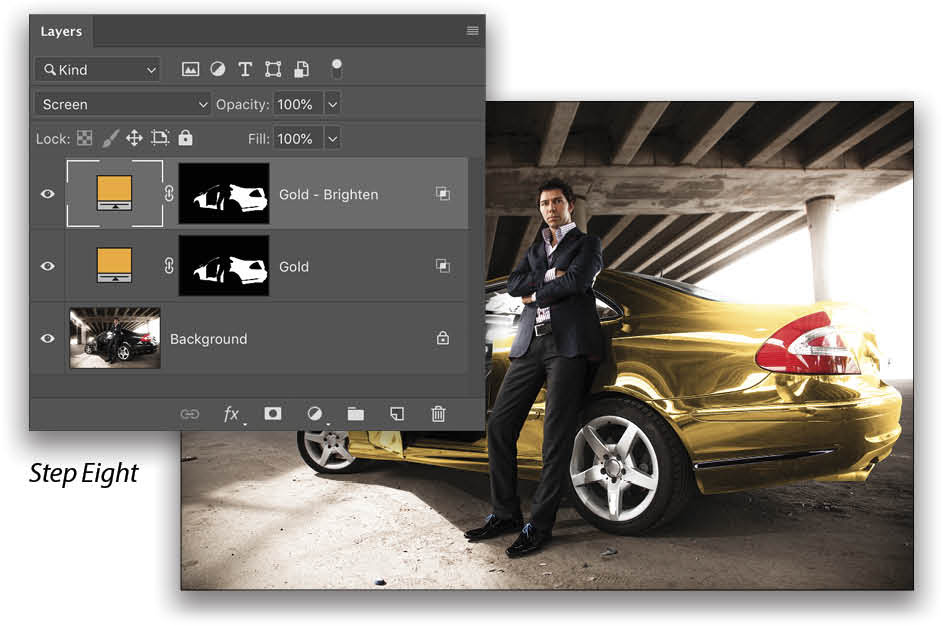
With the Gold layer active, press Command-J (PC: Ctrl-J) to make a copy of the layer. Rename this layer “Gold – Brighten.” This adds an additional punch in the dark areas, but also blows out the highlights, so we’ll need to mask it.
STEP NINE: BRIGHTEN THE DARK AREAS
With the Gold – Brighten layer active, press Command-G (PC: Ctrl-G) to put this layer in a group so that we can have a separate mask for that group. Option-click (PC: Alt-click) on the Add Layer Mask icon (circle in a square) at the bottom of the Layers panel to create a black mask, which hides the layer.
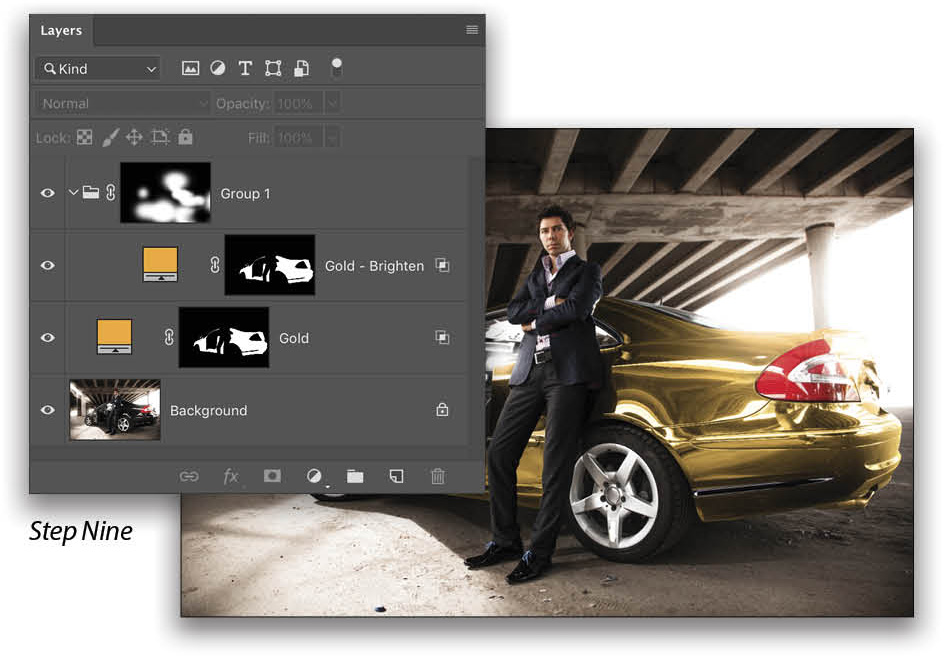
With the mask selected (you’ll see a white frame around it), get the Brush tool (B) and choose a soft, round brush in the Brush Picker in the Options Bar. Press D to set white as your Foreground color, and paint over the dark areas of the car.
STEP 10: ADJUST THE COLOR (OPTIONAL)
If you feel like changing the shade of gold, or any color you’ve applied to the car, simply double-click on the Solid Color adjustment layers’ thumbnails, change the color values as you wish in the Color Picker, and click OK.
In this example, we used very basic concepts in Photo-shop. Since the car is black, any color added needs brightening, and we know that the Screen blend mode brightens. But, the Screen blend mode also heavily brightens the shadows, which we don’t want. Therefore, we used Blend If to limit the application of brightening in the shadows. I encourage you to experiment with this technique using your favorite colors. Also, consider this an assignment, a little challenge, or something to think about: How would you change the color of the car if it were white? (Hint: The Multiply blend mode darkens.). All the best!
This article originally published in the March, 2019 issue of Photoshop User magazine.


