Sun flare effects are really popular right now, and thankfully, they’re pretty darn easy to do. Plus, there are two ways you can pull this off. I’ll go with my favorite method first, and I’m adding the second method as a tip, since it uses the same settings—just a different tool.
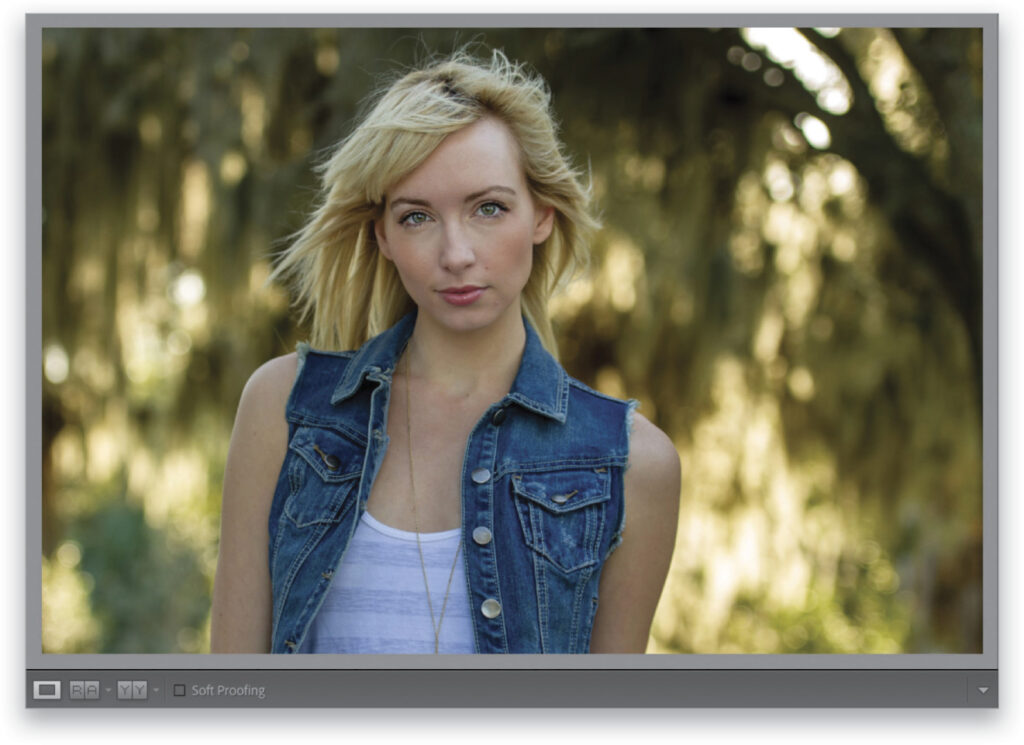
Step One: Here’s our original image, and if you look at her hair and the little bit of backlighting she’s getting from the sun peeking through the trees, it looks like we should put our sun flare on the top-right corner of the image.
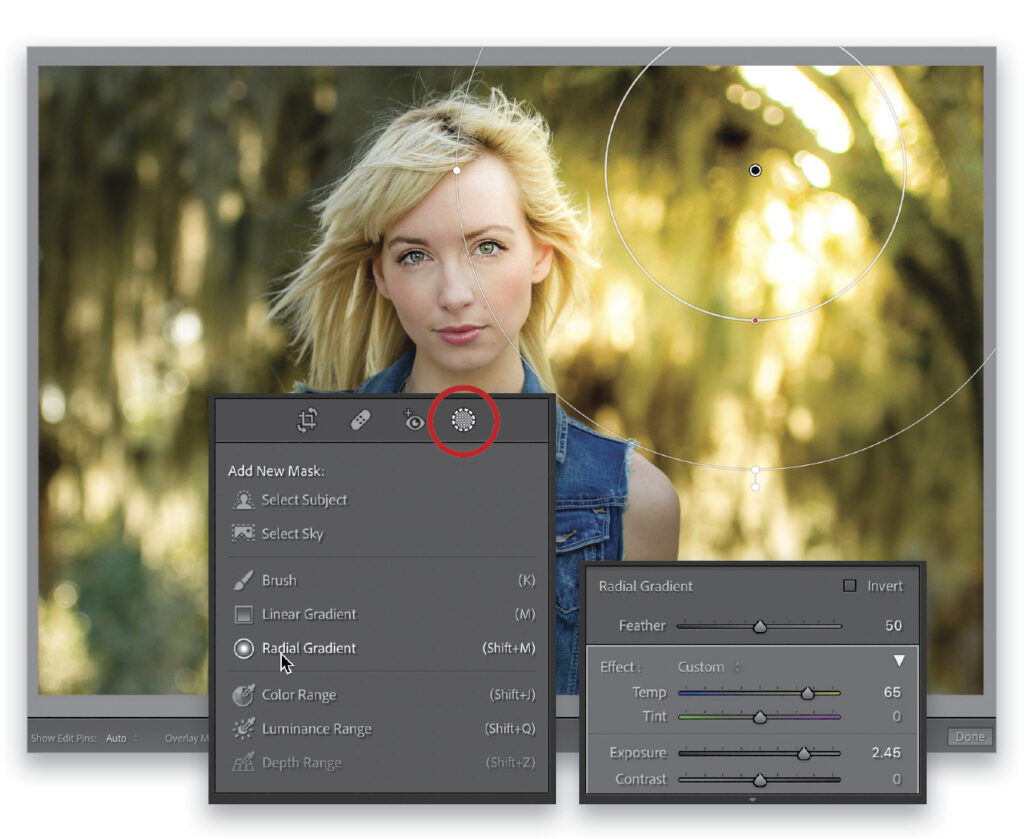
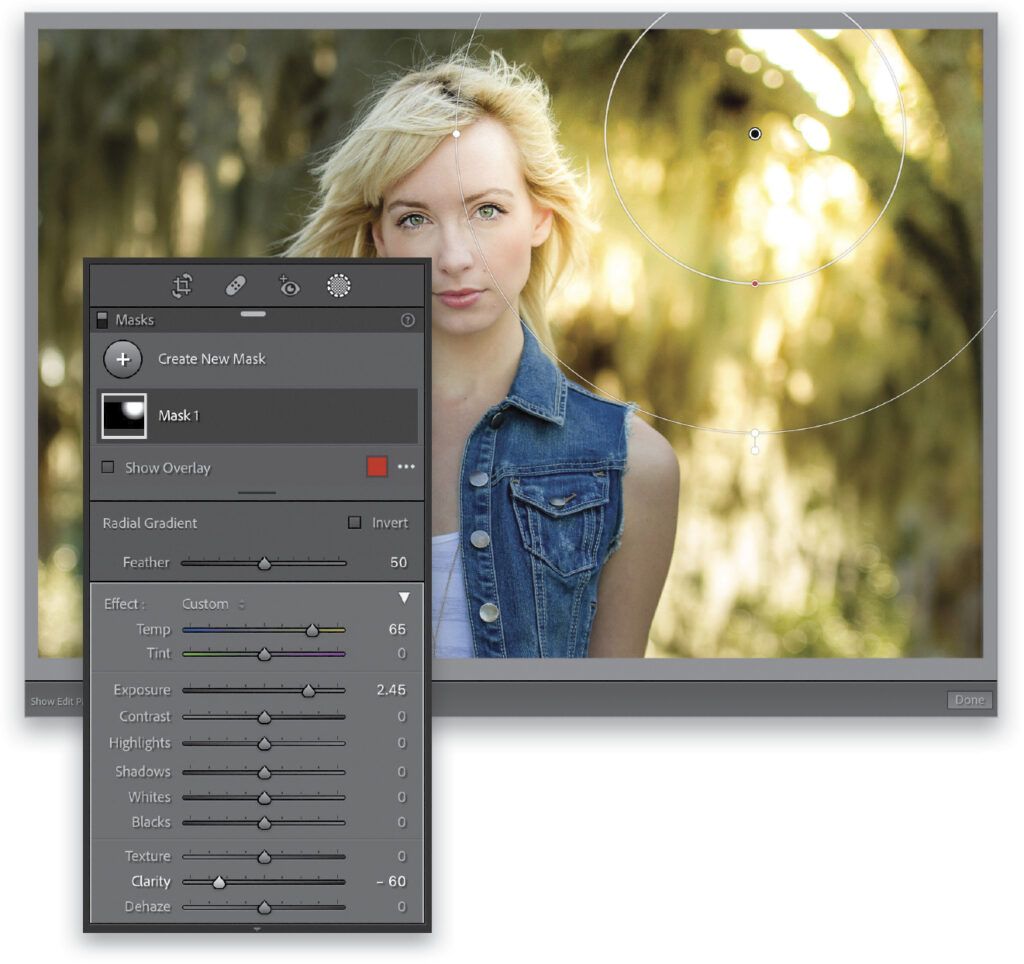
Step Two: Click on the Masking icon (seen circled here), in the toolbox beneath the histogram, and from the panel of tools that appears, click on the Radial Gradient (as shown here; or press Shift-M). Before you click-and-drag the sun flare out, drag the Temp slider way over to the yellow side (here, I dragged it over to 65). Then, crank up the Exposure (it is the sun, ya know, and in this case, I dragged it over to the right to 2.45, so basically adding about 2-1/2 extra stops of exposure). Now, click-and-drag the sun flare out in the top-right corner (as seen here). Notice the position of the oval here—I’m intentionally letting it spill a little over onto the side of her face.
Step Three: Next, we’re going to add some negative Clarity to soften our sun flare, so drag the Clarity slider way over to the left (here, I dragged it over to –60). Don’t forget— you can reposition your sun flare any time by clicking on the little black edit pin and dragging it right where you want it. Note: In case you were wondering, I docked my Masks panel here beneath the toolbox by just clicking-and-dragging it from its usual spot on the left of the right side panels.
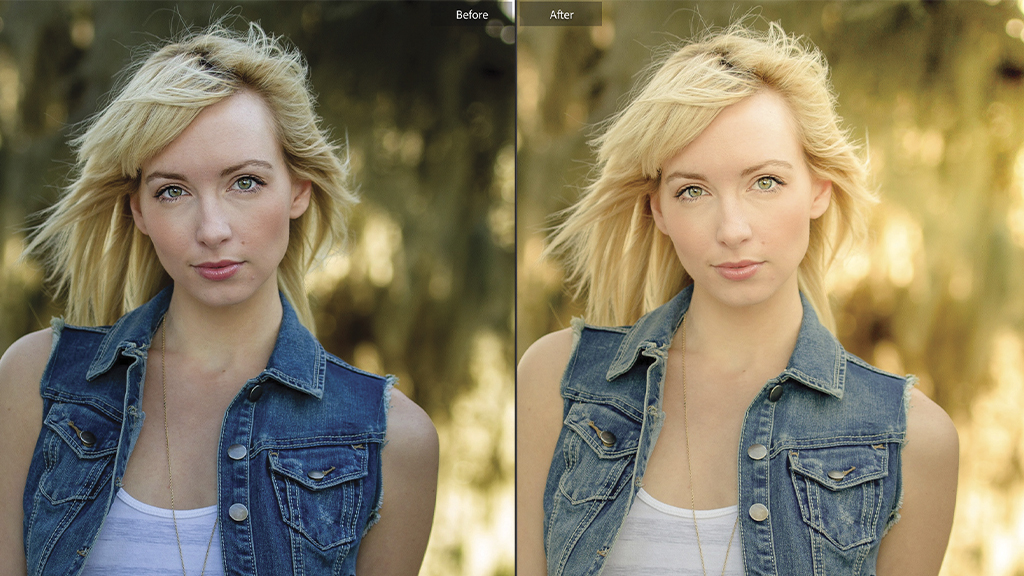
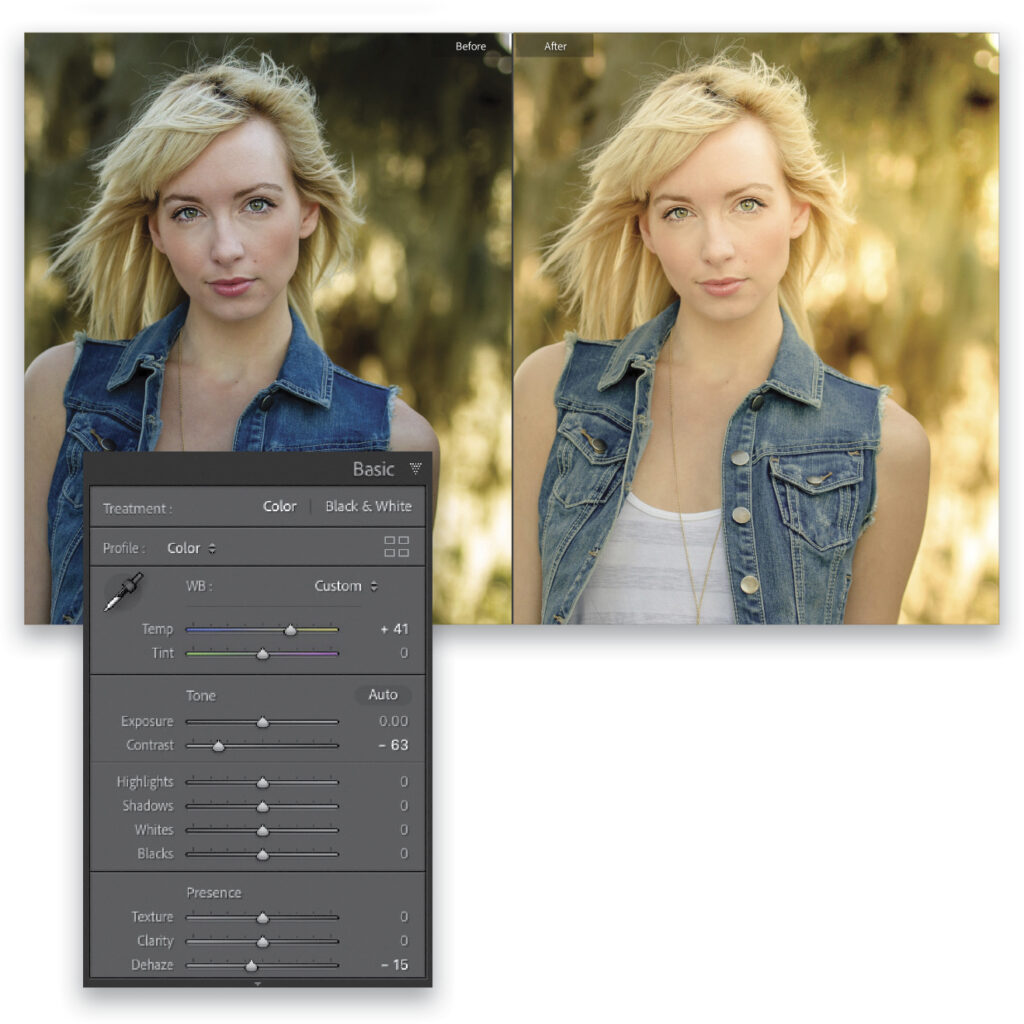
Step Four: To make the effect look more realistic, you’re going to need to somewhat match up the color of the rest of the image with the very warm color you just added with this sun flare. So, click the Done button at the bottom right of the Preview area, then go to the Basic panel and drag the Temp slider over to the right until the color blends in with the color of the sun flare (here, I dragged it to +41). To finish things off, back off the contrast a bunch (one of the rare times I add negative contrast, but in this case, with the sun bursting in, it helps sell the look by lowering the contrast of the rest of the image). Here, I dragged the Contrast slider down to –63, and I also ended up dragging the Dehaze slider a little to the left to –15. A before and after is shown here.
TIP: Optional Second Method If you’re not comfortable using the Radial Gradient yet, you can use the Brush tool (K) instead. Just make your brush size really big, and then click it a couple of times in that top-right corner to get a similar look.
Excerpted from The Adobe Photoshop Lightroom Classic Book by Scott Kelby
If you liked this tutorial and want lots more Lightroom learning, I hope you’ll join us for our upcoming KelbyOne Lightroom Conference – happening April 16th and 17th (with 2 pre-con sessions on the 15th). It’s 2 full days, 2 simultaneous training tracks, and an instructor team made up of some of the best in the business. You can find all the details here.