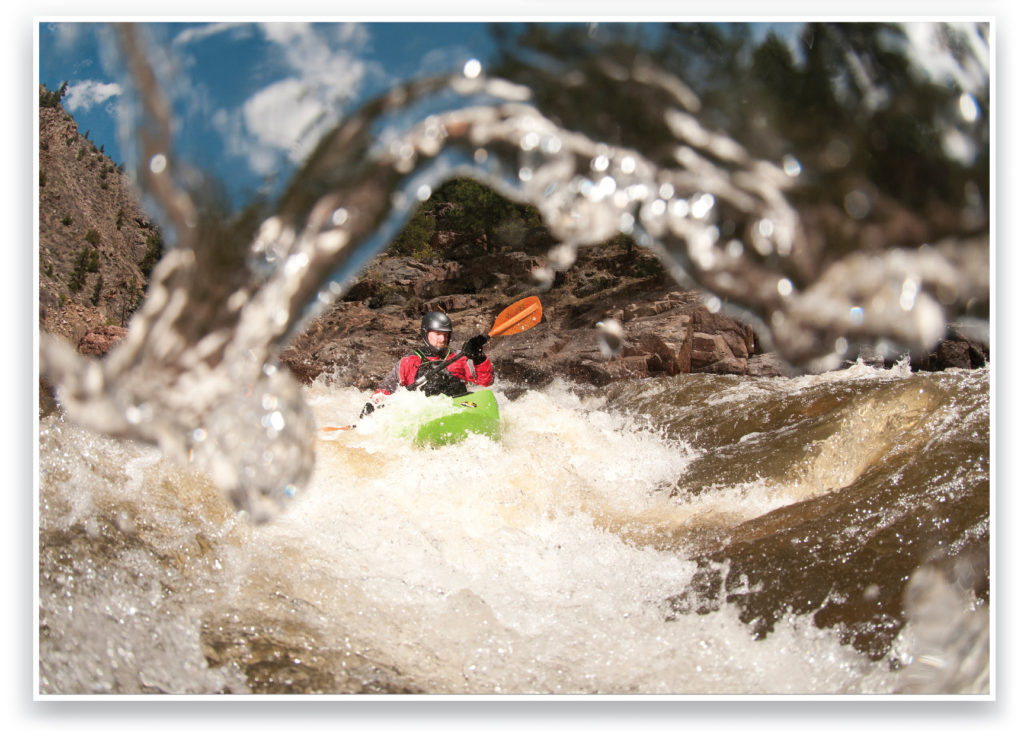
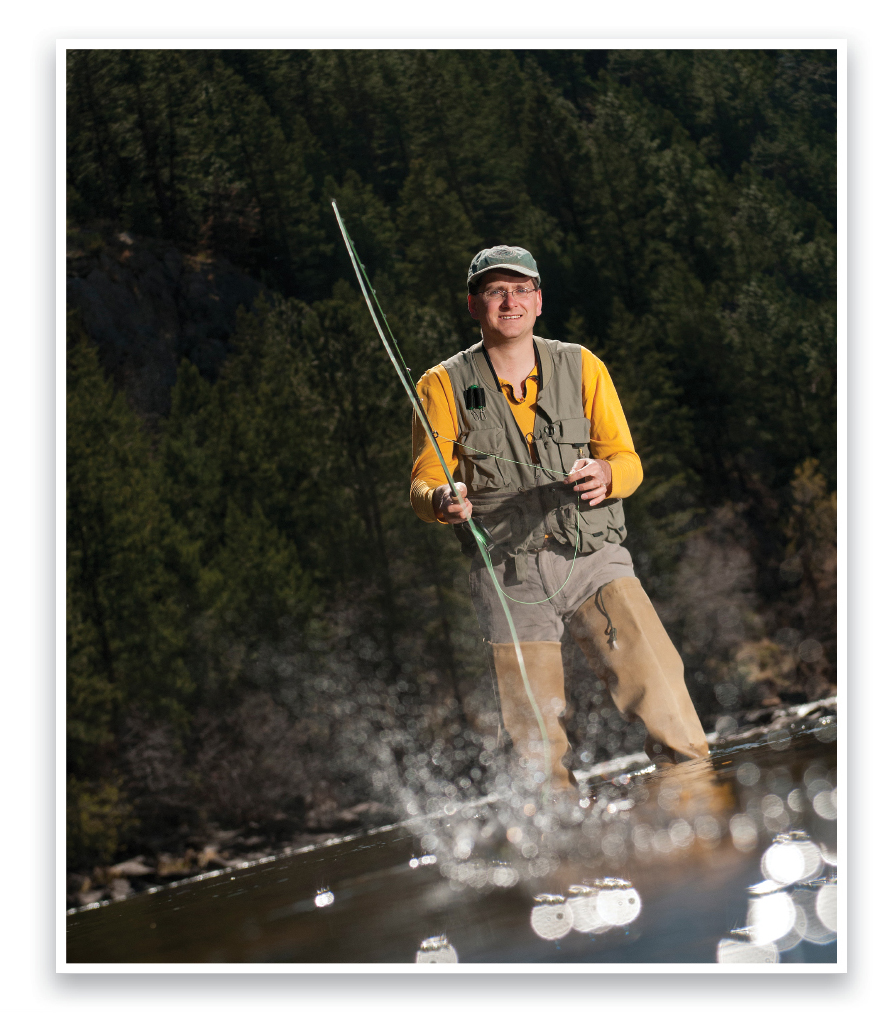
Ever since I started my career as an adventure sports photographer, I’ve been floating in the water with a camera in hand. On one assignment I might be documenting a two-month kayaking trip in southern Chile, and the next month photographing a famous trout fisherman in Wyoming. Editors wanted fresh imagery, and that meant figuring out a way to shoot in the water. And not just simply shooting underwater, but creating a photograph that revealed both under and above the water at the same time. These images, referred to as over/under images, always caught the viewer’s attention.
But over/under photography had a lot of challenges 20 years ago, and only dedicated shooters attempted it. First, you had to set up a bulky, massive, dive housing to hold your camera. (Imagine carrying around a 20-lb basketball-sized camera setup on the beach.) Housings were finicky; one bump and the entire housing purged. I’ll never forget when a model asked me if the round dome port holding my lens was supposed to have sea water sloshing around in it. Say goodbye to that camera. And let’s not forget that there were no LCD preview screens back then, and after 36 exposures you had to open the housing and change film. Ugh!
Here’s the good news: Today, your grandma could shoot over/under photographs on your next summer vacation. Cameras, housings, and technology have dramatically improved to the point that for a few hundred bucks you can create terrific over/under images. How do I know? I’ve shot numerous assignments using underwater cameras and housings. I just returned from a shoot in the Caribbean where I used three different types of cameras to get over/under shots. So, let’s look at today’s options, and what techniques to use to create stunning water shots.
The Gear
There are three basic camera systems you can use to shoot over/under images. I’ll start with the least expensive compact cameras ($200–300), which offer a lot of performance and great image quality. Most major camera manufacturers, including Nikon, Canon, and Olympus, to name a few, have a waterproof compact camera in their lineup. I’m a Nikon shooter, and I love the “bombproof” (waterproof, shockproof, and freezeproof) Coolpix AW130. Similar to other compacts, the AW130 has minimal doors, which means less rubber gaskets (i.e., fewer places for water to seep into your camera). The lens is the equivalent of a 24–120mm, and this is important for over/under photography, as you need to have a wide-angle lens that can capture below and above the water. The 24mm is about the minimum, and a wider angle is better and easier to create these images.
Most compacts are waterproof to 100’ or more, so you don’t have to worry about shooting on the surface. Perhaps the best thing about these cameras is that you can knock them around and they still don’t leak. And they’re small enough to put in a shirt pocket. (The GoPro could also qualify in this category; but I put this camera more into the video category, rather than a dedicated still camera.)
Next in the lineup is a unique camera offered by Nikon: the mirrorless AW1. This camera is the only one on the market that is waterproof and has interchangeable lenses. Each lens firmly attaches to the camera body, and a rubber gasket keeps the water out. For over/under photography, use the 10mm lens for a wide-angle perspective. The image quality in this camera is noticeably higher than in the compacts, and with this comes a steeper price: $699.95. The Nikon 1 AW1 has more doors and interchangeable lenses, so you need to be a little more careful to avoid hard knocks on the lens. This is, however, a great option between a compact and DSLR with housing.
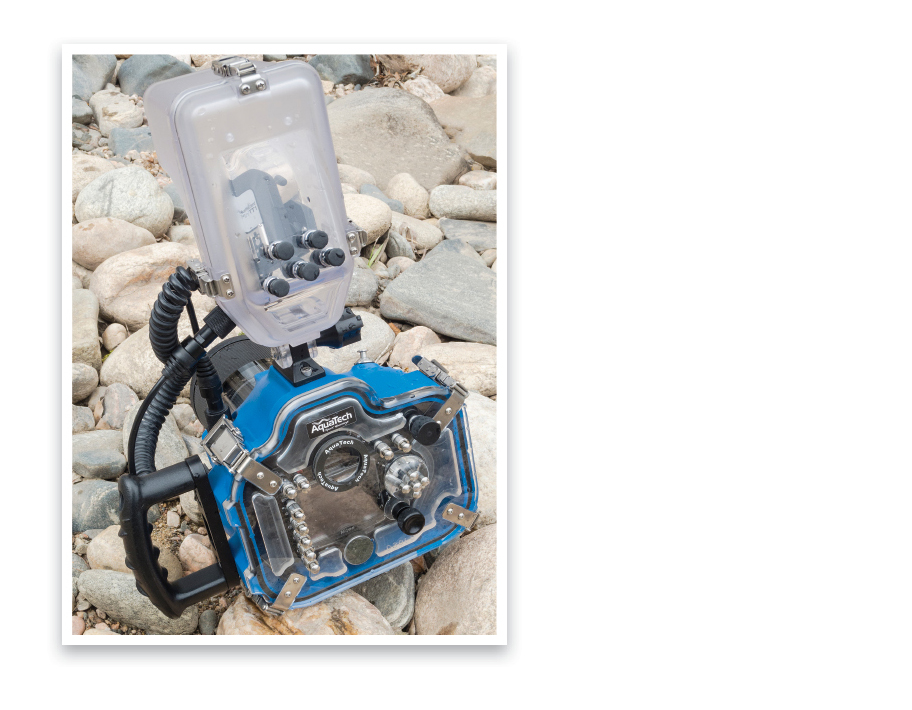
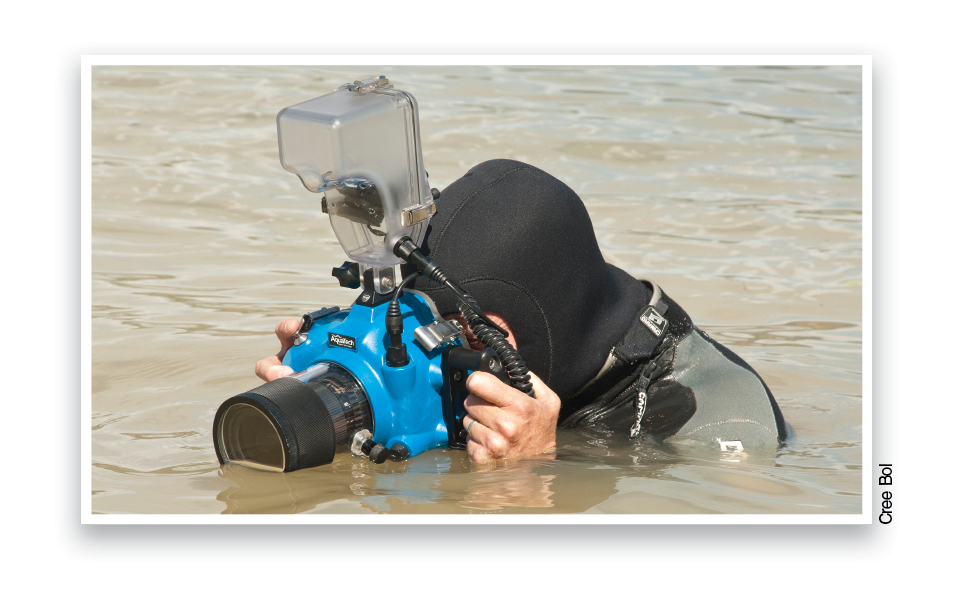
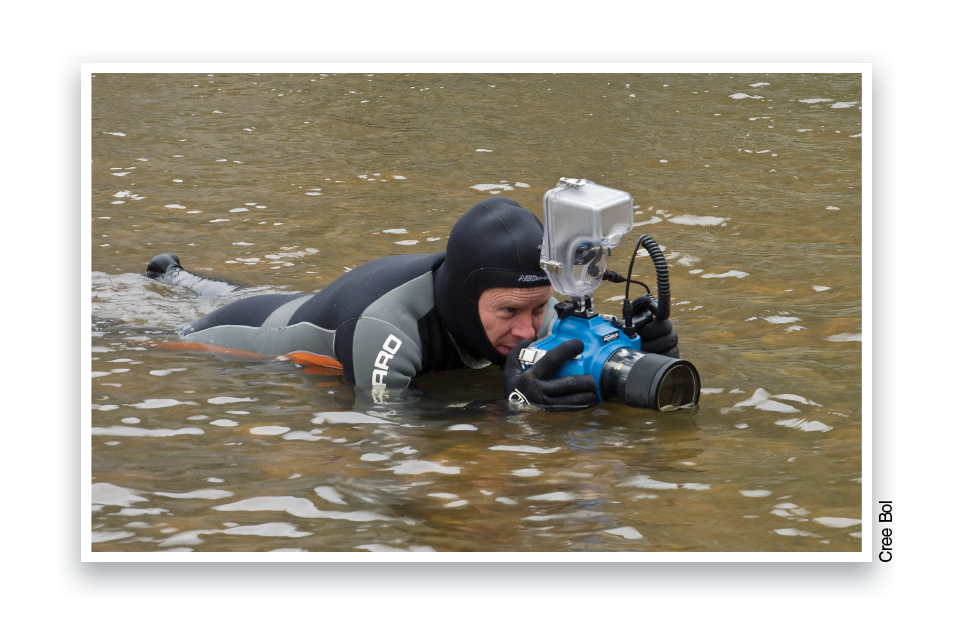
Last, and most expensive, is a system that uses a dedicated housing with your DSLR. Often the housing costs more than your camera, and will only work with that particular model; but you have full access to all your controls, and the ability to use different lenses with different lens ports attached to the housing. Hands down, my favorite lens for shooting over/under images is a 16mm fisheye with my full-frame DSLR. The 16mm lens gives you a 180° view, making over/under images simple, with room to spare. I use an Aqua Tech housing (https://aquatech.net) with dome port for my fisheye lens. The AquaTech is a sport housing that’s meant to be used at or near the surface, and it can take a lot of bumps and knocks and still keep your camera safe and dry.
Note: You can go deeper with a standard dive housing, which is meant to keep things sealed tight as you descend into more water pressure; but at the surface, these housings can leak with just one little bump. And the inexpensive, plastic waterproof camera bags will keep your gear dry, but they often fog up and don’t give you much access to camera controls and settings.
Over/Under Techniques
Once you’ve chosen your gear, the fun begins. You get to jump into the bathtub-warm, cerulean waters of the Caribbean and photograph marine life and super models snorkeling past! Well, maybe something like that, but you do get to shoot in the water. Let’s discuss a few tips that will help you with your over/under shooting.
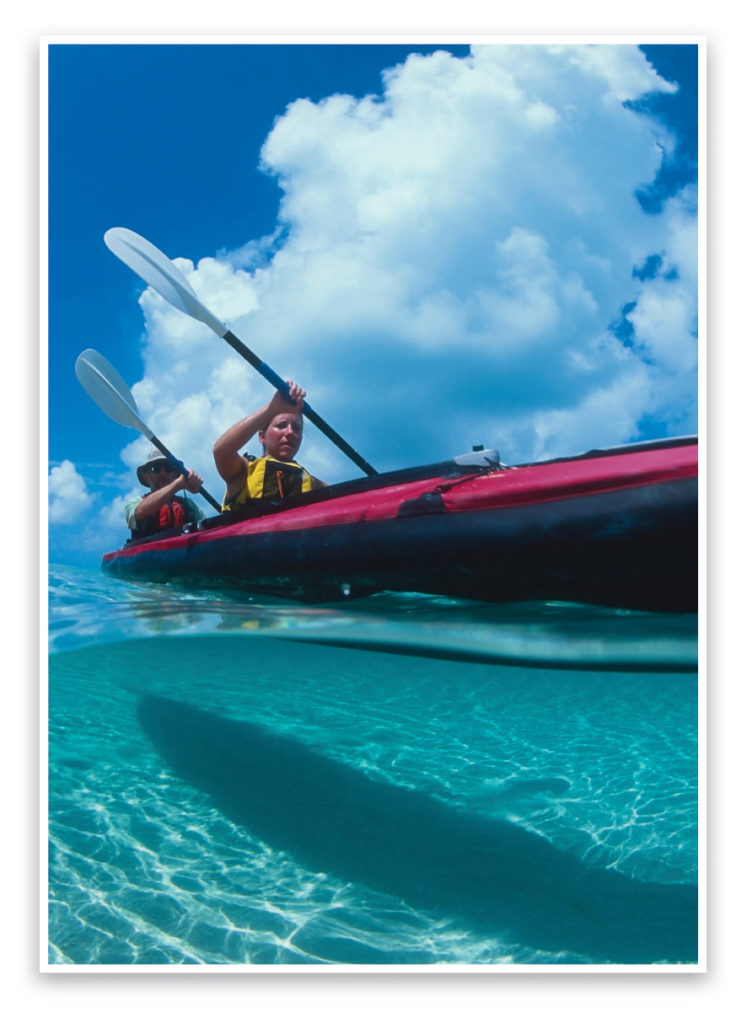
Shoot at noon: First, start celebrating because you don’t need to get up early for first light. In fact, shooting in midday sun is best for over/under photos. Why? Because water absorbs light and, just a few feet under the surface, you lose stops of light. To avoid the huge exposure difference between above and below the water, shoot at midday with lots of sunlight to minimize the contrast. Along the same lines, try shooting in sandy shallow areas, as sand reflects light. If you’re shooting in 3’ of clear water in the Bahamas with a sandy bottom, there’s minimal exposure difference between above and below the water.
Shoot in calm water: Next, shoot in the calmest water you can find. If you’re shooting with a small waterproof compact camera, the lens diameter may only be 1” across. To perfectly split the under and above water parts of the image, you need flat water. Even the smallest waves will cause lots of trouble when you’re trying to capture the perfect over/under shot. (But you may get some cool creative shots just trying.)
Start shooting first in shallow water, ideally where you can stand: Most people aren’t nearly as agile in the water as they are on shore, especially with a camera in hand. If you’re standing on the bottom, it’s easier to get a good shot; however, be careful not to stir up the sand as this will reduce clarity and cause backscatter.
Avoid backscatter: Backscatter is created when your flash hits particles in the water and reflects them back to your camera. In essence, it looks like a snowstorm underwater and the images go into the trash. Keep the water as clear as you can.
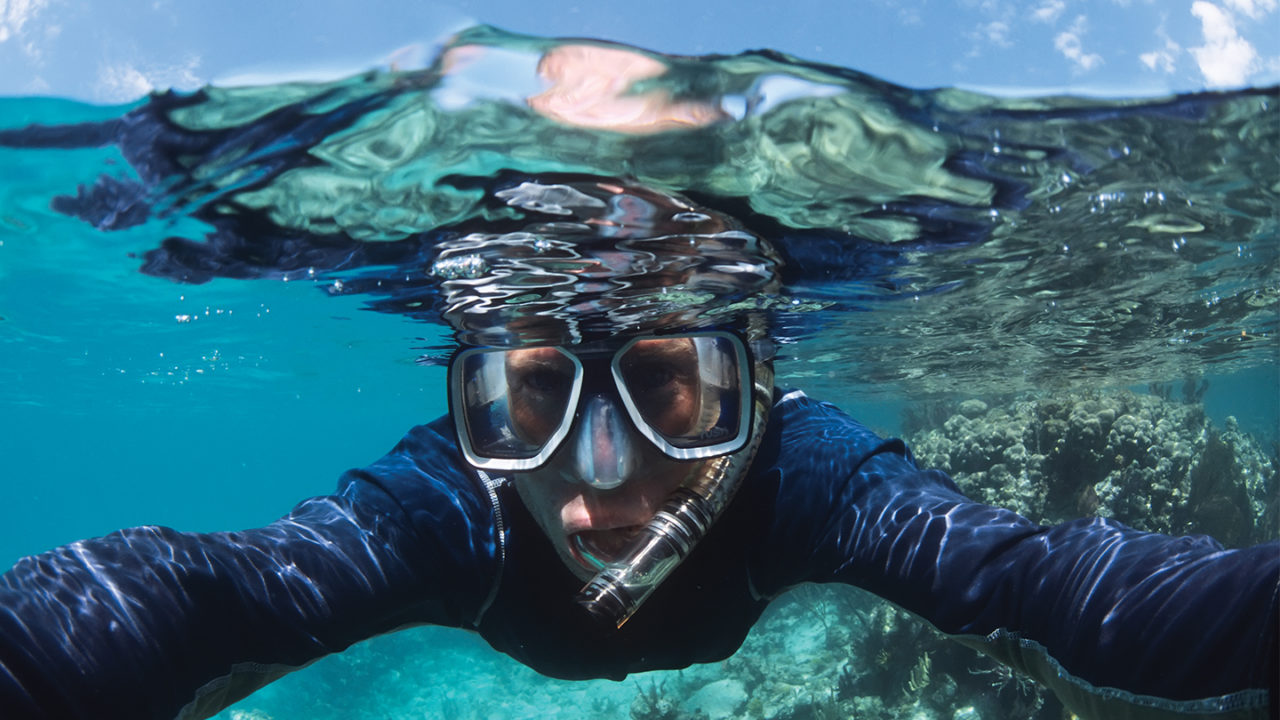
Don’t wear a dive mask: Over/under images are created at the surface, so technically your head shouldn’t be underwater. Unless your camera/housing is designed to be used with a dive mask, don’t wear one, as this pushes your eye further from the viewfinder, which makes composing the shot harder. I will sometimes use a snorkel, as my mouth might be underwater; but my eye is above the water. Note: Compact cameras have viewfinders for normal viewing, but housings often have special eyepieces so you can use a mask to compose underwater. If I’m shooting with my fisheye, I may not even look in the viewfinder while shooting. Because there’s such a wide angle of view with this lens, I just point it in the general direction of my subject with half the lens port above water, and shoot away.
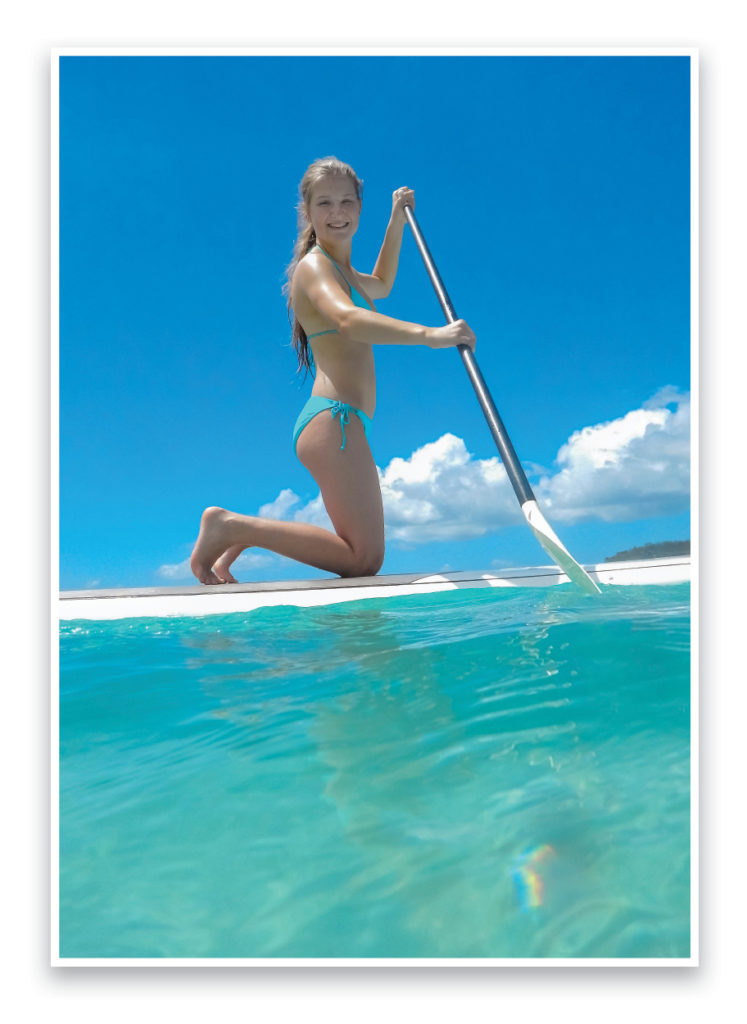
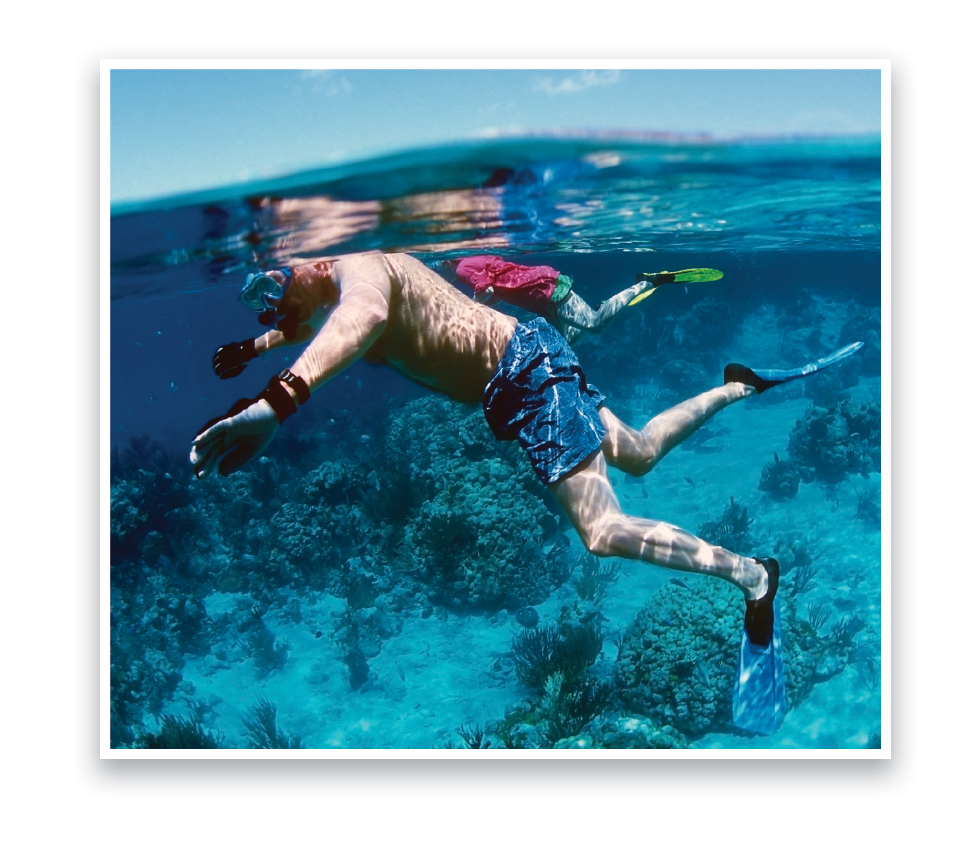
Focusing: With over/under photography, focusing can be tricky. Your camera may have a hard time if the focus point is right at the surface. If my subject is above water, I normally put my active focus point in the above-water area.
![]()
If I’m photographing a sea turtle or snorkeler underwater, then I’ll put the focus point underwater. And, if I’m using my 16mm fisheye, I often set my focus to infinity, and tape the lens at this point. When shooting at f/16, I’ll have everything from a few feet to infinity in focus.
Bring a lens cleaning cloth: Now this might be impractical if you’re going out snorkeling; but if I’m in the shallows and shooting over/under shots, I try to have a dry, cleaning cloth handy (let your friend hold it while you shoot). Every little droplet of water that lands on the above-water part of your lens will show up in your final shot, so using a cloth to wipe these off is helpful.
Submerge your camera: Here’s another technique to try if you’re getting a lot of droplets on your lens: Submerge the camera entirely underwater, then quickly bring it up and shoot. Sometimes this gives you better results than shooting through a lens with lots of water spots on it.
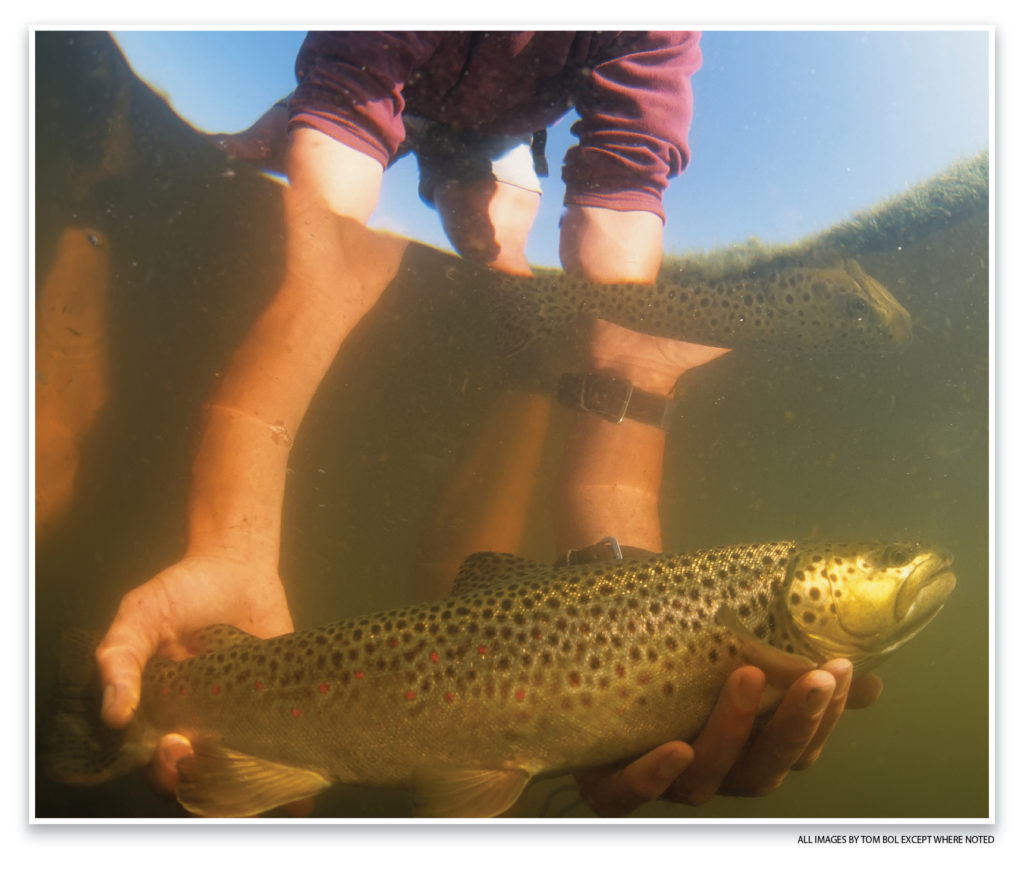
Over/under photography can be addictive. Imagine the strange looks you’ll get as you hike down a trail in the mountains with a DSLR underwater housing in your hand; but just think how incredible your over/under fly-fishing image will be. The viewer will see the massive brown trout hooked to the fly underwater, and the grinning fisherman above the water. Now that’s a cool shot!
This article originally published in Photoshop User magazine, December, 2015.


