In this time of staying at home, I’ve been trying to learn about focus stacking as a way to keep shooting what’s available to me right now. I still have a lot to learn (which is awesome), but it got me thinking about all the many ways Lightroom Classic allows us to increase our postprocessing efficiency through various batch-editing functions. I couldn’t believe how many options there were when I started listing them.
Batching the Baseline
The first place to start is by setting your Raw Defaults, which I covered in my “Under the Loupe” column in Issue 59 of Lightroom Magazine, so be sure to give that article a read if you haven’t yet. By customizing your Raw Default setting, you’re batch editing right out of the gate. The gate, so to speak, is the Import dialog window, and that’s where the second option for batch editing can be found. If you expand the Apply During Import panel, you’ll see the Develop Settings drop-down menu.
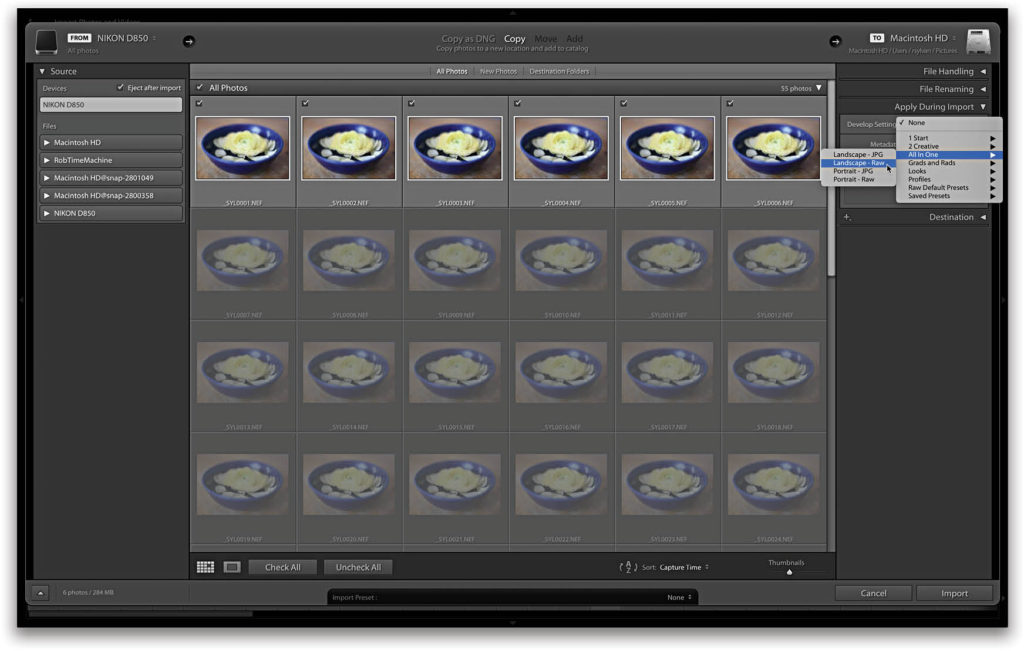
Keeping in mind that our Raw Default setting is automatically being applied to all RAW photos, the Develop Settings drop-down is an opportunity to apply what I consider creative or additional edits that might be more job-specific in the form of a Develop preset that you’ve already made. For example, let’s say that my Raw Defaults setting includes a generic profile (such as Adobe Color) as a starting point for all RAW photos, and I’m about to import a set of landscape photos. I can take my batch editing to the next level by selecting one of my custom presets that includes the Adobe Landscape profile and my preferred Detail panel settings for landscapes.
Now, I don’t take advantage of applying a Develop Settings preset to all imports because the preset will be applied to all the photos, and that may not be appropriate for all sessions. Just file that away as an option to consider when it makes sense in your workflow.
Right After Import
After import, you’re going to land in the Library module and, aside from the important viewing, sorting, and management tasks you’ll need to do, there are actually several options for batch editing here too. The most powerful set of options can be found in the Quick Develop panel.
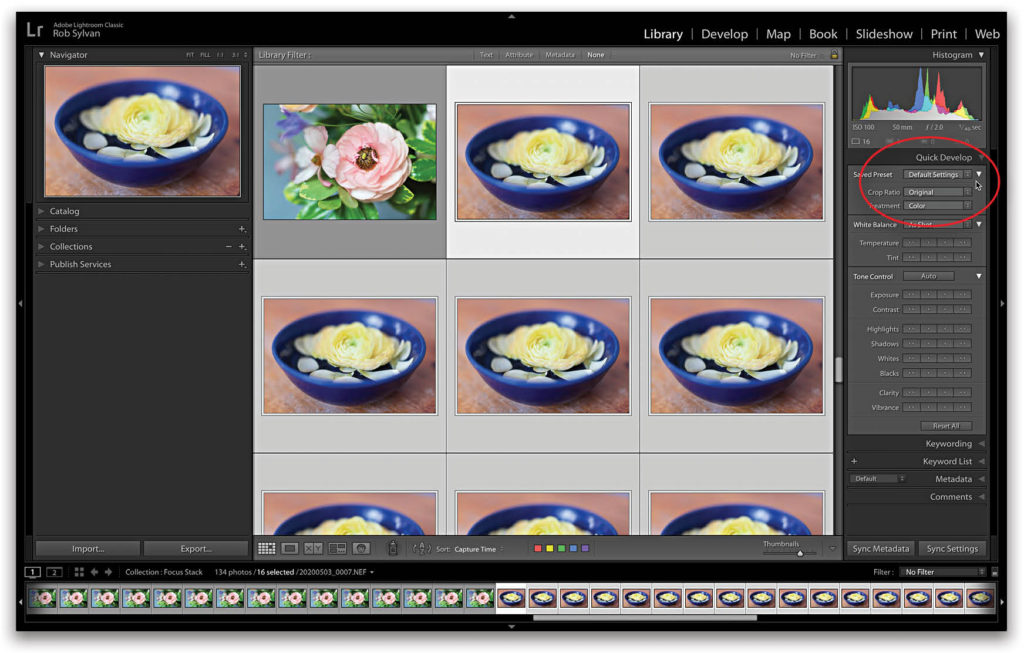
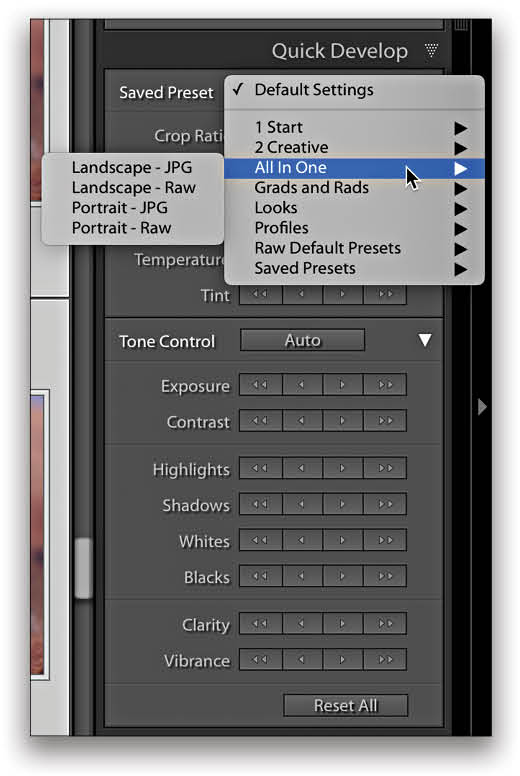
Once you expand the Quick Develop panel, you’ll also want to click all three of the white disclosure triangles that are found within each subsection of the panel to reveal all possibilities. The key to batch editing in the Library module is that when you work in Grid view (press G), you can select multiple photos, and then apply settings to them all at once. If you’re in Loupe view, then only the most selected, or active, photo is affected by whatever action you take.
For example, let’s say I opted not to apply a preset during import because the batch of photos I imported was a mix of portrait and landscape photos. Here, in Grid view, I can select all the portrait photos, and then click the Saved Preset drop-down menu and choose my preferred portrait preset to have it applied to all selected photos. Then, I can select the landscape photos and apply my preferred landscape preset; all before even setting foot in the Develop module.
Another cool thing about the Quick Develop panel is that all of the buttons within the Tone Control section of the panel are relative adjustments, which means that, if I click the +1/3 stop Exposure button (the single right-pointing triangle), all selected photos get nudged +1/3 stop from their current Exposure setting; instead of setting them all to precisely +1/3 stop, as it works in the Develop module. (The buttons with the two triangles change the Exposure a full stop.)
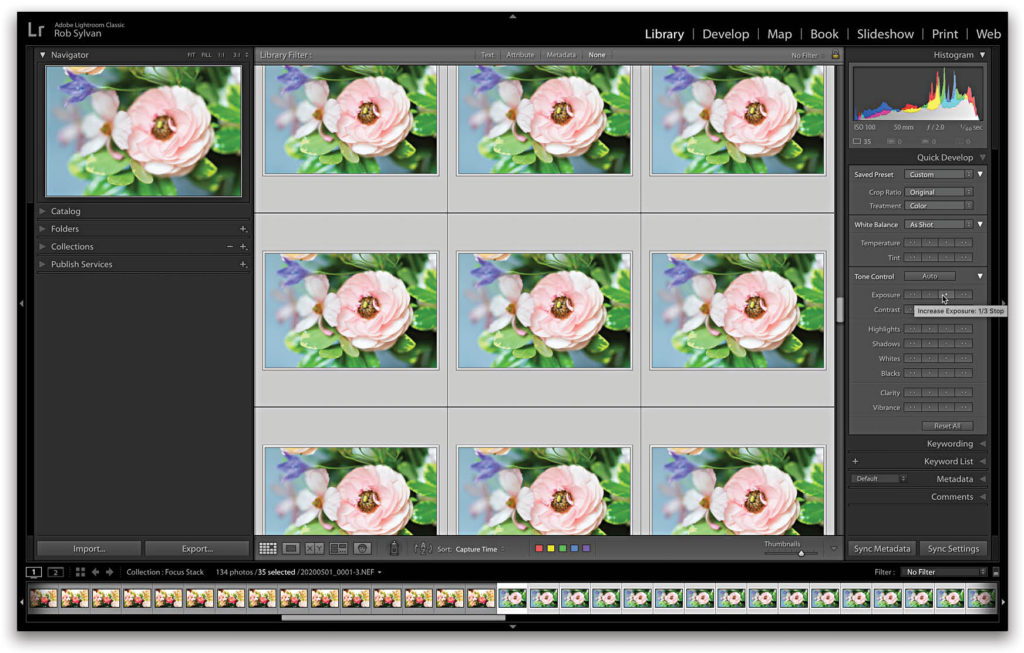
Think of it this way: Say you import a batch of photos and, for whatever reason, they all look a little underexposed. Just select them all, and use the Exposure buttons in Quick Develop to nudge up their brightness a little (you can always refine your adjustments later in Develop). This can be a useful tool for evaluating your photos while trying to decide if they’re keepers or not. When you’re ready, take the keepers to the Develop module where even more batch options await.
Develop Module Options
As you might expect, the Develop module is packed with batch-editing opportunities to make your workflow more efficient. The simplest option is the easily overlooked Previous button at the bottom of the right panel group. One reason it’s easily overlooked is that it appears only when just one photo is selected in the Filmstrip.
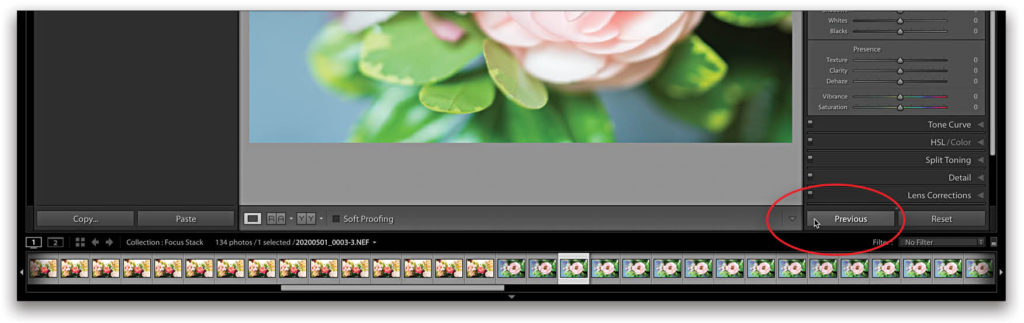
All the Previous button does is apply all of the settings you applied to the previously edited photo to the new photo that’s now selected. This is most useful when editing a set of similar photos and, after editing the first image, you move to the second and decide it should get the exact same treatment. Theoretically, you could manually edit the first photo, then use just your Right Arrow key and the Previous button to work your way through editing the entire set.
That’s not terribly efficient though, so here’s where you might employ the Sync button instead. You can start the same way by manually editing the first photo, but then selecting all similar photos in the Filmstrip (be sure to keep your edited photo as the active photo). Watch the Previous button change to Sync!
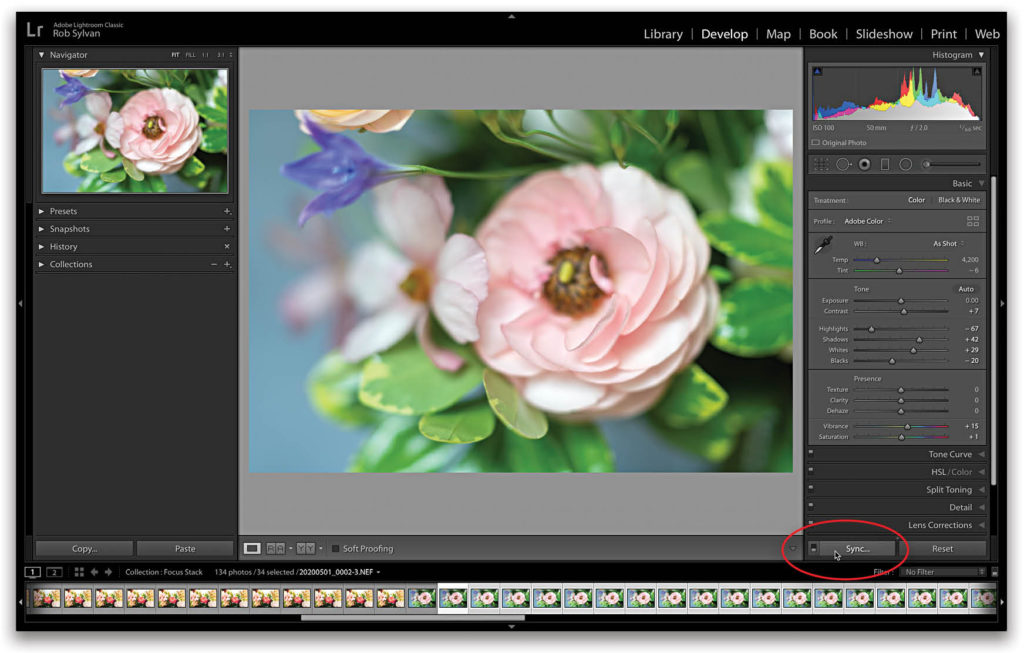
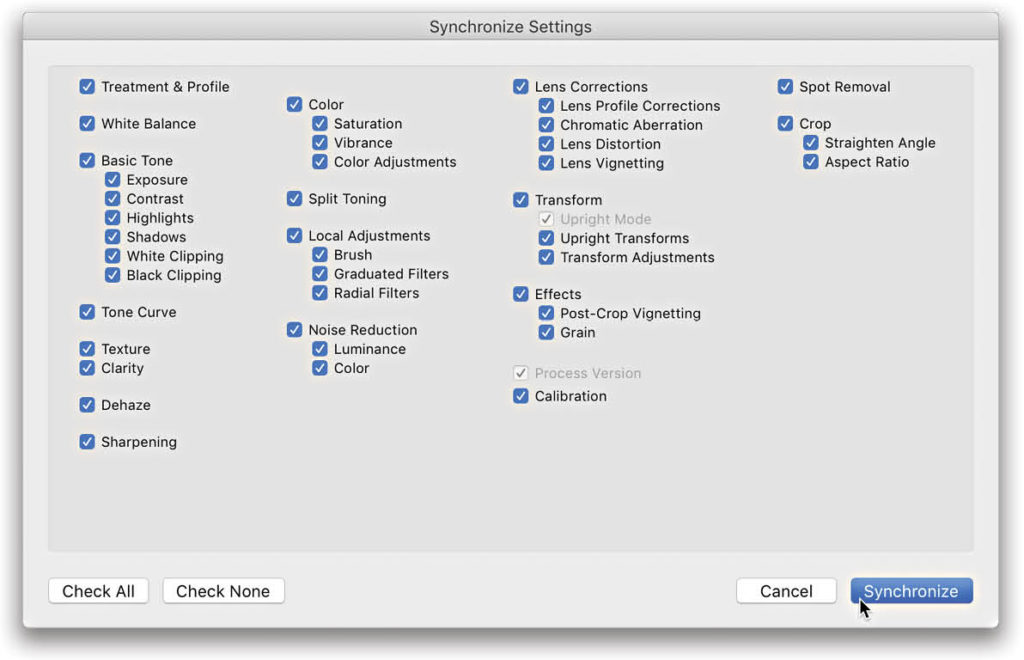
Click the Sync button to open the Synchronize Settings dialog and then choose which settings you want to be synced from your edited photo to all of the other selected photos. This isn’t just a whole lot faster than using the Previous button through an entire set, but it also gives you control over which settings you want to synchronize. Note: If you intended to sync all settings, click the Check All button, then the Synchronize button, and away you go.
If you’re really in a hurry, and like walking on the wild side, click that little switch to the left of the Sync button to change it to Auto Sync. Once Auto Sync is engaged, all edits you make to the active photo are automatically synced in real time to all the selected photos. This is a very powerful setting. You could theoretically edit an entire set of photos all at once, which is exactly what I did with my photo sets for focus stacking.
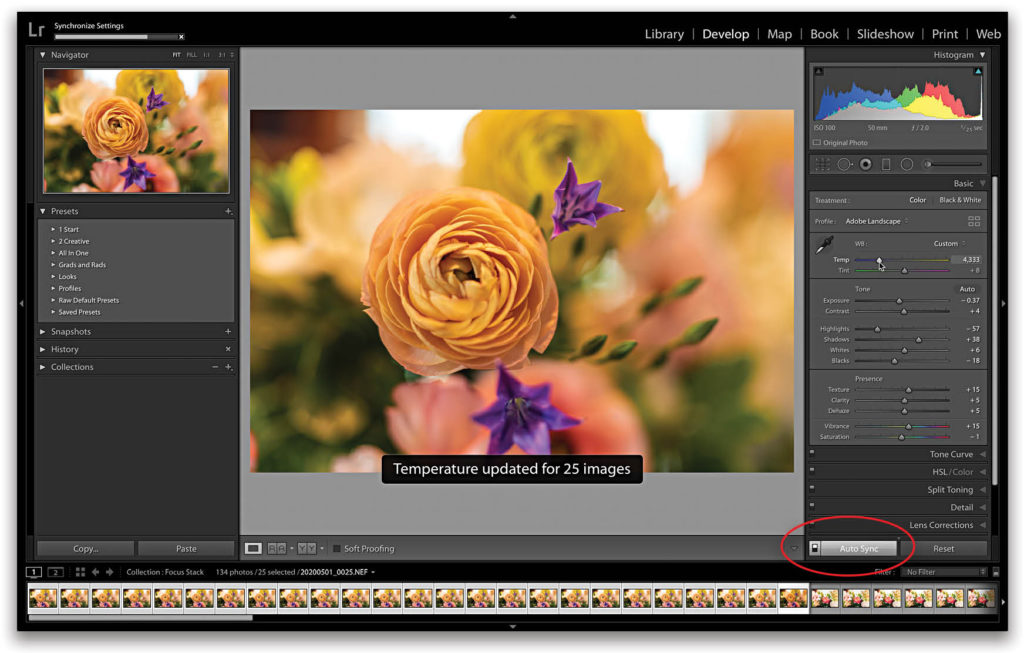
It’s so powerful that Adobe recently made Auto Sync more visibly highlighted when it’s enabled, and it even pops up a bezel displaying which edits are being auto synced to all selected photos each time you move a slider, click a button, check a box, or apply a preset. As soon as you’re done with your Auto Sync session, click that same little switch to change it back to Sync.
Another option to consider is Copy and Paste. Think of this as a version of the Sync function, but instead of syncing settings to all selected photos, it loads your desired settings into your clipboard so that you can paste those settings to a photo, as needed, while working through an editing session.
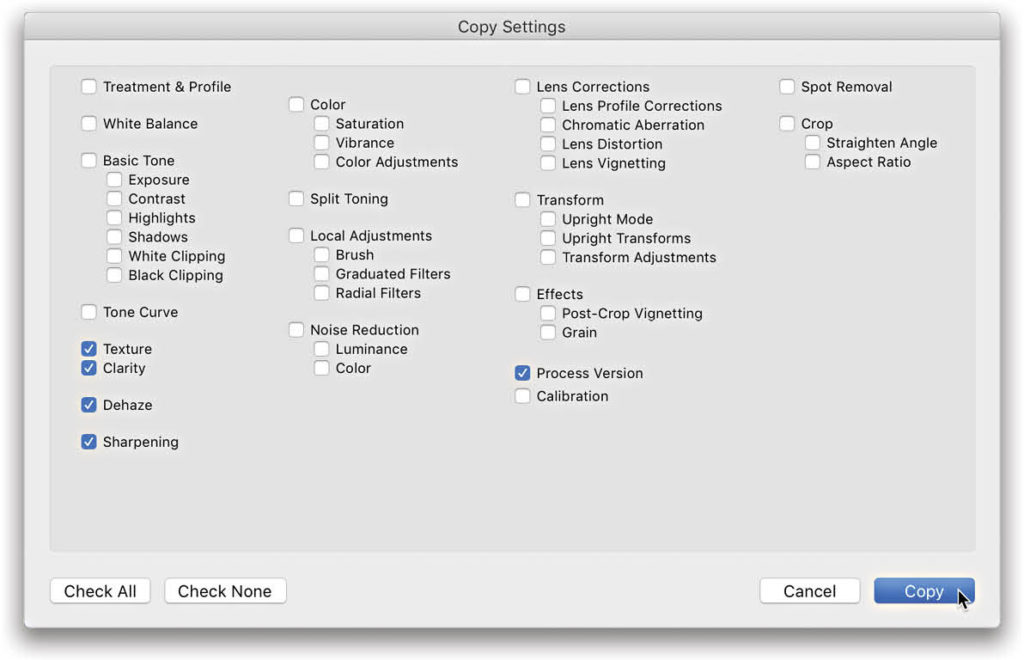
Here’s how it works: First, as with all the previous Develop module options, you edit one photo. Then, if there are settings you’ve applied that you think you’ll want to apply to similar photos in that set, click the Copy button at the bottom of the left-side panels. This opens the Copy Settings dialog where you can choose the settings you want to have at the ready.
Thinking back to our simple example of importing both landscape and portrait photos, you could manually edit the first portrait photo and use the Copy button to copy key settings. Then, when you encounter the next portrait photo in the set, use the Paste button to apply those same settings before fine-tuning that photo.
To really add some efficiency to your workflow, here’s a handy guide to all of the keyboard shortcuts for these options:
- Paste settings from Previous: Command-Option-V (PC: Ctrl-Alt-V)
- Sync Settings: Command-Shift-S (PC: Ctrl-Shift-S)
- Enable/Disable Auto Sync: Command-Option-Shift-A (PC: Ctrl-Alt-Shift-A)
- Copy Settings: Command-Shift-C (PC: Ctrl-Shift-C)
- Paste Settings: Command-Shift-V (PC: Ctrl-Shift-V)
Post Develop Module
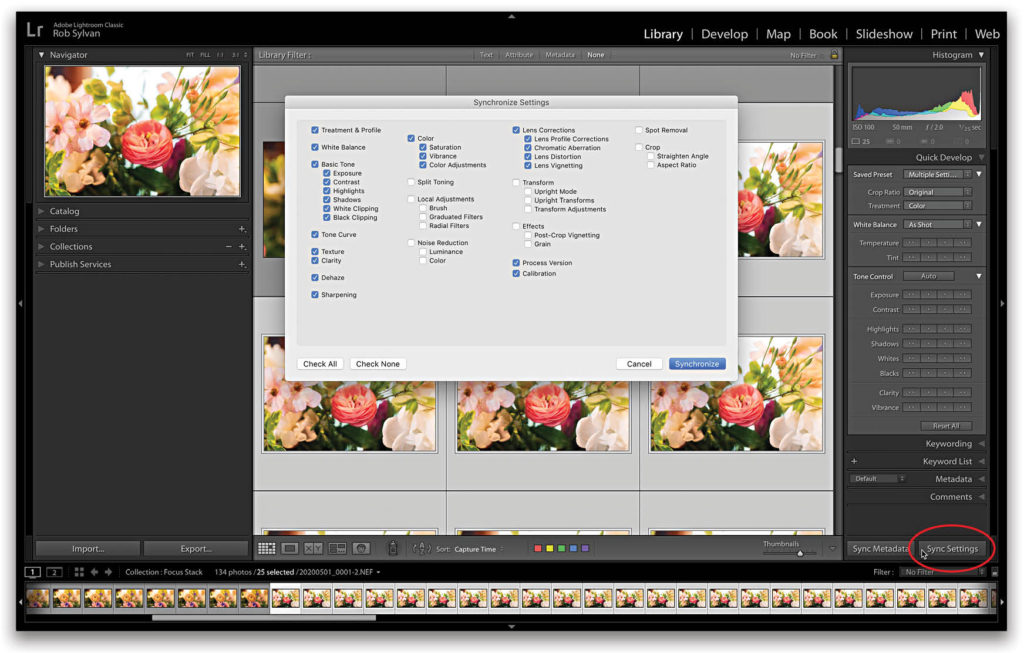
We’ve covered a lot of batch-editing options, but I want to leave you with one more, which is back in the Library module. While it may be nice to edit an entire shoot in a single session in a nice linear fashion, there are many times where that’s just not possible. So, let me point out that there’s also a Sync Settings button in the Library module, and it works the same as the Sync button in the Develop module (same shortcut too).
First, select the first photo with settings and then select the rest of the photos to which you want to sync those settings. When you’re done, click the Sync Settings button at the bottom of the right panel group, which will open the now-familiar Synchronize Settings dialog. Here, you can choose which settings you want to apply to the rest of the selected photos, and then click Synchronize to complete the task. In fact, using the keyboard shortcuts I mentioned previously, you can even invoke the Copy, Paste, and Previous functions while in the Library module.
By leveraging the work we’ve already done and applying it to similar photos, this combo of features gives us a tremendous amount of power to edit our photos faster and more consistently. I highly encourage you to pick one of these many options and start implementing it in your workflow. Once it becomes second nature, add another, and before you know it, you’ll have transformed the way you edit and reduced the amount of time you spend in Lightroom.
This article originally published in Issue 61 of Lightroom Magazine.