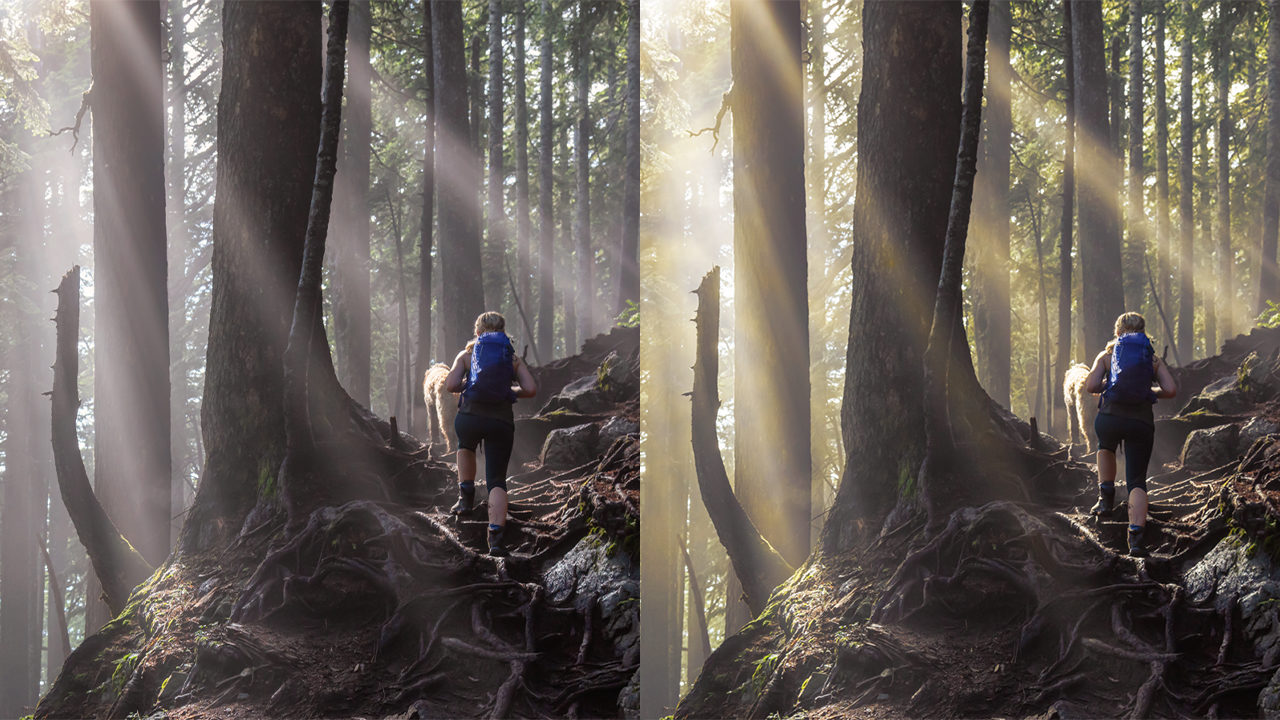
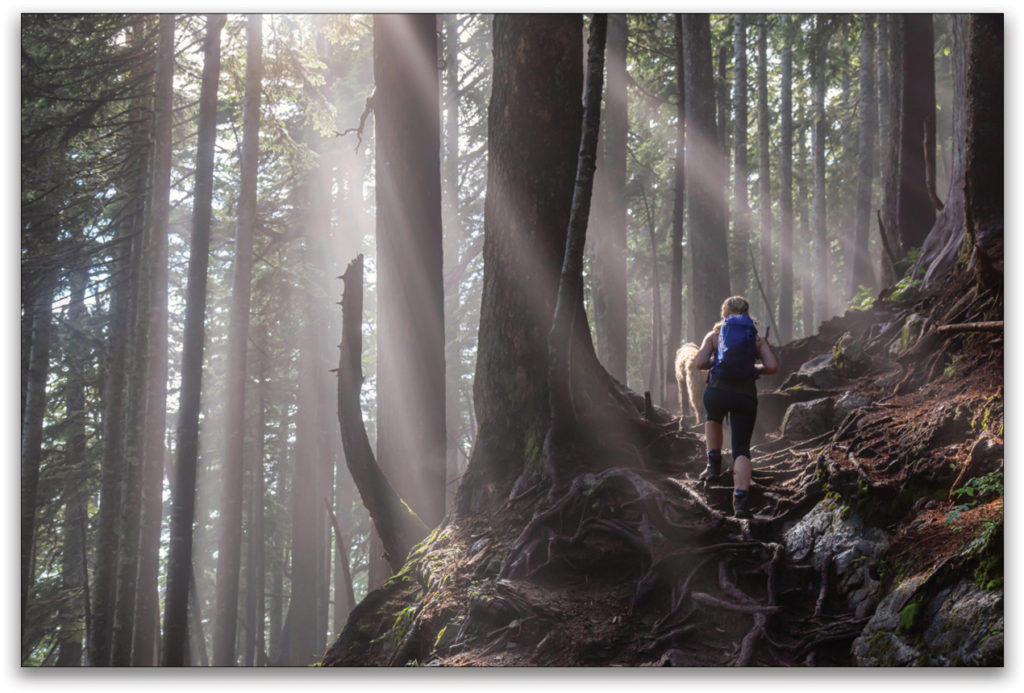
In this article, we’re going to continue with our previous themes of selecting things that are more atmospheric. Even though artificial intelligence and machine-learning technologies are being added to Photoshop (see recent article here), the truth is that machines can still only be taught what a particular thing is: pizza, car, person, dog, building, clock, etc. But, as an editor, there are often things that can’t be seen as an object or thing. That’s where we still have to solve the problems for our projects by applying some awareness of tone, physics, and light.
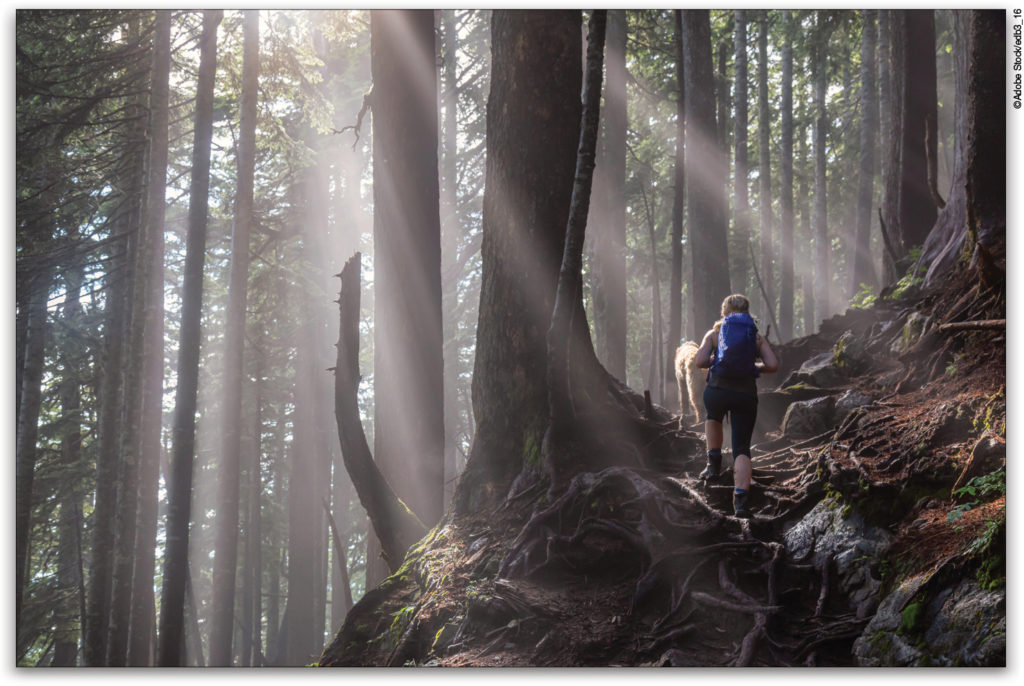
For this image, let’s imagine your edit request is to select the rays of light, and add warmth to the image. What do you do? You could attempt this with luminosity masks, but that gets a bit complicated with partially selected elements. Instead, let’s use an old feature in Photoshop that has been evolving quietly in the background: Select>Color Range.
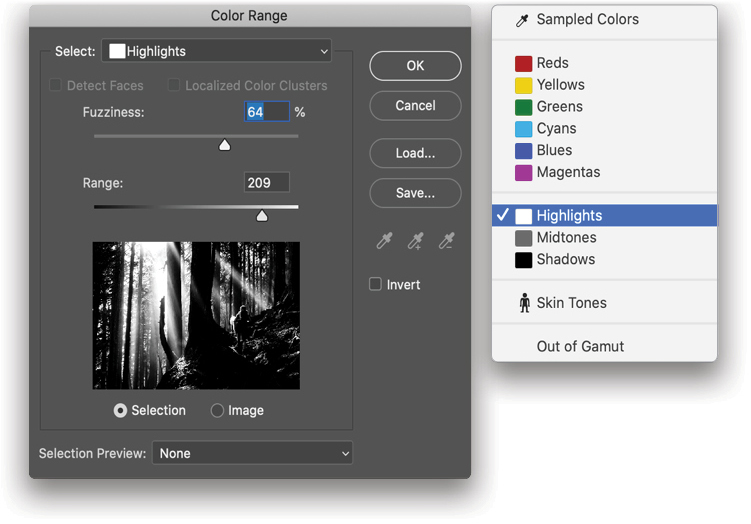
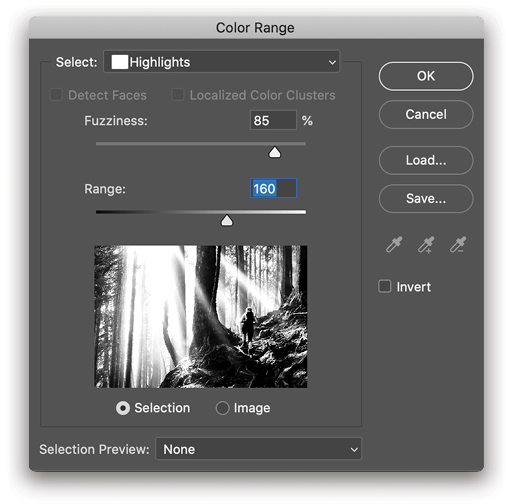
In this dialog, you can choose Highlights, Midtones, or Shadows from the Select menu at the top. This will automatically segment a tonal range of your image into a potential selection. What this means is that, if you were to choose Highlights and then adjust the Range slider, which acts as a form of tolerance or threshold, you can refine the selection that will be produced. The great thing about this is you can see the mask preview as a guide for what will be selected: white for the selected area and black for non-selected areas.

About These Options
There are a few points about these selections that you should be aware of. For instance, when you choose Highlights in the Select drop-down menu, it instructs Photoshop to select the brightest values. Then, as you increase the Range setting, it will begin accepting tones that are slightly less than the brightest values.
If you use the Shadows option, it will start by selecting all of the darkest values, and then, as you increase the Range setting, the mask begins including tones that are less dark, adding those to your selected area.
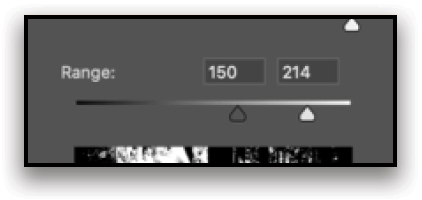
Interestingly, when you pick the option for Midtones, it doesn’t isolate only the middle values of the tonal range. On the Ranger slider, there are two points instead of one, and you can bracket tones you want to select between those points; anything between those two values will be 100% selected. This is handy because it gives you a great deal of control to isolate a tone in your image for a selection.
Now when you’re looking at tones and shades in your image, you could imagine it as a grayscale image, and make a decision as to what range, or tone, is the area that you want to select. The Range values align to the RGB 0–255 range of luminosity, and the Fuzziness slider will feather the tones that are being selected. This helps reduce some aliasing.
For this particular image, we want to add some warmth to the rays of light and keep some of that atmospheric, or foggy, feel in the image. (If you’d like to follow along with this image, click here, and then click the Save to Library button.) To do this, we’ll use the Highlights option, and set the Range to 160 and Fuzziness to 85%. This will select the brightest parts of the image, as well as include the rays of light that are in front of the trees and other parts of the scene. Here’s the Color Range dialog showing the final settings. When you click OK, the selection is activated on the canvas.
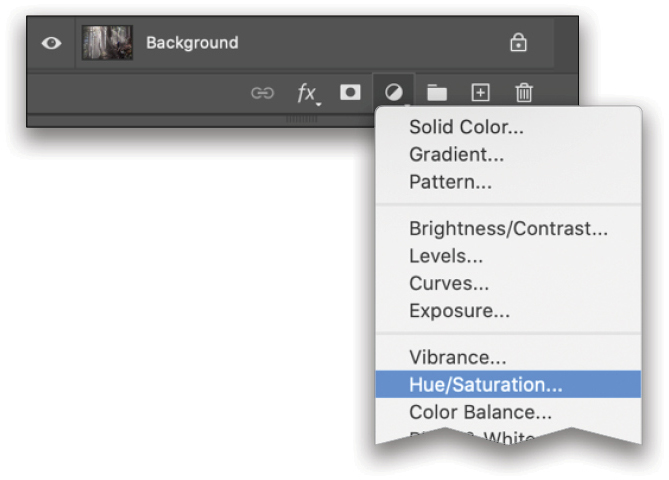
Once the Selection is active, let’s add a Hue/Saturation adjustment layer. Go to Layer>New Adjustment Layer>Hue/Saturation, or click the Create New Adjustment Layer icon at the bottom of the Layers panel and choose Hue/Saturation.
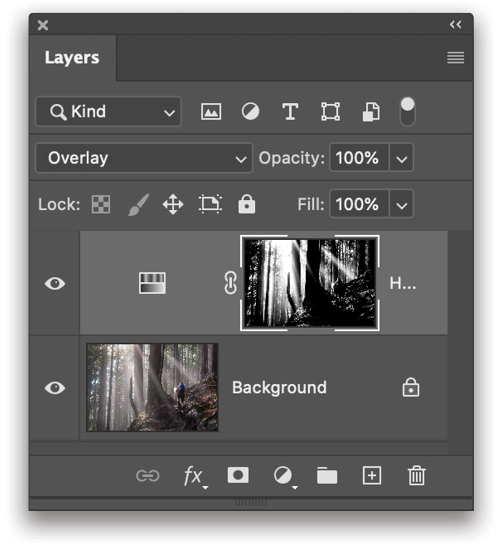
The active selection you previously created with Select>Color Range has now been converted to a mask for your Hue/Saturation adjustment layer.
Warming up the Light
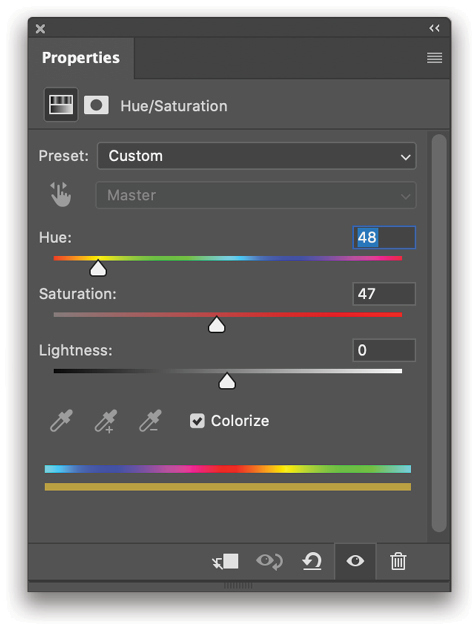
There are many ways to bring warmth into those rays of light. For a simple, quick solution, check the Colorize option near the bottom of the Hue/Saturation Properties panel. When this is activated, it applies a single hue value over any pixel’s original color, constrained within that masked/selected area. If you move the Hue slider, you can align it to a nice warm yellow color (here, it’s moved to 48 and the Saturation to 47).
Next, back in the Layers panel, change the blend mode for the Hue/Saturation adjustment layer from Normal to Overlay, which will help colorize pixels while still allowing brighter values on the source image layer to pass through, for a better blending of the Colorize effect. In the image produced (shown here), you can see the dramatic yellow being pushed into those rays of light.
Nesting Masks for Better Blended Results
To make this image look a little less modified by Photoshop, we’ll add another mask to blend it into the Hue/Saturation effect; however, let’s do it in a way that doesn’t damage the integrity of the original mask that was created when selecting the rays of light.
Make sure the Hue/Saturation adjustment layer is selected in the Layers panel. Now, hold down the Shift key and click the Create a New Group icon at the bottom of the Layers panel. Note: Because you’re holding down the Shift key, this creates a layer group and, at the same time, adds any selected layers into that group. Another way to do this is to select the layer(s) and press Command-G (PC: Ctrl-G).
With your layer group selected, click the Add Layer Mask icon (circle in a square) at the bottom of the Layers panel to add a layer mask to your layer group. Here’s how the Layers panel now looks.
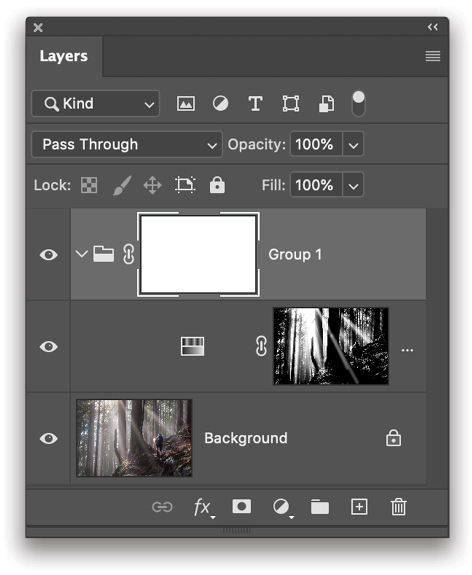
Now you have a Hue/Saturation adjustment layer that’s colorizing the rays of light through its mask and that’s also nested inside the layer group with its own mask. Hierarchy here dictates that the group’s mask will impact the appearance of the layers first, and then the masks of any layers within the group will impact the image.
Finishing Touches
To finish the effect, press D on your keyboard, which resets your Foreground and Background colors to their default black and white. Your layer group’s mask should still be selected and targeted, indicated by the little corner frames around the mask thumbnail.
Now we can use Filter>Render>Clouds to create a soft, cloudy, patchy, pattern within the mask for the layer group. Because this mask affects all layers within the layer group, the Colorize effect from the Hue/Saturation adjustment layer appears to be randomized as to which parts of the rays of light are tinted with a warm hue.
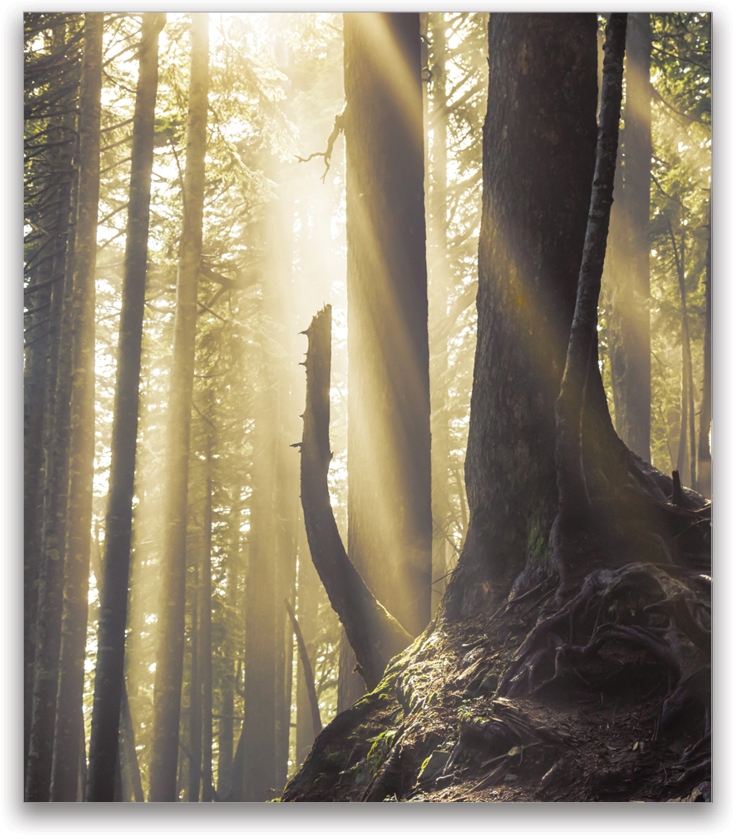
This adds to the foggy, atmospheric appearance of the scene and makes the effect seem less artificial in post. If you aren’t happy with the effect, you can run the filter again, or adjust the Density and Feather sliders in the Properties panel. Here’s our final result.
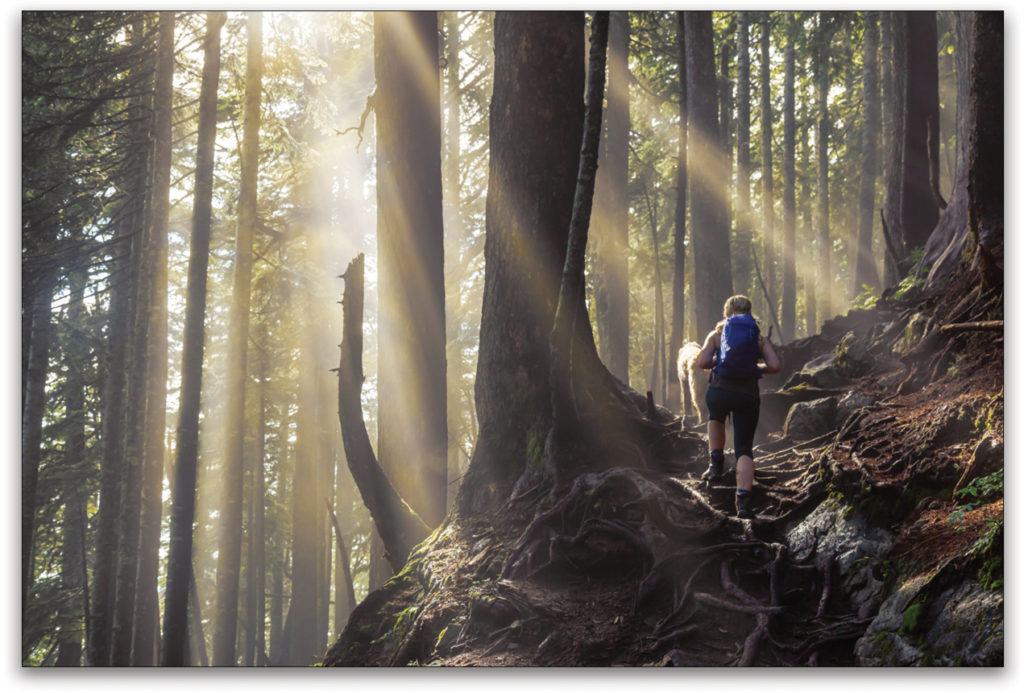
And, for comparison, here’s that original image again.
This article originally published in the February, 2020 issue of Photoshop User magazine.


